May 15, 2018 Sergey Somov
Everyone good day maybe evenings or mornings. It's not that important. What matters is what I have step by step recipe"how to make wall painting with your own hands in the interior or apartment."
There is a common opinion that painting is a kind of miracle that is given only to the elect, that you either have it here or you don’t! It’s strange, because my teacher, who taught me everything that I can and know, said: “Close a monkey with me in the workshop for a week, and he WILL draw, and draw well!”
Why am I writing all this, and how can this be attributed to the topic of painting the wall with my own hands in the room? Yes, very easy! What I'm trying to tell you is that even art needs a system! And if we draw a parallel with sports, then you will not notice the difference, and here and there there must be a system, a competent sequence of actions that will facilitate the achievement of the goal and improve its quality.
And so, this was an introduction to the article “do-it-yourself wall painting in the interior”, which is important to comprehend and understand. And we're moving on to the first step.
Choosing a picture for painting a wall with your own hands
I decided to show simple example wall painting how to do it yourself, without special skills and achievements in the field visual arts. To do this, I will take a picture with small color gradations, a picture that is built on large local spots, blah blah blah .... Yes, this one: 
I strongly advise you not to rush to pounce on the wall to paint it with a masterpiece that the world has never seen! Take something simpler, smaller. But you will do the most important thing on the way to the skill of painting a wall with your own hands, namely, you will understand the principle and approach in this work. Trust me! After all, you have already read to the next paragraph)!
Preparatory drawing for painting the wall with your own hands in the apartment
Now we're going to get tricky. In short, we will print this picture and transfer the drawing to the wall. But this is very brief, and here it is necessary to understand in more detail.


On this, we will put aside all thoughts about the preparatory drawing for painting the wall with our own hands in the apartment and talk about an equally important point of our undertaking.
Preparing the wall surface for do-it-yourself painting
I want to immediately note the fact that in this article about wall painting in the interior, everything I write about is of paramount importance! Otherwise, you run the risk of encountering a violation of the technology, and this, in turn, will slow down the workflow, and further to the mechanical destruction of the paint layer of the painting.
So let's come up with full responsibility and finish correctly what we have already begun.
One of the many questions that we constantly hear from customers is how to prepare a wall for painting? The answer is simple: "Let's level the wall as if it were to be painted", that's all. And just at this stage of my repair, and my walls are aligned for painting, I will start painting with my own hands at a pre-planned place. But maybe your wall is already leveled and painted a long time ago - that's even better, because you don't have to read my moralizing about the primer and so on.
Important point! Preparing a wall for painting means:
- Give the wall the correct geometric shape by applying shiukaturka and putty
- Apply multiple coats of primer deep penetration
You can check the last, important point by swiping your palm along the wall: 
Please note that dust and whitewash remain on the palm, and this should not be in any case!
If we consider this moment from a logical point of view, then when we apply paint to the wall, dust will remain between the paint and the wall, which will not give proper adhesion to one another, the consequences will be deplorable for our wall painting in the interior.
That's just the soil of deep penetration will help us to avoid this. Plus, it levels the absorbency of the wall, which is also important!
Choosing a soil
The best and highest quality for all types of finishing work was and remains Knauf Tiefengrunt. But it is expensive, and it is possible for our training to take it is not entirely appropriate. Therefore, I can offer you an analogue, which is a fairly high-quality replacement - Dufa Tiefengrunt. Well, if you don’t find any, we will need a deep penetration soil of any company. Further, it is a matter of technology, we simply prime our wall, where there will be a painting with our own hands. And thuja also has an important point that is worth considering! After priming, do not rush to pounce on the wall and paint on it! Let the soil dry well, at least an hour. 

Well, if you don’t find any, we will need a deep penetration soil of any company. Further, it is a matter of technology, we simply prime our wall, where there will be a painting with our own hands. 
And thuja also has an important point that is worth considering! After priming, do not rush to pounce on the wall and paint on it! Let the soil dry well, at least an hour.
We transfer the picture for painting on the wall
And so, the next step is to transfer our drawing to the already prepared wall for painting. My approach to work is simple: “In war, all means are good”! The main result, and if it is good, no one will care that we cheated a little!
Namely, we will not pick up a pencil, and like real artists to draw on the wall, we will simply transfer the existing printout to the wall using the technology that I will describe below:
We will need:
- Our printout
- molar ribbon
- Sanguine or any other soft material (charcoal, sepia sanguine, etc.) that is sold in an art store.
- And a sharpened pencil.
We turn over the printed picture and put it on a flat surface. Then we take a piece soft material for drawing (sanguine, charcoal, sepia) and rub reverse side drawing how I do it in the picture below:

As a result, you should get the following:

I applied sepia to the back of the wall painting printout only where I got the painting.
Next, we place our printout directly on the wall, see where it will look best, and fix it with molar tape from several sides. 
Thus, a layer of soft material remained between the wall and the sheet.
We take a sharpened pencil in our hands, and outline each line of our drawing right on the wall, slightly pressing on the pencil. Try not to move the drawing, secure it with masking tape properly! 
When we have drawn everything with you (make sure of this for sure), we remove our sheet, because it will not be needed anymore, and look! 
The most accurate, perfect drawing was transferred without any problems.
So, the preparatory drawing for painting the wall with your own hands in the interior is ready. Let's explore further, shall we?
Do-it-yourself wall paints
I have already written several articles about DIY wall paints. Wrote about better and less expensive. In this wall painting, I will use the paints from this article. I hope you are not too lazy to look at this article, since I was not too lazy to write this)
Color system in painting
In our case, when painting a wall with our own hands in an apartment, we will use the color system. What does this mean and why is it needed?
I'll start from afar. Acrylic paint, on water based, when dried, it darkens significantly and changes color. To be honest, I don’t know exactly what this is connected with, but this has to be reckoned with and taken into account! And now, when you paint on the wall with paints, and mix colors on the palette, then, in order to correct something, finish painting, you need to mix the same color, you mix it again on the palette, put a few strokes on the wall, on the old layer of paint, everything seems to be fine, but after 15 minutes, when the last strokes of paint dry, you will see that it turned out to be a completely different color! You didn't hit the shade! How to be in this situation? How to do this wall painting with your own hands professionally? For this, there is a system of colors. It lies in the fact that we pre-mix the colors we need in separate containers, as many colors as needed, and then we use only them. And later, if you need to finish and fix something, we still have the same paint and the same color! I use food jars from the grocery store in my wall painting with my own hands, they are very convenient because the kit has a lid that you can always close, and the paint will not dry for many more weeks! 
And here, we smoothly approach the practice, even if it is still a technical part of it.
First of all, I will use light shades and colors, therefore, I will first pour white into the container, and then add paint that has color. I'll add a little. 
I will mix it thoroughly, and make a small color on the wall, because only on the wall can we understand whether this is the color that we need. 
As I wrote earlier, the paint changes color and becomes darker when it dries. Therefore, I suggest that you wait until it sets, about 5-10 minutes, and then decide whether this color suits us.
I will not be harmful, since this is a training painting, and I am doing it for informational purposes only. I'll just continue painting the wall. 
A small digression. We will have to paint over each layer several times, since the paint will lie unevenly the first time. Yes, this is not very convenient, but if you want a high-quality painting of your wall, you have to work here. And be sure to wait until the layer dries, and only then apply on top of a new one! Well, I'll continue.
I would like to hope that you understood the principle, and then I will give a few photos of the sequence of painting the wall with my own hands according to the above scheme:
We mix the color (the color we need).
Let's try it on the wall.
If everything suits, we paint the area we need.
If a smooth seam line is required, glue the masking tape as in the photo. 
We continue the painting further according to the previously given principle. 

Important conclusion!
As you can see, in fact, there is nothing complicated in this. And absolutely anyone who knows the sequence in wall painting will be able to feel like a real artist and decorate his interior with an original solution.
If you still have any questions, because I understand that it is impossible to describe everything in great detail, ask them in the comments under this article.
There is one more important question left unanswered: “What kind of varnish to cover the wall painting?” . I will answer it by mail to everyone who leaves it in the comments! Promise!
There are no barriers to a modern designer in terms of realizing his most daring decisions and fantasies. The experience of generations combined with progressive technologies allows you to use skills and techniques to create unique design projects. Wall painting is one of the most original and versatile design techniques for creating a truly unique interior. At the same time, today wall painting means not only the use of classical techniques for creating complex, multi-layered compositions, but also the use of techniques available to most Russians, such as screen printing, drawing with prints and other street art methods. Wall painting can radically change the image of your home without the use of any constructive redevelopment. Create an accent or highlight the most advantageous area, visually change the parameters of the room or mask unsuccessful ones architectural features or finishing flaws - with all these tasks, wall painting is able to cope perfectly. We invite you to familiarize yourself with our large selection of design projects for various rooms in which the wall painting technique was used and be inspired for your own achievements.

Design features
First of all, it is necessary to determine what is currently understood by such a design technique as “wall painting”. ancient art, taking its origins from the Egyptian and Sumerian civilization has not lost its popularity even today. But, of course, not only the techniques and materials used to create images on the walls have changed with the course of history - the very principle of decorating a home (and public buildings) has changed radically. Nowadays, artists (designers) do not need to leave messages to posterity in the form wall paintings, this technique is used solely for decorative purposes.


Many homeowners who are planning a renovation or a small alteration in their homes believe that it makes no sense to spend time and money on creating a unique mural on the walls, because there are enough incredibly realistic wall murals with high quality image printing. And partly they are right - it will not be difficult to find a suitable plot on photo wallpapers in the store. But the interior created with their help will not be unique, will not carry a piece of the artist's warmth. And if you yourself paint the wall, then your individual view of aesthetics, the way you decorate your own home.


Today, an incredibly wide range of themes and stylistic solutions is available for interior wall painting. With the help of modern materials and the individual eye of the artist (which may be you), you can create unique masterpieces - from traditional murals to graffiti-style inscriptions.


Of course, the following criteria will influence the choice of theme and color palette of the image on the wall:
- belonging to the room (if in the children's room it would be logical to depict cartoon and fairytale heroes, a landscape or abstraction will look spectacular in a living room or bedroom, then in the dining room you can depict bright fruits, berries - to increase your appetite);
- the size of the room and its layout (number and location of door and equestrian openings);
- the location of the room relative to the cardinal points and, as a result, the level of natural light;
- interior design style (it would be strange to depict a classic fresco in a room with a modern design and graphic handprints of family members as a composition in a room with a traditional style);
- your personal preferences in the style of image execution and choice color solutions.


Wall painting in the interior: stylistic solutions
In order to navigate in all the variety of topics for wall painting modern dwelling(we omit the options for creating images for public buildings), it is necessary to at least superficially familiarize yourself with stylistic decisions.


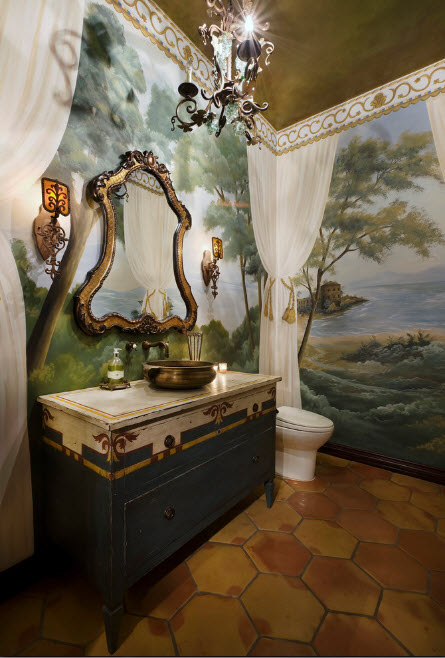
 Classic direction. Classics in the interior will never go out of fashion. It is not for nothing that this direction in the design of spaces is considered traditional - the harmony of shapes and lines, color combinations and materials. In wall painting, this is most often reflected in the image of an ideal landscape - it is as realistic as it is a reflection of the dream of a "golden age". By choosing a classic style for wall decoration, you leave behind the banality and monotony. This is surprising, but these days the classics in wall painting look more relevant than high-tech, minimalism or loft. What is typical for the execution of painting in classical style You can use the most modern materials and techniques.


Baroque and Empire. These are two opposite lines in the development of classicism. If the baroque strives to demonstrate luxury, extensive decoration, then the empire tries to join the conciseness, use simple solutions. Both directions are relevant for use in the painting of residential spaces. But much depends on the general style of interior design, the size of the premises and, so to speak, the general scope.

Modern or Art Nouveau. This style of painting is easy to recognize - the predominance of "lush", "live" and literally "breathing" forms. A characteristic feature is the use of a complex floral ornament with a predominance of wavy lines. The color palette mainly consists of natural shades, bright, flashy tones are used extremely rarely.


Japanese style. At present, the Japanese style when painting walls is manifested not only in the application of traditional oriental landscapes, images of sakura or small courtyards with a characteristic landscape design. The Japanese style in wall painting is also an anime, replete with details, characteristic paraphernalia, allowing even an ignorant person to unmistakably recognize the handwriting of this hobby that has conquered many people. In our country, plant motifs, the image of landscapes, and sometimes fragments of oriental nature, have become more widespread.


Minimalism and primitivism. The name speaks for itself - a minimal set is used to express the artist's thoughts. color combinations, lines and shapes. It may be just a single stripe or a figure executed in a contrasting color, but thanks to its balance, the pattern becomes a symbol of the designer's imagination.


Wall painting: a decorative component in various rooms
In addition to the obvious decorative component, wall painting can also have very specific functional purposes. For example, with the help of wall painting, you can visually change the architecture of the room - make it wider, "deeper", "raise" the ceiling, or completely "erase" the boundaries of space. Wall painting can also act as a zoning element, delimiting the functional segments of the combined room. Wall images are able to focus attention on a particular area of the room, highlighting the most advantageous elements of the interior, "pulling" attention from the unsuccessful ones.
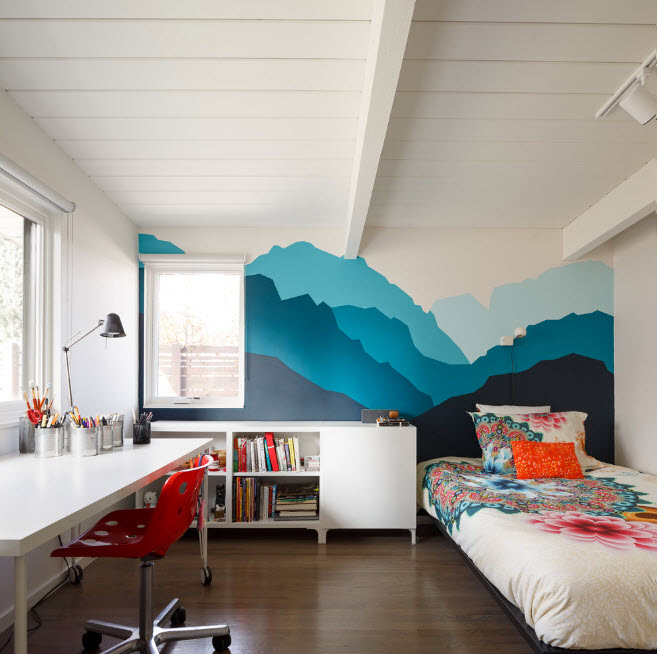


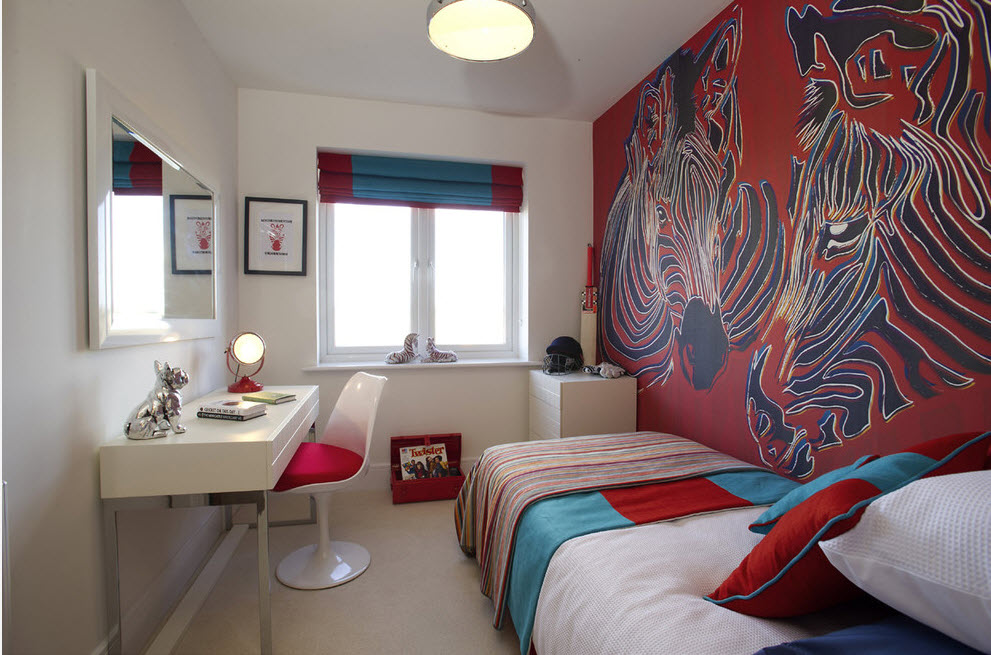
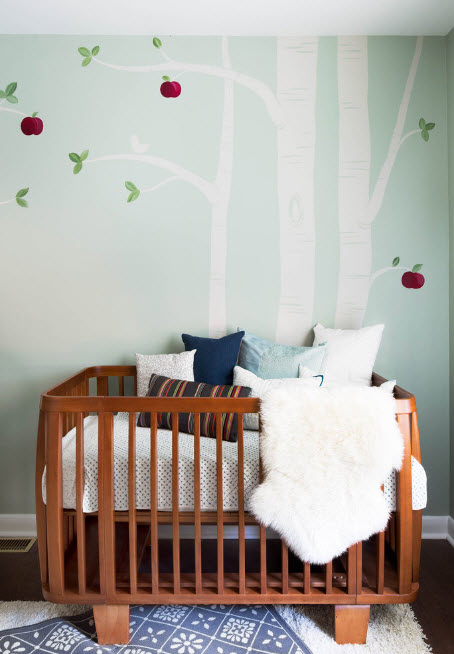
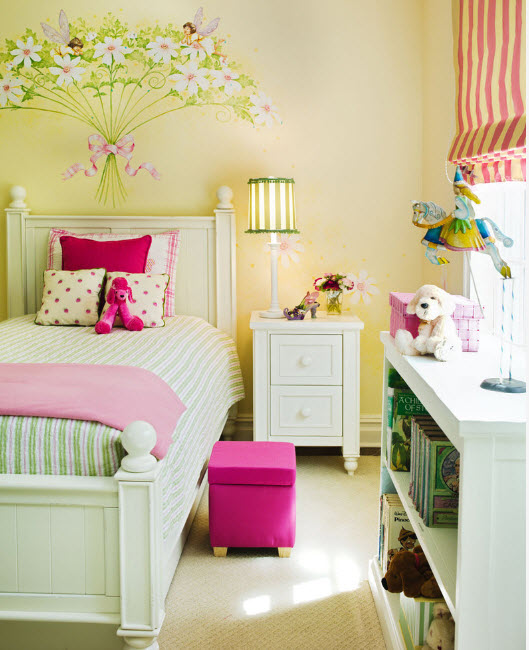
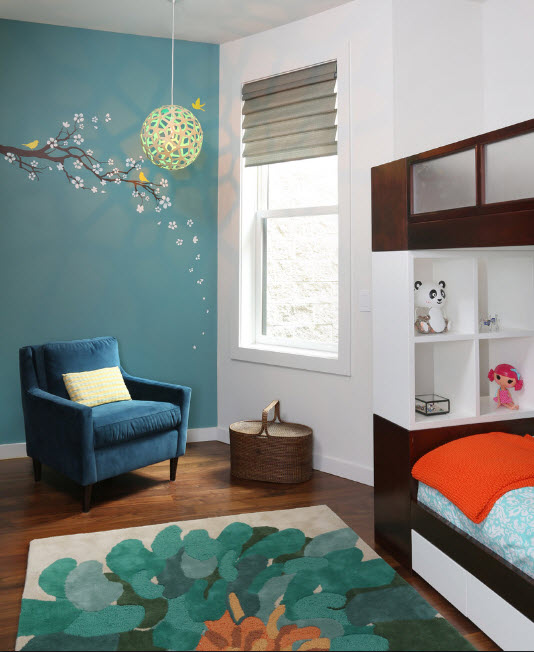
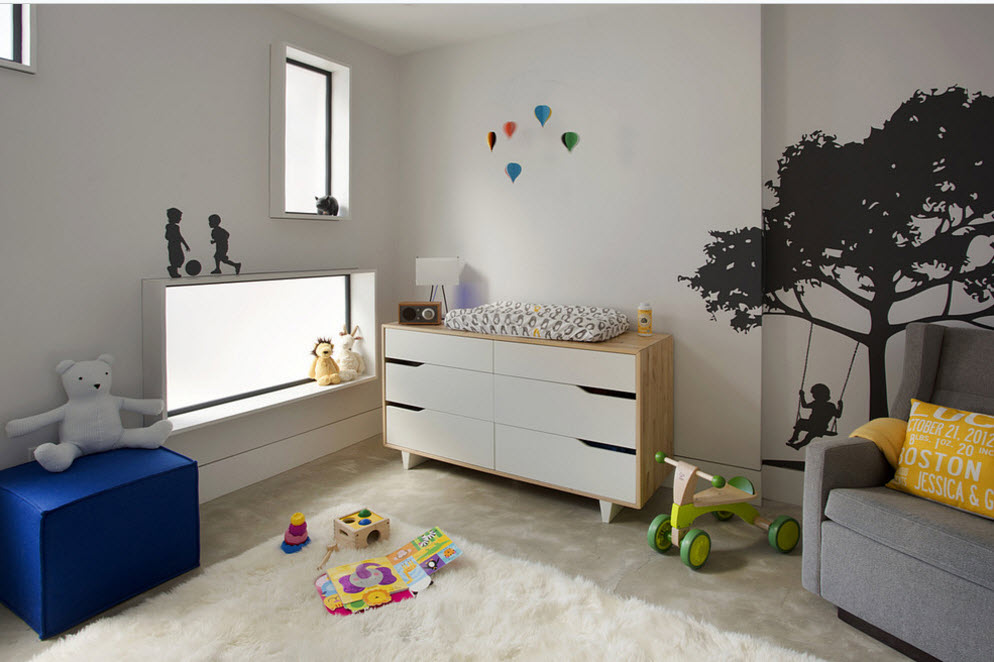
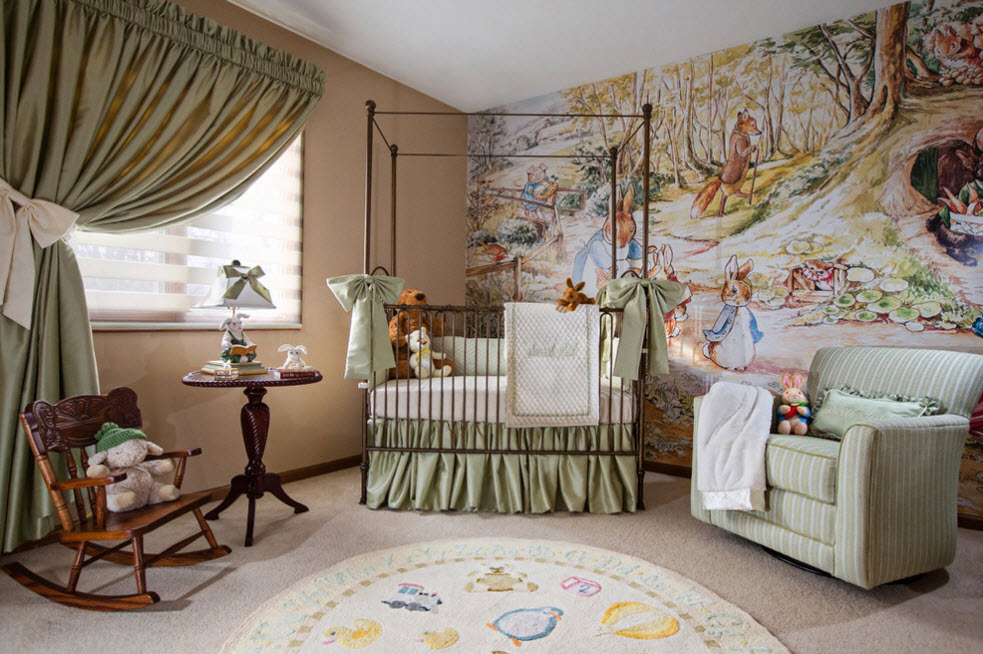
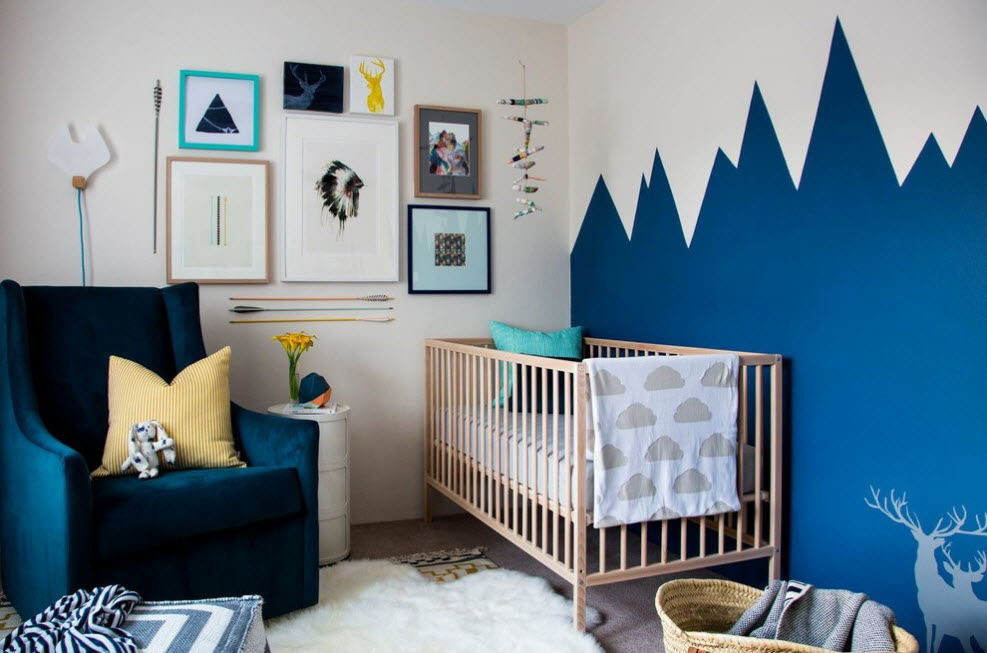
Children's room
Currently, the undisputed leader in the creation of wall paintings is the interior of the children's room. And this is not surprising - it is for the child that we want to create an amazing world in which it will be interesting for him not only to sleep, play and spend time, but also to develop, gain new knowledge and skills. And everyone knows that any knowledge is perceived by children much easier and easier if it is presented in a playful way. With the help of wall painting, you can create any of the options. fairy worlds. Of course, there are photo wallpapers and interior stickers that will cost many times cheaper, but, firstly, it is not always possible to find decorative material that suits the theme, interesting to the child, and secondly, hand-painted walls will always come first in terms of exclusivity and artistry.


Living room
Wall painting in the living room will not only create a highlight of the interior, increase the status of the exclusivity of the room, but also create a certain accent. At the same time, this design technique relevant for small spaces, and spacious living rooms, in which several functional segments are connected. But the dimensions of the space, of course, must be taken into account when choosing an image to create artistic painting.


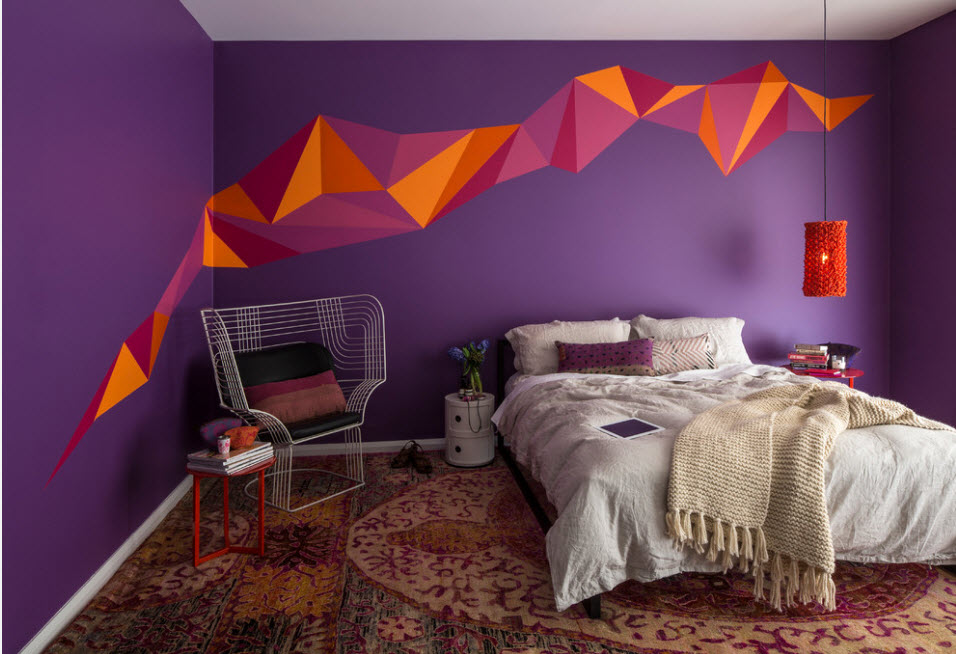
Bedroom
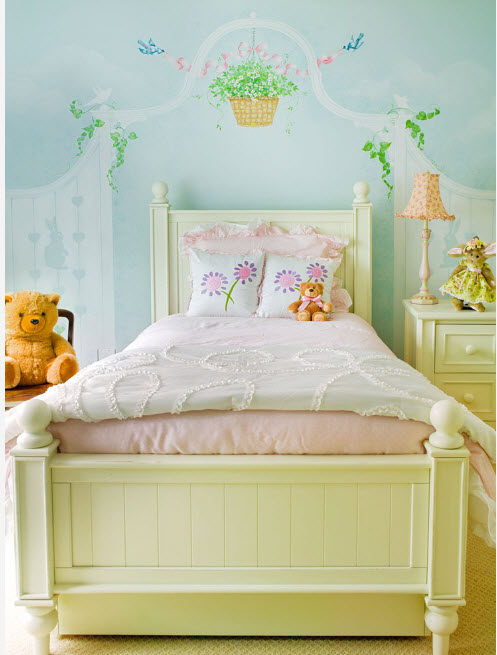
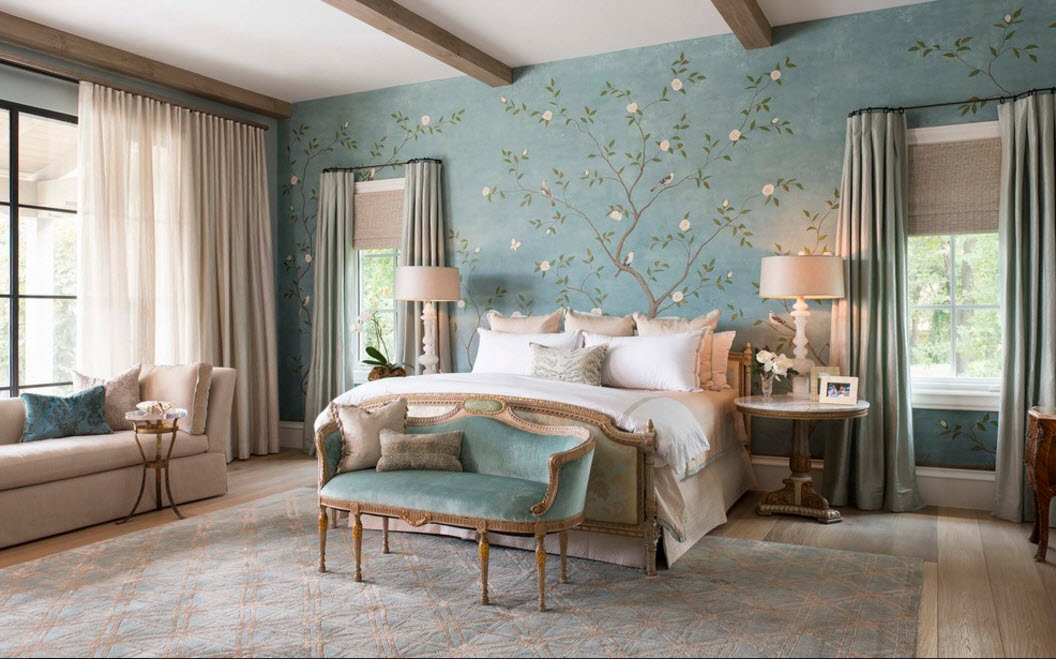
Most often, for bedrooms, a romantic style of drawing on the walls is chosen. Most of us try to create the most relaxing and soothing atmosphere in the room for sleeping and resting. Therefore, delicate shades in the image of floral motifs or light landscapes become the central theme in the interior of the bedroom.


Techniques used in creating wall paintings
Modern designers have practically no restrictions in the choice of techniques for creating wall paintings. At their service and the experience of generations, and modern materials and improvised means. The image can be applied both on a perfectly smooth surface and on a textured one - the weight depends on the goal. Most often, when creating images on the walls, modern artists use:
- oil;
- acrylic;
- fluorescent paints.

A very popular tool for creating an original wall painting is an airbrush - on a perfectly flat surface, you can create a drawing without traces of strokes and sharp transitions between colors. Consider the most popular techniques used for wall painting in modern homes.


Aerography
A fairly popular technique these days. If we translate this expression literally, it turns out “I write with air”. Air really plays an important role in the use of an airbrush tool - an airbrush. By using compressed air paint is sprayed on a previously prepared surface. Images are light, literally airy with barely noticeable color transitions.


Fresco
The oldest technique based on painting on wet plaster is relevant at all times. The characteristic texture of this technique is recognizable in any version. The resulting image has a high wear resistance - it is not without reason that many samples of the most ancient frescoes have survived to this day. At present, the fresco technique is used both to create samples of modern painting and to imitate old wall images (for this, they resort to artificial aging of the surface, patting).


Painting with fluorescent paints
It is easy to guess that the technique is based on the use of fluorescent paints that glow in the dark. A unique image can be created using different color solutions of these special paints. But the technique was most widely used for decorating the ceiling in the form of a starry sky. In addition to the fabulous effect, a feeling of dimensionless space is created.


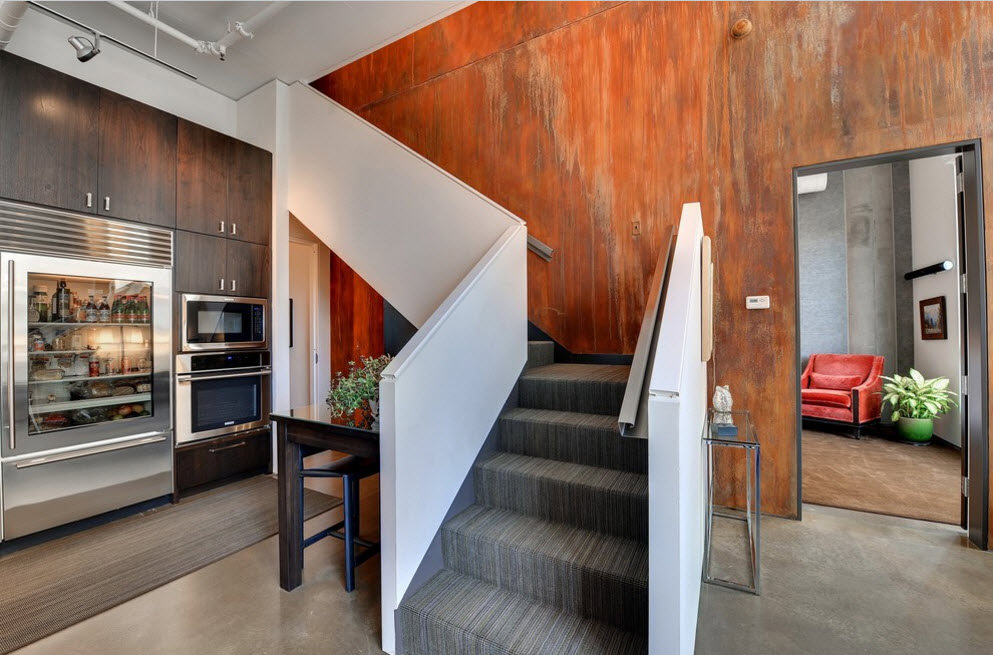
With the help of volumetric painting, you can visually erase the boundaries of the room, make the ceiling "higher" and the room "wider". Certainly on design features painting does not affect the room, but visually creates the effect of some curvature of the volumes of space. Designers like to depict stairs that go into the distance and seem to have no end or open windows, behind which a beautiful landscape opens.

Using stencils
For those who want to express themselves from the artistic side, literally “leave an imprint” on the walls of their own home, stencil technique is an ideal way. It does not require special skills, because it is based on applying images using ready-made stencils that you can create yourself or purchase in a store.


Painting with acrylic paints
The use of acrylic paints is incredibly popular at the present time and is due to a number of advantages of these materials for applying images to a wide variety of surfaces:
- fast drying;
- lack of smell;
- high environmental friendliness;
- ease of application;
- the ability to use on surfaces with different textures and textures;
- resistance to ultraviolet radiation.


The first examples of wall paintings can be called rock paintings of the Neolithic period. Even leading a primitive way of life, a person sought not only to capture what he saw around, but to make these pictures an adornment of his home. Each drawing was based on only four colors, the pigments of which could be obtained by simple processing of natural materials. They mainly depicted hunting, since this process occupied the lion's share of the primitive man's time and became the meaning of his life. There are also magnificent examples of early abstractionism: randomly arranged handprints on the vaults and walls, creating a single artistic composition. Man improved, and with him the skill of painting developed. The real "cradle" of this type of art was Ancient Egypt. The frescoes were made in the manner of laconicism, which was compensated by the monumentality of the buildings decorated with them. The Egyptians were hardworking and thorough people. The secrets of compositions for painting and the basics of this science were carefully kept and passed on to the next generations. The central figure of the wall paintings became a man or a deity in his guise. The latter were distinguished from ordinary mortals by animal heads and paraphernalia that helped to fulfill their destiny (the feather of Maat, the rod of Anubis with a dog skin).
The main motive in painting the walls was the relationship between gods and people, as well as scenes-battles. The domestic side of life did not fit into the sublime manner of drawing of the ancient Egyptians. If she was portrayed, then only for ritual purposes. AT Ancient Rome and Greece began to create more mundane paintings. The deities had a completely human appearance, life began to be mentioned much more often. Bas-reliefs appeared, which combined painting and sculpture. Wall painting in the interior began to appear more and more often in the homes of wealthy citizens. At the same time, signboards began to be used, which denoted the prototypes of modern cafes and other public places. Church painting began to develop in the Middle Ages. The interior decoration of temples and cathedrals impressed with its scale and detail. Nowadays, decorative painted walls do not often adorn the interiors of rooms in ordinary apartments. This trend was formed after photo printing appeared, which made it possible to make wallpapers with any images. Many mistakenly believe that only a professional can cope with such an exclusive interior solution, and this will inevitably involve additional costs. In fact, even a novice designer can independently master the basics of this type of art. In extreme cases, there are templates that will make the job much easier. Let's try to understand the intricacies of the process and choose the best technique for a beginner.
Technology and features of wall painting in the interior
With the help of modern technology, people have learned to imitate many expensive materials and replace labor-intensive manual work to a fast process carried out by machines. The decor turns out, as a rule, typical, stamped. In order not to meet a similar design in a neighbor's house, many wall decorations in the house are created by hand. Of course, this process will take time and require certain financial and labor costs, but the interior will turn out to be unique, author's. That is, among hundreds of rooms with standard decor, your home will become an unusual island of originality. Artistic painting is used in any premises, it is universal. Since there is no limit to human imagination, this method also opens up endless possibilities for the creator. A drawing made with high quality looks natural and voluminous. With it, you can "replay" the wrong geometry of the room. With the right selection of colors, painting can visually expand the space. Restrictions on size and stylistic decision are set only by you. Naturally, this element will become the center of the design picture, so no interior will tolerate "hack-work". However, it is important to observe the measure even in such a beautiful decor. The best option the design of only one, accent wall in the room is considered. Its surface must be properly prepared before work.
Preparing the wall for interior painting
The preparatory stage of the surface is conditionally divided into several steps:
- Removing a layer of old coating;
- Filling gaps and leveling defects. Degreasing and plastering;
- Primer after the surface has dried. This layer will provide good adhesion between the paints and the wall;
- Final leveling with putty and applying an additional layer of primer.
After the wall has dried, it will be ready for painting.
Paints for painting walls in the interior
For painting walls, several types of paints are used, each of which has a special composition that determines the characteristics of the substance. Gone are the days when artists independently selected and mixed pigments, and recipes were carefully protected from the encroachments of competitors from the art world. So, the following types of paints are used for painting:
- Oil, where the binder is drying oil, oil. They are gradually becoming a thing of the past, as working with them will require certain skills. The technology of mixing them is also not for everyone. On the surface, the oil will “live” less than modern analogues. The reason for this is lime and alkaline salts, which are contained in the material of the walls. They break down the oil over time. Don't like colors dark rooms and quickly turn yellow without light, but fits well on wooden surfaces. The main advantage of the oil is its long drying time. Since this process takes several days, the artist can make adjustments to the drawing if necessary.
- Tempera (binder - emulsions). The paints dry fairly quickly, and several layers allow you to create the effect of a three-dimensional composition. Tempera is recommended to be varnished on top to obtain deep shades. The latter, by the way, after drying slightly lighten.
- Acrylic (binder - acrylic resins). Modern material that is popular. Paints dry quickly, do not contain toxic substances in the composition and form a durable film on the surface. It is similar to a plastic protective "peel". Acrylic is not afraid of light or its absence. If the paints are of high quality, then the drawing will live for at least 10-15 years. In addition to the usual compositions, luminescent, fluorescent additives are used. They also produce mother-of-pearl or metallized acrylic.
Before you buy expensive paints, listen to the advice of a professional on their choice. So, for example, it is recommended to start with acrylic, and practice on gouache, which is remotely similar to it in work.
Don't forget to get a set of brushes. They will be needed to create any paintings, except for abstract ones. It is recommended to pay more for pony or squirrel hair brushes, as they are softer and do not leave traces of fallen hairs on the surface. The kit should contain tools of different thicknesses to create individual elements compositions.
Techniques used in painting
The painting can be created in various techniques, among which the most popular and spectacular are noted:
- Fresco and Alsecco close to it;
- Volumetric painting (similar to a bas-relief) and sgraffito;
- Aerography;
- Paintings in fluorescent acrylic;
- Grisaille. It will require high skill, as it is performed in one color of different saturation. The technique is similar to graphics.
Separately, it is worth noting the method using stencils. The option is ideal for beginners who are not confident in their abilities and are afraid to put the first stroke on the prepared wall.
Aerography
In this technique, instead of brushes and paints, an airbrush spray is used. It sprays the contents over the surface, even its name translates as "air drawing". Dyes in airbrushing use liquid and powder, but water-soluble acrylic is more popular. The composition lays down on any surface, even on wallpaper. You will have to work in a respirator. Few people succeed in mastering the technique from the first “zilch”. Before painting, you will have to practice to get used to the unusual way. The airbrush allows you to draw even tiny details, thereby providing a high level of detail in the picture. By the way, even ancient artists who blew dye from special tubes owned a similar technique.
Fresco
The fresco technique has been used for interior decoration since the Middle Ages. The essence of the method is to apply paints to the plaster that has not yet dried. It contains lime, which forms a strong calcium film on the surface of the pattern. The disadvantage of this method is the need to work very fast. For this reason, it is not recommended to resort to the technique for novice artists who are just mastering the art of painting. For work, water-soluble paints are used.
Alsecco is like a fresco. Paints are applied to an already dried, but newly moistened surface.
Painting with fluorescent paints
Fluorescent paints have the feature of glowing in the dark. Use transparent or colored formulations. The first day is generally invisible as well as the drawing. Colored in daytime look like conventional paints, which made the painting, and at night they transform the walls with a pleasant glow. Quite often, fluorescent compositions decorate drawings made with acrylic or tempera. They highlight accent elements. The fluorescent composition is absolutely safe for humans, it does not emit toxic substances. Such paints are recommended to depict simple landscapes without an abundance of small details.
Volumetric painting
Volumetric technique combines the process of modeling with coloring. Gypsum or plaster is first applied to the prepared surface. Relief elements are formed from the material that has not yet dried. Then, after drying, the “stucco molding” is painted. There is another technique, which is called sgraffito. The method comes from Italy. Several layers of colored plaster are successively applied to the wall. After it dries, a drawing is scratched out with a special sharp tool. The result is a relief image, which, as practice shows, will last more than one year.
Using stencils
Stencils - best help in situations where the imagination draws fantastic landscapes, but the hands cannot repeat them. Also, the device is used when it is necessary to depict many elements of the same type in order to reduce the time of work. Stencils are usually made of plastic. The plates are washed after use, and they are ready for reuse.
Painting with acrylic paints
Acrylic is considered the most comfortable material for beginner designers. Its color "range" is rich, and the composition is completely safe for humans. Acrylic, if necessary, can be washed off if you need to correct individual details of the painting. Gradually, after you start to fill your hand, it is recommended to use combinations of techniques to improve your skills.
Pattern selection
The drawing must comply with the stylistic decision and color palette rooms. Special attention give it location. The perception of the entire interior depends on which wall will be accented. The loft uses "smoky" paintings and graffiti on brick walls. The painting is done in the technique of airbrushing. The romantic Provence style loves floral motifs. Bouquets of wild flowers, peonies, roses, lilies will be the best addition to the interior of the French hinterland. Art Nouveau often repeats the masterpieces of painting that once adorned ladies' boudoirs and luxurious salons in a manner characteristic of the style. Inimitable art deco favors fine knitting and ornate ornaments. The Japanese style and minimalism close to it in spirit allow for thematic home country painting: orchids, pagodas, sakura branches. There are practically no restrictions in the ethnic direction. If the interior imitates a bungalow in the tropics, then images of the sea and palm trees will be very useful, but for African motifs, trees with characteristic crowns, elephants, and a “dried” landscape are used in the painting. In addition to style, it is worth considering the functional purpose of the room.
In the living room
In the living room, painting usually corrects flaws. For example, for a small room, it is important to use a drawing with a perspective: paths, terraces or paths that go into the endless distance. Painting can replace the installation of columns or pilasters, and at the same time ennoble the classic design. The fireplace is the cozy center of any room. It is not always possible to establish even its imitation, to say nothing of the original. A painted element on the wall with realistic flames will be a wonderful interior addition.
In the bedroom
The bedroom is used exclusively for relaxation, so every piece of furniture in this room should be designed for comfort and relaxation. The painting is usually dominated by natural motifs. Landscapes, panoramas of the water world, greenery of lush grass or heads bright colors help to calm down and prepare for a sound sleep. As a rule, they paint the wall above the head of the bed, since in most cases it is accent. In the same room, ceilings are often decorated in a similar way. It is not recommended to resort to dark tones, which will make the room visually smaller and will psychologically put pressure on the owners.


The art of wall painting has been around for centuries. The frescoes of the Middle Ages and the painting of ancient times have been transformed into modern art painting, which is also popular.
There are many benefits to this type of design. The main thing is that you can create a masterpiece without being an artist and by investing minimum funds. Consider all the nuances.
You can draw a beautiful picture without drawing skills
Fresh original decor
Artistic painting of the walls decor is unusual for the modern design of the room. However, it has become more and more popular lately. Suitable for both connoisseurs of painting, and for lovers original decor. He can bring a touch of elegance and pomposity to the apartment, especially if there are columns in the design project. And also create an extravagant image invented by you. Anything the owner's heart desires.
Depending on the expected result, you can find a professional artist and order a painting in accordance with any requirements. In this case, you can give free rein to your imagination by depicting any, even the most unusual ideas. But if it is not possible to resort to the help of a master, you can do the wall painting with your own hands. This is one of the important advantages of this decor: it will not cause difficulties, it will reduce repair costs. In addition, you can bring all your ideas to life with a brush and paint.
 If there are no drawing skills, you can use the services of a professional
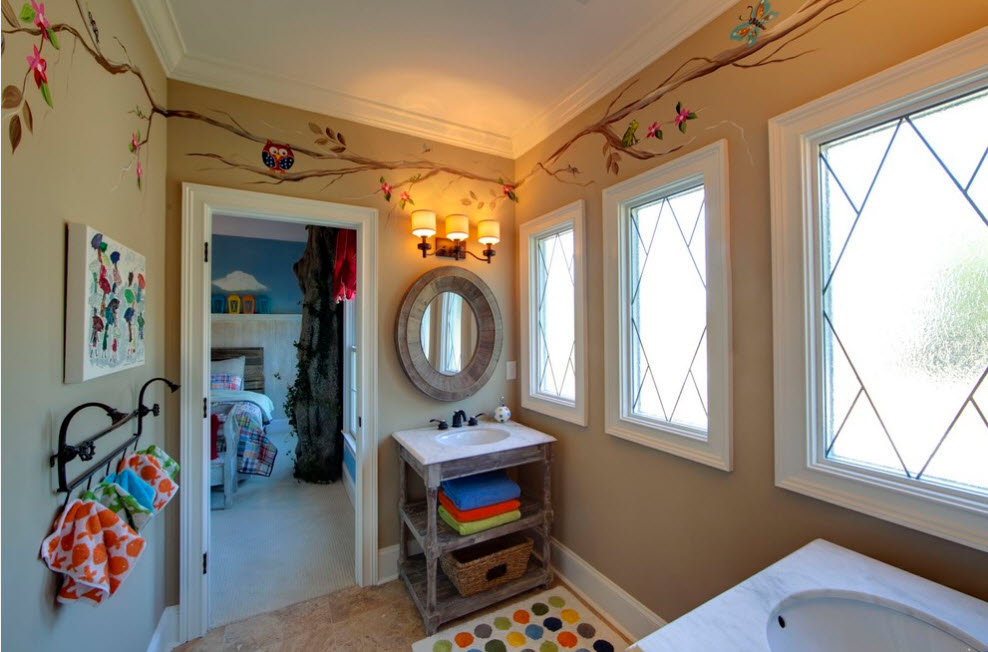
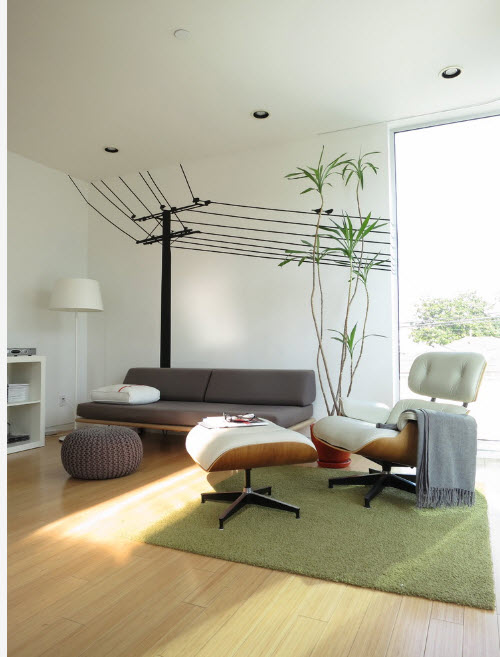
 This option is suitable not only for a large room with a huge blank wall. You can decorate a small bedroom, a nursery, a kitchen, and even a bathroom. It will be convenient to decorate and a wall with a window painting will only add originality. Another proof of the usefulness of this design, you can "disguise" the cord hanging from the wall from the air conditioner or TV, and also turn children's wall doodles into a real masterpiece.
 This decor option is suitable for any room.
 Choosing a paint
Modern technologies for creating paints offer you a wide range. You can use:
- oil;
- acrylic;
- tempera;
- fluorescent paint.
They differ mainly in properties, drying speed and saturation. Fluorescent paint is known for its ability to glow when exposed to ultraviolet rays.
Here are the main types of paint used for artistic painting. You can also use an aerosol look. But after working in indoors in this way, long-term ventilation will be necessary. It can also negatively affect the artist's well-being: cause nausea, dizziness and headaches, an allergic reaction is possible. Deal with spray paints recommended outdoors, with access to a large amount of fresh air.
 You can choose the color of your choice. There are paints that will glow
 The choice of basis depends on the expected result. Watercolor will create a delicate drawing with blurry outlines. To highlight the necessary zones, you can combine it with other types. Please note that watercolor painting must be varnished for better preservation of the drawing. Fluorescent can bring some elements, or draw heavenly bodies in the nursery. Often, an oil base is used for artistic painting of residential premises.
 Paint can be combined with other types
 Placement of the picture
A factor that is also worth paying attention to. If you do not plan to cover the drawing with varnish, you need to carefully choose the location of its location. The main criteria for placement are temperature and humidity. Do not place the painting on the wall above the radiator and in a place where condensation can accumulate. In these places, the paint may leak or crack. For reliability, it is better to protect the drawing from the effects of negative environmental factors with the help of varnish.
 So that the drawing is not damaged or cracked, it is worth treating it with varnish
 Stages of creation
Let's move on to detailed description how to paint a wall. Start creating with preparatory work. Need to prepare the right materials: brushes, paints, thinner (if necessary), rags, stencils (depending on technique), stepladder, palette (for mixing colors). Preparing the wall. Pay attention to the surface. The painting can be applied to plaster and wallpaper intended for this kind of exploitation. The surface must be degreased and free from dust, deposits and previous paint. For oil material, the wall needs to be covered with a primer, for watercolor, it should be slightly damp.
After doing preparatory phase Let's move on to sketching. The contours can be applied by attaching a stencil to the wall, or drawn "by hand" in accordance with the sketch. Next, fill in the resulting shell. Let the drawing dry well. After that, cover it with a layer of varnish.
Remember! After work, be sure to ventilate the room well.
 After sketching, you can start drawing. After completion, the drawing is recommended to be varnished
 Application features
For better preservation of the picture, pay attention to some features when working:
- it is better to apply the material in a thin layer;
- before coating, be sure to treat the wall with a primer (for oil) or leave wet plaster (for watercolor);
- drawing sketches is an obligatory part for a small and for a large room;
- be careful when applying the image to the ceiling or high surfaces;
- Make sure the pattern is dry before varnishing. Be sure to check for heavy paint buildup.
Important! Take precautions when working with caustic substances
 Before applying varnish, make sure that the drawing is completely dry.
 Various techniques
Modern painting is moving away from medieval frescoes, the technique of painting walls on wet plaster. At the moment there are various options.
To begin with, the type of painting depends on the chosen paint, which we discussed above. If in doubt about the choice, consult a specialist. He will make a project, showing how the creation will look like when completed. He will also create a sketch and help in choosing the base.
The second criterion is the type of application. To transfer the pattern to the surface, use the following methods:
- stencil
To do this, print the pattern you like, transfer it to a hard surface, then circle the outline by attaching the stencil to the wall. Also, this device can be bought already in ready-made, or resort to the help of a designer. This technique is mainly applied to simple patterns, or simple drawings. Here you can use both a brush and a roller to speed up the process.
- hand painted
All presented species are generally hand-painted. But this technique involves drawing a contour sketch, and then filling the resulting shell. This type considered the most difficult. Although it all depends on the chosen pattern.
- Through projection
A technique that does not require a sketch. It is enough to find the picture you like, use the projector to transfer it to the wall, and draw on this projection. This method helps to accurately reproduce the nuances of the picture, while not being an artist.
 Hand painting is the most complex view drawing
 Let's get down to business
Having decided on the choice of drawing, colors and technique, we proceed to create an image. We offer several options for different rooms.
Shall we arrange the rooms?
 Landscapes in the apartment will look very beautiful
 Living room
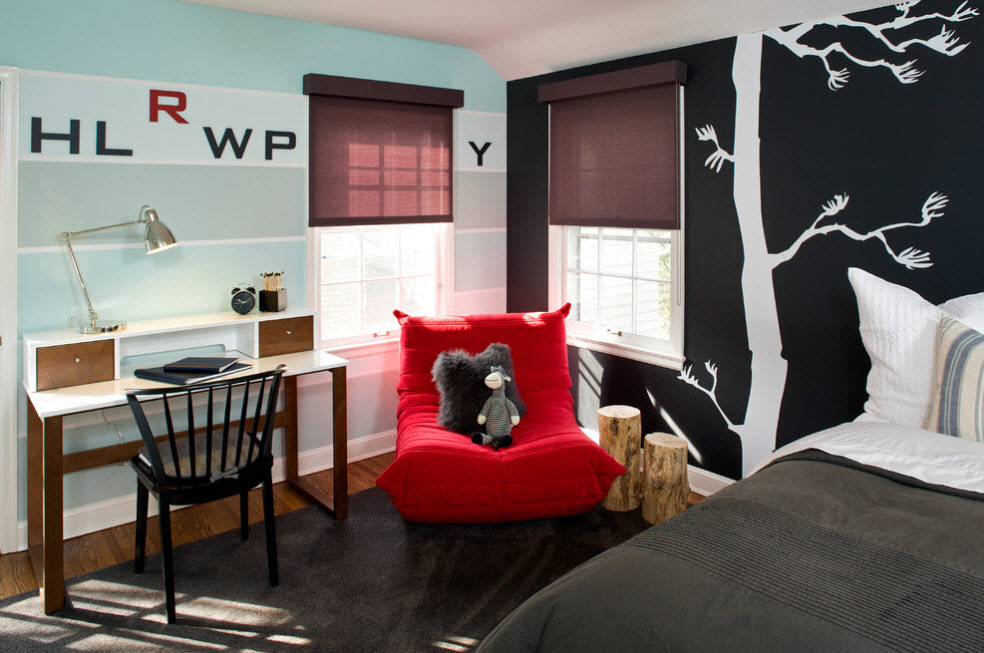
The choice of scale and theme depends on the overall style of the room. For any color, black silhouettes of any kind you like are well suited. They harmoniously fit into the cold and warm shades without looking gloomy.
For a large living room, a watercolor painting on the entire wall would be an excellent option. Do it in cool light colors to create a feeling of freedom and space, or use warm colors to create coziness.
An example is a flower painting in purple or blue hues with the addition of green on a white background. In this room, it is better to use hand-painted.
 For large rooms, you can make a large painting on the entire wall.
 Bedroom
The help of stencils will be appropriate here. They can create original patterns by making a photo frame that will be a great addition and a reminder to the couple of the wonderful moments spent together.
 In the bedroom it is better to use calm colors.
 Children's
In this room, creative thoughts are allowed to be fully realized. You can create an original and fashionable design by inviting a master. Then get an abundance of bright colors, and an accurate display of the chosen theme. Possessing artistic talent, you will be able to independently portray your baby’s favorite characters by decorating the entire wall.
If talents do not allow you to create on a large scale, you have a chance to paint a wall with your child. To do this, use stencils or projector technology. This choice will be a good opportunity to have fun together and let the child show their artistic abilities.
 The children's room should have bright colors
 Care rules
Despite the fact that the materials and the method of their application differ from those used in the Middle Ages, some care will be required for the product.
- To begin with, do not forget to cover the picture with varnish. This will simplify care and allow her to stay fresh for a long time.
- If the coating is not included in the plans, use a dry cloth to remove dust.
- Monitor the temperature and humidity of the room.
- If the drawing runs, make small corrections with a brush.
- Periodically update the brightness of the image, or change it completely.
In general, when using a protective coating, maintenance is reduced to dust removal from the wall. damp cloth. The rules of care are quite simple, so you can safely make your dreams come true, creating unrealistic images to your delight and your friends to envy.
Video: Volumetric 3D wall painting - an orchid.
Video: Wall painting. Lace 3D flower
How many times did our eyes stop at the intricate patterns applied to the walls. It is not only beautiful, but also quite affordable. You can, of course, turn to a specialist and bring a new trend to the interior, but it's easier to do it yourself. Enough to stock up acrylic paints buy a stencil or make your own unique pattern. Even people who are far from art will be able to do such art.
Sometimes painting brings not only aesthetic pleasure, but also decides additional functions, for example, hides low ceiling or uneven walls. In small rooms, small patterns of light colors are appropriate.
Often the walls of a children's room are decorated with frames from your favorite cartoons or fairy-tale characters.

The hand-painted ceiling echoes the ornamentation on the wallpaper.

Decor should complement style and color scheme rooms. Floral motifs are appropriate on the walls of a classic kitchen.

Moroccan patterns on the walls of the bedroom, applied using a stencil.

Stencils for wall painting, where to buy
To decide on a stencil for painting, you need to explore the room and choose a place for decor. If there are already existing textures and patterns in the interior, the ornament must be compared with them. If the work will be carried out on a "blank canvas", they try to think ahead and imagine furniture and other future interior accessories. Typically, wall stencils are designed to cover large areas. Although, with small designs, for example, a damask stencil, it is convenient to decorate the walls. After choosing a template, you need to decide on the color of the composition.
Remember, paint is applied over the stencil.
Designers do not recommend using two contrasting colors on their own. It is better to opt for a combination of glossy paints of the same or similar shade.
You can find stencils on the websites of online stores or on the shelves of building hypermarkets. An example is the online decor store Allstick.ru.
 Having opted for a universal roller, you can get a whole set of rubber nozzles for decoration.
 The best choice ready-made templates will be products based on a polymer film that is glued to the wall. These stencils can be easily washed and reused many times. If there is no template you like, you can make it yourself.

Stencils for painting walls with your own hands, step by step with a photo
Homemade stencils for wall painting can be made on a cardboard or lavsan base.
Option number 1 Template on the film
A lavsan film is placed on the glass, and then covered with a printed paper stencil. With the help of a clerical knife, excess details are removed, creating your own unique pattern.
 Option number 2 Stencil from plastic folders
Stationery folders vary in density, color, and smoothness, but any of them will work for stencil cutting. Such templates are durable and water resistant. If you stick the transparent part of four folders together with masking tape, you can make a template for a large pattern.
 The selected ornament is printed out, and then applied to plastic and cut out. It is advisable to fix the edges with tape.
 It turns out a ready-made stencil for painting.
 Option number 3 Cardboard template
For a budget stencil, a cardboard base is suitable. It is made according to the principle of plastic, but scissors are used for cutting. Cardboard templates get wet, so they are more suitable for one-time use. Often the edges of the stencil are reinforced with adhesive tape or varnish.

Option number 4 Drawing using a projector
The drawing template is transferred to the wall through the projector, outlined and painted.

Option number 5 Stencil masking tape
You can create a picture on the wall using masking tape / narrow tape. First, an ornament is formed on the wall, and then paints pass exactly along the edge of the ribbon.

Option number 6 With the use of fruits
A half of a lemon dipped in paint may well become an original template for a kitchen wall.
 Homemade templates have a number of pros and cons that must be taken into account when making them.
Advantages:
- variety of options;
- ease of manufacture;
- use on different types surfaces;
- economy.
Flaws:
- problem with fixing on the wall;
- the occurrence of errors when cutting;
- rapid wear;
- small details spoil the drawing itself.

Wall painting styles, photo
There are many types of wall decoration. To decide on the choice of ornament for your interior, you need to navigate the styles of wall decor.
- Classics adheres to harmony and simplicity. It has neutral motifs that fill the room with positive and soothing after a hard day's work.

- Abstraction on the wall is an unusual interweaving of geometric shapes, plant elements and other artistic forms.

- Splendor, grandeur and volume bears the Baroque style. It is distinguished by the brightness of colors and the richness of the play of light and shadows. The style is characterized by large leaves and large flowers.

- A special worldview, imposed by the influence of Islam, conveys the Arab direction. The complexity of the ornament is complemented by Arabic script and canvases similar to Arabic carpets.

- Artistic paintings are real canvases or copies of famous masters.

Sometimes styles combine or complement some important element.
Wall painting master class with photo
Required tools:
- plastic sheets;
- marker;
- roulette;
- stationery knife;
- glue spray;
- insulating tape;
- dye;
- brush.
Step 1. Design selection
Having artistic skills, you can create your own unique pattern or go online for a ready-made template. The pattern you like is printed. With a large format, several sheets are printed, and then they are glued together.
With a repeating ornament, it is necessary to achieve a uniform arrangement of the pattern on the wall.

Step 2. Sheet preparation
You can buy blank plastic from an art supply store, but it's easier and cheaper to use plastic folders for this. For the blank, you need a square of 60x60 cm, so the sheets are interconnected with adhesive tape.

Step 3: Transferring the Pattern
The printed image is placed under a translucent stencil, and then transferred to the plastic with a marker.

Step 4: Preparing the Stencil
Cut out the template using a utility knife. This step is the most laborious, because every detail is important here.

Step 5: Placing the Template on the Wall
To attach the stencil to the wall, you will need glue spray or tape. For convenience, they use a ladder, because it is better to start painting from the top corner.

Step 6: Patterning
The paint is applied with a brush to the wall through a stencil. Sometimes a sponge is used for this. The amount of paint depends on the size of the room and the detailing chosen. It usually takes at least 24 hours for the dye to dry completely.
The template is removed with sharp movements, at the end of the decoration.

Step 7: Repeat
The stencil is applied to the wall several times until the selected pattern is completely formed.

View of the interior before painting:

View after completion of work:

Wall painting in the room, photo
It is known that the color of the interior affects the mood. Despite the existing rules for selecting shades for the bedroom, each person has his own preferences and tastes. It can be unexpected colors and abstract patterns. Forget traditional rules when choosing bedroom wall decor.

The Art Nouveau living room features earthy tones and breathable shapes.

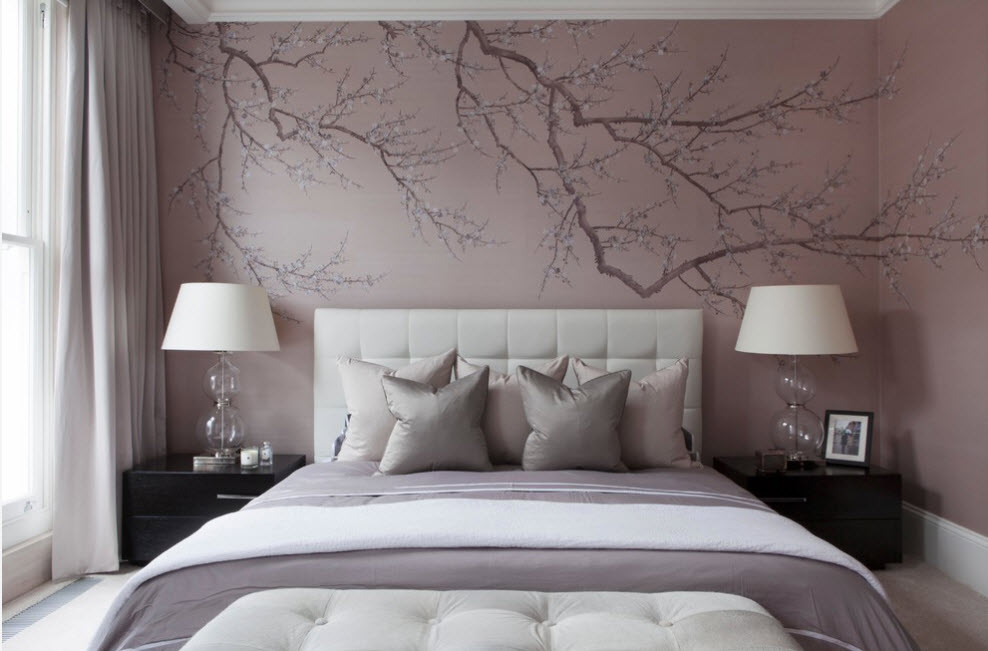
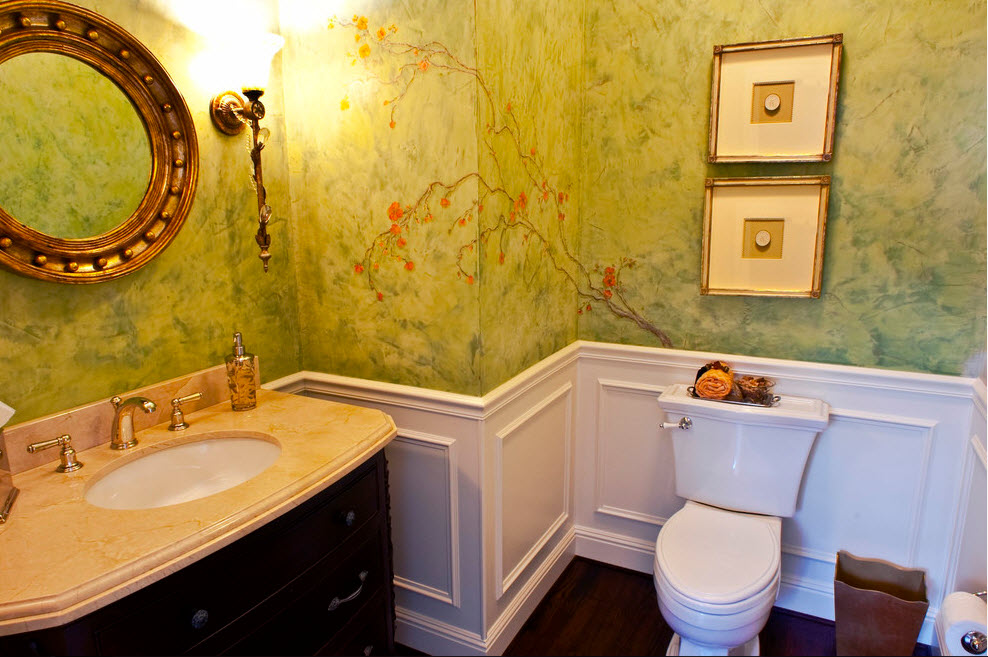
Oriental landscapes with cherry blossoms are inherent Japanese style. It is most often used for the bedroom.

An example of painting when the boundary of space is “erased”.

Fresco - painting on damp plaster, appropriate even in the bathroom. It is not subject to fading and cracking. is a particle of the plaster itself.

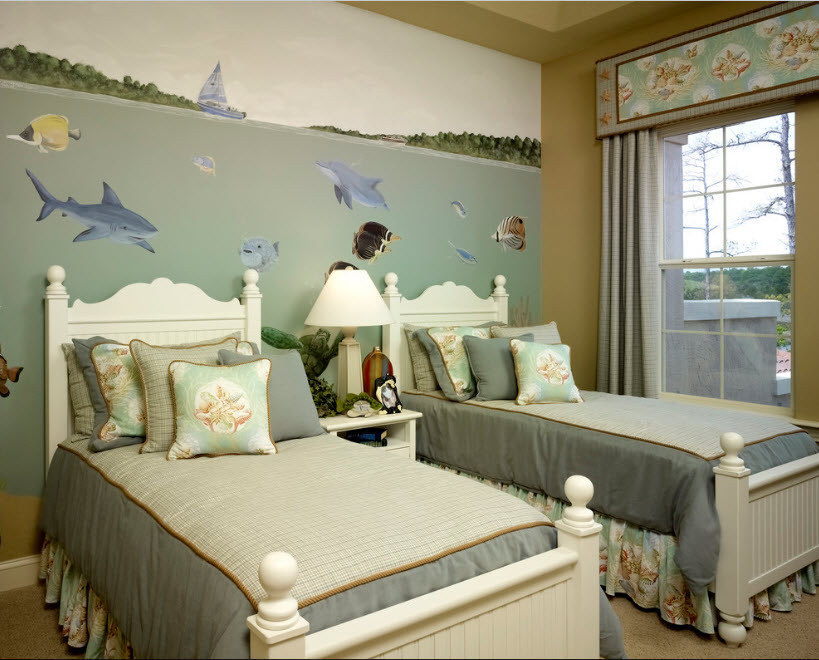
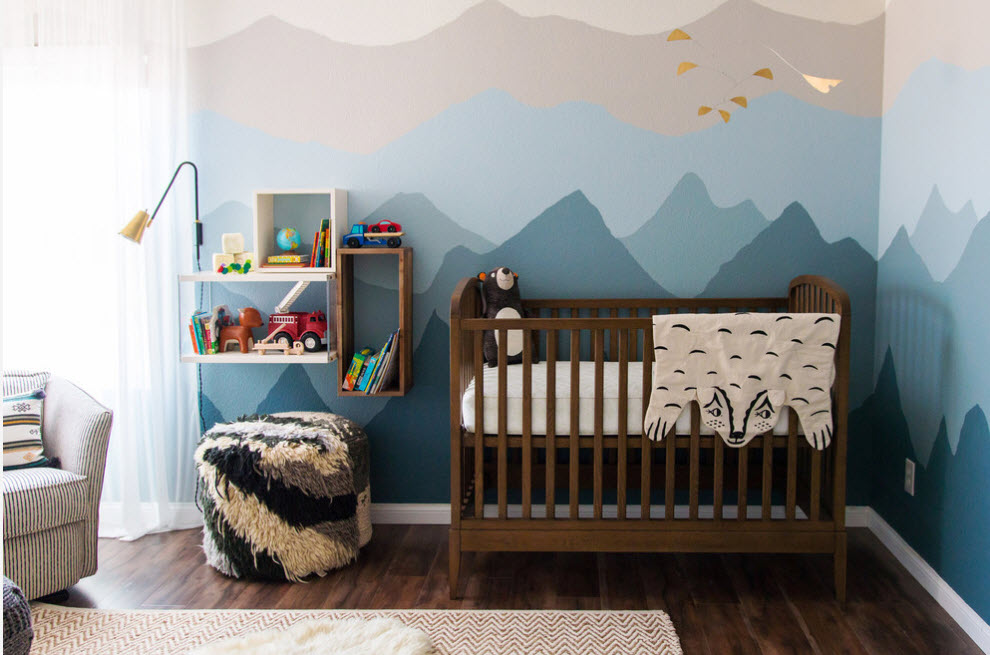
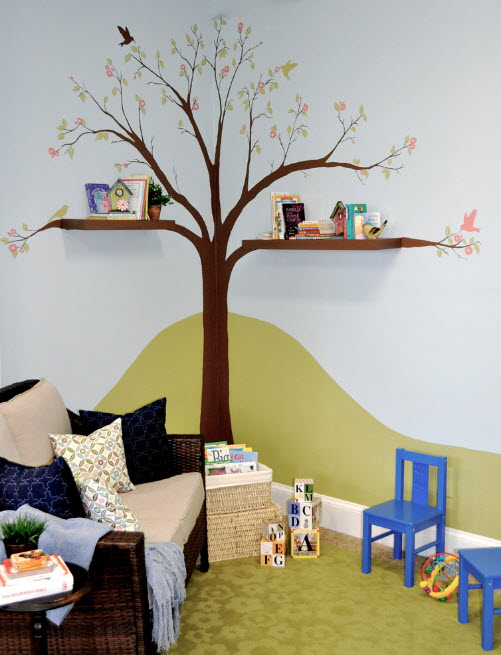
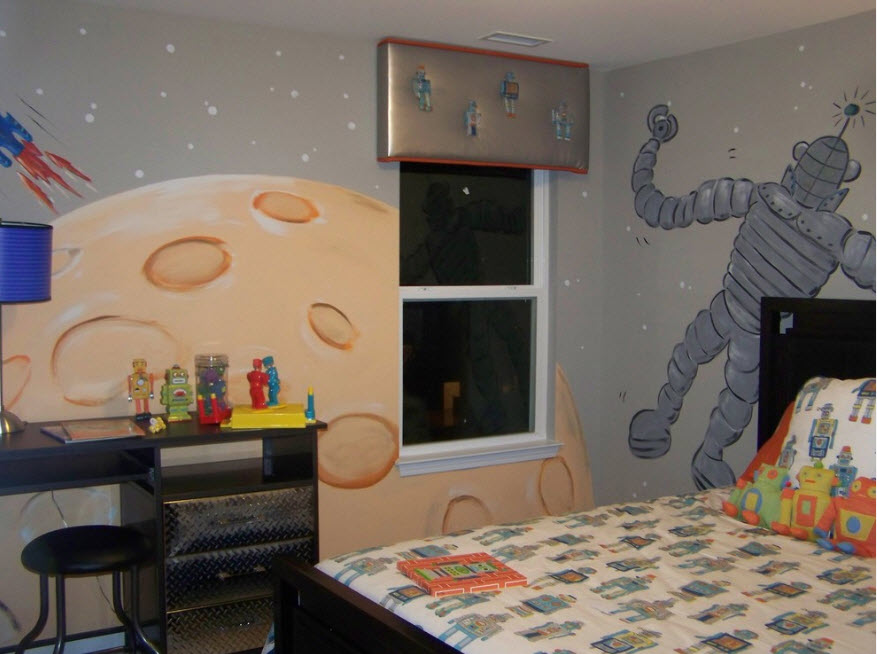
Wall painting in the children's room, photo
Children's wall decor should be bright and understandable for the baby himself. Often in such artistic painting there are:
- scenes of favorite books;
- starry sky;
- nature (animals and plants);

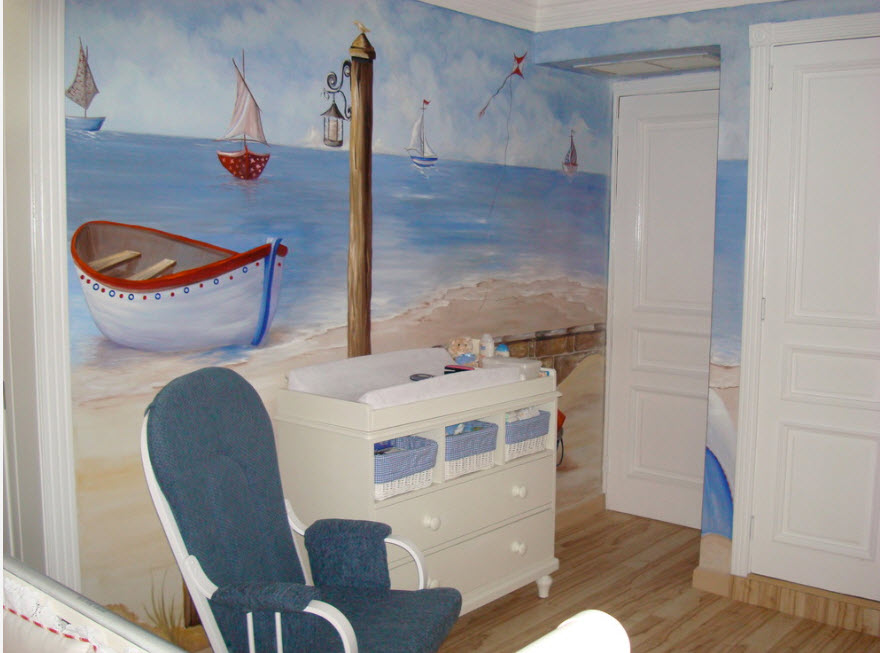
- marine theme (ships, fish, pirates);
- the name of the child is played;
- cartoon fragment;
- transfer is appropriate children's drawing on the wall.

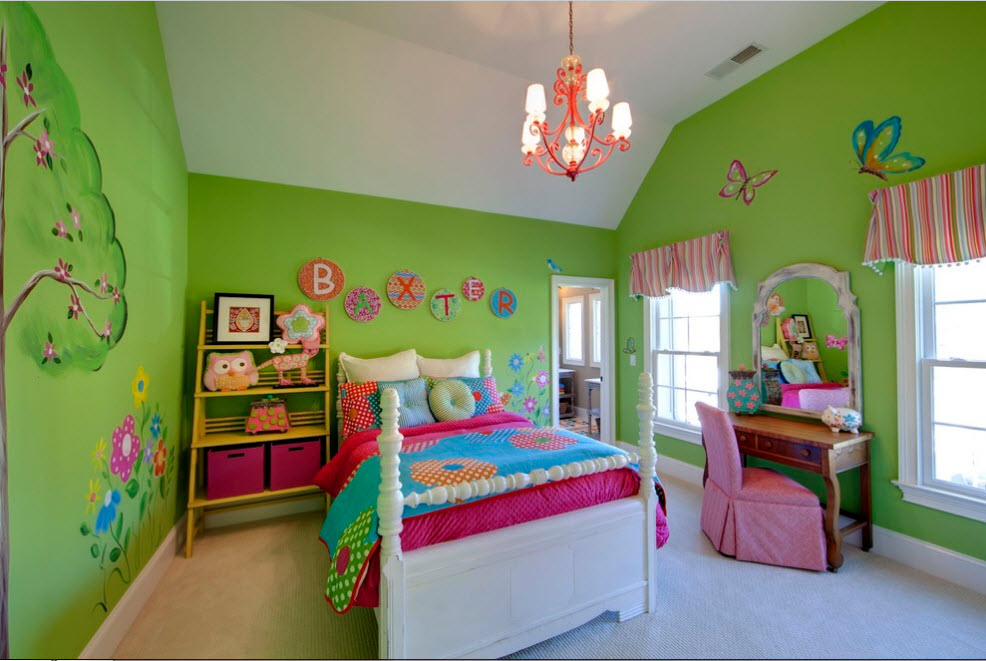
For girls, the wall is decorated in pink, decorating it with princesses and fairies.

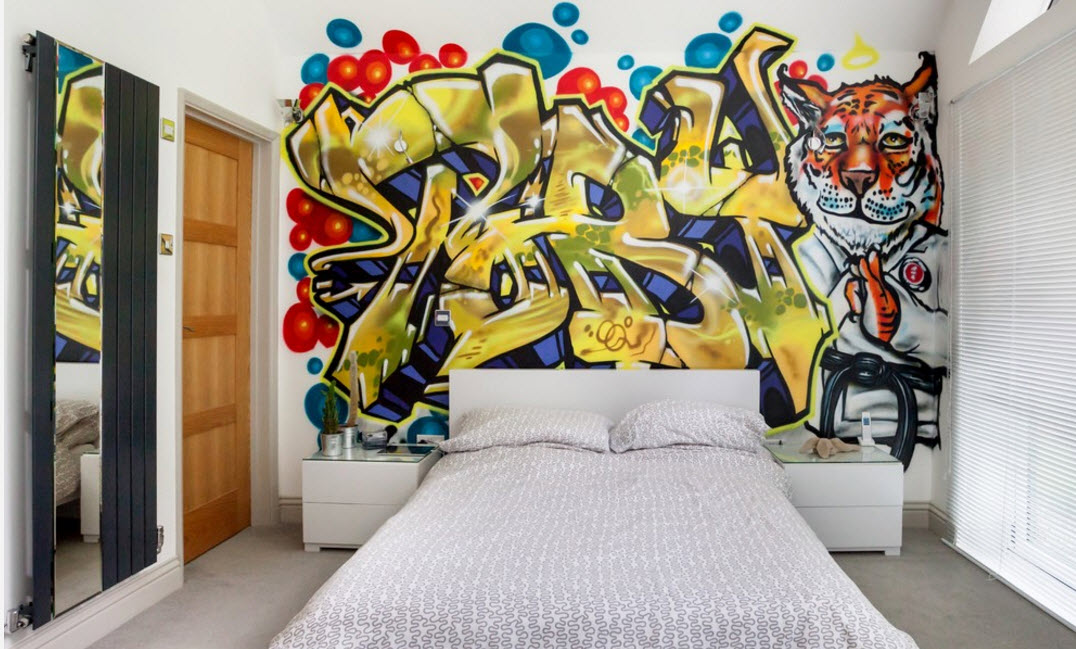
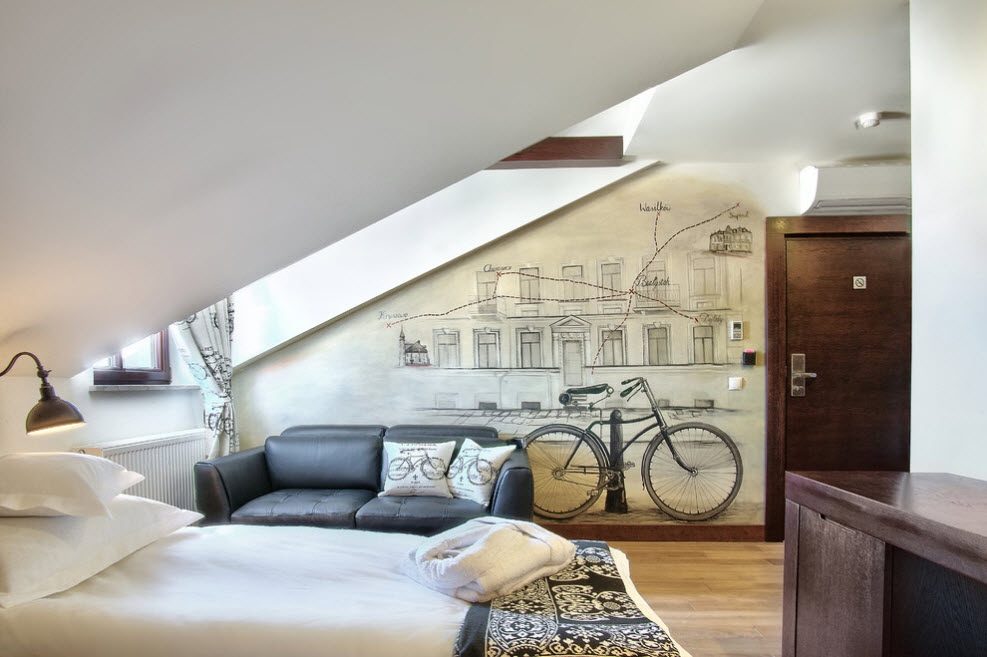
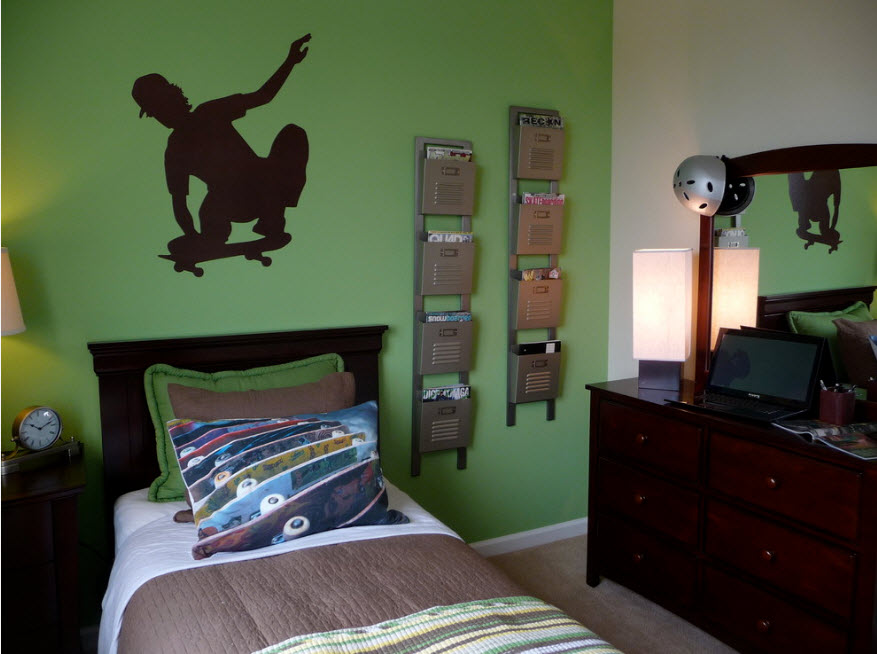
Teenagers will be delighted with graffiti or high-tech stories.

For a non-standard room, a pattern that smoothly passes into the floor is suitable.

Wall painting in the kitchen, photo
Before you start painting kitchen walls, you need to choose the style of decoration and the size of the ornament. All elements must be combined with the features of this space.

An increase in the interior can be achieved with the help of a distant landscape.

Separation kitchen areas by wall decoration.

Classic kitchen wall painting using a stencil.

Abstraction would be appropriate for a high-tech kitchen.

Ceiling painting, photo
Of course, paint the ceiling much harder than walls. This is where patience and care come in handy. It is also necessary to think about acquiring special scaffolding for lying down, because the creation of a drawing often takes several weeks. Hands and neck get tired from continuous work.
Artistic painting on the ceiling is mainly framed in an oval or circle, and a light source is located in the center.

Visually raise the ceiling with the image of the sky and stars.

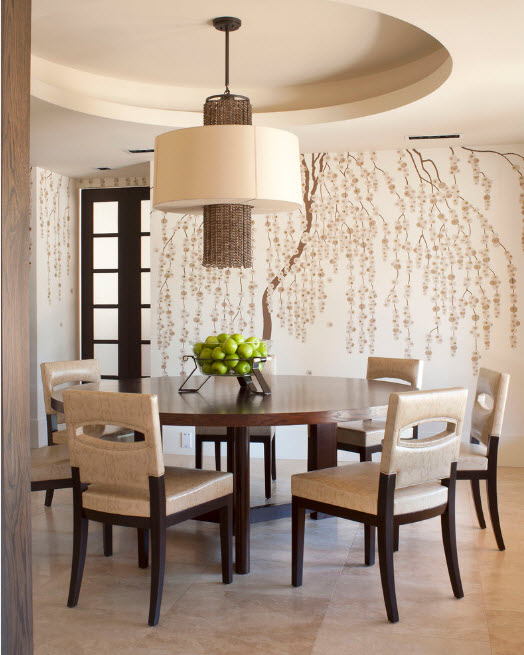
In the dining room, the pattern is placed on the farthest plane, so it looks like a real landscape.

The star theme is applied to the ceiling with fluorescent paint. At night, the decor glows under UV lamps. They are placed around the perimeter of the picture.

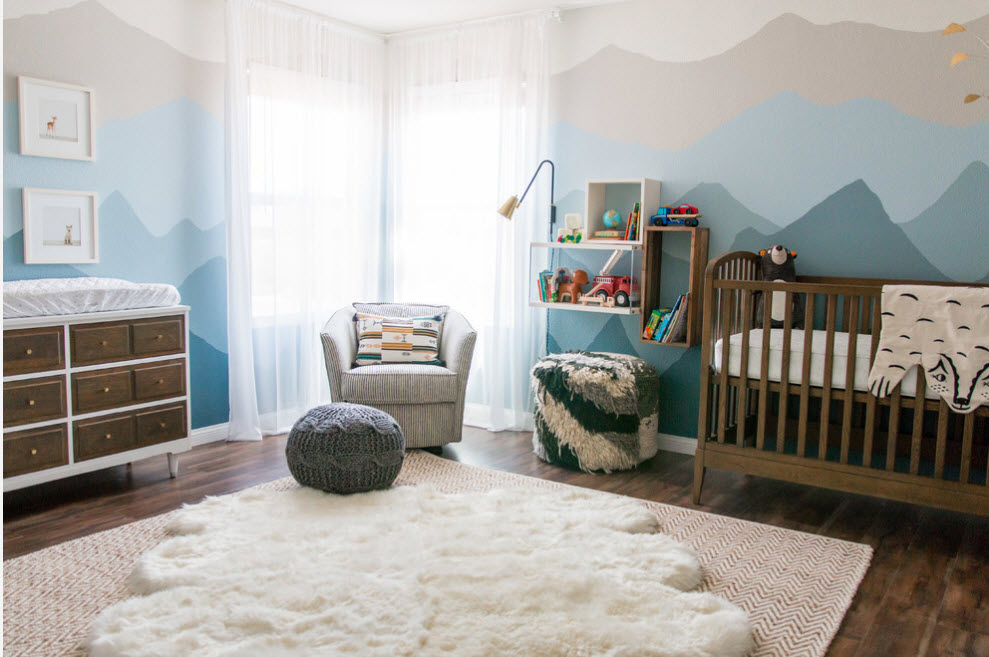
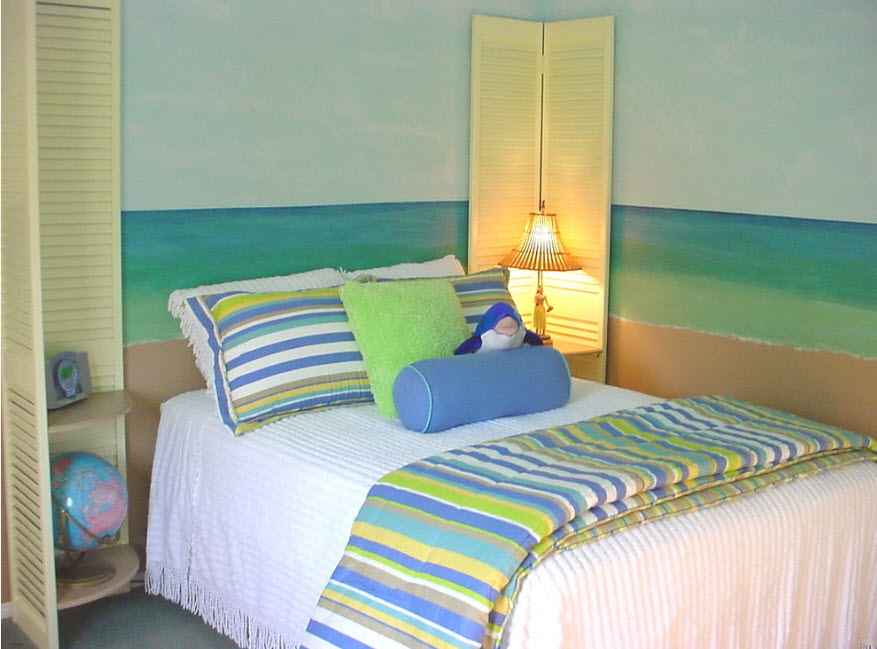
In the nursery, not only the walls, but also the ceiling are often decorated. A smoothly transitional landscape from one surface to another creates a whole and will be appropriate for all ages.

The basis for painting is a drawing that is transferred to the surface through a stencil or displayed using a projector. In order for the template to fit snugly against the wall, its surface is treated with screen glue.
Self-painting on the walls provides for the following rules:
- the work surface is cleaned and degreased before painting;
- the borders of the ornament are marked with a level and a pencil;
- for decoration it is better to use a universal roller. It works well in large areas.
- circular movements with a brush during staining will exclude the ingress of villi into the pattern;
- a small amount of paint is taken on the brush, and its excess is removed with a rag;
- reusable stencils must be washed at the end of work;
- to protect the pattern from exposure to the sun and moisture, it is varnished;
- For beginners, it is better to work with acrylic paints. They dry quickly.
By adhering to the above rules, you can avoid many mistakes and not waste time correcting them.
Do-it-yourself painting is best done without intricate patterns and small details.

Wall paints

Suitable for painting different kinds paints: water-based, oil, enamel, tempera, but acrylic is most often used.
- The fresco on the wall is applied with a special powder mixed with water. Such material is most often used for painting the ceiling. The paint is very durable, does not crack or fade.
- To decorate the ceilings of clubs and restaurants, fluorescent paint is used, which glows under the influence of ultraviolet radiation.
- Acrylic is considered the most practical. It is odorless, moisture resistant and sunlight which is especially useful for children's rooms and kitchens. Any surface is suitable for its application. The paint dries in about half an hour.
- The depth and originality of color is conveyed by oil paints. They are bright and do not crack, although they dry slowly and smell unpleasant.
- Tempera paints are ground on yolks or a solution of glue. They are durable but prone to cracking.
Tools and materials for work
Starting to decorate, you need to stock up the following materials and tools:
- For the sketch, you will need a variety of paper and tracing paper. For non-standard ornaments take whatman paper.
- Auxiliary tools: two sizes of ruler, triangle, adhesive tape, scissors, etc.
- Charcoal and graphite pencils, markers, eraser.
- A variety of brushes: building, synthetic, bristle, flutes.
- Acrylic paints different colors and shades. They come in glitter, mother-of-pearl and silver. For painting large areas, building acrylic is purchased, which is supplemented with colors. There are facade and interior acrylic.
- To paint and create a three-dimensional panel, you will need spatulas and stacks.
- The work requires baths, rollers, sponges and a telescopic stick.
- Bucket, spray gun for wall irrigation.
- To prepare the wall for work, decorative plaster is required.
- Beads and glass for decoration.
- fine-grained sandpaper for grouting and varnish for fixing.
Sometimes masters use an airbrush and a spray gun to paint large surfaces.

Wall painting in the interior technique
The painting technique depends on the technology of applying the pattern and is performed both on wet and dried plaster.
- A drawing on dry plaster, called alsecco, will be light and short-lived.
- When frescoing, a layer of water-soluble paint is applied over wet plaster. The paint dries quickly, and the ornament itself is considered one of the most resistant and durable. Work in this technique is within the power of professionals.
- Relief painting is based on plaster and has ledges.
- Airbrushing means "painting with air" when paint is sprayed onto a wall with an airbrush. This decor comes out very gentle, with soft transitions.

- Screen painting is the simplest. It does not require special skills and abilities. The template is bought ready-made or made independently.
- Three-dimensional decor (blende) allows you to expand the interior and correct flaws in the finish. It is applied by the master and such work is expensive.

Do-it-yourself wall painting in the interior, step by step with a photo
On a white or cream background, green tropical foliage will look good. This decor is perfect for a living room or bedroom.
To work, you need two types of palm leaf stencils.
Stencil #1

Stencil #2
The leaves will be in three shades: white, green and pale olive. Distribute three colors oil paint on separate trays, as well as for each shade, they prepare their own rollers and brushes.

Begin the decor with a green leaf. The paint must be distributed over the entire roller, including the edges. Then its excess is left on a paper towel.
You can initially distribute and fix three stencils on the wall surface and paint them in your own shades.

Then stencil No. 2 is taken and a row of colored leaves is covered with new samples. At the same time, they try not to match their colors; they make a green or olive tint on a white background.
Self-decoration of the walls will bring zest to your interior, making it inimitable and unique. The most important thing is to choose the right ornament, because it will be in front of your eyes every day.