The main task of renovation in most houses and apartments is to bring the walls back to normal condition. After all, a couple of decades ago, almost no one thought perfectly smooth walls and didn’t think about it. They were leveled according to the “at least somehow” principle. You can correct the situation according to all the rules: knock down old plaster and completely plaster along the beacons. This is correct and reliable. But long, dirty, expensive. It is easier to use the so-called dry methods: level the surface of the wall with plasterboard (gypsum plasterboard). The second task that often has to be solved during the renovation process is redevelopment. We remove old partitions and install new ones. New interior and decorative partitions also done using drywall. We will tell you how to level and install plasterboard walls with your own hands in the article.
How to cover walls with plasterboard
First, let's consider the case when you need to level the surface of existing walls. There are three options for attaching drywall to walls:

The latest technology - installing plasterboard with glue - is the fastest, but it also has disadvantages. The first is that there is not glue under the finishing everywhere, so hanging cabinets on such a wall is problematic. If you plan in advance to attach something to the wall, lay a continuous layer of glue at this height or install an embedded beam, which will also serve as an additional beacon when setting the sheet level. Then the problem will be solved. Another minus is that there are small differences. That is, the surface turns out to be imperfect. The difference is 2-3 mm. Between the “pieces” of glue, the sheet bends slightly. However, this is a good way to quickly level a wall.
For more information on how to glue drywall to a wall, watch the video.
Attachment to frame
Since no fasteners are needed when gluing drywall to a wall, we will talk about a frame and mostly a metal one. The rules for attaching to wood are the same, you just use wood screws.
GKL dimensions and purpose
A few words about what sizes the sheets come in and how to lay plasterboard on the walls. The standard sizes are as follows: the width is always 1.2 m, the height is 2.5 and 3 meters. Sometimes there are “non-standard” ones of shorter length: shorter ones are easier to work with, but you end up with more seams, which then have to be sealed. GKL thickness:
- 12.5 mm — universal material for walls and ceilings;
- 6 mm and 9 mm - for curved surfaces.
It is often said that 9 mm sheets are for ceilings. But manufacturers have no such recommendations. Any of the manufacturers position thin sheets as those used for finishing curved surfaces.
Bevels are made along the long edges of the sheet. They are needed so that the joint can be glued with reinforcing tape and sealed with putty. It is the side where there is a bevel that is the front side. It is turned inside the room.

How to dock
If it is necessary to join sheets in height, position the joints so that you do not end up with a long longitudinal line. They say that the sheets are laid staggered or offset. In this case, it is desirable that the displacement be at least 40-60 cm. Long joints are the most likely places for cracks to appear. By moving the seam, you are almost 100% likely to get rid of cracks (see the figure for an example of laying sheets).
If the wall is sheathed with two layers of plasterboard, then the vertical seams also move. The sheet on top must be installed so that the joint of the bottom one falls in its middle (shift by half the width - 60 cm).

How to attach and in what steps
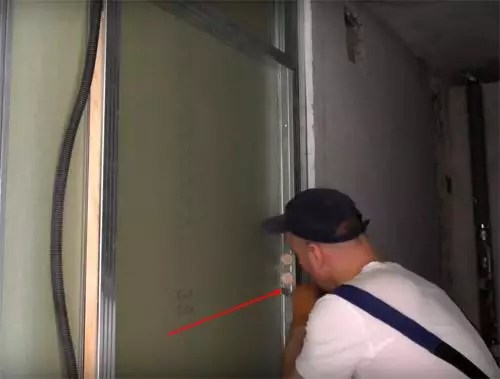
When installing, the sheet is pressed against the frame and secured using a screwdriver and special self-tapping screws with flat heads. If the frame is made of metal, use TN25 screws (3.5x25 mm). In stores they are called “for drywall.” Length - 25 mm, color - black (more often broken) or white. For a wooden frame, select those that are close in size with the flattest head: there will be less putty.
During installation, it is important to tighten the fasteners to the required depth: the cap should be recessed into the sheet, but the cardboard should not tear. It is also necessary that the self-tapping screw be installed strictly perpendicular to the plane of the sheet: this way there is less chance of damaging the cardboard layer, which in this design is responsible for rigidity.

To see how you can simplify the work and make sure that the screw goes to the required depth, watch the video.
When assembling the frame on a solid wall, the distance between the posts must be at least 60 cm. Then it turns out that each sheet is attached to three vertical profiles: two at the edges and one in the middle. In this case, the edge of the sheet falls in the middle of the profile.

Stepping back 10-12 mm from the edge, screw in the screws. They can be placed, as in the figure above, one opposite the other, or they can be offset, as in the figure below. The installation step is 250-300 mm. Fastened along the perimeter and along the middle profile.

Another important point: when cutting out sheets, keep in mind that its height should be 10-12 mm shorter than the height from floor to ceiling. This is necessary in case of shrinkage: so that the wall or partition has the opportunity to compensate for changes in height without cracks (especially important for wooden and panel houses).
These are, perhaps, all the main points of working with drywall (without taking into account the specifics of installing profiles).
Plasterboard partition
Installing a partition is somewhat more difficult, so we will describe the process step by step with a photo.
Marking
First, mark the installation location of the partition. The easiest way to do this is with a laser plane builder (laser level). This straight line is applied to the walls, floor and ceiling.
If laser level no, you will have to use ordinary construction material ( good quality) and plumb line. First, mark a line on the floor - this is the easiest. Then, using a level, transfer it to the walls. If both lines on the walls are vertical, the straight line connecting them should be strictly above the line on the floor. Whether this is true or not can be checked using a plumb line, lowering it from a mark on the ceiling to the floor line.

Marking a partition using a level and plumb line
It is necessary to achieve a perfect match - the quality of all work depends on this.
Frame assembly
We will consider assembling a frame from galvanized profiles. Guide profiles are installed along the intended line on the floor and ceiling. It is marked UW or PN - load-bearing profile. They are most often fastened with dowels - 6*40 mm or 6*60 mm, the distance between two dowels is 30-40 cm.
PN profile has standard depth(wall height) - 40 mm, but can be of different widths 50 mm, 75 mm or 100 mm. The thickness of the partition depends on the width of the supporting profile, as well as the thickness of the insulation and/or soundproofing material you can put it there.

Supporting racks are inserted into the guide profiles. They are marked CW or PS - rack profile. It differs from the guide in the presence of additional shelves on the walls. These shelves make it more rigid, increasing bearing capacity. The width of the rack profiles depends on the width of the supporting ones: they must be the same. That is, the racks must be the same width. It is between them that the insulation is then installed.

The posts are attached to the guides in two ways. The first is used mainly by professional builders. They work with a cutter - a special tool that breaks through and bends metal to the sides, fastening two parts. Amateur builders independent work with drywall, attached to “flea beetles” (also called bugs and seeds) - small self-tapping screws with a screw at the bottom - TEX 9.5 (3.5 * 9.5 mm). They drill through the metal themselves, speeding up the assembly process (no need to drill holes). The racks are secured on each side with at least two self-tapping screws.
One point: if you are installing a partition in a high-rise building or on the ground floor of your house, then place a special film or some kind of material at the junction of the rack and the ceiling guide that will prevent squeaking. When people walk, vibrations occur and are transmitted to the profiles, causing them to rub and create a creaking sound. The second option is to make the racks 1 cm shorter. It is more correct: both the shrinkage of the house is provided for and unpleasant sounds No.
The installation pitch of the racks is 60 cm or less. This distance is determined by the width of the gypsum board (plasterboard), which is standardly 120 cm. As mentioned earlier, it turns out that each sheet is attached to three racks. So it turns out that there should be 60 cm between the verticals.
If the gap between two posts is more than 60 cm, but less than 120 cm, a vertical profile is still placed between them in the middle, otherwise this section will “bounce” - the sheet will wobble and sag. One more point: the first rack is attached to the wall a little closer - the first sheet will be attached to the entire plane of the outer profile, therefore the distance should be a little less - 57.5 cm.

It is advisable to strengthen the profiles to which doors or windows will be attached. The easiest way to do this is with a wooden block of a suitable size. It is inserted inside and secured with a pair of screws. You need to use dry wood so that the timber does not twist.
After all the racks are exposed and secured, the structures are given greater rigidity using jumpers - horizontally installed pieces of rack profiles. They are made in one of three ways suggested in the photo. The third option is the easiest to manufacture and easy to install.

The jumpers are usually placed at the height where the two sheets will be joined. Their edges must be fixed, so jumpers are necessary there. For the rest - in increments of 60-80 cm. If the wall is large - place it every 60 cm, if small, 80 cm is enough. Crossbars above the doorway are required: at the same height door frame. It is also advisable to strengthen them by placing a wooden block inside.
Laying communications
After installing all the crossbars, you can begin laying communications and electrical wiring. It is advisable to install all electrical wires in a corrugated sleeve. If you place the partition in wooden house or on a wooden frame, it must be metal. In houses from non-combustible materials, in walls made of plasterboard on a frame made of galvanized steel, the use of plastic corrugated hoses made of non-flammable raw materials is allowed (marked “NG”).
Sheathing with plasterboard and heat/sound insulation
After laying communications, the installation of plasterboard sheets begins. They are installed in the same way as for sheathing. Do-it-yourself plasterboard wall covering begins on one side. Then, on the other side, insulation and/or sound insulation is installed between the profiles (bars) of the frame. After its installation, the gypsum board wall is sewn up on the other side.
The usual insulation for walls and partitions made of plasterboard is used:

In principle, it is possible to use other insulation materials, but the ones listed are the most popular.
How to cut drywall
When making walls from plasterboard with your own hands, you will have to cut the sheets: they are not always complete. For this you will only need a sharp stationery knife(for paper), a long, flat object - a ruler, board, beam, level, rule, etc. And a wooden block a couple of meters long, but it’s not necessary, it’s just easier. That's all. A jigsaw may be needed when cutting curved lines, but there will be a lot of dust.
The sequence of actions is as follows:
- draw a line with a pencil on the front side along which you need to cut the drywall;
- apply a ruler (block, board) along the line and cut the cardboard with a stationery knife;
- We place a block under the cut line;
- on the shorter side we tap with the palm of our hand, which causes the plaster to break along the cut line;
- we break the sheet along the entire length of the cut;
- bend the broken piece and cut the remaining cardboard intact.
It's really very simple. The main task: to mark correctly. There are no further problems (unless the sheet is broken).
Video lessons
Not all subtleties can be described; some are better seen. We have selected videos that show the specifics of working with drywall. They mainly concern the assembly of a frame from profiles. This is really the most time consuming part. And how smooth the wall or partition will be depends on how correctly the frame is made.
How to make a false wall from plasterboard
How to make reinforced racks in a partition. This frame assembly method is non-standard, but that doesn't mean it's wrong. The racks are actually more rigid. This is necessary if you are building a full-fledged interior partition from plasterboard. Strengthening won't hurt here. The disadvantages are that it will take more time, and the cost of such a frame is higher.
Which profile is better: smooth or grooved? On the market there is different models profiles, including those with uneven rather than rough walls and sides. With the same thickness of metal, it is more rigid, which seems to be good. But how good is he at his job? Watch the video.
Drywall partition from start to finish. Here we film the installation of the partition step by step. Everything is quite accessible; you can take it as a basis and build walls from plasterboard with your own hands.
Tsugunov Anton Valerievich
Reading time: 5 minutes
Installing a gypsum plasterboard partition in an apartment is the optimal solution for dividing the interior space. Thanks to its versatility this material is in high demand and popularity in the field of apartment renovation. The options for its use are very diverse, but most often plasterboard is used for the construction of partitions with their subsequent decorative finishing.
Makes such designs attractive appearance, ease of installation and the ability to do it yourself. And the opening ones design possibilities allow you to make the overall appearance of the apartment original, individual, stylish and extremely attractive.
A partition with plasterboard lining is given rigidity by a frame made of wooden or metal profiles. With clear step-by-step instructions, necessary materials and tools, its construction will also not take much effort and time.
Price
How much does the arrangement cost? plasterboard partition? If you decide to turn to specialists, erecting a partition without sound insulation with gypsum plasterboard sheathing in one layer will cost you, taking into account the cost of materials, 900–1100 rubles. for 1 sq. m in Moscow and 800–900 rubles. for 1 sq. m in St. Petersburg. The cost of a two-layer partition with noise and heat insulation will range from 1800 to 2100 rubles. for 1 sq. m in the capital and from 1200 rubles. for 1 sq. m in St. Petersburg.
If you plan to install the partition yourself, it will cost you 2 times less.
Where do we start?
Before you start installing a plasterboard partition with your own hands in the selected room, you need to carefully consider the future design and complete a basic drawing. It will not require specific knowledge and calculations from you, but should reflect all the necessary parameters down to the smallest detail.
- Let's start by displaying on paper in the chosen format the dimensions of the room chosen for the partition.
- We draw the location of the desired location of the future internal partition made of plasterboard.
- Similarly, we carry out the front drawing of the partition, reflecting bearing structures and jumpers.
- Determining the planned loads on the partition using drywall during its operation will help you calculate the number of future racks. Additionally, keep in mind that the edges of the sheets of material are attached to different frame profiles. This will make it possible to distribute the load evenly across the entire plane of the frame, taking into account all used decorative elements. Perhaps you decide to make a wall with shelves from plasterboard.
What materials and tools will be needed
To make a plasterboard partition, you will first need to construct a rigid frame. It is made from galvanized profile 75 mm wide using additional elements and wooden blocks. You will need the latter to increase the rigidity of the structure in certain areas. The partition is covered with standard sheets 12.5 mm thick, which are secured with self-tapping screws. Soundproofing material is laid between the gypsum boards.
In addition to the materials listed, you will need your own or rented tools:
- or a drill with an appropriate attachment.
- Laser or hydro level. The first option is preferable, as it will significantly simplify and speed up your work on creating a partition, and will allow you to create high-quality vertical and horizontal levels.
- Five or ten meter tape measure.
- Plumb.
The process of arranging a partition using plasterboard can be divided into several stages, including:
- installation of a doorway;
- covering the gypsum board partition;
- finishing.
We create the basis for the partition frame
Using drawing tools and a level on the ceiling and floor surface We make markings, noting where the partition will stand.
- We fix the guide profile to the floor with self-tapping screws.
- We insert vertical guides into the profile located on the floor in steps of half a meter, and attach them to the walls strictly vertically. At the joints of the profiles, we use self-tapping screws or a cutter to fasten them together.
- Using a plumb line, we mount the guide profile of the future partition to the ceiling.
As a result, by installing 4 profiles, we get a rectangular frame, which will serve as the basis for the future frame.
Design of a doorway in a partition
If the partition design provides for the presence swing door, care should be taken to ensure there is space in the frame for installation door block. The walls of the structure must have sufficient rigidity to withstand the expected load.
Strengthening the profile with dry, straight wooden blocks will help to give rigidity to the profile.
To install a doorway in a partition, we perform the following steps:
- We cut the rack profile to the required height and strengthen it with a wooden block inserted inside.
- We install the finished structure inside the upper (ceiling) and lower (floor) guide profile so that the width is the same at the top and bottom of the opening. We check the verticality of the racks with a level and secure them with self-tapping screws.
- To make a cross beam, we cut out a piece of the rack profile corresponding to the width of the future doorway. We also strengthen it with a wooden block.
- We install the transverse profile strictly horizontally to the required height.
The crossbar can be installed in two ways:
- Attach the cuttings of the guides corresponding to the width of the rack profile to both reinforced racks, insert the prepared crossbar into them and secure.
- Cut out the middle part of the rack profile that will serve as a crossbar, leaving “antennae” for which it will be attached to the racks.
Important! In both cases, it is recommended to use a cutter when connecting the profile. This will help ensure a tight fit of the gypsum board and avoid “humps” from the screws on the surface of the partition.
We fasten with nails wooden structures, inserted into the profile.
Installation of vertical racks
We mount the rack profile, taking into account standard width GKL (120 cm), there are 3 racks per sheet.
Since it is better to start installing entire sheets of drywall from the center, this makes it possible to most effectively “hide” the cut points, we install the racks accordingly - from the door to the walls. We check the verticality of each of the vertical profiles with a level.
Wiring and horizontal bars
The connection of vertical rack profiles with horizontal crossbars will add rigidity to the entire structure. The installation step is usually taken around 75 cm.
- Depending on the pitch of the vertical posts, we cut pieces of the rack profile of a suitable size.
- After assembling the frame, we lay the electrical wires (for this, the manufacturer provides special holes in the profiles).
Important! Electrical wiring must be placed in a corrugated pipe.

A plasterboard partition is an inexpensive and convenient way to change the layout of an apartment. This material allows you to independently change the internal structure of the apartment, create your own individual design and delimit the premises into clear zones. In new apartments, as a rule, the number of partitions is kept to a minimum so that the owner can use drywall to zone the room to his liking.
Advantages of plasterboard partitions
Drywall - relatively new material, it first went on sale about 15 years ago. At the same time, in the construction of interior partitions, it very quickly replaced traditional brick and foam block. This is due to the following advantages:
- Flexibility and the ability to cut any shape, which opens up new design possibilities.
- Easy to install - drywall is installed with a minimum of tools and effort.
- The ability to regulate humidity in the apartment.
- Moisture-resistant types of drywall are suitable for bathroom partitions.
- The light weight of the material does not put a load on the supporting structures.
- Environmental friendliness and safety of the material.
- Low cost of drywall compared to brick and foam block.

Modern drywall practically does not burn, which makes it good choice to provide fire safety.
Preparation
How to make a plasterboard partition with your own hands, step-by-step instructions for installing it - we will tell you further. If you follow this, you can easily and without problems build a partition from plasterboard with your own hands. The work is divided into the following stages:
- Marking.
- Installation of the frame.
- Installation of drywall.
- Laying insulating materials.
The first stage is marking. It is not particularly difficult; you just need to take measurements of the room, transfer them to paper and calculate the required amount of building materials. Having carried out such calculations, you need to purchase the following materials:
- Plasterboard thickness from 6 to 12.5 mm. Its thickness varies depending on the expected load on the walls.
- Metallic profile. Its width ranges from 50 to 100 mm, the choice depends on the load on the wall.
- Vertical posts for the frame.
- Self-tapping screws. Their choice depends on the material used for the walls of the building. To screw them in you need a screwdriver.
- Plumb for measurements.
- Insulation materials - mineral wool or expanded polystyrene.
- To install a partition in a concrete building, you will need a hammer drill.
Video: DIY plasterboard partitions
After purchasing all necessary tools and materials, you can begin installing the partition.
Frame
The basis of the future partition is the frame, and the strength and aesthetics of the structure depend on the correct installation. Do-it-yourself step-by-step instructions for a plasterboard partition frame are very important, since this stage is the most difficult.
So, its installation looks like this:
- A line is drawn along the ceiling, exactly perpendicular to the opposite walls. Control points are lowered plumb to the floor and a similar line is drawn along them.
- Using a screwdriver, profiles are installed on the floor, ceiling and walls. They need to be secured especially carefully, since they bear the main load.
- Vertical supports are attached to the profiles, at the rate of three pieces per sheet of drywall. In this case, the joints of adjacent sheets will be on the same support, and there should also be a stand in the center of each sheet.

To ensure sound insulation, you can lay a self-adhesive seal between the profiles and the wall, and only then screw them in with self-tapping screws. If heavy furniture will be hung on the wall, the step between the vertical supports should be no more than 40 cm.
Drywall installation
Installing drywall is not difficult. Its sheets are installed in a vertical position, and the horizontal joints of adjacent sheets should not be located in a row. Fastening is carried out as follows:
- The self-tapping screw should be located no closer than 5 cm from the corners of the drywall, and 1.5 cm from its edges.
- The heads of the screws need to be recessed into the drywall as much as possible so that they do not subsequently stick out.

To cut drywall, a simple stationery knife is suitable, which must be used in combination with the rule. The knife does not need to go too deep into the sheet; a 2 mm cut is enough, after which it will break on its own.
Insulation
Do-it-yourself insulation of a plasterboard partition is also done according to step-by-step instructions. She insulates the partition and prevents noise penetration. The most environmentally friendly and fireproof option is mineral wool, but polystyrene foam can also be used. The insulation should be installed after the drywall has been installed on one side of the wall. As a rule, the material comes in the form of slabs and does not need to be particularly secured. After installing the insulation, you should complete the sheathing with plasterboard. After this you can start decorative design partitions.
For some families, a wall becomes the only way out. Children are growing up, and only a few can buy new housing. How to make separate rooms for children from? Don't put a wall in the middle of the apartment. The solution will be with your own hands, step-by-step manufacturing instructions for which will be discussed in today’s article. Let's try to understand how difficult it is to do such work on your own: from selection to finishing. Let's figure out how to install electrical wiring in the partitions and ensure sound insulation so that the room becomes complete.
We have already talked about dividing the room into two parts. However, a partition will be necessary in other cases. It could be similar, made according to the same principle, or perhaps decorative from plasterboard for decorating a woman’s boudoir. Let's consider the advantages and disadvantages of gypsum plasterboard partitions.
Positive and negative qualities of plasterboard walls
Installation of plasterboard partitions is so simple that you can do the job House master without such experience. You just need to know some of the nuances, which we will try to highlight today. Among the advantages of working with such material, in addition to ease of installation, one can note the low cost of time and money. GCR is not expensive, except famous brands. Allows you to implement many of the most bold ideas, it can be bent if necessary. For example, when installing interior partitions, a plasterboard doorway can be made in the shape of an arch or traditional.

The disadvantage of the material can be considered its susceptibility to mechanical damage. It is easy to break when hit. Also, the soundproofing qualities leave much to be desired. To ensure them, it will be necessary to produce additional work. One should not hope that massive objects will be available later. To ensure such installation, it is necessary to lay stiffening ribs in the right places to strengthen the structure.
Important information! When installing partitions, you should not rely on the room being dry. At any moment, the neighbors above can flood, which will lead to quite unpleasant consequences And unnecessary costs. It is better to purchase more expensive moisture-resistant material. This will not completely eliminate its swelling, but it will significantly reduce the damage.

What material is required to make a plasterboard partition with your own hands?
A gypsum plasterboard partition consists of a frame, which provides the main strength, and plasterboard sheathing. The frame is made of metal profiles, wooden blocks or a combination of both materials. Dowel-nails are also used to attach guides to, and and, with which jumpers and gypsum boards are attached to them.
Drywall sheets can be divided into types:
- Standard– gray color, blue markings. The most common material. It is divided into (a little thinner and stiffer) and wall;
- Moisture resistant – green color, blue markings. You should not think that it is not at all afraid of moisture; nevertheless, gypsum is hygroscopic, but more resistant to dampness;
- Refractory – pink color, red marking. and high temperatures.

Related article:
GVL, GKLV and other types, their characteristics, sizes and areas of application - we will talk about all this in detail in this publication. We’ll also look at how gypsum fiber boards and gypsum boards differ and for what work it’s best to use each option.
Optimal thickness of plasterboard partitions
The thickness of the gypsum board for the interior partition depends on the purpose of the wall. If this is a decorative false wall, the minimum sheet thickness will be 12.5 mm. If you are planning a full-fledged partition, in which installation or various souvenirs are possible, then some calculations will be required:
- If the load is 40÷50 kg/m², you need a sheet with a thickness of at least 15 mm;
- Over 70 kg/m² involves the use of double sheets and reinforcement of the frame structure.
When sheathing the frame, you should not make joints between plasterboard sheets of opposite walls at the same level. This will lead to weakening of the structure and the appearance of cracks at the seams. But the choice of gypsum boards is not the most important thing in such an installation. Before you make a plasterboard partition in a room, you should understand which metal profile to choose for certain purposes.

Main types of partitions: features and markings
| Image | Construction type | Options | Some characteristics |
 | S111 | The weight of 1 m³ is 28 kg, the recommended height is up to 8 m | A single frame made of galvanized steel profile, which is sheathed on both sides with sheets of waterproof plasterboard in one layer. Inside is filled in the form mineral wool. Used as partitions in rooms with low requirements for sound insulation and fire resistance. The thickness of the partition depends on the size of the profile and gypsum board. |
 | S112 | Weight 1 m³ – 53 kg, height 4÷9 m | Single metal frame with two-layer gypsum board sheathing on both sides. Filler – mineral wool. The design provides high sound insulation characteristics and fire resistance (up to 1.25 hours). It is used for redevelopment or capital construction. |
 | S113 | Height up to 9.5 m. Weight 1m³ – 78 kg | The single frame is sheathed on both sides with sheets of waterproof plasterboard in three layers. By increasing the number of gypsum plasterboard layers, sound insulation increases. |
 | S115.1 | Height – 6.5 m, weight 1 m³ – 57 kg | Double frame covered with gypsum board in two layers. Along with strength, it has excellent fire resistance. |
| S115.2 | Weight 1 m³ – 69 kg. Height up to 9 m | In addition to the two-layer sheathing, the double frame is separated by an additional sheet of plasterboard (spaced frame). Due to this, strength and thermal insulation properties increase. Mineral wool slabs are laid inside. | |
 | S116 | Height 4.5 – 6.5 m, weight 1 m³ – 61 kg. Minimum partition thickness 220 mm | A double metal frame covered with two layers of plasterboard is convenient for... Fire resistance - 1.25 hours. Sound insulation up to 50 dB. |
 | S118 | Weight 1 m³ - 86 kg. Height up to 9 m | Partition class “Protection of premises from penetration”. Made according to type C113 with single metal frame, covered with a three-layer plasterboard covering. A special feature of the product is galvanized steel sheets, 0.5 mm thick, inserted between the gypsum boards, which significantly increases the strength and fire resistance of the structure. Most optimal for creating a plasterboard partition with a door in a warehouse. |
 | S121 | Weight 1 m³ – 32 kg. Height up to 3.1 m | The frame is made of wood with a moisture content of 12% and sheathed on both sides with one layer of plasterboard. |
 | S122 | Weight of 1 m³ – about 57 kg. Height up to 3.1 m | Double-layer “upholstery” wooden frame GKL. The insulating material of the partition is mineral fiber boards. Advantages: high strength and good sound insulation. |

Related article:
What materials can be used for manufacturing, how to choose the shape of the partition and expert advice on its installation - read all this and much more in this material.
Types of profiles for gypsum plasterboard partitions
To assemble a frame for an interior partition made of plasterboard, you will need three types of profiles - racks, guides (main) and lintels.
Guides – U-shaped profile with standard sizes width – 5; 6.5; 7.5 and 10 cm. Height - 4 or 4.5 cm. The main (guide) profiles are attached to the ceiling and walls, giving the structure stability. Marking – PN or UW.
Rack elements are marked as PS or CW. The dimensions in height and width are identical, because they must be inserted into one another. But the length of the rack profiles is more varied. If the guides are produced in lengths of 3 m, then the rack-mount ones can also be 3.5 or 4 m. The reason for this is that the racks cannot be increased - this harms the strength of the frame structure.
Jumpers are made independently from any type of profile and serve to increase the strength of the frame. Typically, scraps left over from rack or main elements are used. The method of bending (internal or external) depends on the wishes of the master, but the internal one is more durable.

Methods for soundproofing walls made of gypsum plasterboard
The most common method of soundproofing (as well as) gypsum plasterboard walls is to lay mineral wool or foam plastic between the skins. The denser and thicker this layer is, the better the wall or sound.
Do-it-yourself plasterboard partitions: step-by-step instructions for the main stages
Installation of a gypsum plasterboard wall is carried out in several stages. But first you need to figure out which one you might need for the job.
 First, one side is sewn up, and after filling the voids with mineral wool, the other
 Partition installation tool
In addition to the main tool (perforator, drill, etc.), you will need a plasterboard knife. With its help you can cut out parts of the desired size. This is done as follows. Having marked the sheet, we apply a metal profile and run the knife along the strip several times, cutting through the surface as deeply as possible. We break the remaining part. It's not difficult; even a schoolboy can do the job. The cut is leveled with a gypsum board plane or the same knife so that the joint is as even as possible.
Need to know! There is no need to adjust the slabs perfectly, because all imperfections will be covered with putty during finishing. But before you make a plasterboard wall, you should practice on an unnecessary section.

Calculation of consumables for constructing a gypsum board wall
It is not difficult to calculate the required amount of gypsum boards. It depends on the layers of the wall, and we will not dwell on it. But calculate the carrier profile more difficult. Calculations are made using the formula Q = (P/0.6 + 4) × K , if the wall is less than 3 m high, and Q = ((P/0.6 + 4) × H/3) + P×K , if the wall height is more than 3 m, where:
- Q – number of supporting profile;
- K – waste coefficient;
- P – perimeter of the room;
- 0,6 – the value of the strut spacing in meters;
- 4 – the number of racks indicated in pieces that must be installed in the corners of the room.
However, load-bearing elements of the frame also remain. We carry out calculations as follows. We divide the perimeter of the future wall by 3 (the height of one profile), and then multiply it by the overexpenditure coefficient. It is different for different areas, and is 1.075 for an area over 20 m2, 1.175 for an area from 10 to 20 m2 and 1.275 if an area is less than 10 m2.

Frame installation: let's start work
First, we will analyze the stages of work on how to make a partition from plasterboard, superficially, and then we will try to understand the whole technology using photo examples in detailed step-by-step instructions. First of all, using a laser level, we mark the locations of the main profiles - they are the basis of the future wall. In addition to fastening with dowel nails to the walls and ceiling, we fix the profiles together with a special punch or self-tapping screws.
Having completed this work, we move on to the racks. If it is planned, then we install wooden blocks in the rack profiles around it - they will add strength to the structure.
Good to know! If the wall is small, then you can do without horizontal crossbars. If the dimensions are large, then jumpers will have to be installed.

Before making a partition in a room, cutouts are made in the main profiles to lay the wiring, into which it is pulled. After the main frame is assembled, one side of the partition is closed. In this case, drywall is attached over the entire area, not excluding the future doorway. It's much easier to cut it out later.
Having closed one side of the wall on which sockets and switches will be installed and cutting through the doorway, we install glasses under the electrical fittings, stretch cables through them and fill the free space with mineral wool, which will provide noise and heat insulation. All that remains is to close the wall with reverse side GKL and cut through the doorway again.
Now let's look at how to install a plasterboard wall with your own hands in step-by-step instructions with photo examples.
Step-by-step instructions for installing a gypsum board partition with your own hands
| Illustration | Action to be performed |
 | First, measure the length of the main profiles and cut them to the required length. To do this, you can use metal scissors or a grinder. When working with an angle grinder, do not forget about safety glasses. |
 | Holes are cut in the lower profile for pulling cables (in our case they pass under the floor). |
 | The main profile is laid according to pre-made markings and attached to the floor. The cables are pulled into the prepared holes. |
 | The same actions are performed with the upper profile and with the guides along the walls. |
 | This is how the main profile is attached if there is a doorway directly next to the wall. |
 | We install a wooden block in the profile along the door jamb, which is fastened with self-tapping screws. It will add strength to the structure and door hinges. |
 | The profiles are fastened together using self-tapping screws or special device- breakdown. |
 | Be sure to use a mounting level to check the position of each rack and guide. This will give you confidence that the wall will be level, without tilting. |
 | We begin to sew up the gypsum board frame, along with the doorway. This is much more convenient than attaching sheets in pieces |
 | Coat all seams of the first layer with putty and level them. This will provide better heat and noise insulation. |
 | Let's start cutting the door. Here it will not be possible to break the sheet, and therefore you will have to cut it completely, to the full thickness. In our case it is 12.5 mm. |
 | We proceed to fastening the second layer of drywall. This time the sheets are shifted by 60 cm, covering the first seam. |
 | Having covered one side in 2 layers, mark the location of the sockets and drill them out using a wood crown... |
 | ...after which we mount the glasses and route the cables into them. |
 | On the reverse side we begin laying the insulation – mineral wool. It fills all free space. |
 | The final result of insulation looks like this. All that remains is to close the second side of the wall. |
 | Having completed this work and again cutting through the doorway, we get the following picture. But we still have one more blank wall left uninstalled. |
 | Similarly, we assemble a frame from a metal profile... |
 | ...and cover it with plasterboard. All joints should be as smooth and neat as possible. |
 | Lastly, we will close the ends of the metal profile, after which we can begin finishing the mounted wall. |
How to bend gypsum boards to install an arched passage
This work is quite simple to do. We cut the strip to size and, placing it on the floor, using a knife and ruler, make transverse cuts every centimeter along the entire length. After these steps, the strip will easily bend and position itself as needed. It becomes clear that the question of how to make a plasterboard partition with your own hands is not so complicated.
If you need to build a wall, partition, arch or niche from plasterboard, then it is extremely important to know not only the technical aspects of installation, but also the features of the material itself.
Peculiarities
A sheet of plasterboard is a lightweight and flexible material with which you can quickly and easily transform an office, home or apartment. From this material you can either build a wall or build an ornate interior structure.
The structure of plasterboard sheet (GKL) fully corresponds to the name: its core is made of gypsum with mineral pigments, to which the surface layer of cardboard is attached using glue.

The advantages of the material are well known to professional finishers. They are as follows:
- allow you to create perfectly smooth surfaces vertically and horizontally;
- allow the construction of curved structures, as well as individual elements most various shapes and complexity;
- have good breathability, promote air circulation and maintain a healthy indoor microclimate;
- differ in sound insulation;
- characterized by high thermal insulation;
- made from environmentally friendly safe materials, do not cause allergies;
- fire-resistant, not prone to spontaneous combustion, do not support combustion and protect walls in case of fire;


- are light in weight;
- easy to install, do not require professional skills or special equipment for cladding;
- the price of gypsum board and its consumables is affordable;
- a coating made from this fiber is optimal for any type of finishing (painting, plastering, wallpapering);
- leave little waste.

The use of gypsum plasterboard can significantly reduce the time spent on finishing work; for example, a partition made of plasterboard can be built in a few hours, while the construction of a similar structure made of brick will require two or more days.
Like any building material, plasterboard has some disadvantages that significantly limit the scope of its use - the panels are not durable, they are destroyed by mechanical damage, and in addition, they absorb moisture.
And attaching anything to such a covering is quite problematic - only dowels and screws can hold a picture or a bulky shelf on it. But even in this case, it is undesirable to place anything heavy; this will cause the wall to collapse at any moment.


Types of structures
Using plasterboard, you can build structures that are diverse in appearance and functionality, namely:
- walls that divide the room;
- partitions of any shape;
- complex interior installations.
A plasterboard wall or partition has practical functionality or performs a purely decorative function. Using sheets, you can divide the space into zones, build niches, change the location and shape of the doorway, create a false wall, and achieve increased heat and sound insulation.

Partitions made from gypsum plasterboard are considered to be more appropriate than similar installations made from other materials: brick, wood and foam blocks. Partitions made from plasterboard fiber are produced in short time, their cost is much lower than options made of brick or wood. The false wall remains hollow inside, which makes it possible to lay the necessary engineering Communication and provide additional insulation.
The material is light in weight and small in size, it is easy to cut, so installation can be carried out even by a person with minimal experience using the usual tools found in every home.


There are a great many options for gypsum plasterboard partitions. The following are distinguished:
- by profile type: regular and arched;
- By functional purpose: temporary or capital;
- by design type: solid or with an opening for a door or window;
- by type of installation: sliding or stationary.
In addition, partitions and interior walls from gypsum boards differ in thickness and some other criteria.
Decorative plasterboard partitions, as a rule, are installed in order to hide flaws in the room and cover heating radiators. They do not require serious fasteners, and are often complemented by stylish elements: lighting, mosaics, inserts from other types of materials. Usually the same elements are fixed with glue or installed on a frame. Models that have a practical purpose are mounted during internal repair work. They modify the general appearance of the room, contribute to its division into different zones and add additional functionality to finishing elements. Such walls and partitions are installed frame method and are attached to all walls in the room.


Regardless of the type of partitions, each has the same structure, namely:
- the frame is made of wood or metal profiles;
- cladding made from gypsum plasterboard sheets is used for walls or partitions;
- The wall filling is glass wool or mineral wool, which contributes to additional noise and heat insulation.


Depending on the technical characteristics There are several types of drywall:
- Wall gypsum board It is characterized by a thickness of 12.5 mm, a width of 1.2 m, and the length of the sheet can be 2.3 or 2.5 m. It does not contain any additives and is used for the installation of walls and partitions.
- Ceiling gypsum board has a thickness of 9.5 mm, a width of 1.2 m, a length of 2 or 2.5 m. This lightweight modification has found wide application in the construction of niches and door arches, as well as in ceiling cladding. It differs from the first option only in thickness.


- GKLV– This is a moisture-resistant material. Its thickness is the same as that of wall option, the width is also standard (1.2 m), and the length can be 2 or 2.3 m. A distinctive feature of the material is the introduction of moisture-resistant pigments and antifungal impregnations into the structure. Thanks to them, the material becomes hygroscopic, resists moisture and is used in rooms with high humidity (bathrooms and showers).
- GKLO- This is a sheet of plasterboard with fire-resistant parameters. It has standard parameters: thickness 12.5 mm, width 1.2 m, length 2.3 or 2.5 meters. The core of this type of fiber includes active components that are resistant to high temperatures and combustion, all of which are reinforced with special fire-retardant impregnations. The material is widely used in those premises where increased fire safety requirements are imposed, as well as for lining fireplaces and chimneys.


It is worth paying attention to the fact that the cardboard covering of all types of gypsum boards is fire resistant. This material does not burn, and at most only chars. But the core resists flame only in GKLO.
- GKLVO is a moisture- and fire-resistant material that combines all the advantages of gypsum boards and gypsum boards.
- Arched gypsum board used to create exquisite wave-like designs and rounded interior elements. Its width complies with the standards of 1.2 m, the length is presented in one version - 3 m. But the thickness of the sheet is small - only 6.5 mm. The small thickness, as well as the introduction of fiberglass threads into the composition, results in increased flexibility and ductility of the material. Such sheets have a fairly high price, and the fact that they have to be mounted in several layers makes finishing work more expensive.

Design
Drywall has found application in covering surfaces and creating decorative elements indoors.
Ceiling
Today, plasterboard is one of the most popular materials for cladding ceilings and constructing multi-level suspended structures. Drywall is necessary for design in the following situations:
- when the ceiling is uneven;
- if necessary, hide utility lines laid on top - pipes, massive ventilation ducts, unsightly cables and others;
- for the implementation of original interior solutions.
Ceiling finishing using gypsum plasterboard can be carried out in rooms of any type and purpose.


Walls
Almost any interior work for interior decoration are associated with the installation of drywall. It is used to create a perfectly smooth coating, arranging all kinds of niches and shelves, as well as constructing other elements of the design structure. Besides decorative function, GCR also has a practical purpose - creates enhanced sound absorption and room insulation. Gypsum fiber sheets are mounted directly on the wall using glue or on a pre-assembled frame; as a rule, sheets with a thickness of 12.5 mm are used for this. Sometimes, to ensure greater structural strength, gypsum boards are laid in two or three layers.
Plasterboard lining is carried out in any room; it is most effective for cold walls facing the street, which freeze in the winter.
A plasterboard wall with thermal insulation helps to insulate the room, preventing the accumulation of dangerous condensation and the appearance of fungus. Finishing The plasterboard wall can be anything.


Floor
Drywall can also be used to finish the floor using the dry method. Of course, for this purpose, exclusively especially durable sheets with increased abrasion resistance and resistance to mechanical damage are used. This coating is applied in two layers, then covered with any standard finishing coat– parquet, linoleum, carpet, tiles or laminate. The advantages of this method are obvious - the high speed of work and its cost-effectiveness.
In design, gypsum boards are often used to construct multi-level compositions, for example, podiums and ledges, which effectively mask unaesthetic pipes and other communications.


Partitions
When creating partitions, plasterboard is the number 1 material. It is most often used to divide a room and create stylish and functional zoning of space. Some structures can be built on the basis of a metal profile frame, which is fixed to the walls and ceiling, and then sheathed directly with gypsum fiber plates.


Built-in niches
Shelves with drawers in plasterboard structures look very impressive in the interior, and in homes with small children they are simply irreplaceable, because the baby will not be able to hit the sharp edges hanging elements. Niches are used to place small decorative elements in them that make the room cozy. These could be photographs, small souvenirs or books. The shape of such niches can be very different. As a rule, they are equipped with lighting, which makes the interior unusual and spectacular.
Tip: when installing niches Special attention You should pay attention to the weight of the products that are stored in the niche. Drywall can only support lightweight objects.


Frame
Most often, work on covering the surface with plasterboard is carried out using a frame method; for this purpose, wooden or metal sheathing. It is very important to apply correct markings, since the strength and evenness of the future false wall largely depends on the accuracy of the calculations.


To do this, first mark the place on the floor where the mounting of the supporting panel will begin, the resulting indicator is projected onto the ceiling - this is the length of the frame. The distance between the wall and the marking is its width. Markings for rack-mount metal profiles are applied perpendicular to the floor on a nearby wall. The markings are presented in the form of vertical lines with a pitch of 50–60 cm; in the future, when attaching drywall to the plank, the edges of the sheet will be located along them.
When facing walls, it is important to remember that one wall is finished first, starting with the installation of guides and ending with the installation of gypsum boards, and only then is the transition to the next surface made.


The work is carried out in several stages, namely:
- the marks on the floor and walls need to be connected, and then guides are mounted along them;
- the installation of hangers is carried out at a distance of 60–70 cm, their center must certainly be located along the line;
- rack-mounts are fixed into the guides metal profiles so that their middle groove coincides with the upper and lower marks, and then they are connected to each other;
- The building level controls the verticality of the base and shelves, after which you need to make the final fixation with self-tapping screws.


Application area
Drywall is used for various options performances such as:
- ceiling finishing;
- installation of partitions;
- giving the walls perfect evenness;
- construction of interior compositions of various arches, shelves, plinths;
- masking unaesthetic and damaged surfaces;
- repair of old coatings;
- giving surfaces relief;
- creating multi-level structures;
- insulation, soundproofing of cavities and openings.


Drywall with increased moisture resistance is usually used for finishing bathrooms and kitchens. Fire-resistant modifications are widespread when lining communication shafts and air ducts, when telephone and Internet cables, plumbing systems and heating pipes are required inside, as well as ventilation devices. Drywall is used in both wooden and brick houses.


Drywall installation
The installation technology is quite simple. First, the sheet is cut. For this purpose the usual construction knife with a spare block of replaceable blades. The sequence of actions is described by instructions according to which the following actions must be performed:
- the sheet is laid on a clean, flat surface;
- markings are applied with a pencil;
- using a knife, cut cardboard with outside;


- The gypsum board is installed on the edge of the support, the sheet is carefully broken along the cut line;
- the plasterboard panel is returned to its original position, placed on its edge and bent;
- the cardboard from the inside is also cut through, but the blade should not pass through;
- the sheet is turned over on the inside, placed again on the support and finally broken.


After the sheet has been prepared, you should begin directly assembling the installation with your own hands in accordance with the step-by-step instructions.
You need to do the following:
- Guides are attached along the lines drawn on the ceiling and floor; self-tapping screws are used for this;
- a sealing tape is placed under the fixed profile;
- Planks are mounted to the profile along vertical markers, all work starts from the corners and leads to the center;
- The stiffening ribs are fixed to self-tapping screws;


- then communications, wires and cables are carried into the cavity, and they are also filled with mineral wool;
- a sheet of drywall is attached directly to the frame;


- the edges of the sheets are covered with putty or a reinforcing mesh is applied, then sanded;
- A primer is applied over the panels and the finishing is carried out.


It is worth paying attention to following points when installing gypsum boards:
- the sheet is attached to metal profiles using 3.5x35 mm self-tapping screws;
- First of all, the edges of the panel are attached, and then the central part. Self-tapping screws are placed in increments of 10–25 cm;
- the self-tapping screw is screwed in so that the caps slightly “sink” into the drywall; under no circumstances should they stick out above the surface;
- If possible, before starting cladding, you should watch a master class on how to install drywall.

Drywall is a very popular material, so it is widely available in construction stores. At the same time, it absorbs moisture well, so if it is stored improperly in a warehouse, its consumer parameters can be significantly damaged. To avoid problems and purchase the product yourself High Quality, you should adhere to the following recommendations:
- try to purchase the product only in large stores that have established themselves as a reliable and stable seller, avoid dubious points of sale;
- evaluate the conditions in which the plasterboard was stored, the cleanliness of the room and the level of humidity in it;

- Personally inspect each purchased sheet of plasterboard; there should be no chips or deformations on it. No crooked bends, dents or scratches are allowed on a product of proper quality. Any violation of integrity will entail the breaking of the entire sheet in the damaged area;
- You need to carefully monitor loading and unloading operations. Even if the sheet of drywall was purchased from perfect condition, this does not at all guarantee that it will arrive in the same form. If the product was purchased and paid for, but defects were discovered later, then the warranty will not apply to it;
- If possible, you should not purchase the entire batch with the required quantity at once. To start, you should buy one sheet to test it. For example, you can cut a sheet into strips; a high-quality sheet should have a strictly uniform core, a cut without inclusions, and the knife should move evenly and smoothly when cutting;
- If you decide to buy a product from a dubious supplier, but at a very attractive price, then it is worth remembering that the stingy always pays twice. Handicraft products can not only crumble and break, but also be unsafe for health.


To protect yourself from counterfeits and defects, you should give preference to products from well-known brands.
About 70% of Russian construction market occupies the products of the German concern Knauf. This giant has production facilities all over the world. In Russia alone there are about 10 production plants building materials. The Knauf company is associated by many with high quality, reliability and practicality. About 10% of the market is accounted for by other European brands – Lafarge, Gyproc, Rigips.
Gyproc is a Scandinavian brand that has successfully established itself as one of the leaders in the global plasterboard market. In terms of production volumes in 2002, it took first place, leaving all its main competitors far behind. Distinctive feature GCR of this brand is high environmental Safety, confirmed by the certificates “Leaf of Life”, “Ecomaterial”. In addition, Gyproc has released drywall that is 20% lighter than products from other manufacturers. However, its price is slightly higher than the cost of Knauf products.


Lafarge is a Polish manufacturer that has established production of drywall throughout the world. Even Knauf is inferior to this concern in terms of the number of production workshops. This allows you to reduce the cost of production, which is why Lafarge plasterboard has a fairly affordable price. It was this company that, at the beginning of this century, made a real revolution in the production of drywall, bringing to the market semicircular sheets, all edges of which were covered with cardboard. This processing of panels has become a kind of calling card of the company.


About 20% of the market belongs to domestic companies. From the leading Russian manufacturers the following can be distinguished:
- "Gypsum" (Volgograd)– produces drywall under the famous Volma brand. The products of this brand are distinguished by excellent performance characteristics and reasonable price.
- Gifas (Sverdlovsk)– produces products of exceptionally high quality, which in terms of performance parameters are not inferior even to popular European brands.


- Abdullingips (Kazan)– has established the production of conventional gypsum boards and gypsum boards, which are distinguished by their low price compared to other Russian analogues.
- "Golden Group Gips" (Tolyatti)– produces sheets of plasterboard using equipment from the French concern Lafarge. The products are distinguished by exceptional quality and competitive prices.


