You can add individuality to the interior different ways, including using such a technique as textured painting walls. Wide color palette and the ability to create a huge number of different textures and shapes makes this method of decorating walls popular among professional designers.
What is structural wall painting and its advantages
First, let's find out what texture paint is. In fact, this material is much closer in structure to than to paint itself. This is a thick and viscous white mass, the composition of which includes various inclusions, due to which a certain texture is formed on the surface. Thanks to the acrylic components contained in the paint, it can be used not only for interior decoration, but also for finishing works outside the house.
The dense structure of the paint allows you to hide small flaws in the walls, so level them up perfect condition no need. The only condition is that the surface must be treated with a primer, which will improve adhesion to decorative coating.
Since any structural paint initially has White color, you can give it any shade you like. For this purpose, use a special color paint- it is better if it is from the same company as the structural coating.
Among the advantages of this coating are high wear resistance, resistance to fading and the ability to “breathe” even if it was applied in a fairly thick layer. In addition, you can change the color of the paint at any time by covering it with acrylic enamel. The cost of this decorative coating is quite low - an 18-kilogram bucket will cost about one thousand rubles. The consumption of such paint ranges from half a kilogram to a kilogram per 1 m2, depending on the thickness of application.


Relief painting - preparing the surface
So, first you need to prepare the walls. As we said above, there is no need to level the walls to perfect smoothness. However, if the walls are too crooked or have other obvious defects, it will hardly be possible to do without. After the plaster on the wall has dried, the walls will need to be treated with a primer - most often Betonokontakt is used for this purpose. Before you start decorating the walls, you need to wait for it to dry - as a rule, this takes at least 24 hours.
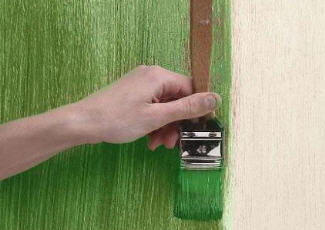
It's time to move on to working with paint. First of all, the composition must be mixed very thoroughly, since the particles that give the texture can be distributed extremely unevenly in it. If the manufacturer allows, a certain amount of sand can be added to the composition. This will make the painted surface appear rougher and rougher. To ensure that the boundaries of paint application are not visible on the surface, the wall must be treated from corner to corner in one go. U It is most convenient to do this together: one master will apply the composition to the wall, and the second will give it the desired texture. So, to work with this decorative coating you will need:
- Wide soft spatula;
- Tools for creating texture: sponges, etc.
Let's get started
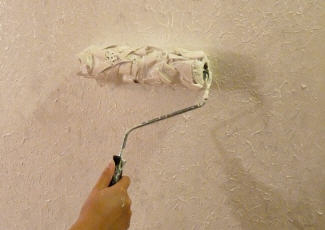
In fact, painting with structure paint not much different from applying putty. A small amount of the composition is applied to a spatula, with the help of which it is transferred to the walls. Following this, the second master, using the selected device, gives the surface texture. If a rubber roller is used to decorate the composition, then before each rolling it must be moistened with water, otherwise the composition will stick.
Within two hours the paint dries, so to speak, “touch-free,” and after 48 hours it dries completely. After this time, any coating can be applied to the paint - be it decorative wax, varnish or acrylic enamel. You can transfer any design you like onto the paint, applying it by hand or through a special one. If the paint is used for the facade, then you should remember that you cannot work with it in rainy weather; in addition, the temperature outside should not be lower than 5-7° C.
Modern society spoiled by a variety of designer delights. People are no longer satisfied with simply being painted beautiful, even layer walls They want something more. Well, since there is demand, manufacturers of paint and varnish products respond with their supply.
This is how special decorative finishing materials appeared, such as relief paint for walls, and others.
What family of paints do relief paints belong to?
Embossed paints and varnishes- This is a subtype of water-dispersion paints, to which a special filler is added, making them very thick. Thanks to this filler, it is possible to achieve not smooth walls, but a relief coating.
Initially, this decorative finishing material was used exclusively for interior work, but later they began to add an acrylic-based binder to it, which increased the resistance of relief wall paint to atmospheric agents and made it possible to use it for exterior finishing work.
Advantages and disadvantages of relief paints.
Embossed wall paints have a number of undeniable advantages that make them quite popular. Below are the main ones:
- In the production of embossed paints and varnishes finishing materials no solvent is used, which makes them slightly flammable and environmentally friendly;
- Despite the large thickness of the wall covering layer, relief paints for walls do not interfere with natural hydroregulation;
- This decorative material has increased level resistance to household and atmospheric mechanical influences;
- Increased level of adhesion to other finishing materials. It is for this reason that over them is sometimes used on walls.
How are textured paints applied to walls?
Start application relief paint for walls onto the surface you need to prepare the working area. To do this, the old one is deleted paintwork, traces of fungus and mold, after which the surface is primed with a deeply penetrating solution.
There is no need to level the walls to perfect evenness; it is enough to repair only deep cracks and potholes.
To apply relief paints, you can use any painting tool, but the result will differ from each of them. You must understand that using a brush or roller to apply relief paint for walls, you will get a relatively uniform structure, but using a sponge, you can achieve creative chaos that will look very original.
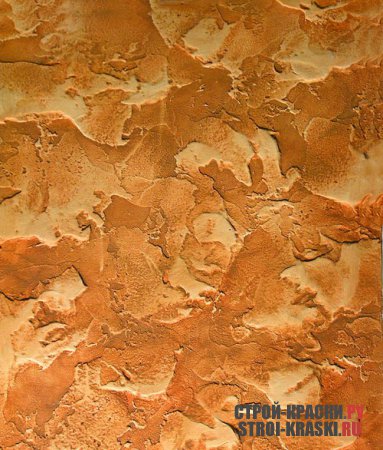
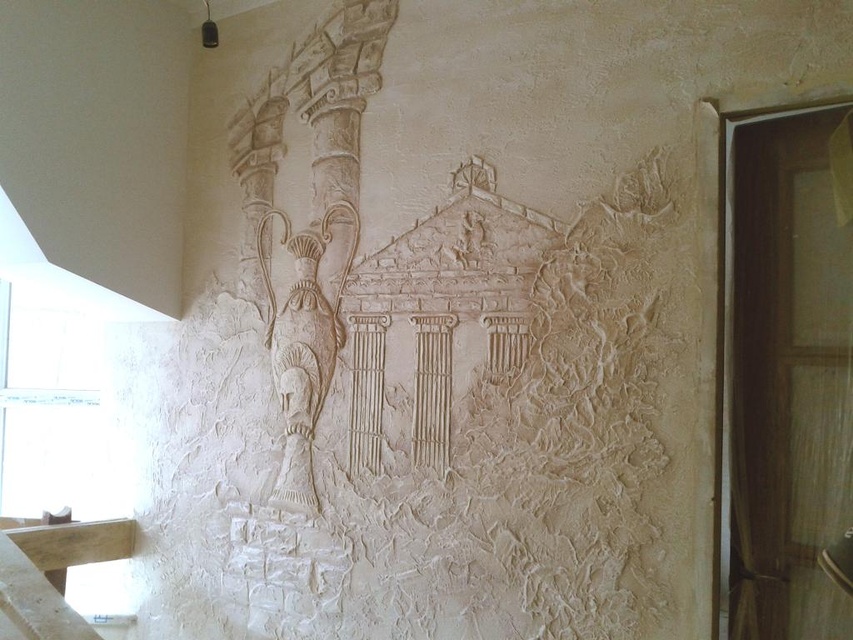
Relief plaster is the most common type of decorative plaster; it does not necessarily require a lot of money and can be done with your own hands. At the same time, she creates unique drawings with her curves and texture; You can also use it to create an elegant artistic panel both on an area and on an entire wall.
Depending on the complexity of the future pattern, you can use inexpensive but high-quality putty for relief plaster, but a more correct and easier option is to use ready-made textured plaster, especially for creating panels. This plaster is developed by manufacturers specifically for decorative finishing, it is more plastic, easier to give the desired shapes and bends. Textured plaster It is usually sold ready-made, it does not need to be diluted with water, and even after opening it can be stored in a closed container for a long time (read the instructions on the product packaging). You need to dilute the mixture yourself for the entire room in strictly identical proportions, otherwise the pattern will not be the same, which will negatively affect the visual perception of the entire interior.
To make your own relief plaster look professional, take your time when purchasing the material. First, decide exactly what kind of wall or ceiling pattern you want to get, based on this, you will need to purchase certain materials and stock up on certain tools.
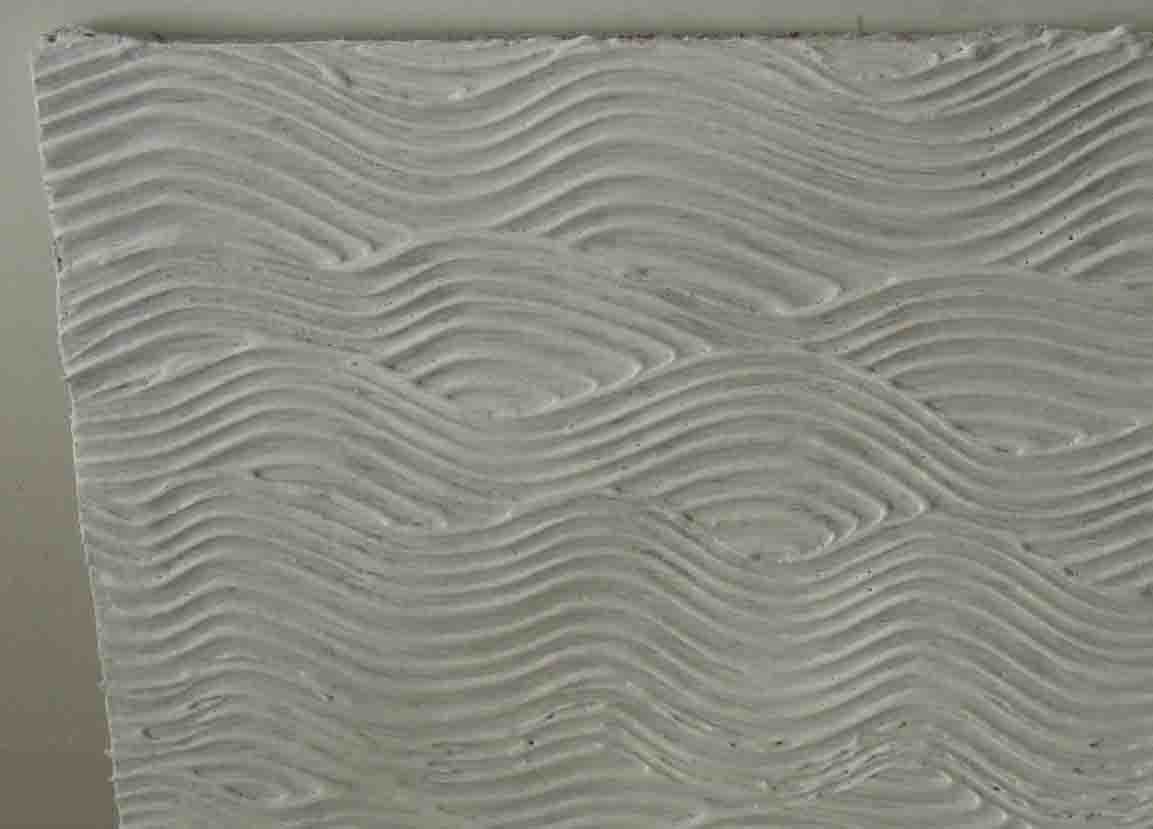
Relief plaster with a “wave” pattern
Materials and tools
In addition, whether you chose dry putty or ready mixture you will need additional materials:
- primer deep penetration(for preparing the base and before painting the plaster);
- water-based paint (possibly several colors or shades);
- varnish on water based(For finishing coating panel).
List of main tools:
- small spatula;
- long spatula 50 cm;
- paint roller or brush for priming walls;
- chisel + hammer for surface preparation;
- roller with long pile for painting;
- paint tray for painting;
- a thin brush or sponge (for applying varnish) or a hard roller;
- tools for applying texture.

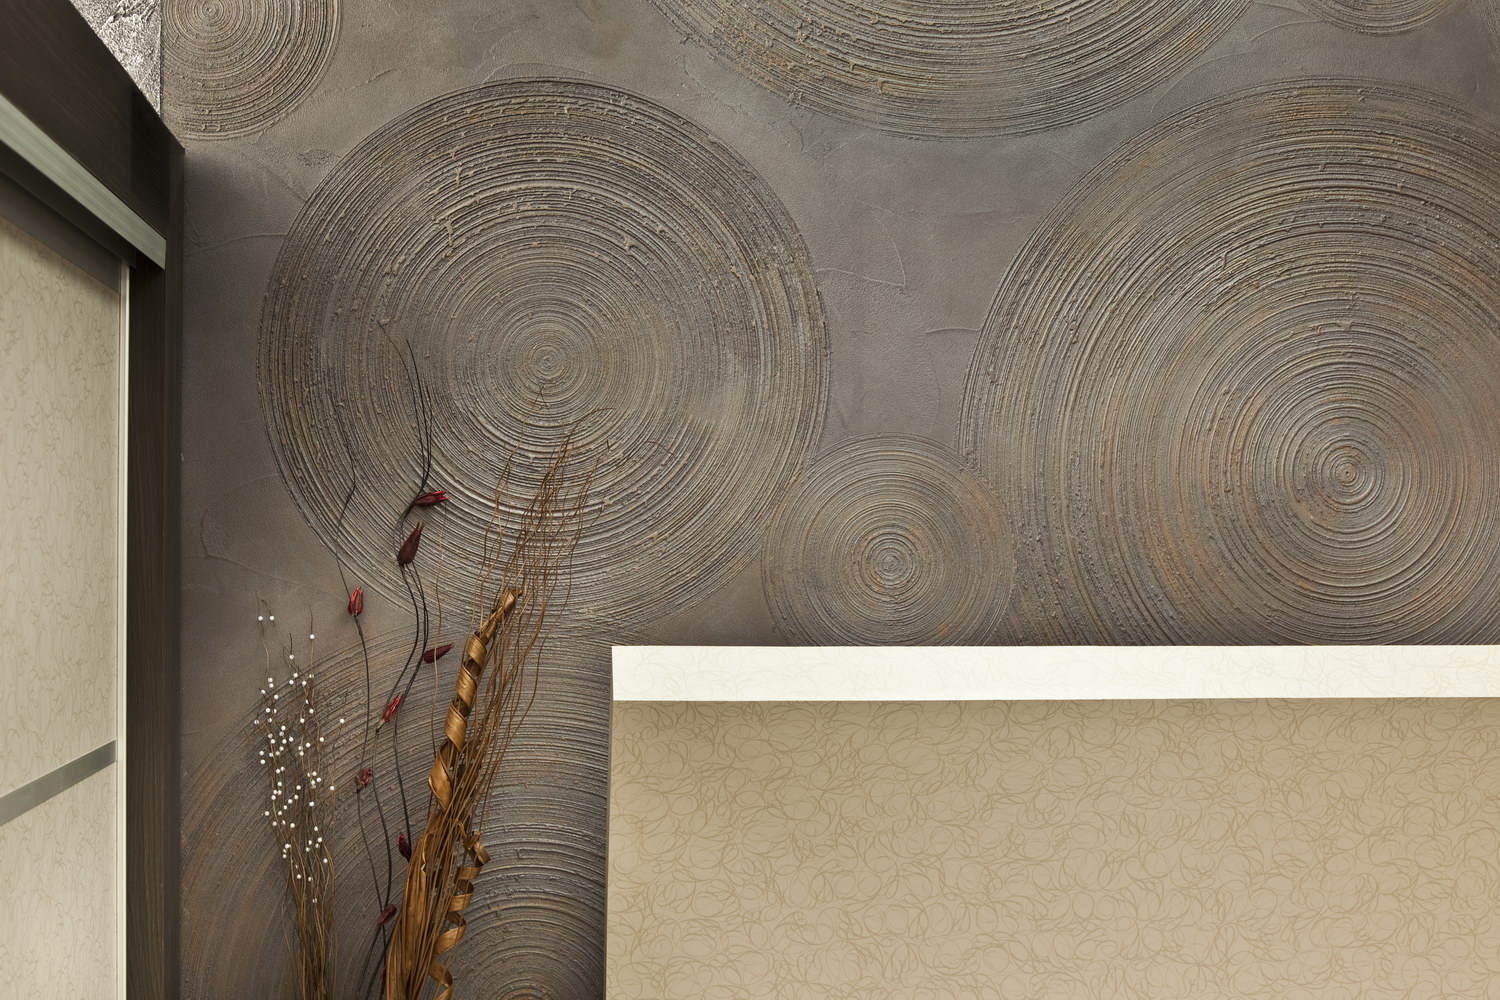
Variants of patterns with various objects
You can apply the texture with various objects, your imagination will help here: sponges, polyethylene, brushes, spatulas, special rollers with a pattern, etc. You can create a relief with your own fingers, most importantly, wear gloves to comply with safety regulations. To create a panel, you will need a special set of tools for decorative artists.
Surface preparation
In order for decorative plaster to last long and with high quality, the surface must be clean, dry, and even!
We remove the old wallpaper, you can leave the paint, but make notches on it with a chisel. There should be at least a hundred of them per 1 square meter. If old plaster It holds weakly, remove it. You can partially remove it by tapping the wall with your fist, where the sound is dull, which means there is emptiness under the plaster and it should be replaced.
We clean damp places and places with mold to the ground and treat them with special antifungal agents in several layers. For work we use a paint roller. Before doing this, eliminate the source of moisture, if any.

Mold repellent for walls and ceilings
We sweep away dust and debris from the surface.
Primer and leveling
The primer is needed to increase adhesion (adhesion) between the decorative plaster and the base of the walls and as a protective barrier against the appearance of fungi on the surface.
We treat the entire wall with a deep penetration primer; it is convenient to use a paint roller or a wide brush; The wall must be covered completely, but without drips. Let the primer dry for 2 hours.

Treating the wall with primer
We level the areas where the plaster was removed with a new solution. Its composition should be the same as the original one: cement-sand, gypsum, clay, or lime. Do not begin further work until the solution has completely dried; the process may take a day or more.
Places with new plaster also treat with a primer.
Applying plaster
Base layer
This is the first mandatory layer of decorative plaster. Thanks to it, the relief layer will lie softer, and the base layer will hide defects in the base of the walls.
The layer is applied with a spatula in a layer of 2-3 mm evenly over the entire surface. Leave it to dry until completely hardened.
Each layer of plaster must dry completely before applying the next one.
Relief layer
Here, each wall drawing and panel creation has its own work process. But there are several rules that must be followed:
1. The plaster is applied in a layer of 5, maximum 12 mm, and using the selected tool, a texture or a whole panel is created. Do not apply too thick a layer of plaster, as it may crack when drying.
2. The relief must be created within 30-40 minutes after applying the mortar to the wall, so you only need to plaster the area that you have time to process in given time. After this, the solution will lose its initial plastic properties, harden, and the pattern will become heterogeneous.
3. Each section is overlapped, slightly overlapping the previous one, to avoid visible joints between areas.
4. One wall must be plastered in one approach, otherwise a visible joint will remain.
5. Work with the adjacent wall only after the first one has completely dried, so you will not smudge the texture of the pattern on the corners of the first wall.
After the texture is formed, it must dry completely. Afterwards, depending on the selected wall relief, you can lightly sand it sandpaper, removing excessively protruding parts of the plaster.
Before painting, the wall should be primed again. Thus, the paint will not be absorbed into the plaster and the wall relief will not be washed away.
Painting
Typically, relief plaster is painted with water-based paints. Use a roller with long pile and paint the wall with a base color, and after drying it, either rub it with fine sandpaper to add depth to the design, or apply a second color of paint with a sponge or dry brush with light movements only on the protruding parts of the relief.

Painting decorative plaster in 2 shades
Remember that when the paint dries, it becomes 1-2 shades lighter.
Varnishing
To make the color of the plaster look brighter and the relief to stand out more visually, the wall is coated with water-based varnish. This should be a special varnish for decorative plaster.
The varnish is applied in 2-3 thin layers paint brush, sponge or a hard roller will do. There should be no leaks. Each layer is applied after the previous one has dried. Usually the varnish dries quickly; check the drying time of the varnish on the product packaging.
Search the Internet for the process of creating a particular relief for each type separately. There are many detailed video instructions. Before working on the wall, you can first try to apply decorative plaster on a square of plywood or plasterboard.
Finished coating option
Do-it-yourself relief plaster is not an easy task, but if you do it well, you will get an expensive-looking interior, and people with artistic talent can even create a beautiful panel with natural, animal and other motifs.
Also for your attention is a video with an option for creating antique relief plaster.