The quality of the garage door determines the safety of the car and the comfort of staying indoors, so their manufacture should be approached with all responsibility. There are several options for gates: they differ primarily in the opening mechanism. Modern models They are quite complex and require special skills and tools for installation, but you can install classic swing garage doors with your own hands even without experience in such work.
Choosing the type of garage door
Self-assembly of gates - This great way save money on garage construction. However, before you begin the task, it is worth considering existing types designs and determine the most suitable one. The choice depends on many factors, and if models with a complex mechanism turn out to be optimal, it makes sense to contact specialists - installing them incorrectly with your own hands can lead to various problems with the functioning of the structure.
Sliding gates
Sliding gates are one wide leaf that slides to the side when opened.
Guides along which the sash rides and catchers that hold it in the open position are attached to the frame of the structure. Depending on the design of the guides, gates can be suspended, cantilever or rail; The options differ in size, ease of use, number of parts and complexity of installation.
Like other types of garage doors, sliding structures can be manual or automatic. In the second case, an electric drive is connected to the frame, the control of which can be stationary or remote.
Although it is not difficult to make such garage doors with your own hands, they are rarely chosen, since they have more disadvantages than advantages. Their main advantage is that they save space outside, but inside the room they require a lot of space - it must be very wide. Because of this, sliding models are often used outside, built into the fence of the site. These structures are used in industrial facilities and hangars.
Disadvantages also include the need to install a reinforced frame capable of holding a suspended sliding sash, which is larger in size and weight than in the case of swing options.
It is important to constantly monitor the rollers so that the structure does not jam.
Lift-and-swivel structures
 The up-and-over gate leaf rotates around its horizontal axis, rises to the ceiling and hangs flat over the opening. The mechanism is very convenient and reliable, space is saved both outside and inside the garage. However, such gates have features that may make their use not the best solution.
The main design is solid sash. To make it easier to lift it to the ceiling, you have to reduce its mass as much as possible. This affects the range of possible manufacturing materials: most often the frame is made of small-section steel tubes, but it can also be used aluminum profile. Thin galvanized metal is used for cladding. Because of this they decrease thermal insulation characteristics, which leads to increased energy costs for heating the garage.
If the structure is made of aluminum, its protective ability is significantly deteriorated - the frame rigidity is not enough to withstand significant physical exercise. Therefore, lift-and-turn structures are used primarily in fenced areas equipped with additional levels of security. They are also used inside warehouses.
It is very difficult to install a model of this type with your own hands - assembling the lifting mechanism requires special knowledge and skills.
Lifting sectional and roll mechanisms
Up-and-over sectional doors are similar to up-and-over doors in their operating principle, but differ in design: instead of a solid leaf, they use a movable leaf consisting of interconnected lamellas. Because of this, such gates are considered a type of blinds.
The frame consists of two parts: one is installed around the perimeter of the opening, the second - under the garage ceiling. It is assembled from a guide profile. Each sash lamella has rollers on the side edges, with the help of which the leaf moves along the guides. An electric drive is connected to the top of the frame, which is connected to the sash by a cable. When the gate is activated, the motor pulls the door leaf, raising it towards the ceiling.
The fabric is made from sandwich panels, which ensures sufficient structural rigidity and high-quality thermal insulation of the garage. Gates can have different configurations and sizes. The canvas does not necessarily have to rise to the ceiling - in some models the sash moves to the side. Thanks to the flexibility of the lamella connections, this can be done sliding gates in a garage with a small area.

Rolling gates are an analogue of lifting sectional structures, differing in that the door leaf does not move away, but is wound onto a shaft. This allows you to save space, but the sash in this case is made of thin, narrow slats and has lower thermal insulation and protective characteristics.
Structures of this type can be assembled independently, but all components, including slats and sashes, will have to be purchased ready-made. Companies that supply such products usually provide gate installation services, so there is no point in doing the work yourself. In addition, without knowing the nuances, it is easy to make mistakes when installing gate parts, which will lead to their incorrect functioning.
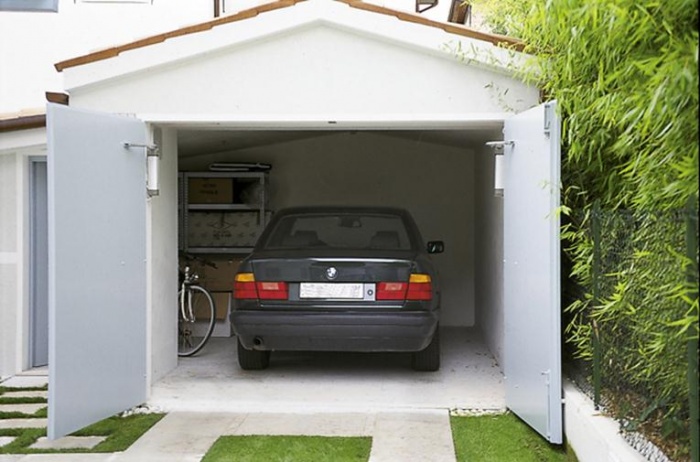
Swing gates
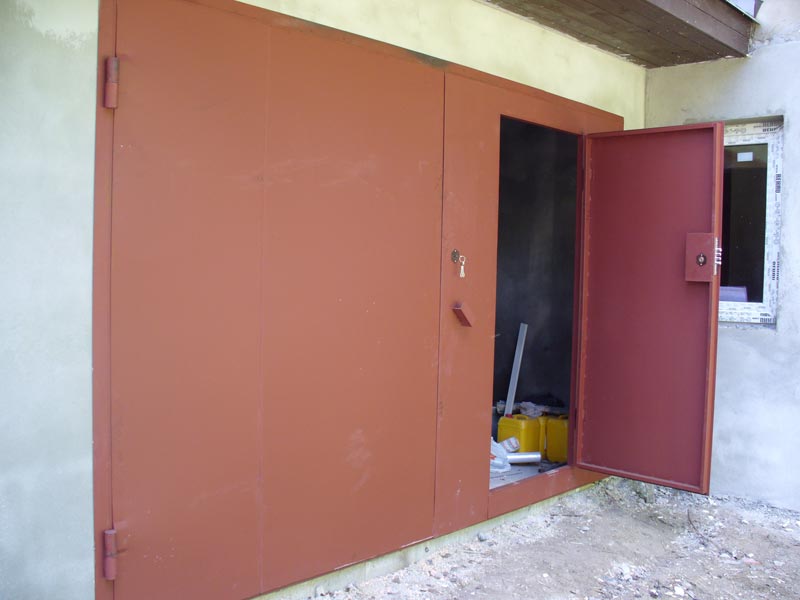
Classic swing gates usually consist of two hinged doors. An ordinary Entrance door. The doors consist of a frame, which is sheathed with sheet metal, sandwich panels, wood and other materials. Thermal insulation material can be laid between the outer and inner surfaces.
This is the most economical material, and thanks to its simple design, installing such gates with your own hands will not be a problem. In addition, they provide the most reliable protection for your garage.
Thus, if you do not have the skills to assemble complex lifting and sliding mechanisms or work with electronics, simple swing gates will be the best option.
If ease of use and space saving are important, you should pay attention to more advanced options.
Project development
 The quality of the gate depends on how correctly the dimensions of its elements are selected and how accurately the parts fit together, so before you make a garage door with your own hands, you need to draw up a project. Despite the simplicity of the swing design, it consists of many parts, and without drawings or sketches it will be easy to make mistakes in the work.
First of all, you need to decide on the size of the gate. To make them convenient to use, the total width of the doors should be 0.6 m greater than the width of the car. Most often, the gate size is selected within the range of 2–4 m; if the width exceeds 5 m, the operation of the structure will be difficult. The height of the doors is also calculated based on the dimensions of the car.
The design of swing gates includes a frame, which is fixed around the perimeter of the garage opening, and two leaves, one of which has a built-in gate - they are fixed to the frame using hinges. The frame is made of steel angle 65 mm wide. For the frame of the valves, it is better to choose a profile pipe with a rectangular cross-section; its size can be any.
The outer surface of the doors is sheathed with sheet steel 3 mm thick. The inside of the frame can be covered with boards and plywood. This is done if the gate is insulated. The amount of materials is calculated based on the area of the valves.
Tools and materials
To assemble a high-quality swing structure yourself, you will need skills in handling basic construction tools, as well as the ability to use a welding machine. It is impossible to connect parts using fasteners: in this case, the reliability of the structure will be insufficient. Self-tapping screws are useful only when installing the inner lining of the sashes.
To work you will need the following set of tools:
- manual welding machine - for a beginner it is better to choose an inverter for arc welding, it is easier to use;
- an electric generator of sufficient power for welding if there is no possibility of connecting to the mains;
- grinder with a set of wheels for cutting and grinding;
- Sander;
- drill with metal drills;
- screwdriver;
- brush or roller;
- measuring instruments- tape measure, set of metal squares, level.
Kit necessary materials depends on the specifics of the project. In general, you will need to prepare:
- steel rectangular profile or corners for the manufacture of gate frames, frames and ribs of the leaves;
- 6 reinforced welded hinges;
- sheet metal;
- steel rods;
- set of self-tapping screws;
- wooden blocks;
- liquid Nails;
- insulation - mineral wool or polystyrene foam, a small amount of foil polyethylene foam;
- sheet material for internal lining;
- primer and paint;
- polyurethane foam.
Additionally, you should purchase a lock, constipation, door handles and other accessories.
Manufacturing instructions
The gates are manufactured in the following order: first the frame and frame are welded, then the doors are sheathed, after which the structure is installed on the garage opening. For greater convenience, welding work should be carried out on a flat horizontal surface. When the gate is secured, it is carried out interior lining, installation of fittings and decorative finishing.
Frame assembly
The frame is assembled according to the same pattern, regardless of the number, size of the doors and the presence of a gate. It will consist of two identical rectangles - external and internal, which are connected by reinforcement or strips of sheet steel.
The operating procedure is as follows:
- The corner or steel profile is cut using a grinder. The ends of the segments are cut at an angle of 45°.
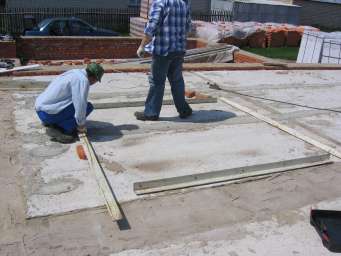
- The pieces are laid out on a flat surface. If suitable place no, you can use bricks or other supports. It is important that the parts lie in the same plane - this should be checked using a level at each stage of work. After welding, mistakes made will be very difficult to correct.
- Frame elements are welded at the corners. If this part of the gate is made from a corner, the parts can be welded overlapping, placing the shelves on top of each other.
- The corners are additionally reinforced with scraps of reinforcement to increase the rigidity of the structure.
- Sheet metal mounting pads are welded to the inside of the frame.
- Weld seams are ground - the frame must be perfectly smooth with outside so that the doors fit tightly.
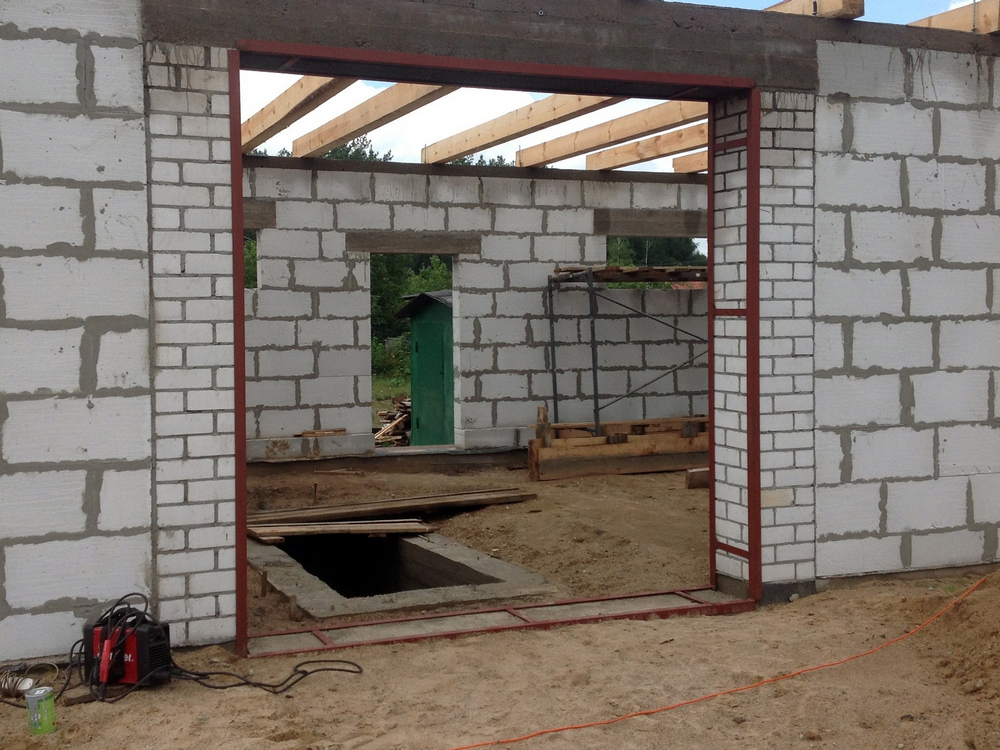
It is important to think in advance about how to fix the frame to the garage wall. There are two options: make steel embedded parts next to the opening and weld fastening pads to them, or drill holes in the latter for fastening with anchors.
Welding and cladding of sashes
 The sash frame is assembled in the same way as the frame - by welding profile sections together. To make it convenient to work, you should place the finished frame on a flat surface and insert the frame parts into it. The dimensions of the sections for the shutters should be 15-20 mm smaller to ensure a gap - this will simplify the operation of the gate.
Unlike the frame, the sash frame must have additional stiffening ribs. To save money, they can be made from pipes with a smaller cross-sectional area. The ribs can be diagonal or vertical, in the second case they run through the middle of each leaf.
After welding and grinding the frame, the sashes are sheathed. This is done as follows:
- Sheet metal is cut to fit the sashes. After welding, it should extend beyond the edges of the frame by 15-20 mm (according to the size of the gap).
- One of the leaves is cut so that it is 10-20 mm narrower than the second one - this way the gate elements will fit snugly against each other.
- The sheets are welded to the frame. First, you should fasten the parts in the corners and in the center, then connect the metal along the perimeter of the sashes.
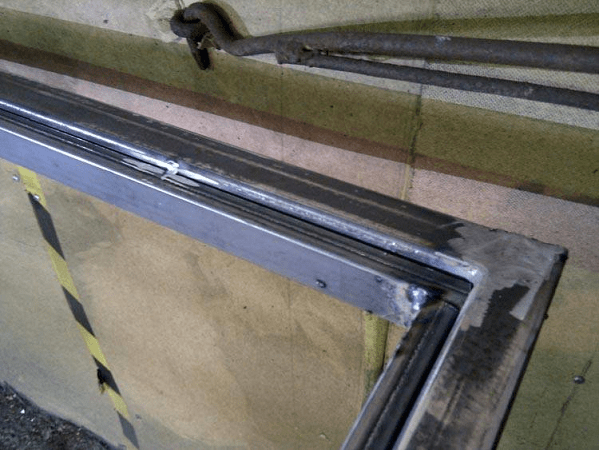
Once the welding is complete, the hinges are attached to the gate. The lower part of the part is welded to the frame, the upper part to the sash. For better fixation, the hinges can be reinforced with reinforcement inserts, which are welded to the inside of each product.
Installation of the structure
A fully welded structure is installed in the gate opening; Due to its large mass, an assistant will be needed at this stage. It is recommended to carry out the installation in parallel with the construction of the garage walls.
Before placing the gate in the opening, you should connect the outer and inner parts of the frame. For this purpose, strips of sheet steel 40 mm wide are used; their length should be equal to the thickness of the garage wall. Parts are installed in increments of 60 cm around the entire perimeter of the frame.
If the gate is installed in ready garage, the best option would be anchoring. If the wall is still under construction, pieces of reinforcement should be walled into it, to which the inner part of the frame is then welded.
After installation is complete, all that remains is install fittings. Hinges and a padlock are sufficient to ensure minimal security. More complex products are installed according to the manufacturer's instructions. Completely finished gates are primed and painted. The inside of the doors can be insulated with mineral wool, secured with liquid nails, and if polystyrene foam is used, it should be laid on a lathing made of wooden blocks.
Knowing how to make a garage door with your own hands, you can assemble a structure of any configuration. Instead of metal, wood can be used to make the frame. The gate can also be sheathed with any similar sheet material.
Statistics show that most car enthusiasts prefer to build their garage on their own. This will allow you to significantly save on hiring specialists. And the advantage over a purchased garage is the ability to plan the garage space yourself, make it for yourself and using your preferred materials. An important element garage doors are. You can also make them yourself so as not to buy an expensive design.
From this article you can learn how to make garage doors on your own using available materials. And since a swing structure is most often used, you will recognize its construction as being made of metal.
Garage door design
To make a garage door, you cannot do without careful planning and detailed drawings. Thanks to the graphic drawing which has detailed instructions and designations of each detail, you will be able to create the right gate that meets all requirements. You will have a guideline and finish the job quickly.
Advice! The drawings will allow you to assemble the structure right away and see what errors may occur. Also, thanks to them, you will find out the preliminary amount of material and the cost of the structure.
When making the drawing, you must take into account the size of the garage door opening. You need to find out the width and height of the opening. Typically, garage doors are made according to the following scheme: their width and height should be 60 cm larger on each side than the dimensions of the car.
Note! Swing gates are made with a permissible gate width of up to 5 m and a height of up to 2.5 m. This size will be quite enough for a compact car, SUV or small minibus to enter.
In general, a garage door consists of the following elements:
- The main frame is made of metal corners, the shelf width of which is 50-65 mm.
- Gate leaves, which are made of profile metal. Ideally, this is a profile with a rectangular cross-section, the width of which is from 40 to 50 mm.
- Reinforced hinged hinges installed externally. They connect the supporting frame with the sashes, allowing them to be covered in the desired direction.
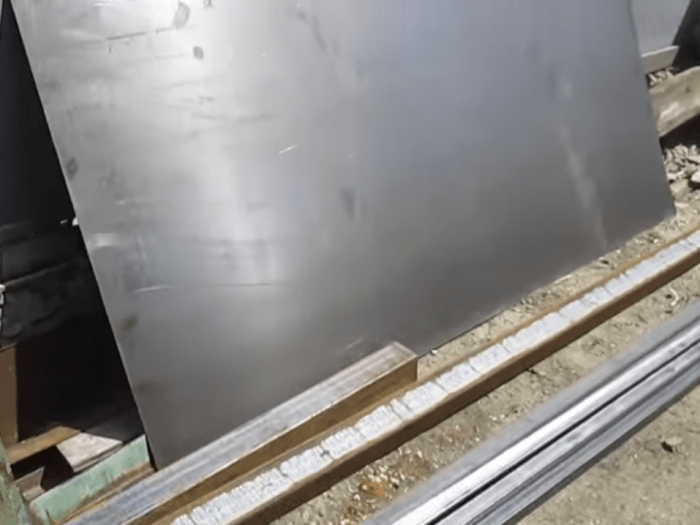
All these elements are made of metal. In addition to everything, you need to take care of such little things as the lock and latch. In addition, the sheathing of the frame can be made of simple rolled steel sheet, the thickness of which is 3 mm, or from corrugated sheets.
Advice! To make your garage warmer, it is better to make the gate so that it is immediately insulated. In inner space insulation is laid, and the inside is lined with clapboard or plastic panels.
Tools and materials for work
When you have completely drawn up the drawings of the future gate, you can begin to prepare what is necessary for the work. Based on the estimate, purchase required quantity materials. Only there is small nuance, it is better to buy 10-15% more so that there is a reserve for unforeseen circumstances.
If we talk about the necessary tools, then you can’t do without:
- A metal square to check the corners of the structure.
- Roulettes from 5 m.
- Welding machine and electrodes for it. When working with welding, you need to wear a protective mask and suit.
- Grinders along with a set of discs for cutting and sanding.
- Construction pencil, marker or chalk for marking.
- Construction level.

Note! When working with an angle grinder or a welding machine, you must understand that sparks can harm you. Never work without protective glasses and gloves. Shoes should also be tight and closed. Slippers must not be used.
As for materials, they may be different. For example, the frame is most often made from 65 mm steel corners. To make the frame you will need profile pipes. And to connect the structure, loops are used. You can buy cylindrical, rectangular or hexagonal. You may also need reinforcement bars in your work. When you have prepared everything you need, you can begin to carry out the work.
Stage 1 - making the supporting frame
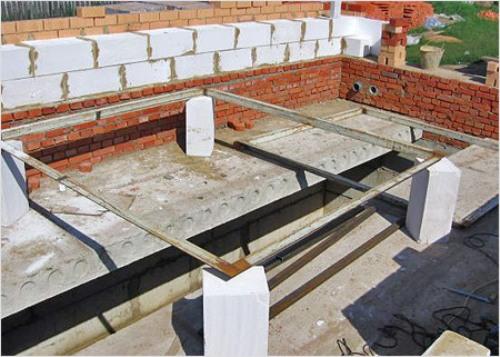
Here you have several development options. Some people make gates at the stage of garage construction, when the opening has not yet been built. In this case, the entire structure is made, the gate is installed in the required location, and after that the walls are erected taking into account the selected opening size. Then you can make gates of the width you need. If your garage is already ready, then first a frame is made, taking into account the dimensions of the already finished opening for the gate.

Note! The frame of the structure is made of metal corners and is divided into outer and inner parts. The corners are welded so that they can fit tightly into the opening and wrap around it. When internal and outer part frame is installed, they need to be connected with a metal plate, as shown in the figure.
Now let's begin the process of creating a supporting frame. All work must be performed on a perfectly flat surface. For this job you need to have a square, a welding machine, a tape measure and a grinder with a metal cutting disc. The step-by-step instructions are as follows:
Advice! If you study the instructions regarding welding work, then it is better to assemble the frame using tacks. You should not immediately weld the seam, but make several welding points so that the structure holds, but if necessary, it can be leveled. And after measurements, you can weld the seam completely. Thanks to the tacks, the frame, when heated, will not lose its diagonal and become deformed.

Stage 2 - we make the frame for the sashes
Now you can start making the gate leaves. For the structure to function correctly, the sashes must be 0.8-1 cm smaller than inner size external supporting frame. So, the doors will open and close freely. To create the sashes, you must follow the instructions:

That's it, your garage door frame is ready. We can say that you have completed the large and difficult part. All that remains is to cover the gate with sheet material and install it. Let's take a closer look at all the manufacturing and installation.
Stage 3 - sheathing the sashes and installing hinges
As cladding, you can use steel sheets, the thickness of which is from 2 to 4 mm, or corrugated sheets. We will consider the first option, since a durable sheet of steel is used for garage doors. It will also make the doors stronger. The process is as follows:

That's all, your gate can be installed in its place. If you have a built garage with an opening, then the structure needs to be inserted into it and pressed as tightly as possible. To fix in this position, use bars that serve as supports. Inside the garage, install the inner part of the frame that you made originally and fasten them together with metal plates. It is better if the plates are located at the same level as the gate hinges.

In the case where the opening has not yet been built, the supporting frame and the entire structure are assembled and installed at the location of the opening. When the gate is in place, they begin to build the façade wall.
Let's sum it up
If you are careful, carefully check the correct dimensions and adhere to all wishes, you will receive a strong and durable garage door that will serve you well long service. With this design, you have the opportunity to insulate the gate by laying foam plastic on the inside and making lining. All that remains is to install the security system (locks) and check the functioning of the garage door you created. Garage doors with a gate are a little more difficult to make, but not critical. You will see the process in this video:
Garage doors are an expensive design, so more and more car owners are trying to assemble and install them on their own. The method of making a garage door with your own hands is not as complicated as it might seem at first, and if you follow the instructions exactly, the “home” for your car will receive reliable protection. But first, let’s look at what variations of garage entrance groups there are.

Swing gates are the most popular among motorists
Modern car enthusiasts prefer swing gates, because they are the easiest to create for a garage with your own hands. Having purchased steel sheets, angles and profiles, the owner will be able to create the entire structure without the involvement of assistants. Other types of gates can also be made at home if desired, but they show their advantages only in regions with warm weather conditions.
However, if you really want to protect your garage with lifting-sectional or rotating structures, you should take care of heating in the room. Otherwise, in extreme cold, the linkages and guides will freeze. We propose to make swing gates yourself, so we will describe in detail their manufacture, installation and fitting with locks.
Creation entrance structure begins with project development. The drawing is made on paper indicating the dimensions and materials. First, the owner is recommended to decide on the width and height of the future structure. The minimum value of the first parameter should be such that the distance from the machine on both sides to the gate frame reaches 30 cm or more. The maximum width is 5 m, but standard width The gate varies between 2.5 - 3 m. This space makes entering the garage comfortable.

An example of a garage door drawing
When choosing the width of the garage door, you should take into account the distance between the frame and the perpendicular wall. He should be given at least 80 cm.
The height of the structure is calculated based on the size of the “iron horse”. A minibus requires an opening of 2.5 m. For a regular car, 2 - 2.2 m is enough. To avoid inconsistencies with the garage plan experienced craftsmen It is recommended to create sketches of the gate at the time of designing the room.
The design of the gate that we will make for the garage with our own hands consists of several elements:
- sheet iron;
- two doors on hinges;
- frame for framing a garage.
Making a frame requires purchasing a 65 mm steel angle; it is advisable to use reinforced hinges. We will create the frame from a rectangular steel profile and cover it with iron sheet 3 mm thick. We will calculate the amount of building materials according to the dimensions of the future structure.

Making a garage door frame is a very important process!
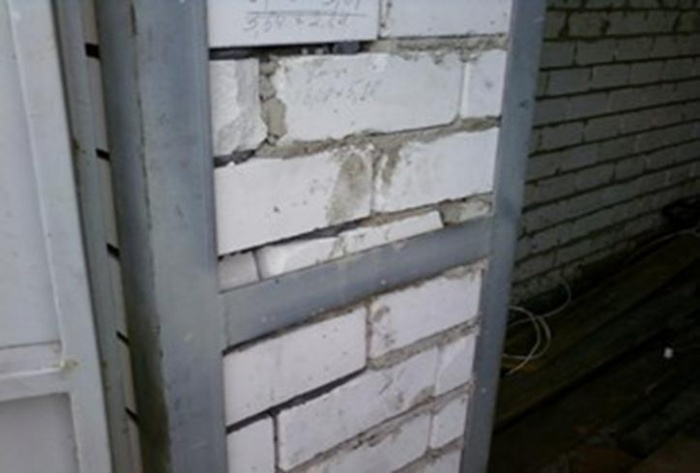
We begin work on creating a garage door with our own hands by making the frame. It is most convenient to do it during the construction of the front wall. As soon as the masonry reaches half a meter in height, we install the frame and continue laying out. To make the frame you will need materials and equipment:
- steel corners – 65 mm;
- pieces of steel reinforcing rod;
- grinder with welding machine;
- square, measuring tape, level;
- steel strips 3 cm wide and 4 mm thick.
We create a frame for a garage door step by step. First, cut the corner into 8 pieces. 4 pieces should match the width of the opening, the other 4 pieces should match the height. We cut the corner exactly with exact observance of the distance or make a 10-centimeter reserve. In the second case, we cut the side of the corner intended for the inside of the opening to size. On the sides inside and outside the wall we leave 5-centimeter strips at the top and bottom or cut them off at an angle. This approach will ensure convenient welding of strips.

Making a garage door frame
At the second stage, we lay out the corner blanks on a flat surface and measure the corners to ensure they correspond to 90 degrees. During the work, we regularly monitor this parameter with a square.
The third stage is welding the corners to obtain a frame. Here you can do things differently:
- Overlap the edges of the corners and connect them.
- Cut the edge at an angle and weld the parts, but this connection is not as strong as the first.
A corner that has deviated to the side is corrected using a lever, which is a piece of a corner. By welding it in the desired position, the frame part is oriented in the planned direction.
WITH outside We carefully clean off the excess welding from the frame and proceed to the next work.

Making frames for sashes
The size of this part should be smaller than the garage door frame. The frame needs to be made so that it fits easily into the opening, and the sashes fit snugly on the outer part of the frame. To make a frame for the sashes, take a steel corner or a rectangular profile. But it’s more comfortable to work with a steel corner:
- We cut 4 pieces from the material with a length different from the height of the frame by 10 - 15 mm. The gap ensures ease of entry of the sashes into the opening. Considering the number of sashes, and there are two of them, we separate 4 more horizontal parts from the corner. We calculate their size as follows: divide the width of the gate frame by 2 and subtract 30 - 35 mm from the resulting figure.
- Having laid out the segments on level ground, we check that the angles correspond to 90 degrees. The layout inside the welded frame allows you to quickly see errors.
- We connect the sections into a solid frame and strengthen the structure with an additional horizontal piece - it will prevent the panels from skewing. We place the element in the center of the frame.
Manufacturing of gate leaves
The gate leaves that we make for the garage with our own hands will require a steel sheet with a thickness of at least 2 mm. We deal with it as follows. We cut out two canvases 4 cm higher than the length of the garage opening, but make the width different. One sash should be a couple of centimeters less than the width of the frame, the other 2 cm more.

The first diagram shows the location of gate leaves made of corrugated board or wood.
In the second diagram of the location of gate leaves made of steel sheets
We weld the canvases to the frame. At the same time, we try to ensure that the top and bottom of the canvas extend beyond the frame by 2 cm. On the sash that will open second, the canvas should not touch the edge of the frame, let 1 cm remain free. A small gap is needed for a tight fit of this canvas. We weld the other sash so that it protrudes 3 cm beyond the frame.
The steel sheet slips during welding and spoils the geometry of the product. Therefore, you first need to grab the corners and center of the sheet, then spot weld the sheet completely and maintaining a distance of 10 - 15 cm. To avoid deformation, the welding is cut off at the corners.

Garage door hinges
Finally, we weld the hinges. We attach the bottom of the parts to the gate frame, the top to the opening leaf. We strengthen the fastening by welding metal strips and reinforcement inserts. We bend an iron strip 7 mm thick and weld it to the top of the hinge and the sash. We fix the reinforcement element from the inside.
When the structure is laid out on a flat area, the owner will be able to check the correctness of the work performed and the ease of movement of the sashes. If there are no mistakes, proceed with the installation.
Garage door installation

Garage door installation requires careful steps
First we will install the inner and outer gate frames. If the garage is just being built, then if there is a front wall 50 cm high, we introduce the structure into the opening. For a neat, even position, carefully check the vertical and horizontal of the product. We fasten the frames with metal strips 4 cm wide, welding them to the frame at intervals of 60 cm.
We continue to build the wall, allowing the bricks to take place in the middle of the external and internal structures. At the same time, we introduce the frame into the masonry: we weld 3 reinforcing rods about 30 cm long and install them between the bricks directly into the seam. Having reached the top of the frame, we make a ceiling from concrete or metal beam. Next, we check the operation of the gates that we made for the garage with our own hands - the doors should open and close easily.
Installation of locks and latches on garage doors

Lock - lock for garage
We complete the production of garage doors by installing locks and latches - these minor work We will also do it ourselves. Car owners have adopted an option in which only one door is closed from inside the room due to rods going into the floor and ceiling. For the lock to work, holes 5 cm deep are needed. They are made in the frame, floor and ceiling.
The second gate is equipped with a lock, the retractable rods of which extend behind the gate or fall into holes made in the frame of the second part of the gate. On the outside of the structure, to increase reliability, an external lock is placed on special eyelets. It will connect both doors.

A “Spider” lock or a “Crab” lock is one of the most reliable for garage doors
Despite a certain degree of reliability of such a lock, it does not provide a 100% guarantee against intrusion by intruders. Burglars can use a grinder to cut off hinges or remove doors. Let's consider an option that increases the chances of car safety. A piece of corner is welded to the place where the hinges are attached to the sash frame, which, when the sash is closed, will extend almost 20 mm into the wall. For this maneuver in the masonry, you need to do it in advance free place. When you try to remove the doors, the corner will cling to the garage frame and will not allow dismantling.
The “spider” lock is considered a reliable option. Its pins are fixed into the floor, wall and ceiling of the garage. The lock is supplemented with a locking mechanism that jams it closed. To unlock the spider you will need a special key.

Garage door insulation should be effective and economical
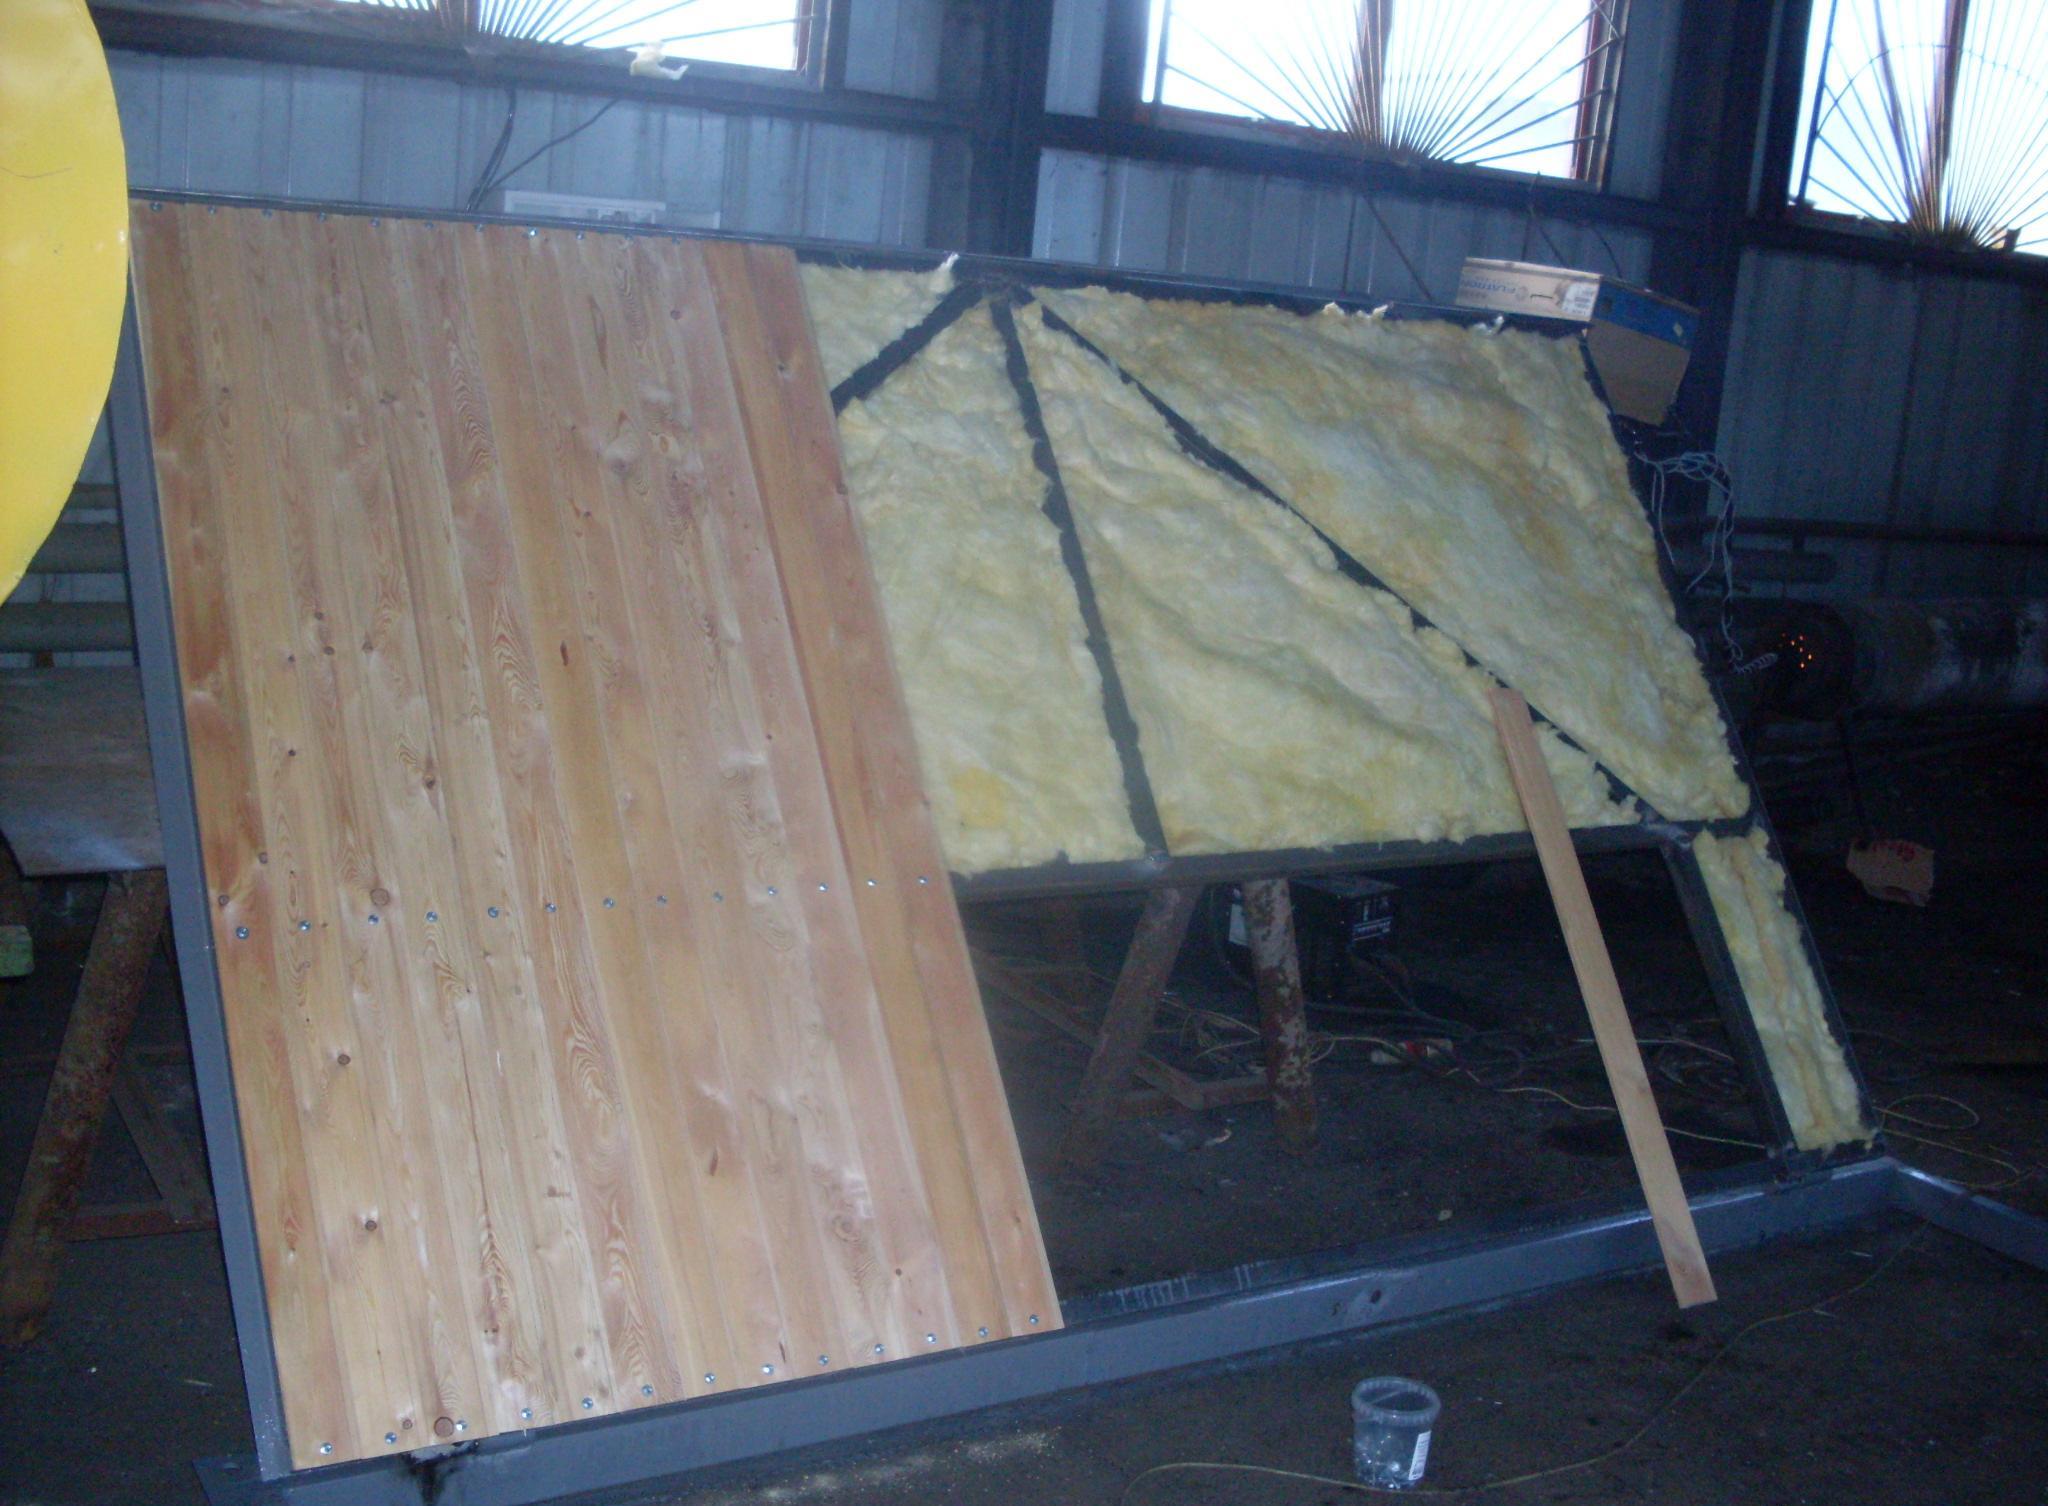
Insulation of the entrance structure is a topical issue for residents of harsh climatic regions. It is better not to cover the doors with cotton insulation, as they quickly lose their beneficial properties. Optimal materials are sheet foam and extruded polystyrene foam. To insulate the gates, proceed as follows:
- Mark and cut out pieces the right size. With help wooden planks a small gap is made between the metal and the insulating material. TO metal surface The planks are secured with liquid nails.
- The empty space is filled with insulation. The remaining voids are filled with construction foam.
- The gaps in the stiffening ribs are sealed with foil-based insulation. It is also attached with liquid nails.
- Close the gate with insulation over the entire area and wait for the glue and foam to harden.
- In accordance with the parameters of the area, a sheet of plywood is cut out and treated with an anti-rotting agent. As the foam and glue dry, the plywood is fixed to the stiffening ribs and leaf of the gate structure using self-tapping screws.
After installing and insulating the gate, do not forget to organize high-quality ventilation in the garage.
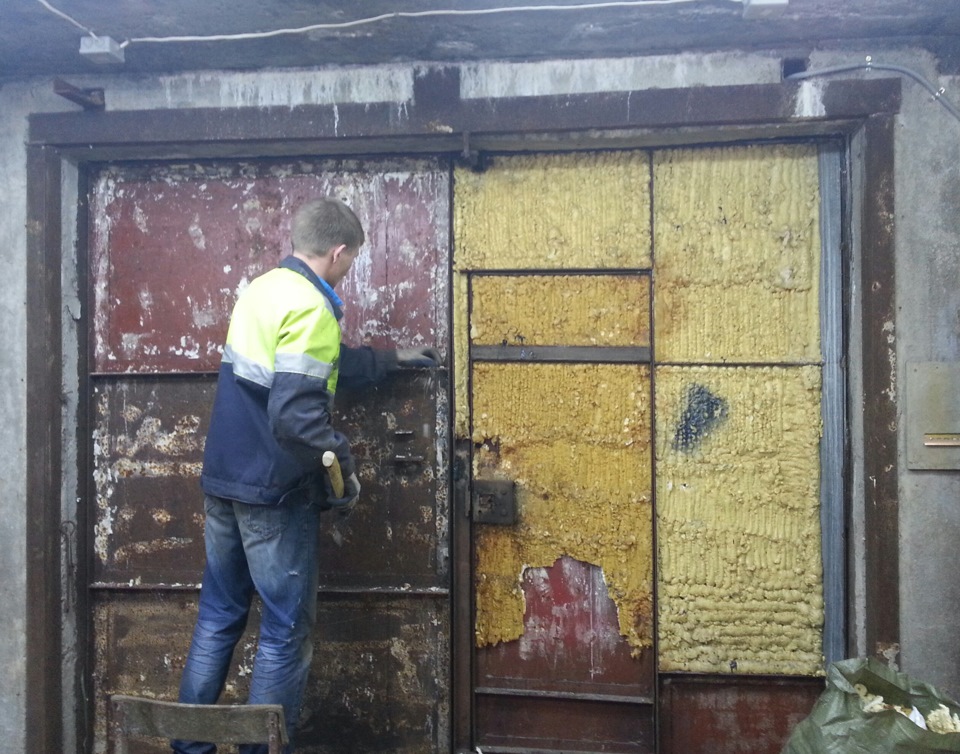
All work on creating a garage door with your own hands is completed by bringing the structure into an aesthetic appearance. To prevent corrosion, it is painted on the inside and outside. They work carefully with the brush.
Additional protection from moisture can be achieved by installing a canopy over the doors. A good canopy is made from corrugated sheets or remnants of iron sheets. It is attached to pipes or steel plates. It is not recommended to cut this part out of wood. Before installation, you should calculate bearing capacity visor, i.e. what load it can withstand.
If you ask which type of garage door is considered the simplest and most affordable, then we can say with confidence that these are swing garage doors. They are the ones that can most often be found in our area. Demand and popularity are determined by a lot of different factors, which we will consider further. If there is an urgent need to properly protect your garage, then this is an excellent solution.
In this article we will look at the features of swing gates, types, design, advantages, and also learn how to make a garage door with your own hands.
Features of garage swing doors
We can say that swing garage doors are a classic. They have a simple but at the same time reliable design. The name itself speaks about the principle of their work. The gate consists of 2 leaves that open in one direction. One of the gate sections may have a wicket. The structure swings open at an angle of 110°. It all depends on the hinges used and the type of construction.
Many people consider swing garage doors to be the best option. There are several reasons for this:
- The design is traditional and familiar. Such garage doors are time-tested, and many experienced car enthusiasts use them.
- Metal garage doors are considered the standard of strength and durability.
- Although the design is simple, it protects the garage from penetration by ill-wishers. In addition, if you use metal with increased thickness and additional stiffening ribs during manufacturing, you can achieve excellent results.
- The installation process for swing gates is quite simple. Even an inexperienced person can handle it.
- Garage doors are secured using supporting posts. They open thanks to hinged hinges. The blades themselves move accurately, easily and make virtually no noise.
- Many people are attracted by the simple operation of garage doors. The design is easy to wash and clean from dirt.
- You can make swinging insulated garage doors to make the room warm. This will be necessary for those for whom the garage serves as a workshop.
- Thanks to the swing design, the owner has many opportunities to modernize the structure and make it attractive and beautiful. You can create 3D images, metal patterns, or simply paint them on the canvases. In general, in this case, imagination can run wild as it pleases.

But there is a main advantage that sets swinging garage doors apart from all others - their affordable cost. You can find the following types of garage doors on sale:
- recoil;
- roller shutters;
- sectional;
- lifting

All of them have a special design and you will have to pay a lot for them. The sectional type performs all the same tasks, but will cost two or even less times less.
Swing gate design
Before you start making garage doors yourself, it is important to familiarize yourself with the components of the product design. Below in the photo you can see a diagram of exactly what this type of gate looks like.
All the elements of a garage door are described here. The main one is support pillars. Only if we are talking about a structure for a garage, then the gate is fixed not to the support pillars, but in the opening to the walls. They are enclosed in a frame, which is securely installed in the garage opening. This can be seen in the next photo

The second most important element is the structure frame. It consists of two parts that can open independently of each other. The frame is made from a metal profile by welding. To make the structure stronger and more reliable, stiffeners are welded.
The doors themselves are attached to support posts or frames using hinges. They play a major role in the performance of the structure. Hinges allow the gate to open and close. And so that the product can be fixed in the same place, latches are made into the ground. The design is simple, but it will allow the sash to firmly take the same position. Well, in order to close them you will need a bolt or lock.
The sample showed a simple type of construction. It is usually used for fences. But swing garage doors are made with a wicket. This is convenient, as it allows you to enter the garage without fully opening the door. After all, we don’t always go there to take out our car. Therefore, a gate can be very useful for people. A drawing of a garage door with a wicket is shown in the photo below.
And finally, the last element of the design is the canvas. Unlike others structural elements, the type of canvas can be very different. It is the type of cladding that may determine what the gate will look like. They can be sheathed:
- Tree.
- Metal.

These are broad concepts. The most popular is metal sheet material, as well as sandwich panels. It is rare to find an aluminum profile. The strength, reliability and protection of the garage door will depend on the choice of casing. Even wooden garage doors can be made durable. You need to choose the right material thickness and adhere to the creation technology.
Pros and cons of swing gates
Why is this type of design still so popular? It's all about positive aspects products. Here is their list:
- Strength and durability.
- If you use anti-removal pins, cutting off the hinges will be impossible.
- The design is very simple and easy to open.
- Installation can be carried out in openings of any features and dimensions.
- The gate can open both inside and outside the room.
- Made from modern materials that do not rust.
- They have an attractive appearance and can be modernized as desired.
- They do not have welded joints, which allows for improved appearance.
- It is possible to make them not only manual, but also automatic, which will greatly simplify their operation.

As for the disadvantages, the design has them:
- since the type of opening is swing, this process will require free space in front of the garage;
- in winter, in order to ensure access to the garage and proper opening of the structure, it is necessary to clear the snow. Although, on the other hand, this must be done in any case, since the car also needs to leave the garage;
- Although the opening system can be made automatic, the devices will need to be installed on both doors. And this will make installation even more expensive.

If you look at the ratio of pros and cons, it becomes clear why many prefer swing garage doors.
Types of swing gates
Depending on the material, type of construction and type of opening, there are several main types of swing garage doors. This allows you to choose for yourself best option in accordance with the allocated budget and requirements.
So, all designs can be divided according to the material used for manufacturing into:

We mentioned that the structure itself is made of metal. This guarantees the durability and other strength characteristics of garage doors. But as for the cladding, it can be different. Metal swing garage doors are the most popular. They are reliable and durable. But wooden garage doors, although not as durable, have an excellent appearance. In addition, wood is environmentally friendly pure material, and it is easy to process. To cut it or connect its component parts, you do not need to have a lot of experience and skills with a welding machine.
Swinging garage doors can also be divided according to the type of opening into:
- manual;
- automatic.
Manual - regular option designs. They are set in motion by the forces of the owner himself. To open them, you have to get out of the car. This is not entirely convenient, however, such gates are the simplest and anyone can afford them.
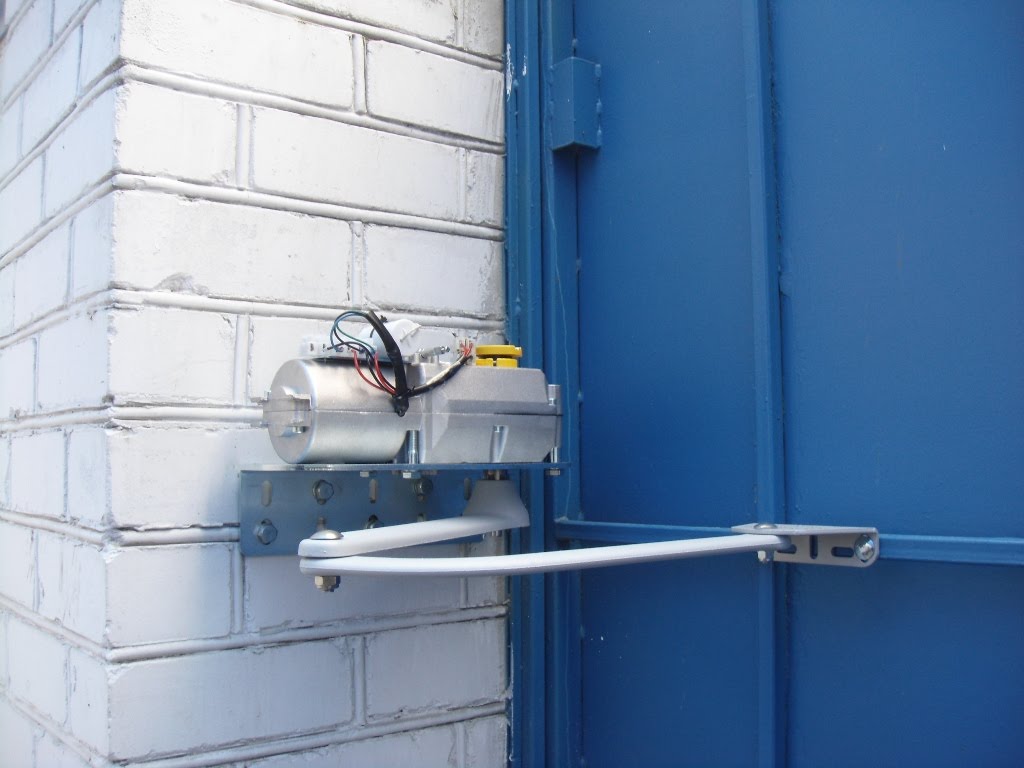
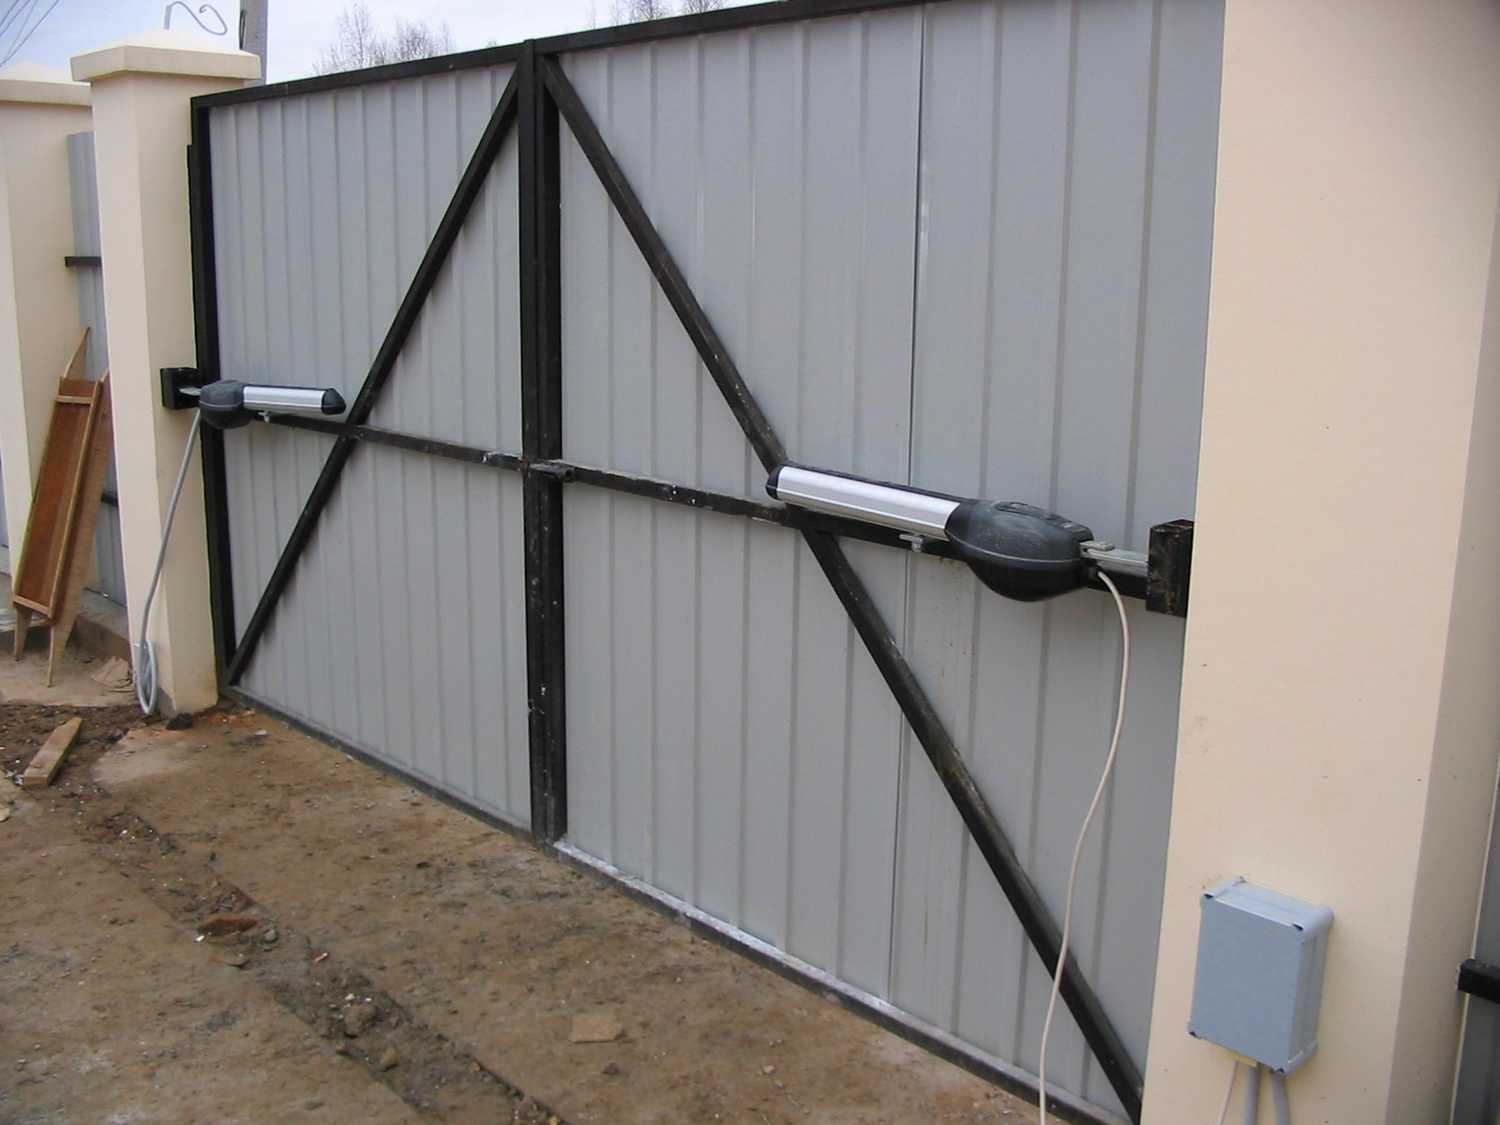
Another thing is automatic swing gates. Their peculiarity is that they automatically open or close when necessary. It is enough to drive up to the gate and, without leaving the car, open it using the remote control. This is possible thanks to the automation that is installed on each sash.
What is included in this set of electrical appliances? The system consists of an electromechanical drive, an access system and a control unit. Automation of this design is carried out through different types of drive (linear or lever). To select a suitable design, many factors must be taken into account. Here are the parameters you should pay attention to:
- The area of the structure's fabric that does not include gaps.
- Frequency of use of garage doors.
- Dimensions and weight of the metal structure.
- How do gates open - outwards or inwards?
- Installation location.
If we talk about a universal option, then this is a linear worm mechanism. It is installed on a structure that opens and closes quite often. The automation is also suitable for gates that open outwards.
The linear hydraulic drive also has its advantages. It is inexpensive, high-power and versatile. In addition, it is easy to use and easy to install. However, if we talk about areas with temperature changes, this is not the best option.

Regarding the lever electric drive, then its scope is narrower. It is highly durable and allows swing gates to be opened in any direction.
What if your automatic swinging garage door malfunctions? What if the mechanism is jammed, how can they be opened? Manufacturers took this fact into account and equipped the system with a function for manually unlocking the blades if the automation failed or the power was cut off.
The only thing that can stop many is the price. You can buy them in any store, but not everyone can afford the design. Minimum price starts from 300 euros. There is a system for 400, 500 euros and more. After purchasing, all that remains is to install them on each shutter and connect the system.
Note! You can ask the company to install the products. Often this service is an addition to the purchase, so there is no need to waste your time and effort.
The last thing I would like to note regarding the types is the type of cladding of the structures. Cloths for the garage can be:
- one-sided;
- double sided;
- sandwich panel.
From this follows the next subtype - insulated and non-insulated structures. The first option interests us more. Insulation consists of using a layer thermal insulation material, which saves heat. Your garage will stay cool in the summer and warm in the winter. This is achieved through the layer insulation material, which is laid between the layers of sheathing. It can be polystyrene foam (the cheapest and very effective) or mineral wool. The cost of such a design will be higher, but the comfort inside the garage will be even higher.
On a note! It is worth mentioning that gates can also be divided according to their design. They are made without a gate or with it. The second option is more preferable.
Now that we have looked at all the features, characteristics and types of swing garage doors, you can find out how to make a garage door.
Requirements for homemade structures
First you need to familiarize yourself with several requirements that are observed in production, and which are important to comply with when working:
- The ability for the car to enter and exit freely. It turns out that the size of the structure is chosen taking into account the dimensions of the car. A van needs a large gate, and a passenger cars less.
- In order not to be afraid of damaging the car when entering, you should leave 30 cm on each side. This will simplify the driving process.
- If we talk about the standard dimensions of a garage opening, they are as follows: 4x2.1 or 5x2.4 m.
- It is important to make strong gates that will be burglary-resistant. This will require high-quality cladding and a castle. Some people buy or make their own security locks. It is better to sheathe the structure with galvanized steel, the thickness of which is 2 or better than 5 mm.
- To strengthen the gate, you can use overhead locks.
Taking into account all these requirements, you can create the right gate with your own hands.
Materials and tools for work
To make swing garage doors with your own hands, you need to stock up on the following materials:
- steel corners, from which the supporting frame (mounting frame) will be made;
- material for covering the frame, selected in advance (wood or metal);
- hinges, latch;
- primer and paint for the fence;
- metallic profile to form the structure as a whole (60x30 or 60x20).

As for the tools for creating garage doors, their list is as follows:
- building level;
- tape measure, pencil or marker;
- grinder for carving;
- square;
- perforator;
- welding machine;
- paint brush or spray gun.
Now you can begin the first stage of creating a metal garage door.
Formation of the gate mounting frame
The design is based on the supporting frame. Since we are talking about a product for a garage, the frame will consist of two parts: an internal and an external frame. The external one is needed to fix the structure in the opening, and the internal one allows the gate to move. The frame will be made of a metal corner.
Do-it-yourself swing gates for a garage - step by step process:

This completes the work on creating the external frame.
Creating a swing gate frame
The gate frame consists of two swinging doors of our product. It is to them that we will further attach the selected canvas. To create the frame of our sashes, a metal profile measuring 6x2 cm is ideal. Step-by-step creation instructions:

At this stage you should have the product shown in the photo below.
In fact, the main and most difficult part of the work has already been done. It will be easier later.
Gate cladding process
Although this stage may seem simple at first glance, it is very important. Both the appearance of the structure and its other features depend on how well it is implemented. functional features. Further work depends on the choice of material for the canvas. We'll consider classic version for the garage - galvanized steel. And below in the photo you can see the wood paneling option.
Instructions for creating a gate trim:
- Galvanized sheet metal must be marked according to the size of the sashes. You need a tape measure and a marker. In addition, it is worth considering that the left sash must be 10 or 20 mm larger in order to overlap the right sash.
- When two identical canvases are cut out using a grinder, you can begin installing them. The sheet is welded at the bottom at several points. This is done in order to secure it to the frame.
- The sheet on the right, which should be 10-20 mm narrower than the left, should be cut off. It turns out that the metal sheet will not reach this distance to the end of the profile.
- When the blades are aligned evenly and correctly, they can be completely fixed by welding. To prevent the skin from moving during the work, which can lead to distortions, it can be secured by welding in the middle and in the corners on each side. When the blade is completely welded, the points can be cut off. If this is not done, then there is a small chance of one of the corners bending outward. Only a sledgehammer can solve the problem, so don’t forget to cut off the dots.

The structure is almost ready. But there is a small detail without which its work is impossible. After all, the doors themselves, as you remember, are not yet connected to the main frame.
Fixing hinges for swing gates
Hinges for garage doors need to be purchased and prepared in advance. They consist of two parts. One of which is mounted on a cylinder and allows the structure to rotate. The gate will require 4 hinges, 2 on each side. Sometimes, if the structure is very large and heavy, 3 loops are needed on each side.

So, the hinges are welded into place. In this case, the lower part of the hinge is welded to the outer frame, but the upper part is attached to the sash from the outside. To strengthen the fixation, a strip of metal can be welded to the loop on each side. On sale you can find hinges already with such plates, with a thickness of 5 to 7 mm.
We install locks and latches on gates
Safety comes first. For such structures, a mortise or the padlock. They are simple and more effective. An excellent option is a deadbolt lock for garage doors. However, it is best to supplement the design with a powerful deadbolt and pin stoppers. They will allow you to close the gate with inside. However, in this case it is necessary to make a gate in the sash or a door in the wall of the garage.

Important! Making a wicket in a gate leaf is not that difficult. You still need to create a frame from the profile according to the dimensions, place it in the sash, and then weld the hinges. The doors are sheathed according to the same principle; a handle and a lock are embedded in them.
The stoppers are made as follows: a section of pipe is driven into the ground, and the moving part of the stopper - the rod - will be immersed in its inner part. The pipe diameter should not be too large. The rod is threaded through the loop in the gate leaf. During operation, you will need to constantly monitor the pipe so that it does not become clogged with snow, dust and dirt.

Garage locks also need care. It is very important to protect them from moisture, especially in winter. If water gets inside and freezes there, the key will not be able to penetrate the well and open the doors. Yes, and the lock can rust and fail. Locks with a cylinder mechanism suffer the most from frost. It is much better for cold regions to use a lock with a tubular key. Gate locks also require regular lubrication.
Painting the frame
Since the entire structure is made of metal, it needs protection from corrosion. For this purpose, a special primer or paint is used. This solution will not only protect your swing garage doors, but will also make them more attractive.
So, the product should be primed. The primer is applied with a roller or paint brush. It is important to do this job carefully so as not to miss any areas. A primer is needed for better adhesion of paint to the surface.
Now, after the soil has dried, the gate can be painted. The composition is applied using any of the methods available to you. It is important to do this in two layers so that the color is saturated and the structure is more protected.
Installation of swing gates
Installing swing garage doors requires an assistant. The structure itself is heavy, so strong man's hands, preferably several. The sequence is as follows:
- The first step is to install the inner and outer parts of the frame. They are securely fixed to the opening slopes using metal pins ranging in size from 15 to 18 cm.
- After which the ends of these pins that will protrude need to be cut off, scalded and thoroughly sanded with a grinder and painted over. This way the pins will not prevent the structure from moving.
- The outer and inner frames are connected to each other using 40 mm metal plates. The plates must be welded in increments of 60 cm.
- All that remains is to hang the sashes in their place.
It is at this stage that our DIY metal or wooden garage doors can be equipped automatic system opening and closing. This can be done later.
Insulation of garage doors
Few people know, but if you do not insulate metal swing doors garage, then they will become the main source of heat loss. They account for as much as 60%. That's why everyone recommends insulating garage doors. Using the same foam, the work will not be expensive. But the result pleases all year round.
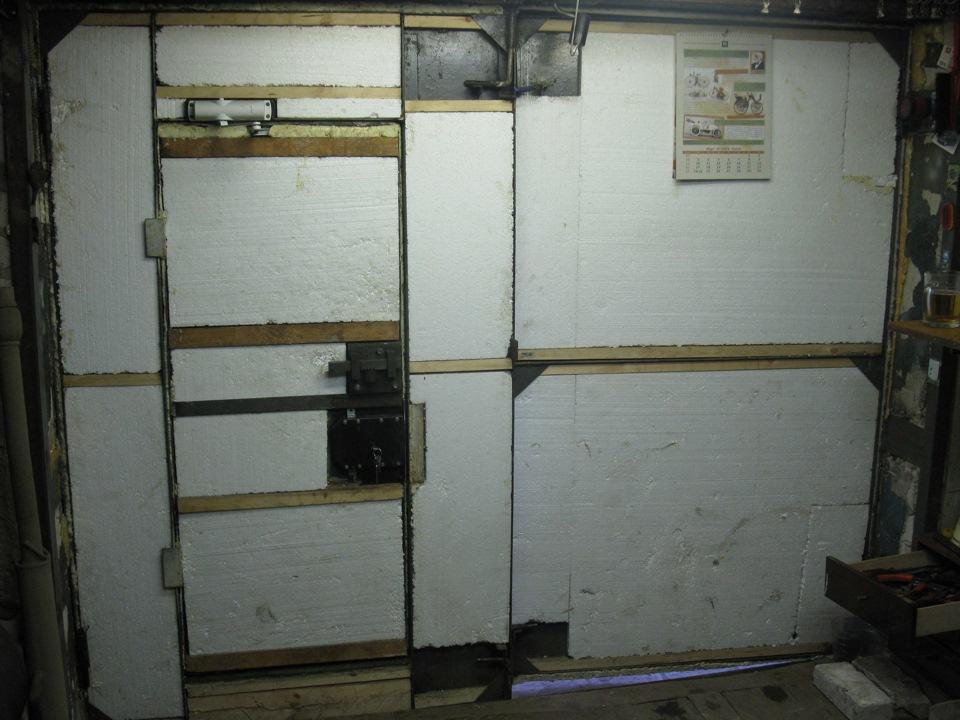
To insulate swing gates, insulation (mineral wool, polystyrene foam, polyurethane foam, glass wool, expanded polystyrene) is placed inside the doors. To subsequently protect the insulation layer from negative influence, it is recommended to sheathe the canvas with wood. When working, you need to make sure that there are no air pockets left. All gaps are filled well.
Attention! For high-quality insulation, you need to use a layer of insulation 15-20 cm thick.
That's all, now you know the whole process of creating a product with your own hands from scratch.
Let's sum it up
Swinging garage doors are the simplest, yet time-tested design that reliably protects your garage from strangers. We looked at not only the features and advantages of the products, but also learned how to weld a garage door. Step-by-step instructions will help you save on the purchase of garage doors by making them yourself. All that remains is to prepare everything you need for work and begin the process. And thanks to the visual video, making a garage structure will be twice as easy.
Making a garage door with your own hands means saving significantly on the purchase and installation of a ready-made structure. It is not surprising that such a prospect seems quite attractive to many craftsmen. However, bringing this idea to life is not as easy as it might seem. To make a truly high-quality, beautiful and reliable garage door, you will have to put in a lot of effort. Moreover, they must be based on knowledge of all the features of assembly technology.
Initially, you need to decide and choose the type of garage door design. There are several of them:
1. Swing. The most ancient type of gate. They have gained popularity due to their convenience, simplicity of design, consisting of two leaf panels, and also due to their relative “inexpensiveness”. In addition, it is easiest to make them yourself.
2. Lift-and-swivel. When opened, the door leaf rises vertically to the ceiling. They are based on a hinged lever mechanism. The gates are quite practical and convenient, they do not take up space either in front of the garage or inside it.
3. Sectional. The design includes a canvas consisting of sections. When opened, they are refracted, rising to the ceiling using a special spring mechanism and a system of profiles. Important benefits Such gates provide good tightness and space saving.
4. Recoil. They open like a wardrobe, i.e. move to the side.
5. Roller shutters. They are similar to roller shutters. The canvas plates are folded under the ceiling into a special box.
As was said above, swing gates are easier and cheaper to make than others, so we will consider the technology of their assembly, as the most acceptable option for the majority. It is more difficult (although quite possible) to make up-and-over and sliding gates. You will have to buy them lifting mechanisms, which will cost significantly more.
Special kits for self-assembly such gates with the accompanying instructions. It is better to buy sectional and roller garage doors from the factory and order installation from specialists.
Requirements for garage doors
When creating a homemade design, it is important to know that high-quality gates must meet certain requirements, namely:
1. Ensure easy, unhindered entry/exit. Their dimensions should be optimal in accordance with the dimensions of the vehicle.
1.1. The distance from the side of the car to the gate post should be no more than< 30 см. Если автомобиль небольшой, то старайтесь как можно больше увеличить это расстояние (на случай, если решите приобрести внедорожник).
1.2. For ordinary passenger cars, the optimal gate height is 2 meters.
1.3. Standard sizes garage openings: from 2.4 x 2.1 to 5.4 x 2.4 m.
2. Be resistant and resistant to burglary. The most durable garage doors will be made of galvanized steel sheet no thinner than 2-5 mm. You can strengthen the gate using overhead locks designed for external pads, and also using armored linings used for internal locks.
3. Provide protection from harmful effects environment. Protection from wind and precipitation should be provided by fastening the garage door. To firmly secure the door leaf, vertical locks should be used, which can prevent the gate from skewing. It is also recommended to use a seal (it will ensure optimal contact of the sashes with the frame).

The gate must ensure free, problem-free passage of the vehicle.
How to make a garage door
Materials:
1. Steel corners for making a supporting (mounting) frame
2. Sheathing (corrugated sheeting, forging, wood or a metal sheet at your discretion).
3. Gate valve
4. Profile (for example, 60x30 or 60x20)
5. Loops
Tools:
1. Roulette
2. Bulgarian
3. Level
4. Square
5. Welding machine

1. metal frame; 2. sheathing; 3. racks; 4. loops; 5. valve
Manufacturing the mounting frame
The supporting (mounting) frame is made of steel angle. It consists of two parts - an internal and an external frame.
1. First you need to measure the height and width of the opening. The accuracy of the measurements is important, on which the installation of the finished frame will depend.
2. Then from the corner with square section(with sides from 160 to 200 mm) measure and cut the required blank elements for the outer frame.
3. Lay them out flat plane, set the horizontal level (it is adjusted by pads) and align the corners. Adjust all right angles by measuring the diagonals. Thus, on a flat surface it is necessary to lay out the blanks in the exact shape of the future frame.
4. Weld the frame. In order for the gate to fit as tightly as possible to the frame in the future, its outer side must be completely flat and smooth. To do this, grind all welding seams using a grinder.
5. Next, you need to weld vertical “levers” into the corners (corner trims are suitable for this). This is necessary to ensure spatial rigidity (i.e. geometric immutability) of the frame. In this case, the corner will not move.

Garage door structural elements need to be laid out on a plane or leveled
Making a frame (sheathing)
The frame is needed for two swinging sashes. Subsequently, a metal sheet will be attached to them. When making the frame, you can use a 60×20 mm profile.
1. Place the garage pipe frame on a flat surface, face up.
2. Insert the guides into the frame, carefully aligning the location of each side.
3. Create a gap between the frame and frame (≤ 20 mm) using inserts. This is necessary for the free movement of all sashes.
4. Then you should carefully check the right angles of the frame and weld the profiles.

For the manufacture of lathing, a metal profile is mainly used
Gate trim is a responsible job
This is a very important and responsible stage; the appearance and functionality of the design will largely depend on the quality of its execution.
Here it is especially important to know how to weld a garage door correctly. So, the sequence of actions:
1. Trim galvanized iron sheet according to the size of the valves. Keep in mind that the left sash should overlap the profile of the right sash by 1 or 2 cm.
2. Weld the sheet in several places at the bottom (to secure it to the frame).
3. Cut off the trim of the right sash, which will be narrower than the left one by about 1-2 cm (that is, the iron sheet will not reach the edge of the profile by this distance).
4. Boil. To prevent the sheet from moving along the frame during welding, it is necessary to weld it in the middle and at the corners of each side of the garage box. At the end of the work, these points are cut off. Otherwise, one of the corners of the canvas may bend outward. This can only be corrected by using a sledgehammer.

Garage cladding sheet iron
Upper and lower parts of loops
The loops must be prepared in advance. The lower part of the hinge must be welded to the frame, and the upper part must be welded to the outer sash. You can cut and bend a strip of metal (5-7 mm), thus strengthening the connection. It is applied to the top of the hinge, as well as to the gate leaf. To enhance the strength of fastening the hinges, a reinforcement tab welded on the inside is suitable.
Installation of locks and latches
Garage doors are usually fitted with either a mortise or padlock. It is also advisable to use a powerful deadbolt and pin stoppers. With their help, you can close the gate from the inside, but this requires another door in the gate leaf or in the wall of the garage.
The design of the stoppers: a piece of pipe is driven into the ground, into which the movable part of the stopper, the rod, is immersed. It is threaded through a loop in the gate leaf. The pipe of this design must be constantly monitored, otherwise it may become clogged with dirt and snow.
Garage locks need careful, timely care. They must be protected from moisture (especially in frosty winter). Once frozen, the moisture will prevent the key from entering the keyhole. Garage locks with cylinder mechanism. It is better to use locks with a tubular key.
Also, the locks should be lubricated, at least with ordinary graphite powder from a pencil or spindle and transformer oil. When using graphite powder, the lead must be removed from the pencil, rubbed, then blown into the keyhole.
Garage door painting
Gates are painted mainly to protect the door from destructive factors: damage, corrosion. First they are primed, then metal paint is applied in 2 layers.
Installation in stages

Gate installation - the final stage
1. First, the inner and outer parts of the frame are installed. Attached to the opening slopes using metal pins 15-18 cm.
2. Then the protruding ends of the pins are cut off, scalded, carefully sanded with a grinder (so that they do not interfere with the door closing), and painted over.
3. The outer and inner frames are fastened together with metal plates (jumpers) 4 cm thick. The plates are welded every 60 cm.
4. This stage ends with hanging the sashes.
If desired, the swing structure can be equipped with automation, as in the video example of a gate enclosing a private area:
Insulation of swing garage doors
If metal gates are not insulated, then up to 60% of the heat will escape from a heated garage through them. Therefore, they need to be insulated by installing them on inner surface sashes with wooden sheathing. Insulation is placed inside it - mineral wool, glass wool or polystyrene foam PSB-S. It is important not to leave any air spaces, filling the gaps carefully. A five-centimeter layer of insulation will be quite enough. The top of the sheathing should be covered with facing slabs or clapboard. You can also hang a tarpaulin or plastic curtain from the inside.
Repair and modernization
Sometimes during operation it may be necessary to correct the location of the garage door.
1. For example, if opening/closing the doors is difficult due to their location being too low. In this case, the easiest way to solve the problem is to trim the bottom of the sashes with a grinder.
2. It may happen that for dimensions new car The height of the opening is no longer suitable. Here you will have to spend more effort than when solving the first problem. The method is applicable only for brick garages: 1-2 rows of masonry should be knocked out above the opening, then the resulting slope should be strengthened, and then the frame should be raised to this height.
Video: homemade lift-and-turn
As we can see, construct homemade gate more than realistic for a garage. However, you will have to put in a lot of effort and knowledge. It is necessary to have at least a minimum set of construction skills and abilities in order to make a truly high-quality gate that will be of good quality and will serve for a long time.


