Sanding walls after puttying is the final stage of preparing surfaces for their further decoration, finishing with paint or wallpaper. The need for this procedure is due to the fact that after applying putty, small irregularities and bumps remain on the wall, which can negatively affect the visual characteristics of surfaces and generally reduce the aesthetics of the interior.
How to sand walls after puttying - suitable tools
Before you begin the final processing of the walls, you should prepare the necessary consumables, materials and tools. To sand the surface at home you will need:
- grinding beam;
- sanding sponge;
- several types of sanding mesh (can be replaced sandpaper);
- ladder;
- putty knife;
- protective equipment – glasses, hat, respirator.
It is very important to provide high-quality lighting in the room so that you do not have to strain your eyes too much, and so as not to leave a single square centimeter of area unprocessed. Standard artificial lighting is unlikely to be sufficient; we recommend preparing powerful lighting in advance. table lamp or spotlight. Sanding the putty itself is not classified as difficult. finishing works, however, it requires significant labor costs and leads to the appearance of huge amounts of dust.
Emery and abrasive mesh - hand work
If you plan to sand the walls after puttying by manual means, initially the performer will have to make a choice between an abrasive mesh and sandpaper. These grinding means have their own advantages and require an individual approach to the process of performing the planned finishing work.

The main advantage of the abrasive mesh is its structure with holes. The dust generated during the processing of the walls will pass through these holes, which means that it is easier to work with it than with sandpaper. But this does not eliminate the physical wear of the tool during surface grinding. Define the right time replacing the mesh with a new one can be done by appearance(break of links), or when the grinding process becomes noticeably less effective than at the beginning of finishing work. On the market, abrasive mesh is sold in pieces the size of sanding bars, so at home all that remains is to assemble the tool for the job and start sanding the wall.
Sandpaper is used less and less today for sanding walls, as it quickly becomes clogged with dust during finishing. Because of this, the paper has to be changed very often, which in turn leads to an increase in work time.
If, answering the question “How to sand putty,” the performer chooses sandpaper, he should know what is available on the market this material presented in a wide range. To achieve high-quality wall finishing, you must first understand what grain size of paper is best suited. Sandpaper grit is a value that determines the number of grains per square centimeter of sheet area. That is, the higher the grain size, the more grains there will be on a piece of paper under the sanding block, and vice versa. Coarse-grained sandpapers are marked from P20 to P220 (number of grains per centimeter). Fine-grain paper is considered to be paper in the range of P240 to P2500.

How to sand walls with sandpaper? Very simple. The whole process is carried out in two stages. First, the walls are rough treated with coarse-grained paper, and fine-grained emery is used for final sanding. At home, they usually use sandpapers in the range from P80 to P280, in rare cases they use abrasives marked up to P360. Considering the relatively low cost of sandpaper, we recommend purchasing several types of coarse and fine-grained paper for sanding walls; in this case, the most suitable marking can be selected already during the finishing of the walls.
Instructions for sanding walls - preparation for final finishing
The finishing process can be divided into several stages. First of all, the finishing contractor needs to prepare for repairs:
- wear personal protective equipment;
- provide high-quality lighting in the room;
- remove large surface irregularities with a spatula.
Work should begin only after the putty has completely dried. After all the preliminary steps, attach the selected sandpaper or abrasive mesh to the sanding block using special clamps. Now you need to divide the entire surface to be treated into equal sections no larger than 1-1.5 meters in size. They should be sanded one at a time, from top to bottom. Grinding is carried out uniform movements round.
It is necessary to press the sanding block against the wall with little force and you should not stop for a long time in one area; it is better to determine in advance the approximate processing time for each area, after which you need to move on to the next one. This is the only way to guarantee that the putty will not be damaged and the walls will be covered evenly. When the putty walls are almost completely processed, you can move on to the most complex and hard-to-reach places and corners.
To do this, use sanding sponges with beveled corners. If you did not purchase a sponge in advance, you can simply roll up a sheet of sandpaper several times and carefully work it over the remaining areas of the wall. If you plan to sand with sandpaper with different markings, after the initial surface treatment with coarse sandpaper, wet cleaning, after which sanding is carried out with fine-grained paper.
The grinding process will be exactly the same as when working with coarse-grained sandpaper, except that the hand movements should not be too sweeping, and less force should be applied to the sanding block. When polishing is completely completed, wet cleaning should be done again and the walls should be primed. Only after this the surface can be subjected to final finishing using purchased facing materials.
How to sand a ceiling using putty - manual and mechanized methods
After applying putty, the ceiling needs sanding no less often than the walls. You can treat the ceiling using the same hand tools, however, such a procedure, firstly, is much more complicated, and secondly, must be performed even more carefully. The fact is that the ceiling is well illuminated due to the close location of the chandelier, and any irregularities and flaws will be clearly visible on it. You can simplify the task of sanding the ceiling with the help of modern grinding machines. With their help, you can carry out all the work quickly and with minimal labor costs.
For mechanized polishing of the surface, it is necessary to use an abrasive mesh for processing putty marked No. 60-80, which is put on a grinding machine. With the help of such a mesh, a rough cleaning of the surface is carried out, after which a finishing mesh marked No. 100 is used. If the machine is equipped with a bar, then polishing the ceiling can be done from the floor, otherwise you will have to climb on a stepladder and move it as you process the surface. Sanding is carried out in a circular motion until the surface is perfectly smooth.
When the grinding process is divided into two stages, after rough finishing, the ceiling is covered with a finishing layer of putty. Polishing using a fine-grained mesh in this case can be carried out only after the putty has completely dried. Owners of private houses and apartments today have everything necessary tools for repair work in their homes without the help of professional installers and builders. If you take your time and do all the work correctly, you can create an attractive interior with minimal financial investment.
Sanding walls after puttying allows you to create a perfectly smooth surface
The final stage of finishing is the most important. And if you do it yourself, everything needs to be done efficiently, in accordance with the technology developed for each type of work, since there will be no one to ask if the result turns out to be unsatisfactory.
One of the stages of preparing walls for painting or wallpapering is often overlooked by inexperienced finishers, namely sanding them after applying the putty layer. In this article we will talk about the need for grinding and the tools with which it is performed.
If you are making repairs not in a closet, but in a living room, and you want the wallpaper to fit together easily, not wrinkle or come off, and the paint to lie perfectly on the walls, then sanding the putty walls is a must. And not just once, but after each applied layer. And even if the surface looks even and smooth.
An exception can be made only for walls leveled by an excellent craftsman who left no marks on them from the movement of the spatula or accidental splashes. And only if you are going to cover them with thick vinyl or non-woven wallpaper (see), which will hide minor defects.
But paint will not only not hide them, but will also emphasize and reveal them. Especially glossy. Therefore, before painting, walls are sanded completely and very carefully, but for wallpaper, you can get by with local work - sanding only those areas where defects are identified.
Advice. To detect all sagging, pits and other irregularities, shine a beam of bright light on the wall at a slight angle from only one side. You will immediately see them by the shadows they cast.

How and with what to grind
Let's start with the fact that grinding is a rather dusty process, so for work you should get a respirator or at least a medical mask, gloves, and safety glasses. This is required by safety instructions, as fine dust can damage mucous membranes, settle in the lungs or cause allergies.
The room in which grinding will be performed must be isolated from other rooms by tightly closing the doors or, if there are none, covering the openings with a thick, damp cloth.
Note. The walls are sanded no earlier than 24 hours after the putty is completed, but before they are primed, since the durable film created by the primer will make this process almost impossible.
Choosing a tool and abrasive
For independent or small house there's no point in buying an electric one grinding machine– it is very expensive, and the quality of grinding is worse than manually. In addition, in hard-to-reach places you still have to operate manually.
Therefore, you will need a sanding float with convenient attachments for abrasive material - mesh or sandpaper.

What is better for sanding putty on walls - sandpaper or mesh?
Choose for yourself:
- The advantage of the abrasive mesh is its perforated structure. The dust formed by the mesh does not linger on the tool, but passes through the cells without clogging the working plane.
It is quite wear-resistant, you will have to change it less often than sandpaper, and you will know about the need for replacement by the appearance of the mesh, which begins to wear out, or by a decrease in the quality of sanding.

- Sandpaper is still a more familiar sanding material for many, which can be sold in sheets, rolls or pieces already cut to the size of standard graters. Its advantage is its lower price than the mesh.
However, the sandpaper becomes unusable faster and will have to be changed more often. In addition, it quickly becomes clogged with construction dust, and if a relatively large piece of putty gets stuck in it, it will scratch the smoothed surface, leaving marks on it.
If you nevertheless decide to choose sandpaper as an abrasive, then pay attention to its grain size. For rough processing of the starting layer of putty, a material with a fairly coarse grain (P60 - P80) is suitable, but bring it to smoothness finishing layer should be fine-grained sandpaper (P100 and above).

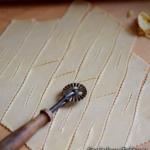
In addition to a grater, you may also need a sanding sponge with beveled edges for sanding corners. But in its absence, it is quite possible to use some auxiliary objects or simply fine-grained sandpaper folded in half.

The photo shows the mark left in the corners from using a grater.
Grinding technology
Visually, this process is quite primitive, but it also has its own subtleties and tricks.
We will tell you in detail how to sand the walls after puttying correctly:
- Wait until the putty layer has completely dried. Do not start work until you are sure that it has gained the required strength;
- Secure the abrasive to the grater, don’t forget about protective equipment, prepare a stepladder, a spotlight and a small spatula, and you’re ready to start;
- First, remove obvious bumps, if any, with a spatula;
- Then, starting from the top of any corner, in a circular motion, begin to treat the wall in small areas, highlighting them with a spotlight;

- Do not press the float too hard, especially if you are sanding the final layer of putty (see), otherwise you will simply rub it completely off;
- Grind only sagging and protrusions, do not try to smooth out the pits and holes: they are sealed with putty, allowed to dry, and then the surface is finished again;
- First treat the entire area of the walls, and then the internal and external corners.
That's basically it. All that remains is to prime the walls, wait for the primer to dry and move on to the most enjoyable job - applying a decorative coating.
Conclusion
Almost any home renovation work can be done yourself if you know how to do it correctly. Sanding is the simplest of them, although quite messy and labor-intensive. The video in this article will help you master it perfectly.
The puttying process, no matter how well it is performed, does not allow obtaining a perfectly flat surface. There are traces left on the wall from the spatula, transitions between layers, small irregularities, bumps and depressions are visible.
You can't do it without sanding the surface. Sanding is the final process that prepares the surface for final finishing.
Any person with the desire, patience and perseverance can perform sanding after puttying. The main thing is to choose the right tools, consumables and accessories, and know the technology for doing the work.
Sanding is performed dry or wet. Wet sanding is advisable on drywall. The main advantage of wet sanding is the relative purity of the process. You will not be bothered by the dust that is necessarily present during dry sanding. The subsequent cleaning process is forgiven.
IN home renovation dry grinding is more often used.
Rule 1
Sanding after puttying is carried out no earlier than 24 hours after applying the putty layer.
Tips for choosing tools, abrasives and accessories
Without the right tools and devices, it will not be possible to perform high-quality sanding of walls after puttying.
You must have:

You will need to purchase a sanding block or mandrel to secure the sandpaper or sanding mesh. This device is properly called a manual skinner.
Rule 2
Sanding paper has different grain sizes and this is important for sanding walls and ceilings for painting. Numbers from 20 to 220 indicate a coarse-grained structure of the material, numbers 250-2500 correspond to fine-grained sandpaper.
In terms of equipment, you will definitely need a stepladder, a lamp or spotlight, and a wide spatula. A wide table or trestle will also work if their height allows for work on the ceiling.
To ensure safety when performing grinding work, be sure to buy safety glasses, a mask or respirator, a cap, a beret or a scarf.
Let's move on to the process of grinding the surface after puttying.
Sanding walls and ceilings after puttying is done in a well-lit, ventilated room on a completely dry surface.
Wall grinding technology
At the first stage, use a spatula to go over the entire surface of the wall. Remove tubercles, all kinds of protrusions, and swellings. If you find large depressions or pits, fill them with putty, do not try to remove them by sanding.
Rule 3
Start sanding only when the surface is completely dry.

Rule 4
High-quality lighting should be installed on one side at an angle to the surface. Its position must not be changed during the entire grinding cycle.
The second stage involves treating the surface with coarse sandpaper or sanding mesh. The consumable material is attached to the sanding block.
Surface grinding is carried out from top to bottom, processing small areas with rotational movements. The size of the plot should not exceed 1×1 m.
It is better to grind from top to bottom in strips no wider than 1 m. When grinding, hand movements are made in a circle, but you can also move up and down or left and right. 
Do not press hard on the tool or grind for a long time in one place. You can erase the entire layer of putty.
After going through the entire surface with a coarse abrasive, continue sanding with fine sandpaper. When using finer sanding material, be sure to bring the light source as close to the wall as possible.
Rule 5
Finishing grinding is performed with less sweeping movements and with less pressure on the tool.
Hard-to-reach places are sanded using sanding sponges or old-fashioned method, folded in several layers of sandpaper. 
Never work corners or hard to reach places using a skinner. You will only ruin the surface.
Rule 6
Choose the right grain size consumables. Correctly selected emery should not leave deep scratches on plaster.
The grinding process is labor-intensive and requires considerable effort to complete. It can be mechanized if you use a special grinding machine. Grinding machines are available that can be connected to a vacuum cleaner, which makes the grinding process virtually dust-free.
Do not use belt sanders. They are suitable for working with wood. An eccentric or orbital sander will work.
Although the application grinder speeds up the grinding process; without special skills, it is very difficult for a novice builder to obtain a high-quality polished surface.
It is necessary to feel the tool not only to move it correctly, but also to regulate the force of pressing the tool on the plane being ground. And such a tool is quite expensive.
After sanding, remove the dust layer, do a wet cleaning and check the quality of the surface. Before finishing a layer must be applied.
Tip 1
It is better for a novice builder to use hand grinders.
devices.
Sanding a ceiling is no different from sanding walls. The process is more labor-intensive and requires patience and accuracy.
Once again about abrasive material
Sanding mesh is more convenient than sandpaper because it does not become clogged with debris and dust during operation. But the right sandpaper also gives good results, besides, it is much cheaper. When sanding walls after puttying with your own hands, it is best to use sandpaper numbers 120...180 (coarse-grained), and finish sanding with abrasive numbers 220-280 (fine-grained).
Tip 2
We grind the first layer of putty using coarse abrasive with grit number 120-180. Second layer finishing putty You should use an abrasive with a smaller grit No. 220-280.
Sandpaper and mesh are marked the same, with reverse side material.
How to control the grinding quality?
At the beginning of the article it was stated that the grinding process must be performed under good lighting, constantly directed from one place. Properly configured lighting allows you to constantly monitor the grinding process and its quality by looking at reflections on the surface or in the light, applying an even ruler or building level. There should be no gaps between the control tool and the wall.
When it comes to the ceiling and it is being prepared for painting, the ceiling needs to be sanded better. Illuminate the grinding area with light, this will allow you to see surface defects. Visible scratches are puttied and cleaned after drying.
Sanding work ends with thorough cleaning of the surface and room and applying a primer to the dry and sanded surface.
In addition, we recommend watching a video on sanding walls and ceilings. Good luck in this dusty business!
Video: Sanding walls and a little more.
Video: Sanding the ceiling without dust
In this article, we will learn how and with what to sand walls, what tools and materials need to be used, and we will get acquainted with interesting nuances that we may encounter during work. The same operation is also called sanding the wall.
Why do you need to sand walls?
All the procedures that we did before: plaster, putty - these are all procedures for leveling the wall. Plastering is rough, puttying is fine. And now the process of sanding or polishing the walls begins.
Even after applying a thin layer of putty, in any case, small irregularities and tubercles remain on the wall, formed mainly by the sharp ends of the spatula, which remain when we disperse the putty and connect one part of the putty wall to another.
That is why when putting putty it is better to use a large spatula so that the area of leveling the wall is maximized. But the joints, no matter how hard we try, can still be traced. Therefore, after you have puttyed the wall, you need to let it dry (at least a day) and you can start sanding the walls.
IMPORTANT!
Don’t try to accidentally prime the wall after puttying! Sanding begins immediately after puttying!
What tools and materials are needed to sand walls?
So, let's look at what we need to have to start sanding the walls.
A sanding block is usually used for sanding walls:
In addition to the block, for grinding you need to have sandpaper or a sanding mesh, which is fixed into the block before starting work:

Sandpaper is on the left in the picture, sanding mesh is on the right.
What to consider when choosing a whetstone and grinding material (sandpaper, mesh)
Sanding mesh
The advantage of the sanding mesh is that it does not become clogged with putty dust during operation. The mesh itself is perforated and all sanded off putty will pass through the mesh. It must be replaced during normal wear and tear, which is determined by the appearance of the mesh used. If the mesh is torn in places or you already feel that sanding is not as effective, replace the mesh with a new one.
Usually the mesh is sold in ready-made pieces directly to the size of the block and all you have to do is install it on the block and work. But, you need to remember that the size of the bars is also different, as shown in the picture. Therefore, when taking a mesh, immediately select a block to match its size. Mesh is more expensive than sandpaper.
Sandpaper
During operation, the sandpaper will become clogged with sanded off dust and the sandpaper will have to be changed more often than the mesh. You need to be aware that sandpaper, although cheaper than mesh, is also not a cheap material. It is sold completely various options: large rolls, small rollers, rectangular pieces.
If you decide to sand with sandpaper, then you need to figure out how you will cut it, taking into account the size of the block, so that there is as little waste as possible. You, of course, can refuse to cut the sandpaper and buy pre-cut pieces ready for bars, but this will be more expensive! There is a concept of sandpaper grit (paper with different grains).
In order not to blow your mind on this topic, buy paper with grain 60, 80 and 100 in small quantities at the store and try to work with it. There is no exact recommendation on what grain to take. But it’s better not to take less than 60 for sure, because it will be very rough sandpaper. More than 100 is also not very good, because it will become very clogged with dust during processing and will have to be changed very often.
IMPORTANT!
The walls that you will sand usually go on to either wallpapering or painting. In case of painting, the wall should be absolutely smooth, I would even say polished. In this case, the craftsmen sand the wall 2 times. The first time, for example, with 60-grit sandpaper, to remove obvious large frozen pieces of putty, and the second time, take even finer sandpaper, for example, with 120-grit sandpaper and polish the wall with it. But in the case of wallpaper, this is clearly a redundant operation. For wallpaper, just go over the wall once.
Catalog of grinding stones
Grinding process
The sanding process is much simpler than, for example, the process of puttying or plastering. All you need to do is take a block, attach a piece of sandpaper or sanding mesh to it using special clamps and start working. This is what the sanding blocks look like ready for use. On the left is a block with sandpaper installed, on the right - with a sanding mesh installed.

It can be seen from the figure that the size of a piece of sandpaper or mesh should be longer than the plane of the bar itself by exactly enough to be able to secure the sandpaper or mesh using the clamps of the bar on both sides.
IMPORTANT!
Remember, sanding walls is a very dusty job! Be sure to read the recommendations in the article before you start working.
When did you install grinding material onto the block and took all protective measures against construction dust, you can start working. It is best to start sanding the wall from the corner and move towards the other corner. I always sand the walls from top to bottom in small strips (about a meter wide). We sanded a meter wide strip from top to bottom and moved on to the next one.
How to sand walls? Take the block in your hand and begin to move it along the putty wall with slight pressure. Movements: up-down, left-right. The main thing is to make sure that in the place where the wall is already smooth, you do not need to continue rubbing for a long time. You must remember that if you rub for a long time, you can thus wipe off all the putty, which, of course, is not included in the plans. We made sure that the section of the wall was smooth, almost polished, and moved on.
It happens that you come to a section of the wall where for some reason a deep hole has formed. In this case, you do not need to rub a lot and for a long time around the hole in order to wear off the putty around the hole to its bottom. Leave this small area alone. Then, when you have sanded everything and primed the wall again, you simply take rubber spatula, which I mentioned in the article and fill up this hole again thin layer putty flush with the wall.
IMPORTANT!
Of course, I must tell you that sanding walls can be done faster if you use.
When you have done everything, take the building level in your hands and attach it to the wall. In any position of the level, its plane should fit snugly against the wall along its entire length. There should be no gaps. If gaps do appear, it means you have put too much putty in some places. Identify these places and try to grind them down with the same block.
That's all. In this article, we learned how and with what to sand walls. However, do not rush to paint the wall or glue wallpaper. After sanding they remained. Have you had problems with sanding? How often did you change the sandpaper on the block?
When carrying out renovations in an apartment or house, it is very rare to do without a layer of plaster on the walls, and only in cases where finishing is planned hanging materials. If we talk about painting walls or gluing wallpaper, then the question always arises - what to do after plastering the walls. In this article I will try to answer this question and talk about what needs to be done to ensure that further finishing lasts for many years and does not cause inconvenience.
Plastered walls require puttying
Preparation of plastered walls
First of all, it should be noted that before moving on to further finishing of the walls, the layer of plaster must be allowed to dry thoroughly. As a rule, this takes about a month, and at the same time there must be constant room temperature and air flow.
It is best if the plastering is done in the warm season, then you can simply leave open windows and doors. Otherwise, temperature changes may lead to surface destruction or cracking.
Proper drying must be given Special attention, since the plaster cannot be allowed to freeze, and at the same time, drying too quickly can have a bad effect on the entire coating.

When carrying out renovations in an apartment or house, it is very rare to do without a layer of plaster on the walls.
Plaster beacons
Another very important point, which is often neglected during renovation work. The fact is that all lighthouses are made of steel, and sooner or later corrosion begins to spread on their surface, which is quite capable of leading to cracking, or even destruction of the plaster layer.
Experts always advise removing beacons and sealing the grooves formed in their place with putty.
Important! Even galvanized beacons do not guarantee that corrosion will not begin. Of course, an additional layer of zinc will significantly increase the service life, but sooner or later rust will eat away the protective layer.
Beacons should be removed very carefully, and even before the plaster has completely dried. Of course, it will not be possible to avoid chipping, but the more carefully the removal is performed, the less effort will have to be spent on removing the formed grooves.

Experts always advise removing beacons and sealing the grooves formed in their place with putty
The next step is to level the walls as much as possible, that is, grout with coarse sandpaper or metal mesh. You can check the evenness of the coating by simply looking at the wall along it, towards the window. Thus, it will be possible to examine all significant irregularities and remove them.
You can also check the evenness of the plaster layer by applying a rule or any other flat object with a large plane to the wall.
After the surface has been grouted and all blemishes have been eliminated, the wall must be treated with a layer of primer, which will serve as additional adhesion to the next layer and will prevent the formation of fungus and mold.
Drying the soil layer can last from several hours to a day, depending on the temperature in the room and drafts, and only after complete drying can you move on to the next stage.
Selection of materials for further processing
The next stage before finishing is puttying, and here it is very important to choose the right materials. It depends on this how long the finish will last and what quality it will be. In total, there are three types of putty mixtures, and each one needs to be discussed in more detail.
The main difference is the binding component in the composition.
Cement putty
- Not afraid of moisture and large amounts of water.
- Resistant to temperature changes.
- Easy to apply, even if you have no experience in such work.
- Relatively low cost.
- It can be applied in a thick layer and reliably covers all defects and irregularities on the surface.

Cement putty
- When drying, cracks may form on the surface as a result of shrinkage of the material.
- It may take several days for the cement putty layer to completely dry, and only after that can you move on to the next layer.
- Poor adhesion to surfaces made of non-mineral materials.
The main advantage of cement putty is that it can be used in any room, even if the environment is very aggressive. It is also used for external works, since it is completely insensitive to moisture and, after complete drying, creates a reliable cover for the walls.
Advice! if it is necessary to apply several layers of putty, then their total thickness should not exceed 15-20 mm, otherwise the weight of the coating will be very large and peeling from the surface is possible.

The main advantage of cement putty is that it can be used in any room
Gypsum putty
- It does not shrink, and during the drying process no cracks form on the surface.
- Plastic and easy to apply.
- It has high adhesion to any surfaces, but only if they are treated with primer.
- Plaster has White color, and the putty contains no coloring pigments, due to which the paint is applied even layer and without gaps.
- It is very easy to level, and grouting occurs in the shortest possible time and without any particular difficulties.

Gypsum putty
- Gypsum is very afraid of moisture and instantly absorbs it, so gypsum-based putty can only be used in rooms with low humidity.
- Hardens quickly. The mixture needs to be diluted small quantities, in order to have time to apply it before the plaster sets.
- To achieve the appropriate quality of the walls, a minimum of two layers is required.
When choosing a gypsum-based putty, you should always remember that subsequently you need to wash such walls very carefully and only with a slightly damp sponge or rag.
Important! Gypsum mixtures should never be used for external work. Even highly resistant gypsum will not withstand the outdoor environment.

Preparing the mixture with a construction mixer
Polymer putty
Pros:
- It is not at all afraid of moisture and even large amounts of water.
- Can be applied in one layer.
- Has high adhesion to any surfaces.
- It dries quickly, but does not harden when diluted.
- Insensitive to temperature changes and can be used in the kitchen or bathroom.
- Does not absorb foreign odors.
- Does not lose its qualities over time and will last much longer than its competitors.
- The highest ductility compared to all types of putty.
- Does not crack when drying, and does not have natural deformation.

Polymer putty
- High price.
- Application requires at least basic repair skills.
Polymer mixtures can be used in any room, and even for outdoor work. This material is rightfully considered the highest quality and most durable, which ultimately affects the cost.
Advice! It is necessary to approach the choice of polymer putty especially carefully, since due to its high cost it is most often counterfeited.
If everything is determined with the choice of material, then you can proceed directly to applying it to the surface.

Polymer mixtures can be used in any room, and even for outdoor work
Final preparation of walls for finishing
Depending on the skills and experience of the person who will do the finishing, the type of putty mixture is selected.
They can be:
- In the form of dry mixtures that are diluted independently. This option is more suitable for specialists or when finishing a large area.
- As ready mixture in buckets. Such material is more expensive than dry mixture, but it does not require additional training. The mixture can be applied immediately, and straight from the jar.
Regardless of the form of putty, wall grouting and priming are necessary.

Grouting walls
The starting layer is applied with a wide spatula and away from the corners. You can move along the wall in any direction depending on your personal convenience.
After partial drying, you need to check the evenness of the coating and sand the surface again, but with fine sandpaper.
Next, the finishing layer is applied, which will serve as the basis for painting or wallpaper, so this is the most important and time-consuming stage.
The starting putty differs from the finishing putty in the size of the fraction in the composition, so the final layer should be perfectly smooth and without any differences.
If necessary, you can carry out another cleaning, but only with the finest sandpaper.
Now that the surface is leveled, it needs to be allowed to dry for several days, and only then proceed to the final finishing.