Very convenient to use. They are ideal for children at the stage of learning to read, helping to “set” their hand, learn to write and draw. In practice, they are used to create flowcharts, conduct lectures and teach. However, the cost of such boards is quite high and starts from 1,500 rubles. Therefore, many people have a question: is it possible to make a magnetic marker board with your own hands?
Materials and tools
You will need:
- for measurements.
- Nails, hooks for attaching boards.
- Screwdriver and hammer.
- Melamine or other suitable look plastic.
While working, be extremely careful not to cut yourself when handling the sheets.
Option one. Transparent board
First you need to decide on the dimensions of the future product. Depending on the purpose, the sizes can be any. A magnetic marker board 90x120 centimeters is suitable for teaching schoolchildren and drawing small diagrams. For young children, you can make a smaller board. For placement in a large office and for holding lectures, the dimensions of the product should be from 150 cm on the narrow side.

Melamine is sold in a building materials store. various sizes. This material has a durable plastic coating on one side, which will ensure the durability of the product. It is better to choose sheets with smooth surface, since they are easier to wipe and the inscriptions will be easier to read.
If you want to make a clear marker board, you can purchase plexiglass or Lexan. The latter option is thinner and more resistant to damage, weighs less, does not crumble, and has a beautiful glossy finish.
If you decide to make a magnetic marker board with your own hands, please note that the material is very thin - only 6 mm thick. You can hang the board on the wall, but if you plan to move it, you will need to glue a backing sheet. To use magnets, it is best to choose a sheet of steel and add plywood or cork board.
Please note that such a board should be placed on flat wall. If the surface is not level enough, the board will not be stable and writing on it will not be very convenient. Also, for convenience, you can attach a shelf for markers and rags to the finished product.
Now stores sell glider boards divided by day of the week. Automotive self-adhesive strips 3-6 mm wide are ideal for marking. If you make a magnetic marker board with your own hands, you can decorate it according to at will and depending on the purpose of use.
Option two. White magnetic marker board
To make a whiteboard, you can take any smooth material and cover it with several layers of paint and varnish. But it will fit perfectly steel sheet. It is cheaper, heavier and magnets attach well to it.
Cover the sheet with white paint in several layers. White is used, since all the colors of the markers will be clearly visible on such a surface. Each layer must dry well.

After all layers of paint have dried, cover the sheet thin layer clear glossy varnish. One of the best coatings again there will be melamine, which is not only solid, but also liquid.
Now you can frame the product, make shelves and hang the board. The shelf is made from a thin strip of metal and is attached to the bottom edge of the product. Framing will hide jagged edges boards.
- Markers should be washed using a dry sponge or soft cloth. It is better to use special markers designed for marker boards. After erasing the inscriptions, light streaks may remain on the surface. They are removed with alcohol. To avoid streaking, you can coat the melamine surface with wax, which is used for polishing cars.
- Cut material better with a saw for laminated materials or plywood.
- To make sawing easier, you can draw a line using a ruler and a knife. Then the material will not break during the cutting process. To prevent crumbling and grinding, you can apply adhesive tape to the cut line.

By making your own magnetic marker board, you can save a lot of money. This product will fully meet your wishes and requirements.
Good day, dear reader.
Today I would like to talk about how, in a few hours, with only 300 rubles in your pocket, and a bag of enthusiasm behind your back, you can make yourself one useful thing like a marker board.
The downloaded image is approximately three megabytes.
So let's get started
What we need:
- Glass from an old window
- Two bottles of white spray paint- 110 rubles/piece
- Coarse sandpaper
- Fine grit sandpaper
- Bucket of water + detergent
- Acetone or solvent - 60 rubles/can
- Rags
- Iron corners for furniture - 10 rubles per piece
- Wooden blocks
- Screws (large ones with dowels for mounting on the wall, and small ones will become clear why later) - 2 rubles = piece
- 2-4 hours time

(Not everything is here, but the main set is shown).
Step one: Looking for glass
The first problem you may encounter is finding the right glass. I was lucky, I found a suitable one on the fifth floor of my house. I can advise you to look at a landfill or some construction site, there is a lot of this stuff there. You can also order glass cut to the required dimensions from a glass workshop, but this will increase the final cost of the board by about seven hundred rubles.Step two: Prepare the glass for painting
Did you find glass? Great, now it needs to be cleaned. On my (window glass), in addition to dust and all kinds of dirt, there was also old Oil paint. Before painting, you should get rid of all this dirty tricks (we do it efficiently).We take a rag with detergent and water and clean the glass from dirt and dust. Then we take a piece of rag and acetone and begin to scrub off the old paint. Does it rub off? What a score! Wipe off all the paint and move on to the next step.
I was not so lucky, and the paint was not rubbed off with either acetone or solvent, well, we take sandpaper with fine grain and a rag soaked in solvent in our hands, now slowly, without putting too much pressure, we begin to carefully go over the paint with sandpaper, periodically wiping the area over which you are currently working with as a solvent.
Of course, this will leave small scratches, but after painting this will not be visible.
Somewhere in the middle of a rather long process, I realized that the sandpaper should also be moistened in a solvent, this helps a little.
Also, in order to do this, it is worth using a large-grain sandpaper to go over the end sides of the glass in order to round them off and avoid cuts during installation and use.

Step three: wash the glass
After there is no paint left on the glass, it is worth rinsing it thoroughly again in order to get rid of the remnants of acetone and various small nonsense that stuck on while getting rid of the paint.This is necessary for the paint to adhere. even layer and there were no hairs or particles of dust left under it.


Step Four: Painting
Well, everything is quite simple, although it requires certain skills.Take a respirator (preferably), rubber gloves, a can of paint and go! Spray the paint at a distance of about 10-15 centimeters, do not worry that the paint does not go on smoothly, poorly painted areas and stains remain (we are not robots), we will paint in four layers!
Attention!: The main thing is to avoid smudges; it is better to underpaint one of the layers than to get smudges, especially in the first two layers.
Aerosol paint dries quite quickly, about 7-10 minutes per layer.
When applying the final layer, you can slightly neglect the smudges, if there are clearly unpainted areas, and paint them better (you can apply not four, but five, six or even seven layers to these places).

(First layer) 
(Third layer)
Step Five: Check
Did you paint it? Everything seems fine, let's make sure.We turn the glass over with the unpainted side facing us and inspect it for poorly painted areas.
In case anyone hasn't realized yet, the unpainted side of our future board is the front one! Yes, yes, that's it. The marker glides on glass much better and can be wiped off several times better. And we painted the glass so that the marker was clearly visible on a white background, and not on transparent glass.
Step six: Prepare the fasteners
There are a lot of options for attaching glass to the wall. Can be used special fasteners which are sold in stores, you can drill holes in the glass and screw it to the wall. Or you can use ordinary furniture corners with small wooden blocks. I’ll tell you about the last option.We take a piece of wood and cut several blocks out of it, so that when you screw the block to the corner, there will be a gap of about half a centimeter between the corner and the block.
It is worth putting some kind of rubber gasket in this gap in order to protect the glass from direct contact with hard parts.
Unfortunately, I didn’t film the process of making the fasteners, but when you see the finished structure, you’ll understand everything.
We paint it to match the board, and go to the wall on which we are going to hang our board.

(Side view with gasket) 
(View from above)
Step Seven: Installation
If you managed to do everything that I described above and not break the glass, break your arm, or screw yourself to the floor, then I think that you will be able to drill several holes in the wall and screw the corners to them without my help. I’ll only tell you about the pitfalls that await you.The first step is to attach the lower corners, so that later you can measure where to screw the upper ones. I did it this way: I screwed the two lower fasteners, placed the glass on them, and placed the upper fasteners, marking their location with a pencil. Then it's a matter of small things.
Secondly, it’s worth noting that inserting a fairly large and fragile glass into such a structure from the side is quite problematic, so it’s worth unscrewing the top fasteners wooden blocks, insert the glass, and then return the bars back.
Thirdly, I would like to note that the glass recedes from the wall by about half a centimeter, which, if large enough, makes the structure extra fragile. I decided this problem by gluing about ten half-centimeter rubber gaskets to the back side of the glass. They prevent the glass from bending in the center when we intensively wash our soaps off it.
Step Eight: Rejoice
Are you laughing? Nothing funny, for the first 20 minutes I wrote various nonsense on this board or simply didn’t take my eyes off it, the quality of workmanship, accuracy, the fact that it looks almost the same as its analogues for several thousand and the fact that you made it with your own hands delivers paradisaic delight.
By the way
As practice has shown, such a board can not only help you develop a project or think of a brilliant plan to take over the world, it is also a great thing for a party:
Game 1: We blindfold one of the participants, put him in front of the board, hand him a marker, whisper so that no one can hear what needs to be drawn and in front, the rest guess.
Game 2: We draw on the board, for example: a donkey, a mora pig and a man, a blindfolded player needs to draw a tail for a donkey, a heel (nose) for a pig, a man, I won’t specify what we drew :), but you can draw a nose.
Finally
Within a month of use, the board showed itself to be excellent and fully repaid the time spent on its creation. I use it in almost every project I develop.As for the changes, I would make the fasteners a little more elegant, they stick out a lot.
I express my deep gratitude to the users taliban, Akson87, pel, as well as to all those who wished to remain anonymous, for increasing karma and the opportunity to write this post.
I would be very glad if a photo of such a board made by someone from the community appears in the comments.
I will be glad to see suggestions for improving the board, as well as the readability of the post, in private messages or comments.
Useful from the comments
1. The user gunnzolder suggested using ORACAL type film to add strength and get rid of fragments (in case of an accident), so that the fragments do not scatter around the room, but remain on the film.Thanks to them for the additions, I’m waiting for new proposals to improve the design.
No matter how hard I tried to write only about travel, one way or another the site turns into a blog about how to be a fun mom) Traveling with a child, playing, working and just a mom of all trades. It’s precisely this test for crookedness that I’ve been taking all the time lately, when I’ve taken on the task of arranging the house, and in particular the child’s room. After a trip to India, I got a second wind and started to come up with a bunch of ideas for the nursery. One of these ideas is a magnetic board for children, or rather one child and his young guests, on which you can sculpt magnets and draw with chalk.
I made it for my son with my own hands back in December. And the time has come to tell you how I succeeded;) I have been dreaming about a large magnetic board for a child for a long time. We had all sorts of magnetic construction sets that could be used perfectly on such a board. The small ones didn’t suit me at all, there’s not much room to move around in a small square, it’s boring :/
When I started monitoring this topic, I realized that the boards large sizes They are not cheap at all. Plus, if you have a huge board, then you immediately imagine a school one, on which you can write with chalk =) Moreover, it’s wooden and black - classic, and so soulful! And not these scary green ones that are everywhere now. There is no soul in them, no. Yes, and magnetic boards do not have it, they look cold and are not at all attractive, but with a child it is very important that it is cozy and attracts attention. In general, you understand my train of thought;)
And maybe all this would have remained just a wish if I hadn’t suddenly accidentally found out that in nature today there are special paints for school boards. And just on sale for home use. No, of course, I have repeatedly seen completely black walls on which you can draw with chalk, but somehow I didn’t think about what they were covered with. And here, wow, the paint is exclusively for school boards!!
The idea began to take on more concrete shape. I realized that I can cover a magnetic board with this paint and I will be happy :) But the prices for magnetic boards I was scared away. Then I Googled “how to make a magnetic board with your own hands.” And then I got another shock. It turns out that magnetic soil and magnetic paints exist in nature!!! That is, I just moved the brush and the piece of wood suddenly became “metal”! Well, aren't they miracles?? For me personally - miracles:) And even more so for my child, because now he cannot be torn away from this wonderful board;) Do you want one for your children? Then welcome to the cat for a detailed recipe;)
Estimate
Let's start with the estimate. That is, what materials I needed to create this board, how much they cost, and how much it all cost. I think the price issue worries many.
Basic materials:
1. Tikkurila paint for school boards (black) - 1069 rubles
2. Marabu magnetic soil - 986 rubles for two 225 ml cans. This price includes delivery by Russian post; I couldn’t find this soil in Perm. Perhaps you will find this soil in your city, then the delivery cost will be deducted. The average price for a jar of soil is 350 rubles. I needed two (depending on the size of the board).
3. Plywood (standard sheet: thickness - 6mm, side length - 1525x1525 mm) - 408 rubles + 30 rubles for cutting plywood, because I needed a size of 1200x800 mm. That is, the price depends on the size of plywood you take, as well as its thickness; it seemed to me that 4 mm would be too thin.
→ Intermediate cost: 2493 rubles*
*In principle, you can already get by with this set. Everything listed below is purely my initiative and idea. The functionality of the board is fully functional even if the three points above are present.
Additional materials:
4. Wooden slats for the frame (3 m x 2 pcs) - 60 rubles
5. White paint to cover the frame - 406 rubles. I took Tikkurila Pesto 10, but there is no point in taking a whole 1 liter can of paint, I just needed it for other purposes, and of course I spent very little on painting the frame. You can take any white one or whatever color you want depending on your room design. Small jars cost around 100 rubles.
→ Intermediate cost: 2493 + 466 = 2959 rubles**
**I decided to make a frame around the board to give it a more finished look. In addition, as it turned out later, thanks to the frame, chalk powder does not spill onto the floor under the board, but remains on it, from where it can be easily wiped off damp cloth. I chose the color white because all the furniture in the child’s room is white, and with orange walls, a white frame should look much more advantageous in my opinion.
Final elements:
6. Railing Byugel - 129 rubles. I took 100 cm, but if the board were smaller, you can choose a rail 55 cm long, and it will be cheaper.
7. Kusiner hanging pockets for storing magnets - 199 RUR. It is very convenient that nothing is lying around the house, because... There are more and more magnets and they are quite small.
8. Byugel containers for crayons and sponges - 78 rub. The price is for 2 pieces, in the white one we store multi-colored crayons, and in the black one there is a cloth for washing the board.
9. Bugel hooks— 49 rubles for 10 pcs. I will still include this in the expense, because... I bought it specifically to hang pockets on the railing. But in the end they turned out to be inconvenient for us, because... because of the hooks, Kusiner’s pockets reached almost to the floor (the board hangs at the height of a child, i.e. not high), it looked very ugly. And also the pockets kept falling off, because... The hooks gave the child no peace :)) So I removed them and simply tied the pockets with strings. Now they are securely fastened, they don’t roll back and forth on the crossbar, I like everything)
→ Final cost: 2493 + 466 + 455 = 3414 rubles***
***Be sure to consider the size of the board. I needed a fairly large one - 1.2 m x 0.8 m. Plus, not everyone needs all these bells and whistles from pockets and frames) Therefore, the cost can vary greatly depending on your requests. Well, don’t forget that I took the prices to the maximum, although the consumption of materials is much lower, for example, 1 liter of black paint is not needed at all. That is, you can team up with friends who also want such a board for their children, and split the cost of materials in half.
Manufacturing process
1. Prepare basic materials. Namely, magnetic primer and paint for school boards. 
I chose black because... I really wanted a classic board, but Tikkurila also has a standard green one. That is, you can make the board green.
2. Plywood is also already awaiting transformation)) 
As I indicated above, I took a sheet standard size and ordered cuttings so that I wouldn’t have to cut it all out myself. That's why they already brought the plywood home to me the right size. I chose 6 mm plywood thickness, because... 4 mm is too thin, it bends and it will be uncomfortable for a child to write on it, but 8 mm is already thick and more difficult to attach to the wall, because she is already noticeably heavier.
3. I processed all the edges of the plywood sandpaper. And then I started covering it with magnetic soil. 
The plywood itself was High Quality, there were no noticeable splinters or roughness on it, so there was no need to sand the entire surface. But it is recommended to wipe with a cloth to remove dust and dirt from the surface. If you are wiping with a damp cloth then of course you will need to wait for the surface to dry before applying primer.
4. Magnetic soil is very thick. It consists of small particles of metal, a kind of “iron” powder, so crushed almost into dust that it is not visible to the eye. It is very surprising to take such a small jar and suddenly discover that its weight exceeds half a kilo. Due to the metal in the soil, the mass increases greatly. It is applied in a thick layer, reminiscent of cement both in color and consistency. I covered it with a regular paint brush, smeared a layer horizontally, and the next one vertically, this way it covers the surface better. The soil dries quickly, so the jar should not be left open for a long time. 
Magnetic soil has the peculiarity that the more layers you apply, the stronger the magnetic properties. In principle, this is easily explained, because in this case there are much more metal particles on the surface. Therefore, I decided to completely use up both jars I had. As a result, two 225 ml cans were enough for me to cover with three layers of plywood measuring 1.2x0.8 m.
I applied each subsequent layer when the previous one was thoroughly dry. As I already said, it dries very quickly, but still, I gave the first layer time to dry deeply for 24 hours. I applied the next layer only a day later, and the third a few hours after the second.
5. After the layers had completely dried, I tried to attach magnets that were at hand. Hold on!!! Magic! :) 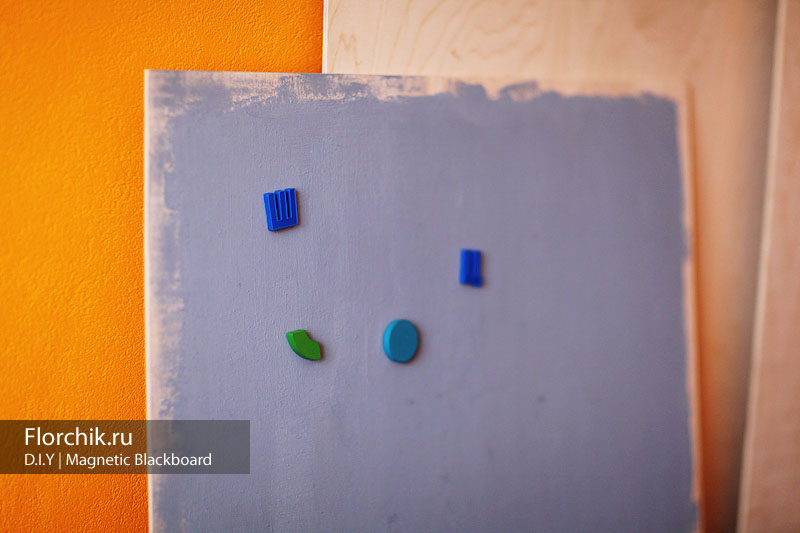
Please note that the edges of the board are not painted with primer. I just already knew that there would be a frame there, so I felt sorry for wasting magnetic soil on these unused areas in the future. I got it with great difficulty, because at first I looked for it all over the Internet, then it turned out that it was not available anywhere, in the end I ordered the last two cans and it took them a while to get to me by mail. In general, I was shaking over this magnetic soil =))) Because I tried to save as much as I could)
After coating, the surface was very rough, the primer was applied with some kind of small crumbs, I really wanted to sand the board at least lightly, but I imagined how much primer would fall off and that the magnetic properties would weaken, so I preferred not to touch anything at all. After all, it is also worth considering that under layers of paint these properties will also weaken.
6. Well, we got to the paint) Unfortunately, I didn’t have a photograph of how I painted it, although this is surprising, because... I remember exactly what I was filming. I will only show the result after this stage. The child and I immediately began testing, without waiting for other tricks to be attached)))

Tikkuril paint is easy to apply. I only needed one coat for a thick, even coverage. Its smell is specific, but not to say that it is pungent, and it dissipates very quickly. It looks like shoe polish)) It dries within a couple of hours, but I left it for a day, afraid to try it right away =) But the next day after painting, we already drew with chalk and washed it, and everything was fine;)
As a result, I only used 1/3 of a liter jar. I’ve already figured out where else to use it) But you can simply save it and over time, if the board loses its “marketable” appearance, just cover it with a new layer, and it will sparkle like new again;)
7. The next step was sawing the frames required size. Two pieces 1.2 m each and two 0.8 m each. Using a special nozzle, I cut out diagonal corners. I covered these slats with white paint. I also painted the railing with the same paint. Tikkurila Pesto 10 dries for almost two days and has a strong smell. The child had to sleep in another room. But it is ideal for both wood and metal, it does not need to be varnished afterwards and can be easily washed, which is why I chose it.
8. I screwed the railing to the board below with a screwdriver, measuring its location laser level. I planned to glue the frames with glue, but after the board hung on the wall. I wanted to use frames to cover the drill holes.
9. So, we got to the stage of attaching the board to the wall. I thought a lot about what would be the best way to hang it. There were thoughts about hinges and glue, but in the end it was decided that we would drill two holes at the top and bottom of the board. There are the same amount in the wall, we hammer in dowels there and screw the board onto the self-tapping screws. Why below too? Because if the board is fixed only at the top, then when drawing on it, it sways and bounces noticeably. If it is also secured from below, it fits very tightly to the wall and there is no movement.
10. I completed the fastening stage with frames, which I glued along the edges of the board using liquid nails. This is what they look like up close. Would you say that under this frame drilled hole? All holes are hidden) The screws, by the way, were chosen not with a round, but with a flat head, so the frame can easily fit tightly to the board. 
11. I hung pockets and containers on the railing. I put all the magnets and crayons we have in them. 
Focus on magnets with animals from Eric Carle's books. If you look closely, you can see above wooden magnets various geometric shapes, and even letters and numbers that we inherited from my sister) We also have plaster magnets, which we make ourselves using molds and then decorate, there’s also a lot of room for imagination, because There are also sea animals and vegetables/fruits and fairy tale heroes. In general, there are a lot of variations for games.
12. For example, an educational game was literally invented on the spot. Mishutka learned to draw waves and imitated the sea on the board. 
When I saw this, I simply asked to find it among all the magnets of those animals that swim in the sea. The child did not make a single mistake; the octopus and gold fish. And I told him to take the polar bear, because... he also swims in the sea and catches fish. This is how a child develops, simply learning everything new in the game.
Well, in the end, to complete this post, I’m posting a view of the finished result from the outside. The photo is not staged, sorry, but this is the only shot I found where the entire board is visible) A child writes the letter A =)) 
I’ll make a reservation that I don’t teach him letters. I think that at this age there is no need for this. But he played ABC on his phone a couple of times and this is the result. Well, again, knowledge in the game is not forbidden;)
Large white boards that you can write on with markers and then wipe dry are great for presenting information visually. Instead of buying such a board, you can make it yourself to save money! A large board can be made from such inexpensive materials, like plastic or foam, insert it into a frame and hang it on the wall. If you want magnets to stick to your board, try painting the steel sheet. You can also make it from paper and plastic small boards that are convenient to carry with you. Among other things, you can write down various notes and reminders on a whiteboard, which will make your life a little easier.
Steps
-
Measure the dimensions of the board according to the amount of free space. Choose the board sizes at your discretion. At the same time, measure the free space on the wall in advance so that you know how much material to order. Take a measuring tape and determine the dimensions of where you want to hang the board. Write down the dimensions you measured and take your notes with you when you go to the store.
- Most of the materials needed for a whiteboard are sold in sheets (e.g. 1.2 x 2.4 meters). If the home improvement store doesn't have the size you need, you can usually place an order accordingly.
-
Buy a sheet of melamine to make a traditional whiteboard. Melamine is a fiberboard (fibreboard) with a hard coating on one side. Most commercial whiteboards use melamine, so you know what to expect from this material. Some sheets have a tile-like texture, which can be useful if you need to break up information into individual squares, but it's usually better to choose a smooth sheet. Smooth sheets are easier to wipe, and the inscriptions on them look neater.
- You can also choose a porcelain finish. It is more durable than melamine, but also more expensive.
-
Choose a sheet of plastic if you are going to make a transparent board. Try using Plexiglas or Lexan for something special. Acrylic and polycarbonate sheets are transparent so you can see the wall behind them. When you write on a board like this, it looks like you are writing on a wall. Of these materials, it is better to use Lexan, as it is about half as thin as plexiglass, weighs less and will not crack if you want to drill it to hang it on the wall.
- Plastic boards don't stand out as much in most spaces and look good against white walls. Can be purchased large leaf plastic covering almost the entire wall to have enough space. Plastic is very easy to clean and lasts longer than melamine.
-
Purchase decorative wood slats to frame the board. The slats should be longer than the sides of the board so that you can trim them when you make the frame. For example, for a 0.6 × 1.2 meter board, two 2.4 meter long slats are perfect. The frame will hide the rough edges of the board and create a border that is pleasing to the eye. Additionally, a board with a wooden frame is usually easier to hang on the wall. The frame is quite easy to make from wooden slats or planks.
- Decorative slats cost a little more compared to others necessary materials. If you want to save money, try using unwanted planks you have around the house.
-
Measure and cut the slats using miter box . Use a measuring tape to determine the length and height of the board. Measure these distances and mark them with a pencil on the slats from which you are going to make a frame. After this, insert the staff into the miter box and align the pencil marks with the saw cutouts. Insert a handsaw into the appropriate notches and cut the slats at a 45-degree angle.
- Fold the slats to check that they fit snugly together. If you cut them correctly, you should end up with a frame like those used for paintings. If the ends of the slats do not fit tightly together or overlap, cut them again.
- If you have a circular saw, you can use it to cut wood slats faster.
-
If you plan to stain the wood, sand the slats with 120 and 220 grit sandpaper. After this, the paint will better adhere to the surface of the wood. Start with 120-grit sandpaper and rub the surface along the grain of the wood, applying light but consistent pressure. Next, go over the wood with 220-grit sandpaper to smooth out the surface.
- Sand the wood along the grain to avoid leaving unsightly scratches.
-
Apply to wood stain to give it the desired shade. Select a stain and apply it along the grain of the wood using a foam brush. Apply the product in continuous sweeping movements along the entire length of the slats. Then wait up to 15 minutes for the product to absorb before applying the next coat. The extra layers will make the wood darker, and the frame will look much more attractive when you hang the board on the wall.
- Wear gloves when working with stain. If you apply too much stain, blot the excess with a rag before it soaks into the wood.
-
Glue wooden frame to the board using clear epoxy glue. Make sure the frame fits snugly against the board before gluing it down. When you are ready to attach the frame, apply glue to the back of the wood slats. Place the slats against the edges of the board and press down if necessary to secure in place. Also add glue where the slats meet each other so that they stick together.
- Epoxy glue is often sold in two parts. To obtain glue, you need to mix the resin and hardener in a 1:1 ratio.
- You can also use acrylic glue or polymer superglue. Polyurethane construction adhesive is great for attaching foam sheets to wood, since foam doesn't respond well to most other types of adhesives.
-
Secure the board to the wall with screws. Measure 30cm intervals along the frame. Using a cordless screwdriver, drive 5cm screws into the wood frame and the wall behind it. At the same time, ask someone to hold the frame with the board. The screws must be screwed into the support beam, otherwise the board may fall and break.
- To find a support beam in a wall, use a discontinuity detector. As you move along the wall, a sensor on it will light up when you hit a beam. Mark the appropriate places so that you can then secure the board as securely as possible.
Metal magnetic board
-
Buy a metal sheet appropriate sizes. For your whiteboard, you'll need something thin and durable. Metal is perfect for this purpose. If you need magnetic material, choose galvanized steel sheet. In this case, you can not only write and draw on the board, but also attach magnets to it.
- Please note that although aluminum appears good choice, since it is lighter than steel, it does not attract magnets.
-
Attach a sheet of wood to the back of the metal to make the board stronger and stronger. Many whiteboards are made up of multiple materials. Place a sheet of wood under the metal to make it easier for you to hang the board and write on it. A soft, lightweight cork sheet works great, although plywood or something similar can also be used.
- Try to find a sheet of wood the same size as the future board. In this case, you do not have to cut the wood to fit the dimensions of the metal sheet.
- If the tree leaf is too large, you can cut it hand saw. Many hardware or building supply stores will cut the board to the size you need if you ask to do so at the time of purchase.
-
If necessary, cut the metal sheet to the size you need using tin snips. It all depends on how big a board you need and how much space you have for it. If you need to shrink a metal sheet, use straight shears to do this. sheet metal. Carefully cut the metal to match the dimensions of the back sheet of wood.
- After cutting metal, sharp edges remain. Be careful not to touch them. To avoid cutting yourself, you can wear leather gloves.
- Eat different kinds metal scissors. Choose scissors with yellow handles - they are best for getting straight cuts, which is what you want for a rectangular board.
-
Spray the metal with primer if you plan to paint it. Although there is no rule that boards must be white, it is customary to paint them in such a way that ink of all colors is visible. First, coat the metal with an anti-corrosion latex primer. Apply it with sweeping, even movements along the entire length of the metal sheet. While doing this, hold the can of primer about 15 centimeters above the metal surface.
- Before applying primer, wipe off any visible dirt from the metal. To do this, take a soft cloth moistened with water. You can also use white vinegar or mineral spirits to better clean the metal surface and prepare it for painting.
- To achieve a smooth, even finish, apply a second coat. Before doing this, wait about 15 minutes for the first coat of primer to dry.
- Dry erase markers work great on bare metal, so there's no need to paint the board if you don't want to. If you prefer a shiny metallic finish rather than a standard white finish, leave it as is. However, keep in mind that in this case the marks from darker markers will be slightly less visible.
-
Paint the metal with dry erase board paint. Be sure to check the mixing instructions on the paint can. Mix the paint itself with the supplied liquid activator and wait about one hour for the solution to settle. After this, apply the paint to the metal with a foam roller. Try to make the paint layer as smooth and uniform as possible, and there are no irregularities left on it that will create inconvenience when writing.
- The white board should be smooth and uniform. Dry erase markers don't write well on rough surfaces, so take your time and try to apply the ink correctly.
-
Wait 10-15 minutes before adding additional coats of paint. After the first coat of paint, the whiteboard will likely not have the finish you want. Apply additional layers of paint over the first one so that it is thick enough to write on. Since metal has dark shade, try applying 3-4 layers of paint. Wait a while before applying each subsequent coat of paint to allow the previous one to dry.
- Cover the metal with an even coat of paint. Apply additional coats until you are happy with the surface quality.
-
Glue the painted metal to the wood back sheet using epoxy glue. Epoxy glue is quite aggressive, so wear rubber gloves before working with it. Stir the glue with something you can throw away, such as a wooden paint stick. When ready, apply the glue directly to the piece of wood in a thick, continuous layer, as if you were frosting a cake. After this, place a metal sheet on top of the glue with the painted surface facing up.
- Sheets can also be glued together using polyurethane-based superglue or silicone construction adhesive.
-
Wait 72 hours for the paint and glue to cure completely. It is too early to use the board - it needs time to dry completely. Once the glue has cured, you can hang the board without worrying about the sheet of metal slipping and crashing to the floor.
- Do not write on the board until it is completely dry.
-
Hang the board using picture mount adhesive strips. Remove the paper covering the strips and place one strip on each corner of the back piece of wood on the board. The other sides of the strips will remain sticky, so press the board firmly against the wall. Press down on the board for about 30 seconds to ensure the strips adhere properly to the wall. Then check to see if the board is securely fastened.
- Picture mount strips are the only way to hang whiteboard without drilling holes in it and the wall.
- If you want to hang the board on your refrigerator, use a little glue to attach magnets to the corners. Epoxy glue, superglue, or any other sufficiently strong and durable glue will do.
- Another possibility is to screw the board to the wall. You can also purchase a metal picture hanger, attach it to the wall, and hang the board on it.
Small cardstock boards
- Cut a piece of card stock the same size as the cover. Thick cardstock paper is great for giving the board the rigidity it needs for writing, although regular paper can also be used. Covers are usually designed to hold papers, so you don't have to trim them. If the cardstock is larger than the cover, cut a matching sheet of cardstock to stiffen the board.
- Although plain paper is less rigid than cardstock, you can always change it. For example, it is very convenient for students. You can put down a math worksheet and then change it for something else.
-
Measure and mark all the borders you are going to put on the sheets. Secure the plastic sheets with duct tape to make them look neater. Select a colored ribbon, measure its width and divide by 2. Using a waterproof marker, draw lines on the plastic sheets at the same distance from their edges.
- Use adhesive tape to cover the edges of the plastic. In this case, half of its width will be on the front, and the second half - on the rear sheet of plastic. You will paste the tape so that its edges coincide with the lines drawn with the marker.
-
Apply tape to the cover to hold the sheets of plastic together. Wrap duct tape around the edges of the plastic to hold it in place. Smooth out the tape - you have a white board. Leave plastic covers on at least one side with tape so you can change the paper between them.
- If you are not going to change the paper, tape the plastic covers on all four sides. Be sure to place cardstock paper between the covers before sealing the last side.
- Another method is to wrap cardstock paper in plastic film. You can use adhesive plastic film or glue the plastic using clear decoupage glue. Plastic or foam board
- Sheet of melamine, plexiglass or Lexan
- Decorative wooden slats
- Manual or a circular saw
- Miter box
- Epoxy adhesive
- Wood stain
- Foam brush
- Cordless screwdriver
- 5 cm drywall screws
- Inhomogeneity detector
- Galvanized steel sheet
- Plywood or cork sheet
- Anti-corrosion latex primer
- White paint for dry erase boards
- Wooden stick for mixing paint
- Epoxy adhesive
- Adhesive strips for attaching pictures
- Magnets (if necessary)
- Metal scissors (if necessary)
- Report covers or plastic film
- Cardstock paper
- Scissors
- Ruler
- Adhesive tape
Metal magnetic board
Small boards made of cardboard
An irreplaceable thing in the house is a magnetic board! It contains memories of the life of a single family. How to make it yourself? We will tell you how to make this necessary thing yourself in just a few hours.
Materials and tools
Wooden frame;
Board or piece of hardboard;
Magnetic soil;
Finishing varnish;
Shells;
Sanding sponge;
White acrylic paint;
Decorative cord;
Hot glue gun;
Magnets;

How to make a magnetic board with your own hands: step-by-step master class
1. Cover the surface of the hardboard or thin board with acrylic primer. We wait until the layer dries properly.
2. Apply primer with a magnetic effect on top of regular primer. In total, you need to apply at least 5-6 layers of this primer with intermediate drying of each. If you apply fewer layers, the magnets will not stick to the surface.
3. Let's start decorating the frame. Sand it with a sponge and remove dust with a damp cloth. Paint the frame white acrylic paint. For this, it is best to use a flat synthetic or bristle brush.
4. We decorate the frame with a decorative cord, but first tie a beautiful sea knot at one end. Fold the cord into a loop. The short end should be under the long one. We make the same loop, but in reverse side. In the process we intertwine the loops with each other.

5. Attach the sea knot to the frame using a hot glue gun. We also glue the cord, adjusting and fixing its tension as we work.
6. Also you without special labor You can make your own original magnets. To do this, simply glue small magnets inside the seashells.
You can make such a board of any shape and size, as well as any color. Many people use special paint for Tikkuril school boards - there is black, green, and other colors.
The shape of the board can be made in the shape of any animal - an elephant, for example, or in the shape of a racing car. Interesting idea- a magnetic board in the shape of a pillar for posting announcements and posters. The main thing here is that the color and shape match overall design your apartment.
I would also like to note that there is now a special magnetic primer and magnetic paint on sale. Use them to make your work easier.
Video materials on the topic of the article
Magnetic board in a couple of hours:
Training video - homemade marker board:
Another interesting master class on this topic:
You might also like this homemade magnetic stirrer:


