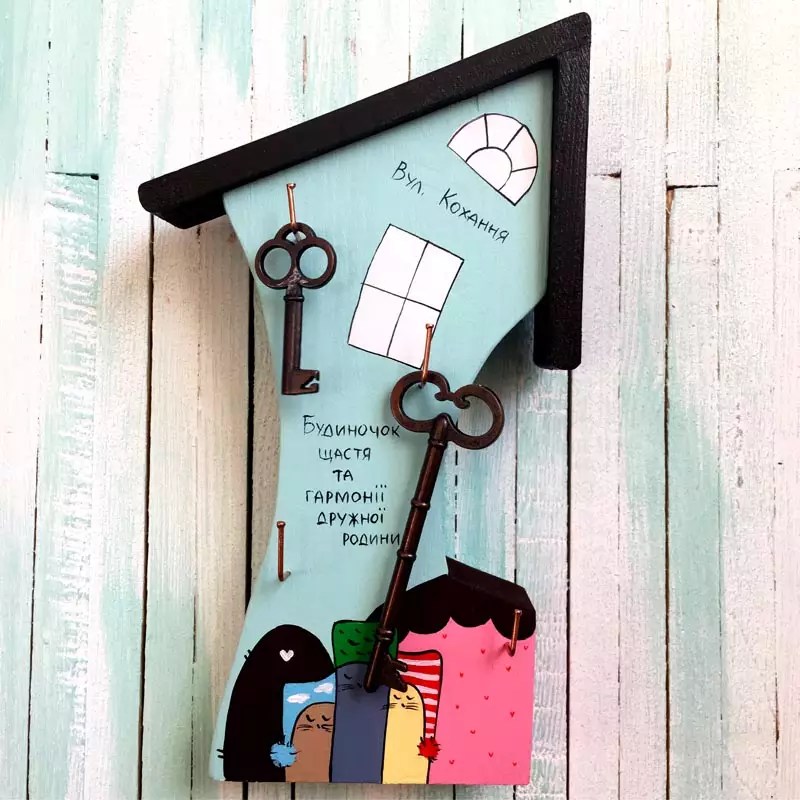
To avoid being in difficult situation when leaving home, you should take care permanent place for storing keys. For this purpose, most people use a key holder with a sufficient number of places. Having placed it in a convenient place, it is difficult to forget your keys when leaving for work or for a walk. When you return, you can quickly secure the ligament in its designated place. If you make a wall-mounted key holder with your own hands, it will definitely become a stylish element. You just need to show your imagination and carefully read the master class on making a specific model.
Read in the article
Wall-mounted key holder: a photo will help you find an idea
Having decided to make a wall-mounted decorative key holder on your own, you should decide on the size and design. Numerous photos presented by the authors are so useful device, will allow you to find a suitable idea for subsequent implementation. You just need to decide which model deserves attention.

Can be used to make key holders various materials. Depending on the stylistic design corridor or preference is given to metal, wood, plastic, leather, their combination, as well as a number of other materials. The shape and design of the product is selected individually.

Wall-mounted key holders for the home have Beautiful design, and therefore can become a stylish element. You just need to show your creativity, come up with an interesting shape and choose a non-standard design.
Most often, the wall key holder is made open. In this case, you can quickly place the key in the designated place. Closed models require a special door that must be opened before taking or hanging the key. On the one hand, you don’t have to worry about accidentally falling the ligament. On the other hand, you will have to spend a little time opening/closing the door.


The functional purpose of products can be broader than simply storing keys. A wall-mounted key holder with a clock will allow you to control the time. When you are late for work, you can appreciate this opportunity. You don't have to waste precious minutes constantly checking the remaining time.

Product size may also vary. It all depends on their purpose. Key holders can be:
- Wall-mounted. Located on the wall closer to the exit;
- Pocket. Prevents keys from being lost inside the bag;
- Tabletop. Closed models installed in the corridor;
- Cabinets. A suitable option for those who have . I’ll use the closet doors so I can manage them more rationally. limited space hallway
The purpose of the product affects its dimensions. As a rule, wall key holders are large, and pocket key holders are small. This allows the latter to be carried not only in a purse, but also in a trouser pocket, reducing the risk of rubbing the fabric.

Various materials can be used to make all types of products. Each option deserves special attention in the selection process. It is worth studying the features of each material separately, so that later you can make right choice.

Making a wall-mounted wooden key holder yourself
Do-it-yourself wall-mounted wooden key holder is made from wooden elements, connected by means of nails and screws, as well as hooks. The simplest option would be a wooden board of small width into which a certain number of hooks are screwed. The manufacture of such a product requires a minimum of time. You can make a beautiful product even if you have no carpentry experience.

If you can’t make the product yourself, buying a wall-mounted wooden key holder can become optimal solution. You can always pick up best option for a specific one, choosing an open model of an interesting shape.
Wall-mounted metal key holder for high-tech interiors
Metal products are highly durable and have large capacity. They are in demand in offices, schools, and business centers. IN residential buildings fixtures can add solidity and give uniqueness to the interior. They look especially advantageous in ones decorated in the Techno style, or.

Making a beautiful metal product on your own is quite difficult. The lack of special equipment will not allow the formation of a strong connection of individual elements. It is best to buy a metal wall-mounted key holder in an online store. The price here is usually lower than in regular stores, and the assortment is larger.
Metal products have a number of advantages. They:
- They don't burn;
- Do not melt;
- They retain their shape well even under significant mechanical stress;
- They can withstand temperature fluctuations even if there is a special protective layer.
DIY plywood key holder: simple and tasteful
Good for cutting. It allows you to create a product of any shape and size. It is enough to use it to become the owner of a stylish and functional product.
The advantages of plywood products include:
- Dimensional stability. The material is manufactured in a factory, and therefore its characteristics are known in advance;
- Light weight. The finished product can be mounted on any wall;
- Easy processing that can be done at home;
- Smooth surface, which reduces the requirements for subsequent finishing.
You can make a wall key holder with your own hands at the same time as key rings. They can be used instead of hooks. It is enough to align the keychain with the groove prepared for it.

To make such a product you should:
- Purchase plywood with a thickness of less than 10 mm and rings with chains;
- Prepare a jigsaw;
- Cut to life size. The key holder itself will consist of an upper, lower part and key rings;
- Transfer the contours of the template onto the plywood;
- Using a jigsaw, cut out the elements of the future product;
- Use sandpaper to polish the cut line;
- Drill holes in the key rings for the rings;
- Connect the upper and lower parts of the key holder. PVA glue can be used as an adhesive;
- Finish the product and key rings.
Making a key holder with your own hands from cardboard
To ensure that the finished product holds its shape well, you should use thick cardboard for its manufacture. It is not necessary to purchase it specifically. You can use a box of cookies or any other product. This will significantly reduce the cost of making a key holder.
The photo will help you understand how to make a wall-mounted key holder with your own hands from a box. Based on the images presented, you can develop a sketch of your own product. It will help you understand what materials will be required to make the product. In addition to the cardboard itself, it is worth preparing hooks and materials that will be needed for decoration. Considering the low resistance of cardboard to mechanical stress, it is possible to provide plywood overlays.

Examples from other materials: take advice
Are somewhat popular combined designs, in the manufacture of which they use different materials. Plastic products are popular. They can be used in any conditions. When making wall-mounted key holders with your own hands, photos on the Internet will come in handy, allowing you to choose the appropriate design.

DIY key holder: master class
The sequence of work will depend on the purpose, type of product, material used, as well as the desired design. You should work carefully, carefully completing each step. Special attention should be paid to the design of the product. The decoupage technique will allow you to form beautiful drawing on the surface even in the absence of specialized education.
Making a pocket key holder
If the product is planned to be carried in a purse or pocket, its size should be relatively small. You should focus on the dimensions of the largest key in the bunch. The material from which the key holder will be made must be durable and soft at the same time. Most often, preference is given to natural or artificial leather.

Do-it-yourself pocket key holders are made in the following sequence:
- We prepare the material and tools: leather, ruler, awl, strong thread, scissors, preferred fastener. We are working on a sketch of the future product. Attention is worth paying to the smallest details. It is better to depict the sketch in full size;
- We cut out two parts: large and small. The width of the larger one should exceed the dimensions of the bunch by 2 cm. In this case, the keys will be conveniently placed inside. The length should be twice the length of the largest key + 8 cm, of which 5 cm will be for the parts of the one-piece valve. The little one will appear internal part valve to which the mating part of the fastener will be attached. It should be 1 cm narrower than the wide part, and the length should be 4.5 cm. This is 0.5 cm less than the valve itself;
- Sew on the fastener. The length of the Velcro should correspond to the dimensions of the front of the key holder. It should be fixed on a piece of thick fabric. To form stitches, use an awl to make holes in the leather. The Velcro should be located 2 mm from the edge. The main and counter parts are sewn on. The last one is to the inside of the valve;
- We apply decoration. The product can be decorated using embroidery or decoupage. The applique also looks beautiful;
- We connect the inner part of the valve with the main part. We make holes around the perimeter of the product in 3 mm increments. Sew from the inside to sewing machine or by hand, using a needle-forward stitch;
- We cut out a narrow strip of leather with which the keys will be attached. Sew one end to the bottom corner. We fold the other end into a loop and secure it. The ring will be used to attach a ring intended for a key ring.

Making a wall key holder
You can make a wall-mounted key holder with your own hands in different ways. One option would be to use a branch of any tree. Preference should be given to oak, larch or other wood. It is advisable to select a workpiece original form. The work is performed in the following sequence:
| Photo | Description |
 | Use sandpaper to sand the wood. It is advisable to completely get rid of the bark, as it can cause insects. |
 | Drilling into a piece of wood required amount holes that will be used to attach hooks and fix the finished product to the wall. The diameter of the hole is selected smaller than the diameter of the hook thread. |
 | Using stain, the finished product is given the desired tone. After the composition has dried, the raised fibers are removed from the tinted surface using fine sandpaper. |
 | The surface is coated with varnish, which gives the product a characteristic shine. Depending on the desired result, preference can be given to a matte or glossy composition. The choice will depend on the desired shine. We attach the key holder to the wall and screw in the hooks. |
A housekeeper for the hallway with your own hands made of wood will look beautiful in or. For , issued in modern style, this option may not be the best choice. Various designs applied by electric burning can be used as decoration. Other options are also possible. For example, drawing a picture.
Decorate using decoupage technique
You can decorate a wall-mounted key holder with your own hands using the decoupage technique as follows:
 | The table on which the work will be performed is being prepared. The tabletop can be covered with old oilcloth or a standard garbage bag. Prepare a blank for the key holder to be decorated, white acrylic paint, sponge. |
 | We dip the sponge into the paint and use a blotting motion to paint the workpiece. Using a sponge instead of a brush allows you to add a unique texture to the surface. If there are unpainted areas, you can use a brush. As a rule, the area where the hooks are attached is painted in this way. |
 | Let the workpiece dry. The paint should not remain on your hands. It takes about an hour for the painted surface to dry completely. Apply a second coat and let the product dry for two hours. If the formed layer turns out to be heterogeneous, the base is visible in some places - another layer of acrylic paint should be applied. |
 | Cooking adhesive composition, consisting of an equal amount of water and PVA glue. With its help, the napkin will stick to the base. |
 | We are preparing a napkin. If it is three-layered, separate it upper layer. The rest will not be needed for work. Extreme care should be taken not to damage the decor. |
 | Using a fan-shaped brush, apply the adhesive composition to the key holder. Carefully glue the napkin in the direction from the middle. Carefully tear off the excess. Apply an additional layer of glue along the edges. Leave until completely dry. |
 | Apply a layer acrylic varnish using a brush. Let the layer dry. To ensure a sufficient level of protection for the formed decor, a minimum of five layers of varnish should be applied. This will allow you to securely fix the pattern on the surface and give the surface a characteristic shine. To give clarity to the formed contour, black acrylic paint can be applied to the edges of the product. After complete drying, any irregularities on the surface of the product can be removed using sandpaper, and then several layers of varnish can be reapplied. |
Article
The key holder represents convenient device for storing keys.
Wall model. Wall-mounted key holders are hung on the hallway wall. Design feature this object is its fixation on wall surface and the presence of hooks or other fasteners for keys.

Pocket model. This model is a wallet and is convenient because it allows you to store all your keys in one place.

Tabletop design. This model looks like a box in which keys are stored. The design, shape and decoration of this model may vary.

Cabinet design. Externally, this model resembles a small cabinet with doors.

How to make a key holder with your own hands
A key holder is a universal item because you can store not only keys in it, but also other small things, such as glasses or mobile phones. If you plan to place more than just keys in the key holder, you will need to install additional fasteners in it.

Wooden key holder
Many people are interested in how to make a key holder out of wood? Making a wooden model of a key holder is not at all difficult; it will require scraps of plywood, acrylic-based paints, varnish and several napkins, as well as several brushes, glue and fasteners.

First, you need to cut out a rectangular or square shape and polish it. Then the workpiece is painted and varnished several times. After this, hooks for keys are attached to it.

Key holder with lock
More difficult option is a cabinet key holder with a lock. To make such an item yourself you need to have certain skills. You can also watch how to make a key holder with your own hands, master class.

Pocket key holder
A fairly simple way to make a key holder is to sew it. To do this you will need pieces of leather, thread and a DIY key holder pattern.

First, using a pattern, parts are cut out of leather, which are then sewn together. If desired, such a product can be decorated with beads or ribbons.

Frame key holder
If you have unnecessary photo frames or picture frames at home, you can use them to make an unusual key holder. For this you will need: plywood, glue and fasteners. This key holder can be decorated in different styles using a variety of materials.

Decor
When making a key holder, it is important not to forget about the decor, because it is a full-fledged element of the hallway interior. Wooden crafts usually wear makeup acrylic paints or varnished. Extensive range of paint colors acrylic base with a matte or glossy surface will allow you to create an interesting design.

Varnishes of different textures look no less impressive on wooden surfaces, creating a matte or glossy surface. A varnish with a 3D effect looks especially beautiful on wood, making the product voluminous with a convex pattern.

If desired, you can create wooden surface aging effect using textured paste.

Some people use the crackle technique to decorate the key holder, which creates the illusion of cracking. Moreover, the varieties of this technique depend on the composition that will be used in the process.

Keys are a very important item, with the help of which we enter the house and open all the doors, drawers and cabinets. But often people forget them at home and lose them; to do this, you need to arrange a storage place for them that will always be in sight, convenient, reliable and visually attractive.

Of course, you will have to tinker with the key holder, but it will save you time looking for the keys, save your nerves, and become a bright, spectacular element of the hallway interior.

Of course, nowadays you can purchase a ready-made version, however, a thing made with your own hands will be original, stylish and suitable just for you.
Tired of constantly looking around the house for your keys? I bring to your attention six ideas for making a key holder with your own hands from scrap materials. Thanks to this accessory, they will always be in one place known to all household members.
Ideas that you can bring to life in your own workshop
Of course, you can simply buy a key holder for the hallway. But when you start choosing for yourself suitable model, it turns out that:
- Price so simple product very considerable;
- They do not have any complex structural components, which could not be made independently.
So, the question arises, why overpay for a factory model, which, moreover, can be found in the apartment of friends, if you can make an original key holder literally from cheap cheap materials at hand?
Idea No. 1: a board with a slot
It is enough to take a polished board that could remain with you after some home renovation, and make a slot in it with a router. That's it, the basic key holder is ready. In this case, depending on the position of the slot, the following options are possible:
| Photo | Description |
 |
Horizontal slot. The keys fit comfortably, but may touch each other when you take them out. |
 |
Vertical slots. In this case, the keys do not interfere with each other, but they require large key fobs, which are not very convenient to carry in your pockets. |

You can even secure such a wooden product using simple double-sided tape, because the load on it will be small.
Idea No. 2: board with hooks
If you have several hooks for clothes, you can make a key holder using them:
| Photo | Description |
 |
|
 |
|
 |
Screw it in in front there are hooks for keys, having previously drilled holes for them. |
 |
Testing. |
Idea #3: frame
Beautiful key holders for the home are made from frames. Here we can also highlight several different approaches to the manufacturing process:
| Photo | Description |
 |
Frame decoration. In this case, the structure for storing keys is made in the same way as in the previous paragraph, but in the end it is also decorated with baguettes. |
 |
Hooks in a frame. Here the wall key holder is made from a frame by screwing hooks into it. |
To make a key holder from one frame, only wood or MDF is suitable. Cast or overlay moldings will crack when drilled.
Idea #4: locker
A wall-mounted key holder in the form of a locker has two main distinctive features:
- Positive: lower or upper wall design - a ready-made shelf for various small accessories;
- Negative: combines only with classical and old Russian styles.
It is noteworthy that the cabinet itself does not have to be assembled from scratch; it is quite possible to use ready-made frames:
| Photo | Description |
 |
Case from an old watch. If you have a ready-made frame, making a key holder with your own hands is very simple:
|
 |
Old box. Here, in addition to hooks, you will also need to consider a system for attaching the product to the wall. |
 |
A box from old furniture. Here also:
|
If you plan to assemble the cabinet yourself, then the following diagram will be useful to you:

Idea No. 5: plywood figure

The most original designs for storing keys can be made from pliable plywood. The principle of installing hooks here is the same as in the case of a regular board. Only now the background will not be in the form of a simple rectangle, but will take the form of any figure you desire.
How to make a key holder from wood-laminated board? Let's highlight five main steps:
- We create the desired drawing in pencil on a sheet of paper or in any graphics editor, then print it out;
- We transfer image on a sheet of plywood using carbon paper;
- Let's direct electric burner circuits;
- Cut it out hand jigsaw;
- Sanding m and decorate.

Idea No. 6: tree branches

Another way to achieve originality is to use branches and twigs from trees. Cut them to the required size, connect them with self-tapping screws and paint.
Decoration
The decor also allows you to add a key holder to your look original solutions, make it as suitable as possible for the surrounding interior, or even turn it into a real attraction in your hallway.
Let's consider the most popular decoration options:
Polymer clay

This material allows you to create a three-dimensional design for your design. This is done like this:
- Knead thoroughly bar polymer clay until soft and pliable;
- We fashion from it a plate with the desired ornament or even figurines with hooks. It all depends on your creative idea;
If the bar is very difficult to handle with your fingers, drop a few drops on it vegetable oil. This will make the process easier and faster.
- Bake the finished product in the oven at a temperature of +120-139 degrees Celsius until a brownish crust appears;
- Turn off oven and let the craft cool without removing it;
- We apply acrylic varnish or paint;
- After drying, install on the key holder.

Decoupage
In the decoupage technique, there are two options for applying an image to the surface to be decorated:
- Straight. The base is primed with a special compound, after which PVA glue and the paper picture itself are applied to it;

- Back. This is, in fact, just a decal that can be purchased at a specialty store.
Conclusion
You have become familiar with several ideas for making key holders and methods for their subsequent decoration. The video in this article contains additional material. In the comments you can ask any questions on the topic.

What is a person most often looking for before leaving home? This could be a mobile phone that you have to call from another or your home phone. Glasses that are always hiding somewhere. Well, the most important thing is the keys. It is their disappearance that causes the greatest stress when there are only a few minutes left before the meeting. To ensure that all these things are always in sight, it is important to know how to make a key holder with your own hands.
What can she be
A key holder is a small device, the design of which is limited only by the creative abilities of a particular person. She may be:
- Wall-mounted. It is usually located closer to the exit at eye level, so as to always be visible to the eye. It may have hooks in its design, or a more creative way of attaching the bundle may be used.
- Pocket. It is a small wallet in which keys are hidden. This product is useful because it allows you to prevent scratches on any gadgets, as well as prevent holes from appearing in pockets and bags.
- Tabletop. In this case, it can be made in the form of a small box with attractive patterns. In order not to forget to put your keys in it, a special keychain is put on them.
- Place it on the locker door. Many have a dressing table installed near the exit. Why not use inner surface doors with greater benefit.

This item does not have to be only a place for keys. Additionally, it can be adapted for business or other notes. A special mount will be useful for glasses or mobile phone. In addition, additional shelves will allow you to remember where your brush and shoe polish were left last time. You can also store portable storage devices (flash drives) here, or their covers, which inevitably tend to get lost somewhere. If wall key holders are located close to the door, then it is better to provide additional levels of protection so that no one sticking their hand in can take possession of the bundle.
There is a huge amount ready-made options. They are designed taking into account the location where they will be used. For office or other companies, they make metal products that have a built-in lock. Hotels can boast of solutions that are created for a specific interior. Warehouses are not fancy, but are designed to serve their primary function rather than being pleasing to the eye. But the renovation of a house or apartment is a reflection of the inner world of its inhabitants. Therefore, it requires an individual approach.
Options for wall key holders

In hand creative person any little thing can become an element of design or decor. For making the most simple option you will need:
- intricately shaped branch;
- metal hooks;
- self-tapping screws;
- dowels

As the first element good decision there will be a knot from oak, larch or other wood, the wood of which is highly durable. But it doesn’t matter, you can take what you like the most.
- The wood is sanded with sandpaper. If possible, the bark is peeled off. This must be done because It may have unpleasant neighbors who will undermine the wood.
- Using a drill, several holes are drilled. Everything will depend on how many key rings there are in the family. The diameter should be slightly less than the diameter of the hook thread. Two additional ones will be required for mounting to the wall.
- To give the desired tone, the product can be coated with stain. After complete drying, it is worth walking over the surface with fine sandpaper to remove any raised fibers.
- The next step is varnish. It will give the pendant a complete appearance. You can use both matte and glossy, everything will depend on what would be better suited to the interior.
- The element is applied to the wall, and marks are made for fastenings for installation.
- The holes are prepared using a hammer drill, dowels are inserted and the key holder is screwed into place.
- The screw caps are recessed. They can be decorated with overlays or wood putty.
- The finishing touch There will be screwing in hooks and hanging out bunches of keys.
This option will be great solution for baths, houses made of logs or logs. Well suited to interiors where wood was used for decoration. Additionally, each hook can be marked with some symbol. They are applied using an electric burner or another method.

Most people have picture frames at home. Some of them may have been collecting dust on the shelves for a long time, because there is nowhere to put them. There is an advantage to breathing into them new life. For this you will also need:
- glue;
- a small piece of plywood or fiberboard;
- decorative hooks.
If you don't really like the appearance of the frame, then you can sand it and paint it in the color that suits you best. Plywood or fiberboard is adjusted to size so as to fit on the protruding sides of the frame. Additionally, this element can be covered with any fabric. In this case, you will need to make a gap of several millimeters on each side. The cover is fixed with glue. They also attach the hooks to the surface. The final touch will be installation on the wall.
Otherwise you don't have to use sheet material to close the frame. After processing it, it is enough to screw the hooks into the inner upper end and further decorate them.
If you have jigsaw skills hand saw or electric, then you can implement another unique project. For it you will need:
- a piece of plywood measuring 25x15 cm;
- stain or paint.

Before starting production, you should think about what shape you would like the keychains to be in. It can be a figurine of a boy and a girl, circles various diameters, figures of objects to which the keys belong. Next, you can find a suitable simple drawing on the Internet or draw it yourself. After that:
- The ends of the board are processed. The chamfer is removed and the corners are rounded. This can be done manually with sandpaper or using a sanding machine.
- The drawn or printed picture is applied to the plane. This must be done so that its lower part coincides with the lower edge of the workpiece.
- The image is transferred with a pen or pencil. You can simply crush it with a suitable metal object.
- The lines are drawn so that they are clearly visible.
- Manual or electric jigsaw, in which a file with small tooth, cuts are made along the intended contour.
- The figures are put aside.
- The main sheet is trimmed by 5 mm from the bottom end. This is necessary so that the key rings protrude a little.
- The surface of the cut products is sanded to remove all chips. Holes for the rings are drilled.
- If desired, the surface can be treated with varnish, paint, stain, or some kind of pattern can be made using a burner or cutting knives.
- The product is screwed to the wall.

This key holder can be customized for each family member. For example, keychains are made for mom and dad bigger size, and for children less. Each of them will have its place and will no longer be lost.
One more interesting solution there will be a key holder made of a small block. To work you will need:
- block 25×8×3 cm;
- end a circular saw or jigsaw;
- a vice or stand in which you can maintain an angle of 45°;
- metal or wooden blanks.
Wood can be processed well using a sander or other device. The corners can be rounded a little, but you shouldn’t overdo it, because... the product will lose its appearance. Then, every 5–7 cm, transverse marks are made with lines. Using these marks, cuts are made at 45°. They must be to the middle, otherwise the structure will simply lose its strength. The block is fixed to the wall so that the slot goes down. For each bunch of keys, a small metal or wooden keychain is made. It can be anything in shape, but its thickness must match the width of the cut. When the keys are no longer needed, the key fob is simply inserted into the slot.

You can refuse keychains. Then the slots can be made of such a size that one of the keys can fit through them. All you have to do is insert it into place and you're done. The slots do not have to be at an angle. It is possible to position them completely horizontally.
To others interesting option There will be the use of small furniture locks. They can be purchased at any specialized store. Their number should correspond to the number of family members. Additionally you will need:
- wooden block;
- feather drills;
- screwdriver;
- sandpaper or sanding machine.

The beam must be of such thickness that inner part the castle could fit completely inside it and not look out. Spade drills will be needed in two sizes. The first should correspond to the diameter of the core, and the second to the diameter of the clamping nut. The wood is processed as desired so that the shape and configuration of the final product matches the existing elements in the house. Marking is being carried out. In this case, it is necessary to take into account the width of the facing ring. Using a feather drill of a smaller diameter, a hole is drilled from the front side. The castle is being tried on. Using a tape measure, measure the length of the thread for the nut. WITH reverse side a hole is drilled with a large drill to a depth slightly less than the length of the thread. It's necessary to drown fastener. The structure is fixed to the wall. Each keyhole is signed or highlighted in a specific color.
An original solution could be to use the decoupage technique. At its core, it is the process of decorating various surfaces with a pattern or picture you like. To carry out the entire operation you will need:
- any wooden blank;
- a napkin or rice card with a pattern you like;
- PVA glue;
- acrylic lacquer;
- acrylic white paint.

The surface is well cleaned and polished. Next, prepare the background for applying the desired image. To do this, the front side is painted with a white composition. After the first layer has dried, you need to apply another one. This way you can hide all the imperfections. The required area is torn out of a napkin or rice card. Or the edges are simply cut off so that they are not evenly cut, because it will not look as attractive. The drawing is placed in the middle of the prepared surface. PVA glue is applied with a large brush. You should start from the middle and move towards the edges. It is in this case that you will be able to smooth the paper well and also remove all air bubbles. The glue needs to set and dry. If the edges are left empty, then they can be decorated. Selected coloring composition in tune with the overall picture. A small piece of foam sponge is cut off and clamped into a clothespin. The device is dipped in pigment, the excess is removed and blotted in the gaps where there is no lining. The final touch will be a protective varnish. It is applied in two layers. To make it easier to see bald spots, just turn the plane towards the light. After drying, you will need to go over it with fine sandpaper to smooth out any imperfections. Hooks are selected as desired.
In addition to open options, you can make a secret one, which will be hidden behind a picture or other decorative element. To work you will need a small wooden box. You can take any cigar box, cream, or an old box that is no longer used for its intended purpose. A frame with some kind of beautiful picture. A recess is made in the wall. If it is drywall, then it will be enough to cut it to the required size. In the case of a concrete wall, you will have to tinker a little. The outline is cut out using a grinder with a diamond wheel, and the rest is knocked down with a hammer drill. The main compartment is placed in the middle and secured with self-tapping screws and dowels to the wall or spacer mechanisms to the drywall and sheathing. For the main lid, you will have to select hinges that would allow it to open together with the picture frame. Hooks are made inside. If you don’t show it to anyone, it will be difficult to guess that there is something hidden behind the drawing or photo.
If there are children in the house who like to play with Lego, then some of its parts can be used to secure keys. A single strip or small module is perfect for this. It must be glued or screwed to the wall. A small brick will be used as a keychain. Eat ready-made elements, in which holes have already been made. If they are missing, they can be easily drilled or melted with a hot awl or nail. When you need to leave the keys, you need to attach the part to the board.

A variation on the Lego theme will be the use of men from this constructor. You should proceed as described above, but it is better to glue the figures to the bar. You will also have to firmly fix your hands. The ring is inserted into the palm or simply hung on the forearm. It looks nice - it looks like the designer is asking you not to forget your house keys.
A convenient and unobtrusive option would be a unique design that will allow you to hang your keys without even looking. To implement the idea you will need a metal magnetic plate. These are usually used for knives in the kitchen. You just need to choose a convenient place near the exit, screw it to the wall and use it. How more keys not made of non-ferrous metals, the more securely the bond will hold.

Don't limit yourself in terms of materials used. For example, don't buy ready-made hooks. If there are unwanted keys from an old castle or apartment left in the house, then the holes in them are perfect for fastening them to a surface with a self-tapping screw, and the bent ends will be used for hanging. Forks can be used for the same purposes. In aluminum products, the teeth are bent to create a greeting gesture with two raised fingers or a branch climbing plants. Small wooden knots glued to the base will also act as holders.
A beautiful solution that will suit almost any interior is the use of beads or wooden balls. To complete the work you will need:
- balloons various sizes by the number of ligaments;
- small wooden block;
- strong thread or chain.

Made in balls through holes. A rope or chain is threaded through the holes. One end of it is fixed with a smaller bead or a beautiful knot. The second part is attached to the ring. Transverse slots are made in the treated block and it is fixed to the wall. In order to hang the product, you just need to thread the thread through the slot; the balls will prevent the bundles from falling out.

You can complement any key holder with a small drawer that will serve as an organizer. You can buy it at a store that sells household items. Often their purpose is to store clothespins. It is also easily assembled from small strips of plywood. This product will be an excellent accessory for a mobile phone or glasses.
It is much more convenient to carry things with you when they are neatly packed. A pocket key holder is not only functional accessory, but also part of the image of its owner. It can be made with any design or with the family coat of arms and initials. You can really do all this yourself. For one of the common options you will need:
- a flap of skin measuring 16×10.5 cm;
- leather-colored rivets;
- riveter;
- blank for a key holder with carabiners;
- scissors;
- punch.

The key holder will look prettier if its edges are rounded. To apply markings, you can use a bottle cap, an intercom key, or something suitable. The following steps proceed in this order:
- A blank with carabiners is applied to the intended installation location.
- The marks from the holes are transferred to the skin.
- A bunch of keys is placed inside and the edges are rolled up. This will allow you to try on where you need to install rivets in order for the product to close. A corresponding note is made.
- The space under the keys is lined with the same leather. This will strengthen back wall and prevent wear and tear.
- Holes are made using the marked marks using a punch.
- The workpiece is fixed with rivets, and then the rivets are attached to the lapels.
An additional highlight will be a stitch of contrasting thread, which can be done with a slight indentation from the edge.
Another option can be made using the multitool principle. In order to determine which specific piece of leather is needed, you need to collect all the keys into one bunch and fasten them with something. You will need to place them on the material and make width marks with a margin of a few millimeters. Next, folds are made and marks are made. One of the sides remains open, and the strap serves as a fastener. The point is that the keys will be in a case, and you can take them out like a penknife. Additional components you will need are eyelets and furniture fasteners. The latter is usually used to fasten adjacent cabinets. It is a threaded bolt that goes into the tube. Their hats are made the same way.
- A hole is made in the places where the keys will be secured.
- The elements are placed in place, small leather pads are placed between them so that they do not rub or ring.
- Furniture fasteners are inserted.
- Rivets are fixed into the strap and on one of the sides.
- A grommet is installed at the bottom to which you can attach a keychain or something else.
Some people prefer a key holder in the shape of a wallet. To do this, a piece of leather is selected and a zipper is sewn into it. The ends are sewn up. A small braid with a ring or carabiner is attached inside. A bunch of keys hangs on it.
Desk key holder

The table key holder is often located on the dressing table. It is installed in the most visible place, so that when you enter the apartment, you can throw in the keys without looking and go about your business. In its role, you can use any small saucer or jewelry packaging. Exist ready-made solutions in the form of shell-shaped products or small cabinets.
As you can see, wooden or metal key holders are an affordable solution. You can make them yourself using what you have on hand. Many of the solutions presented can be used as a basis for your own research. We are interested in what ideas you have. Share them in the comments to the article.
Video
How to make a beautiful Japanese-style wooden key holder:
Master class on making a pocket key holder:
Photo


This article contains 7 step-by-step master classes- how to make a key holder with your own hands on the wall in the hallway on a very budget! This does not require a lot of materials and time, because they can be made from scrap materials such as wood, branches, old toys
And with the help of the original design of a key hanger, you can emphasize the style and interior of your home or apartment.
Sometimes, looking at familiar things from the other side, you can notice completely new possibilities for their use.
Here we offer a new look at using Lego. We perceive it as an educational children's game (of course, adults too, because it's no secret that parents sometimes buy toys more for themselves than for their children). But with the help of a few tools you can use it to make not only different figures for games, but also an original wall-mounted key holder.

Key tag - also made from a construction element

Wall-mounted key holder made of plastic Lego
You will need:
- Lego pieces: a flat rectangular platform and as many small pieces as you want to hang keys
- Drill with fine bit
- Screws, dowels (2 are enough)
- Keychain rings
- Ruler
- Marker
- Lace
- Scissors
Manufacturing:
- On small parts of the construction set (square or rectangular to your taste), on one side, mark the middle with a marker and carefully make a small hole with a drill.
- Tie a string to the ring and to the small part of the construction set (thread through drilled hole and tie a knot).
- On a large flat platform, make two symmetrical holes for screws.
- Attach the platform to the wall (depending on what kind of wall, use dowels)
- Put your keys on rings, hanging from small pieces and attach them to the platform.
Enjoy using it and don't lose your keys again!

Master class No. 2: Original key tags
Let's look at how to make a simple wooden key holder that can be mounted on the wall. This Master Class is very simple, for complete beginners in tinkering with their own hands.

Materials:
- Dremel 8050 Micro multi-tool or similar model (can be used separately grinder, saw, drill)
- wooden block approximately 2.5 cm x 5 cm x 14 (we made it for 4 keys, if you need a different number, take the appropriate size)
- two small pendants for shelves (consider the selected size of the bar)
- leather lace (we used 1.5mm thick, but a regular strong lace can also be used)
- screwdriver
- 4 small opening rings
- 4 pendants around the neck (you can take the keychains you like)
- wire cutters
- round pliers
- pencil
- ruler

Step 1: To make the holder you need:
- Sand the wood block.
- Fix it and go through it first coarser grinding disc to remove irregularities and protrusions, then medium and smooth.
- Mark with a pencil the place for the hangers on the back side of the block and use an engraving cutter to make recesses with a depth of approximately 3 mm(the bar is symmetrical, so choose one of the two back sides at your discretion).
- In the place where there is an opening in the suspension, make recess another 3 mm.
- Place the hangers on the block and secure them with screws.
- On the front of the block, make marks for 4 openings(parallel, as in the photo) and using a cutter attachment, make indentations about 1 cm deep.
- Attach the block to the wall.
Step 2: All that remains is to make the keychains:
- Regardless of whether you took a pendant or a keychain, remove the mount (the keychain is too thick for the opening, and the pendant is too long). Use wire cutters if necessary.
- Place the release ring on the key. Can be clamped with pliers.
- Cut off from leather lace 4 even parts, thread through the key ring and keychain, tie.
Instead of a wire polygon, you can use any object, for example, any toy or ball.

Key tags can be made of any shape and type
Master class No. 3: Key hanger made from tree branches
The easiest way to make a key holder is to use tree branches.
- How to do it right .
- Then we decorate them at our discretion, either varnish or paint with paint.
- We buy in the store hooks, they must be sharpened on one side and carefully hammer it into the wood.
There are many design options for such hangers - look at the photos and choose!

Boho style key hanger


Very simple and beautiful!


Different options for hangers for keys and not only using branches

Master class No. 4: Made from wood and old keys
It sounds strange, but it is true, in this master class we will actually make a key holder, the hooks of which will be made from old and unnecessary keys.

Retro housekeeper
You will need:
- Rectangular wooden board
- Old keys (3-5 pieces depending on how many hooks you need)
- Nails (short and thin, but the head should be wide enough)
- Pliers
- Sandpaper
Manufacturing:
Using a saw, give the board the desired size and shape, and round the corners. Then use sandpaper to remove all burrs. If you are lucky enough to immediately find a suitable board, this step is skipped.

Attaching hooks to the base of the key holder
- Lock the key head, and bend the blade with pliers to form a hook shape. Repeat this step with the remaining keys.
- Place evenly hook keys on a board.
- In the place where there are holes in the key heads, drive in the nails(the hat must be bigger hole on the key to hold it).
- The key holder is ready, all that remains is to hang it on the wall. This can be done by attaching hangers to the back of the board or driving two nails into the wall and making holes in the board and hanging them by them.
It looks very original and immediately reminds of its purpose.
Master class No. 5: Key holder with a vase
In fact, such a board with hooks can be used not only as a key holder in the hallway, but also as a kitchen hanger for potholders and towels, or for the bathroom.

Key holder with vase
It looks interesting and unusual, because it’s not often that you see a vase of flowers on a hanger.
Materials:
- Rectangular wooden board
- White paint for wood
- Hooks (3-4 pieces)
- Jar (maximum 0.5 l)
- Metal pipe clamp (must fit the jar)
- Hangers for fastening
- Screws
- Drill
Manufacturing:

- Paint the board in White color . This will perform two functions at once: aesthetic and protective, the latter is especially important when used in the kitchen or bathroom to reduce the effect of heat and moisture on the wood. Let the paint dry.
- Attach the hooks and clamp to the board using screws and a drill.
- The hooks have special holes for screws, but most likely they will not be in the clamp, so you should use a drill.
- Attach the hangers to the reverse sides e boards and hang them in the chosen place.
- Insert a jar with a bouquet or sprig of flowers into the clamp.
It turned out beautiful housekeeper in soft colors. It will complement the interior well and will serve as an additional accessory for decorating the apartment.
We also described in more detail how to make such a mount - as in the photo below.

Master class No. 6: Housekeeper “like in a hotel”
Such a housekeeper has not only original design, but a definite advantage over others described here is clarity and orderliness. It’s not for nothing that they are used in hotels, because each key location can be signed.
Only we will indicate not the room number, but the purpose of the key: for a house, work, dacha, car, mailbox, parents’ apartment, staircase etc. Often the keys to different rooms look the same, such a key holder will once and for all save you from situations when, instead of keys to the office, you put the keys to the dacha in your bag, and then you cannot open the door.

Large wooden key holder

Necessary materials:
- Thin wooden strip (approximately 8 cm wide)
- Frame strips
- Set of metal tags
- Hooks (threaded)
- Dye
- Suspensions
- Small nails or screws (very thin)
Assembly steps:
Step #1: Prepare the base
Saw wooden plank into 5 identical parts. When choosing the length of the planks, keep in mind that you will then glue them together to make a rectangle or square; calculate the dimensions for the desired shape.

- Form a frame the right size from planks for frames.
- Staple 5 planks and frame special glue for wood, as it shown on the picture.
- Now we need to paint this entire structure.
You can first apply a wood antiseptic, wait until it dries, and then apply several layers of paint one after another. Wait for it to dry.


If you wish, you can give the wood an antique effect by rubbing it a little with sandpaper.
Step 2: Attach tags


- It's time to attach the tags. Think about how the board will hang: so that the slats are vertical or horizontal (in our example they are vertical). Lightly with a pencil mark the mounting locations, they should be at the same distance. You can place them under a ruler or make a stencil out of paper. Attach tags to wooden base cloves or tinsel.
- Under the tags in the center of each of them Make thin holes for the hooks with a drill, use the thinnest nozzle.
- Screw the hooks into the holes.
- Attach pendants on the back of the key holder and hang it on the wall.
- Insert notes about the purpose of the hooks into the key tags and hang the keys.
Use it to your heart's content!
Ideas for key holders using improvised means
From a tennis ball
Easy way to make a key holder from a tennis ball:
- fasten with liquid nails a ball to the suction cup (bath hooks are sold like this),
- make a cut with a sharp knife in the center
- decorate: attach eyes (can be taken from an old doll) or draw with a marker.


