Master class from Valery Rybakov
So let's get started.
Let's take a canvas
IN in this case I used canvas that was not stretched on a stretcher. But this does not affect the result at all. So it doesn’t matter whether the canvas is stretched on a stretcher or not - the main thing is not to look for excuses, but to take on painting a vase with flowers without fear oil paints.

The picture shows that I took a brush and without thinking, painted the entire canvas with oil paint. Moreover, oil paint should be well diluted in thinner or white spirit.

In the next picture, I decided to finalize the background spot of our future floral masterpiece and added oil paint. You can see for yourself what happened.


Then I made a rough outline of our future vase and roughly drew the location of the green leaves of our bouquet of flowers. This is an approximate location - so feel free to experiment in this place.
This picture is not much different from the previous one. However, if we take a closer look, we will see that a highlight has appeared on the vase (a light spot in the upper part of the vase). A shadow from the vase also appeared. From this it was created pleasant impression that the vase “stands” on the plane of the table. I also decided to add the dark end of our table, on which the vase is installed (at the very bottom of the picture).
The image of our future flower painting in a blue vase is already beginning to emerge. However, we don’t stop there, we continue our free master class: .
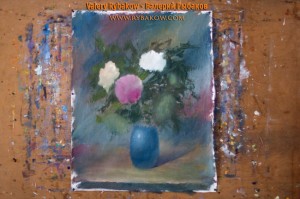
What kind of flower picture can there be without the flowers themselves - you say. And then the flowers begin to appear.
Moreover, before applying our flowers to the canvas, we first remove excess paint in those places. As you can see in the picture, we are removing part of the foliage. And we apply our future beautiful flowers.

In this picture of our master class we have all the main flowers. And the picture already looks very nice
But we don’t stop there and continue to draw our bouquet of flowers in a blue vase.
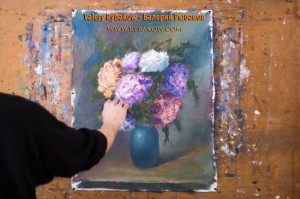
This picture shows me palette knife I begin to add the green leaves of our flower bouquet.

And finally the final stage. This is the finishing image of our flower bouquet in a blue vase. As you can see, I decided to add a few more flowers to our bouquet. Namely 2 yellow flowers medium size and many small blue flowers. This caused more petals to fall on the table. They had to be shown too

It seems that our master class today has come to an end: How to draw a Bouquet of flowers in oil.
Hello!
Today we will paint poppies - very beautiful and spectacular flowers. Let's write poppies not quite in a standard way. We use only a palette knife, a rag and fingers.
Poppies are not difficult to write, even if you are oil painting newbie. Painting flowers with oil using a palette knife is quite simple. You may be wondering how to paint all the exquisite details of delicate flowers without thin brushes? This is exactly what we will demonstrate now.
It is best to write flowers or any other subjects using some visual material: a photograph or nature, for example a bouquet of flowers on the table. The main thing is that you really like what you are going to depict on canvas, since you will have to spend some time with nature, study it, observe, admire...
Erase sketch
Use a rag to wipe the areas where poppy flowers and buds will be written. If the paint does not wash off well, you can soak a cloth in solvent. Erasing, removing paint from a background, is similar to sketching. At this stage, the main details of our future composition are marked.
After we have outlined the flowers, removing the extra layer of paint from the canvas, you can take a palette knife and apply paint. To do this, it will be enough for us to have the following set of paints: cadmium red, cadmium yellow, burnt umber, white, viridon green.
poppies flowers
The poppy flower looks like a bowl.
When we paint these “poppy cups”, we imagine how the light falls on each one, where there will be more shaded areas, and where there will be the most illuminated areas.
Poppies with oil paints on canvas
The main color for writing any flower will be cadmium red light. When we paint the shadow part of the flower, we mix a little brown into the cadmium red. It all depends on how much “darkness” you want to show. When we paint petals illuminated by the sun, we add white or cadmium yellow, or you can do a little of both.
To show the round shape of the flowers, use a palette knife to draw “ rounding movements according to the shape of flowers and petals.
Details
After we have outlined the flowers, their shaded and illuminated sides, we begin to refine the details of the fragile and delicate poppy flowers.
- Using the sharp edge of the tip of a palette knife, mark the thin edges of the petals;
- Using the edge of a palette knife, you can remove paint that has spread beyond the designated limits of a flower, stem, petal, etc.
- A round palette knife is convenient for smoothing out the paint, giving the applied layer a special evenness and smoothness.
Centers of poppy flowers, we plan brown- burnt umber. Apply the paint with the flat of a palette knife or with your finger, using dipping movements. Using this method, the uneven structure of the center of a poppy flower is drawn in a matter of seconds.
On top of the dark color of burnt umber, we apply drops of white - showing the white specks of dust on the stamens of the flowers, we do this with even lighter movements.
In the process of all the work, you can clarify the contours of flowers, stems, leaves, remove what didn’t work out and emphasize especially successful moments, add more light or shadow.
This technique of painting poppy flowers in oil is very eloquent and quite simple. If you practice a little, you will get beautiful flowers with one stroke of a palette knife, and you can paint an oil painting with poppy flowers in a few hours, or even in one hour.
Video painting tutorial, painting poppies
This 15-minute painting video tutorial demonstrates effective techniques painting flowers with oil paints.
I wish you good luck and creative inspiration!
1. Draw are common contours so that they fit into canvas. Then draw the petals and leaves in detail. Please note that the approximate and more detailed outlines are written in different tones.
2. Label paints general color scheme petals and leaves.

3. Write the background compositions.

4. Using large quantity colors, as well as mixing paints on canvas, give flowers and leaves additional shape and volume.
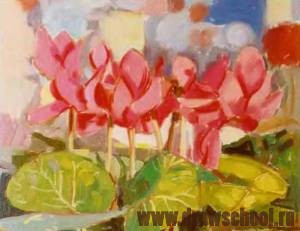
5. Accentuate highlights, midtones and shadows.
6. Small round brush write down the smallest details.
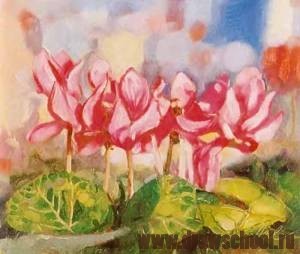
Finished painting 255 x 215 mm
Hibiscus 510 x 510 mm

Flower written on an enlarged scale, and this is a very interesting task. The very size of the flower attracts our attention. When we paint flowers larger than life-size, we are once again convinced that we need to look at the flower very carefully, noting all the subtleties of color and compositional solutions.
Buddleia 510 x 405 mm
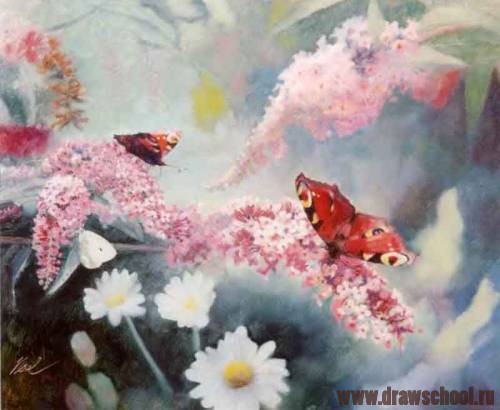
This is the flower that butterflies really love. They were the center of the composition. First, flowers were painted for the background, then the paint dried, and then the artist walked over them with a dry brush, softening their contours, achieving blurriness. The main thing is to wait until the paint dries a little: it should not be completely dry or still damp.
Still life
There are no special laws for painting a still life. The main thing is that the parts of the composition are balanced and look beautiful.
Here are some tips.
Don't clutter still life details. Don't write too much at once different colors. Try to select them in one color scheme. Flower stems should look as natural as possible.
Choose a vase that is similar to the flowers in shape and color. The vase must match the flowers correctly. Remember: if the vase is too elegant, attention will shift to it.
Provide strong one-sided lighting: this will create an effective contrast of light and shadow. Don't forget about proportions: the smaller the vase with flowers, the more background there is in your composition.
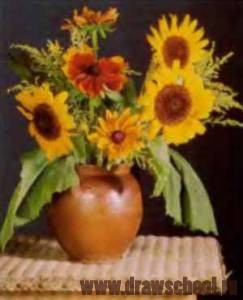
still life photo
1. Work first with a pencil or small brush. Draw light, rough outlines onto the canvas. At this stage you should adjust the overall scale of the composition to the size of your canvas.

2. Now very faintly draw the outlines of the flowers and leaves themselves. Don't go into too much detail in your sketch.
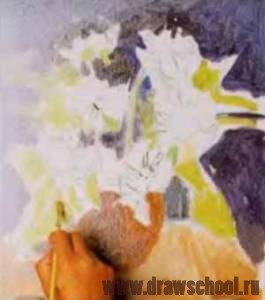
3. Paint over the dark background, avoiding the outlines of the colors. Then paint the table and vase and finally the largest leaves.
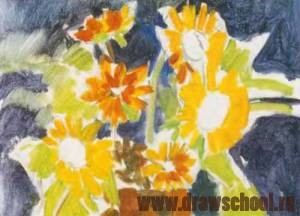
4. Now paint the outlines of the flowers themselves. Work quickly and without details: now you need to decide approximate form and the color of the composition elements.
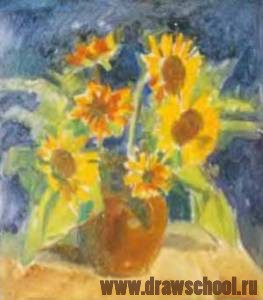
5. Paint over the central parts of the flowers and smaller leaves. Now the entire composition consists of color fragments.
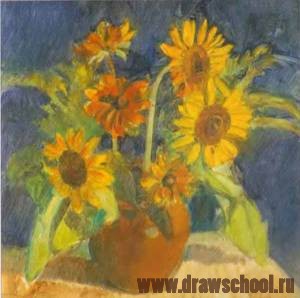
6. Mixing paints directly on the canvas, lighten or darken individual areas. Apply small strokes of white paint to illuminated areas, strokes of ultramarine paint to shaded areas. This is one of the advantages of oil painting: while the paint is still wet, we can change its tone as much as we like.

7. At this stage, you mix paints directly on the canvas, creating some tones off the palette. Experiment with different brushes to try to change the texture of the painting. First work on the smallest fragments, moving on to larger ones, adding details, and somewhere softening the tones using a dry brush. This is the stage where your personal style is developed.
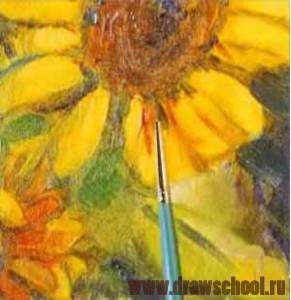
8. Finally little round brush write down the details small flowers, adding small strokes on top of large ones. Knowing how to stop in time is as difficult as finding a place for the first stroke.
Sunflowers and rudbeckias 305 x 345 mm. This is the finished picture.

Anemones in a decanter 405 x 330 mm
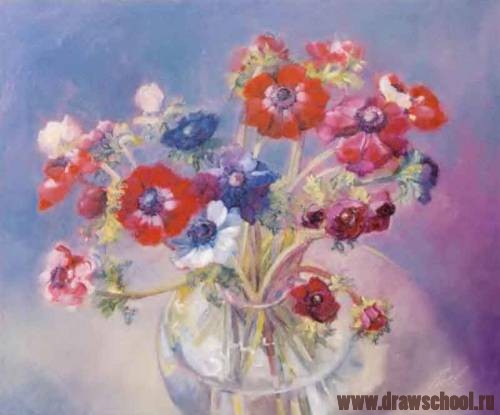
The anemones pulsate with delicate, exquisite colors. A transparent glass decanter emphasizes the elegance of the composition: it should be remembered that water refracts the image of the stems. It will be especially difficult to paint a transparent decanter - for this you need to very carefully study all the reflections and light and shade. To begin with, you can put a single flower in a decanter and copy all the tonal transitions, reducing them to simple forms if possible.
Daisies and their shadows 405 x 330 mm

The compositions include both sides of the spectrum - warm (butterfly) and cool tones
Noel G. Painting flowers with oil

