In December 1956, the Minister of Coal Industry of the Ukrainian SSR Zasyadko himself came to the Zamkovskaya mine, which was preparing for state acceptance, not far from Kadievka. The mine was ready for operation, and the state selection committee was ready for the signing of the Act and a ceremonial banquet. However, after inspecting the industrial site, the minister went into the washing department of the mine bathhouse. Seeing the blatant wretchedness and ugliness of the decoration and equipment, he categorically forbade the mine to be put into operation until the bathhouse was brought into human form. Just the day before, he returned from Great Britain, where he visited the mine bathhouse of the decaying capitalist world. What he saw shocked him so unpleasantly that at the meeting he posed the question bluntly: “The mine will be put into operation only when its bathhouse looks properly.” In modern conditions, every self-respecting bathhouse owner tries to make his brainchild look the best. Finishing the washing room in the bathhouse is an important and responsible process, so that ready sauna the gaze was pleasantly rested. Well? We choose materials and technologies.
The finishing of a washing room in a bathhouse largely depends on the general concept of the bathhouse and its area. The first baths, which combined both a steam room and a washing room. There were several reasons for this. On the one hand, the volume of the bathhouse that needed to be heated was very small, on the other hand, the bathhouse was very simple, and the process itself was designed to satisfy, first of all, the hygienic needs of the population.
IN modern realities, we see two main concepts:
- A small-volume bathhouse, in which the steam compartment and the washing area essentially form a single whole, and the functional zones are separated from each other by some kind of nominal decorative screen. In this case, the washing room in the bathhouse, the interior of which is designed in a single key, in terms of interior decoration forms a single whole, the difference between the individual zones is insignificant and is defined in detail. Even here, one can detect the influence of such a fashionable trend as the studio. That is, a single space divided into functional zones by some element that does not greatly limit the internal volume, for example, an arch.
- A full-fledged, roomy bathhouse designed for simultaneous procedures for a fairly large group of people. In this case, the division functional zones complete. The steam room and the washing room are full-fledged separate rooms, each of which can have its own interior design, united by a single design idea and by design.
We immediately admit that the second option is more preferable, since a clear division of the internal volume of the bathhouse is more rational and convenient. Let's say, for example, how to comply with clear standards for dry steam in a single space that combines a steam room and a washing room if you have a high-temperature sauna. The constant presence of water will negate all efforts.
Choosing material
The market of modern building materials offers very wide choose various raw materials for arranging a full-fledged washing station. This is wood, ceramic or clinker tiles, natural stone and plastic, after all. Which option should you choose as an informed choice? Let's figure it out.
Wooden elements in the interior of the washing compartment
Wood was, is and will probably remain a classic in the design of Russian or Finnish national baths. It has a number of undeniable advantages:
- Creates a unique atmosphere of a real and natural bath;
- Easily processed and quickly installed, provided the operator has basic carpentry skills;
- In the forest regions of the country, this material is the most accessible and inexpensive.
Of the main types of wood for finishing work, it is worth recommending the following:
- Linden- time-tested classic lining, which is perfectly processed, has an attractive color and a delicate aroma, which many lovers, quite seriously, compare with the smell of a blooming honey plant. These raw materials are quite accessible and rarely have severe irreparable defects. In high humidity conditions washing department linden shows satisfactory resistance to major adverse factors. The durability of the linden material can be increased by organizing a good ventilation and airing regime, which is especially important in the warm season, and besides, it is quite easy to implement;
- Oak- belongs, along with ash, to premium types of finishing wood. First of all, due to the fairly high price of industrial wood, on the other hand, such wood behaves well in a humid environment, significantly ahead of well-known competitors. Beautiful drawing, moderate color and expressive texture allow you to collect finishing elements into excellent sets that require virtually no additional processing or tinting;
- Alder- its wood is also worth noting as a very worthy and attractive option, and in many respects. Finishing the washing area in a wooden bath with alder materials allows you to obtain surfaces with beautiful calm color with a refined honey tint. The famous quality of alder to turn red at elevated temperatures, which is why it is very readily used in steam rooms, is not so noticeable in the washing department, however, moderate resistance to the local humid climate and velvety texture make the surfaces very refined and far from ordinary.
- Larch- along with oak, one of the record holders in the eternal dispute between water and wood. The high resin content of its mass, undesirable in rooms with high temperatures, in an environment of abundant water, is manifested by the most the best way. In addition, in some regions, its wood, which is of very decent quality, is offered at a fairly attractive price. True, it is worth noting some difficulty in processing such material, which, however, fully applies to oak.

Now, it’s worth mentioning the negative aspects of using wooden elements in finishing works:
- Wood is perhaps the most demanding to care for. To increase its hydrophobic properties, complex treatment with expensive compounds from famous European brands is required.
- The same applies to damage by pests and microorganisms, primarily molds. Without careful treatment with biocides, it is hardly worth counting on the long service life of such a finish.
- Finishing a bathhouse sink with a wooden floor is not always rational due to the complexity of drainage and drainage of sewage water. In addition, in conditions of total humidity, most tree species will quickly become unusable, even if a bottom ventilation regime is organized.
Important! A good alternative to a wooden floor in the washing area can be removable wooden lattice flooring. They can be made from larch or oak silt, fortunately, the material consumption for the lattice is much lower than for a solid structure. Such products can be taken out to dry completely and periodically treated with protective compounds, restoring properties lost during operation.
Finishing with ceramic or clinker tiles
All the beauty provided by finishing the bathhouse with tiles lies in its extremely low water absorption. And this is not the only useful quality:
A word from Experienced! It could be easier. The most noticeable results of mold activity are on light-colored seams. Once you apply dark grout, the urgency of the problem will fade into the background.
Natural stone finishing
This technique goes very well with solid wood, allowing you to get discreet, classic, but very accentuated design solutions. Natural stone applies:
- In the form of slabs, for floor decoration, with a stone body thickness of about 25 mm;
- In the form of sheets, for finishing wall surfaces. The thickness of the stone in this case is about 15 mm;
- In the form of the so-called “Roman stone”, elongated strips of cut stone, with a textured, “broken” front surface. Due to its high cost, this material can be rationally used for finishing doors and window openings, small niches and arched vaults of short length;
- Stone mosaic - small pieces of stone fines, arbitrarily shaped, but of the same thickness, to create accentuated, textured fragments on walls and other surfaces.

By the way! Due to the large mass of elements from natural stone it's worth taking care quality training mounting surface and the use of the highest quality adhesive compositions. Finishing with elements made of natural and artificial stone on ceilings, vaults, and spans with a negative angle of inclination of more than 8 degrees is not allowed, in order to avoid arbitrary peeling of a fragment of the finish and its falling on those present. A good example can serve as a finishing system for vaulted ceilings in. There, mosaic acts as a natural or artificial stone. Its fall will not cause harm to a person, except perhaps fright.
It is worth noting that natural stone, primarily sandstone, has greater water absorption than artificial stone. Therefore, to use it in conditions of high humidity in the washing compartment, it is worth covering it with a protective composition that ensures the formation of a plastic and waterproof film on the surface of the material. High-quality varnishes, in addition to protective, also have a decorative function. The texture of the processed stone becomes more expressive, the color deeper, and the pattern more contrasting and voluminous.
Finishing with plastic elements
Polymers and plastic masses have come into everyday use modern man. However, do not forget that the finishing of the bathhouse sink plastic panels immediately introduces a touch of artificiality into the interior, making it, in the vast majority of cases, faceless and refined. In addition, plastic carries a certain hidden threat, since when burned it releases very toxic products.
Otherwise, finishing with plastic is not particularly difficult. It is lightweight, has significantly less specific gravity than products made of artificial or natural stone, it is easily cut with household tools and easily attached to the mounting frame. However, low weight results in low mechanical strength. Visitors who have accumulated an exceptional supply of health in the steam room, in a fit of emotion, can easily pierce the plastic panel with their fist, and especially gifted ones, with their finger. Repair is not particularly difficult; installation and dismantling of most structures is carried out using a tongue-and-groove system. However, in this case, you should be concerned about the presence in stock of repair elements from the same batch as the main set. So that the color, pattern, and texture completely coincide.
Application of plasterboard systems
Finally, it is worth mentioning one more solution, with certain reservations, applicable in such an area as the design of a washing room in a bathhouse. Plasterboard sheets are easy to install and allow due to large area installation elements to finish the room in a very short term. However, unprotected material will literally deteriorate before our eyes. Therefore, its use as a load-bearing mounting surface is permissible when:
- Finishing with ceramic, clinker tiles, mosaics;
- Elements made of natural stone;
- Under final application waterproof compositions, such as Venetian and other types of decorative plaster;
- Decoration of the ceiling plane, with the application of a hydrophobic protective coating;
- Painting with waterproof white or tinted paint.
Let us emphasize once again that the use gypsum material requires very careful protection from harmful influence very high humidity inherent in the washing department. Otherwise, the service life of such a structure will be short and often fraught with complete destruction of the plasterboard sheet.
Of course, the bathhouse is still associated with wood, therefore, in the light of this outline, it is worth citing comparison table, reflecting the degree of water absorption various types wood most widely represented on the market:
Conclusion
Summing up today's material, I would like to note the following: key points. The washing room in the bathhouse, the interior of which is designed in traditional style, can be issued various materials, which meet the requirements of environmental purity and naturalness. It is highly doubtful that plastic and painted drywall will look appropriate in the washing department of a bathhouse, the steam room and relaxation room of which are decorated according to all the rules of a national bathhouse, with an abundance of wood, natural stone and the use of individual sharp elements, such as linen. Anyway, modern technologies allow you to leave ample scope for original creative solutions and design techniques. Try it!
The washing room in the bathhouse is a room no less important than the steam room. In the old days it was not provided, but in modern times a sauna and a Russian bathhouse cannot do without a washing room. The interior of the bathhouse washroom should fit harmoniously into the overall design solution.
Planning during the construction phase
The arrangement of the washing room must be thought through at the bathhouse design stage. There are several important points to consider:
- Organization of water flow. On average, about fifty liters of water are consumed per bathhouse visitor. If the bathhouse is equipped with a shower, water will be used much more economically. If there is no shower, moisture should escape through the floor. Should not be placed drain hole right under the washroom floor. Dampness in this place will certainly cause mold and a musty smell in the bathhouse.
- Drain arrangement. The floor surface must be sloped to direct water to the drainage point. The slope should be sufficient so that moisture does not form puddles, but not too steep, as it is easy to slip on such a floor.
The floors of a washing room in a wooden bath should be finished with a material that is resistant to moisture.
In addition to high humidity, the wash compartment differs from the steam room and dressing room in temperature conditions. It should be more comfortable than in a hot steam room, but at the same time it should not be cold here. Insulating the floor and organizing heating in the washing room are important stages in the construction of a bathhouse.
The washroom must have a shower or bench and a container of warm water. In modern baths, sun loungers are installed in this room for massage and relaxation after the steam room.

Important! Full ventilation is important for a washing bath. Even with proper drainage and drainage of water, active air circulation must be organized to protect against dampness.
The ceiling and wall coverings of the bathhouse must retain heat and be reliably protected from moisture. The finish of the washroom is selected from environmentally friendly pure materials, which do not emit toxic substances when heated and wet.
Frequent mistakes in finishing the washroom in a bathhouse:
- defects in the thermal insulation of the floor and walls lead to rapid cooling of the room;
- Badly organized ventilation promotes the development of mold and fungal formations;
- the use of plastic in the design of the walls and ceiling of a bathhouse is undesirable, since the material deforms over time and releases toxins when heated;
- Glazed tiles on the washroom floor can cause falls and serious injury;
- The bathhouse is not finished with tongue and groove boards; its surface may become suitable soil for the development of bacteria and mold.

How to choose finishing materials
When finishing the washroom, you should adhere to several basic recommendations:
- materials for decorating the interior of a bathhouse must have a natural base; the use of linoleum, plastic, oil paint, fiberboards;
- The dimensions of the washroom must correspond to the formula 1 person x minimum 1.2 square meters squares;
- To decorate the walls of the washing room, it is better to use coniferous wood that is resistant to moisture.
The bathhouse needs regular cleaning. Tiled flooring is easy to clean and handle by special means. Ceramic tiles are a material that is resistant to the development of mold and mildew.
The combination of ceramics and wood for a washroom is the most practical option.

Advice! To prevent sauna visitors from accidentally slipping on wet tiles, you can install a wooden grate on the floor. After use, the grate should be dried in a steam room or in the fresh air.
Pros and cons of finishing materials for washing rooms
The interior design of a washing room in a bathhouse made of timber, logs or other materials should be not only attractive, but also practical. That is why not all finishing options and materials are applicable for this room. Advantages and disadvantages of traditional finishing materials:
Tile
Finishing with washable ceramic tiles looks neat and attractive. It is quite applicable for finishing the walls and floor of a bathhouse. Before laying tiles wooden walls need to be treated with waterproofing material. On the floor for tiling, a screed is made with slight slope towards the drain hole. The positive qualities of this finishing material include strength, resistance to the adverse effects of moisture, ease of maintenance and environmental friendliness. The material has great color scheme and may vary in pattern and texture. The downside is the tightness of the coating, the demanding cladding process and the fragility of the material.
Advice! When finishing floors with ceramic tiles, it is better to extend the walls at least forty centimeters. With this option, water will not get on the wall covering.

Tree
In the interior design of a washing room, this material can be used for walls, floors and ceilings. Resinous wood species resist better high humidity bathhouse premises. Material treated with special means successfully resists dampness. For these purposes, wax, oils, water paints. There are practically no downsides to wooden finishing, except that wood loses its attractive appearance over time.
Advice! Wax coating of wood is considered the most expensive, but it is also the most effective. It is wax that will preserve and highlight the rich texture of natural wood for a long time.
Stone
This material is used to treat the floor and walls of the bathhouse. You can combine finishing with natural stone and wood. Among the positive qualities of the stone, one should note its durability, strength and environmental friendliness. But stone is a heavy finishing material and requires certain skills in installation. Natural stone is not a cheap pleasure.
Advice! You can compensate for the shortcomings of natural stone by using its artificial counterpart. It is relatively lightweight, easy to install and inexpensive.

Plastic
Plastic panels - attractive and inexpensive material for finishing the washroom. They are connected using the tongue-and-groove method and create an airtight covering of the ceiling and walls. The panels have a wide range of colors and can imitate wooden lining. But this material is very sensitive to temperature changes; it can lose its shape and, if overheated, fill the sink with an unpleasant, pungent odor.
Advice! If the choice is made in favor of using plastic, it is necessary to pay special attention to waterproofing the walls of the bathhouse. A gap must be left between the panel covering and the waterproofing layer to avoid condensation accumulation.

Dye
Using paint to decorate the washroom is a simple and economical solution. Paints on water based safe for human health and very easy to use. The main disadvantage of this coating is its fragility.
Each of these materials can be used in the interior design of a washroom. They can be combined. If you lack your own skills, finishing work can be entrusted to invited specialists.
Swimming pool and other interior items for the washroom
When designing a bathhouse for a swimming pool, several nuances should be taken into account:
- the font will evaporate a lot of moisture;
- water will splash on the floor and walls of the room;
- If the size of the pool exceeds 3 meters in length, it will require a separate room.
A small font made of plastic or wood can be located in the washing room.

Advice! It is better to drain the pool water after each session. To avoid excessive evaporation of moisture, the font is covered with a lid.
Pools in the washroom can have different shapes and locations. The font can be buried flush with the floor or installed on its surface.
For the interior of a washing room in a bathhouse with a font, you will need to install comfortable sun loungers and benches for relaxation.
In the setting of a washing bath, pieces of country furniture - sun loungers - are suitable.
For lighting, you can use ceiling and wall lamps, LED strip.
Shelves for storing shampoos and washcloths are made of moisture-resistant material. After the bath session they are released to dry.
Advice! Potted plants can be installed in the washroom with a swimming pool. They will “balance” the space and will feel great in a humid environment.
Spathiphyllum, chlorophytum and sansevieria are perfect for landscaping a washing bath.
To decorate the interior, you can use unusual painted tubs or ladles, carved hangers for washcloths. Carved benches of different sizes look good.

- For floors in a washing bath, it is better to choose ceramic tiles with a rough coating that imitates natural wood. This floor will not slip.
- If the size of the washing room allows, you need to install a shower stall and washbasin in it. If the room is small, baths are usually limited to a barrel-font or a dousing bucket
- The room must have at least one bench of a suitable size for massage procedures.
- Usage LED lighting- not just a beautiful and original technique, but also a very practical solution. Sealed LEDs cope well with high humidity and operate flawlessly.
- In the design of a washing bath, unusual basins and towels, original washcloths, thermometers, and bottles are appropriate.

The interior design of a bathhouse washroom should take into account the specific features of the room. When finishing walls, floors and ceilings, it is better to use materials that are resistant to high humidity and temperature changes. Washing bath with a pool or plunge pool can also be a relaxation room, especially if it is decorated with live plants and bright accessories.
Today, many people dream of relaxing in a bathhouse, so their construction is becoming more and more popular. A separate area that requires special attention is the washing room - a room that must be present in a sauna or bathhouse. You can do it yourself, there is nothing complicated about it.
Option for organizing a washing room in a bathhouse
Advantages of a separate washing room
The washing room must be organized according to the standards in separate room, closed from the relaxation room and steam room. It is possible, if space does not allow, to combine these zones, but make a small fence to make the interior more comfortable. The basis of finishing in the bathhouse is wood, but the washing device requires additional materials– tiles and protective curtains.

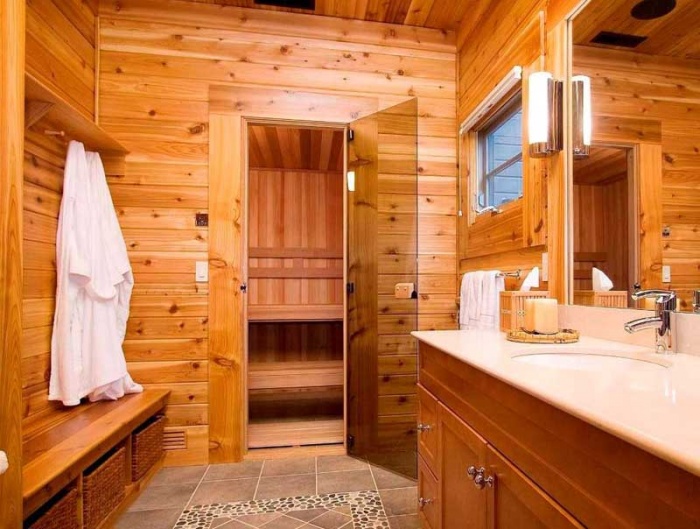
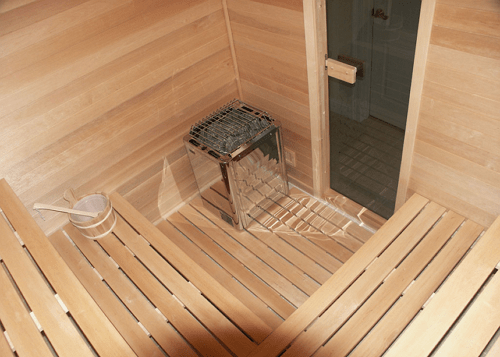
A sink finished with wood looks organic
It is important to remember that a combined washing room and steam room saves space, but the design is less comfortable. The interior of the bathhouse as a whole begins with the washing room, since it is located immediately near the entrance.
Advantages of a separate sink:
- allows you to create comfortable interior and beautiful design;
- if the room allows, then you can accommodate a large group of people;
- the shower cabin does not spoil the overall atmosphere with its unusual appearance for this room.
In turn, the combination will save money on materials and firewood, since there will be no need for additional heating sinks
Advice: shower cabin and tank with hot water(baller) can be decorated, for example, by sticking a film with a wood pattern. This is especially true if the sink is not insulated. The installation of this part of the bath or sauna requires some skills and knowledge, since the humidity levels in the shower room are much higher than in the rest of the room.

Materials other than wood are often used in the washroom.
It is important to remember that high-quality and powerful ventilation is necessary here, so maximum attention must be paid to it. For comfortable accommodation in a common room with a steam room, it is recommended to arrange them in different levels. For example, a shower will occupy the lower zone, and a shelf for relaxation will be placed at the top. Most often, a washing room and a steam room are combined if the total area of the building is less than 16 m2.
Arrangement of walls and floors
The finishing touches in the bathhouse suggest that most of the interior will have wooden elements, but the washing compartment allows the floor and walls to be finished with tiles as well. The cabin in which the shower will be located can be either plastic or made with your own hands from the same wood, which will look stylish and the interior will be completely harmonious. It is important to remember that the installation of a washing room is carried out exclusively with moisture-resistant wood species. Cedar will cope with the task perfectly. It is used both for finishing walls and for covering floors if the use of tiles is not provided. Design and interior also benefit in this case. For wood finishing Linden, larch and abashi are also suitable.

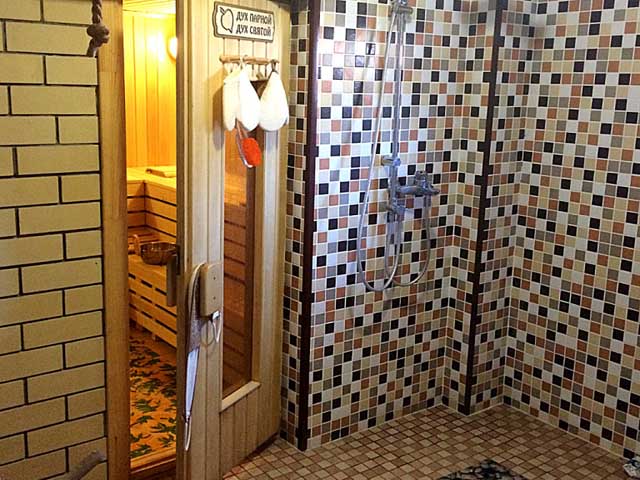
The floor in the washing room is tiled, and the walls are made of natural wood.
The lining can be fastened in different directions:
- horizontally;
- vertically.
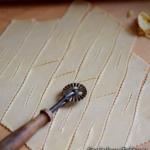
Today it is very fashionable to place it diagonally or combining directions.
In order to create a washing room, you will need to create a frame, which is then covered with clapboard, which creates not only a pleasant design, but also fills the entire room with a pleasant woody aroma. Fastening is done both with nails and self-tapping screws.
Installing a floor in a washing room yourself is also not difficult. It is important to ensure that it does not end up slippery. If you want to move away from the usual and make a modern floor, then experts advise paying attention to ceramic tiles that do not have glaze. Its installation is carried out directly on the concrete floor (rough).
Advice: It is best to ensure good drainage of water. For this purpose, special structures called ladders should be used. You can make them yourself from wooden slats . Ordinary rubber mats will also help get rid of slippery floors and excess moisture. Do not use toxic materials for flooring.

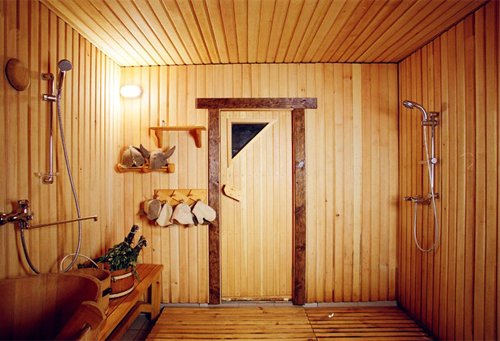
A modern version of finishing a bathhouse sink
In addition, installing a floor with your own hands requires taking into account the fact that the ground cushion, heat insulating material, and the floor screed must not be connected to the foundation to prevent distortion and shrinkage.
Water supply and ventilation system
In a modern bathhouse it is necessary to do not only good shower, respect the design and interior, but also provide ventilation and ensure uninterrupted water supply. This applies primarily to the washing room.
Ventilation is necessary to remove water that may accumulate under the floor, especially where the shower is installed. The blowing device will prevent rotting and will also ensure a stable air temperature. Installing a ventilation pipe together with the stove will keep the floor warm.

It is practical to install a bathtub in the washing room
In the bathhouse there is a natural and forced system for pumping air masses. Natural ventilation occurs due to the difference in air pressure inside and outside the room. The interior will not suffer damage, since special devices, spoiling the appearance, will not need to be purchased. Forced ventilation, the design of which is especially important for large rooms, involves the use of ventilation and filters.
The water supply in the sink and bathhouse as a whole must be made reliable so that there is both hot and cold water. A separate heater can be installed in the shower.

A shower stall in a washroom can look very organic
Advice: to save resources, you can make a preliminary calculation to determine the optimal amount of water per person.
Then the pipes are laid out. In order for the washing room to be in in full provided with hot and cold water, a gas or electric heater can be used as a supplement or alternative. The shower can be made joint or separate, then you need to think about the number of heaters in advance.

The sink can be completely tiled
There are times when water is limited because there is no way to ensure its flow to the site. Then the water supply arrangement looks like this: calculations are made in liters per number of people, after which water is delivered into containers using buckets - in this case, it is most practical to install one shower. Then the hot water is heated to 90°C. Cold water is stored separately. Approximately 40 liters of water per adult, of which at least 10 liters are hot.
Thus, installing a washing bath in a bathhouse is a task that can easily be done with your own hands, without spending money or the help of specialists. Design, interior, furniture - all this is chosen by the owner, but water supply and ventilation should be arranged according to the rules and regulations. The shower in a modern bathhouse can be supplemented with a separate tank - a water heater for comfort and better, more complete rest.
 Modern baths: high-quality finishing from floor to ceiling
Usually baths are equipped with several compartments. This is a rest room, a dressing room and a washing area. Special attention It is necessary to pay attention to the last room in the bathhouse, since it is in the washing room that the temperature and humidity level must be maintained. In a washing bath, it would be appropriate to equip a shower room, purchase and install tubs, or even make a small pool.
But benches are indispensable elements in the washing department of a bathhouse. They are very convenient for performing various procedures, for example, for massage. Such a washing machine in a bathhouse will delight you for many years.

Nuances in arrangement
What the washing compartment of the bathhouse will look like and what elements will be present in it must be thought out in advance. First of all, it is necessary to provide a device for the flow of water into the bathhouse, how it will be heated and a method for draining it. Ventilation is also of no small importance in the washing section of the bathhouse, since moisture and high temperature are constantly present there. With high humidity in the bath, there is a risk of mold and mildew.
Next, we determine the dimensions of the washing compartment of the bathhouse. Here you need to decide exactly how many people will wash in the bathhouse. It is traditionally believed that there is approximately up to 1.2 m2 per person. But in principle, everything is decided by the tastes and capabilities of the bathhouse owners.
As for the material, then interior decoration sinks should be made only from natural materials.
Wood finishing
In the washing section of the bathhouse it is necessary to use coniferous wood. Since the bathhouse has a high level of humidity, and the peculiarity of these rocks is the resistance to moisture due to the resin content, which prevents the material from rotting. In order to provide greater protection, the wood should be treated with special products.

Facing tiles in the washing compartment of the bathhouse
This is one of the most durable materials. It is distinguished by such characteristics as durability and ease of maintenance. The variety of materials is very large, both in color and in original design solutions. The sizes of the tiles are also different and you can choose any one if necessary. The disadvantages of this material are that the surface of ceramic tiles is very slippery. Recently, types of ceramic tiles with special characteristics have appeared that allow them to be used for finishing in a bathroom or bathhouse. But, nevertheless, in order to avoid injury, it is better to additionally use wooden grates or rubber mats on the floor in the washing compartment of the bathhouse.
Application of natural stone
It is used much less frequently due to its high cost. Most often, this type of finishing is performed in combination with ceramic tiles or wood. The advantages of this material include its durability, strength and environmental friendliness. But the downside is that working with this material is quite labor-intensive and can hardly be done without the help of specialists. It is much easier to work with artificial stone. It is very light, and it will not be possible to finish the walls of the bathhouse yourself. special labor. And in price it wins compared to natural material.

Lining and PVC panels
The characteristics of natural materials were presented above. But in some cases, artificial ones can also be used. These include lining and PVC panels. First of all, this material is affordable. It also wins in terms of installation method. But it is significantly inferior in environmental friendliness and resistance to mechanical damage.
The use of materials such as fiberboard and chipboard, as well as impregnated wood, is strictly prohibited. At elevated temperatures, these materials begin to release substances harmful to the human body.
Features of arrangement at the construction stage
Everyone knows that the washing compartment is the part of the bathhouse in which moisture is constantly present. And this fact must be taken into account even at the stage of construction of the bathhouse. Here it is necessary to select building materials that can withstand such a load and ensure the durability of the washing compartment in the bathhouse. In addition to the need to purchase materials such as clay, crushed stone, sand, cement, sawdust, you should definitely think about waterproofing materials. These include both the already common roofing felt and mastic, as well as the less commonly used expanded clay and insulation. various types and moisture-resistant drywall.

Also, at the stage of building a bathhouse, it is necessary to consider the arrangement of all communications. First of all, this is the water supply and provision of drainage in the washing compartment. If you plan to install a shower stall, then you need to purchase it ready-made. But the option of installing a shower yourself cannot be ruled out.
For the exhaust and ventilation device, all the necessary elements are purchased. At the stage of construction of the bathhouse, there must be pipes to ensure air flow and exhaust.
Installing a drain in a washing room
For correct device drain in the washing compartment, it is necessary to correctly calculate the load that will be carried out this system. Here you should take into account the water consumption during bathing of one person. Usually up to 10 liters of hot and 40 liters of cold water. It is clear that with more active use of the washing compartment, the consumption will be much higher. And here you should think about whether the water drainage will cope with such a load and what dimensions can suit it. Therefore, it is necessary to produce a high quality drainage device.

Here is an example of a water drainage device in the washing compartment of a bathhouse and the procedure for carrying out the work:

Important! Under no circumstances should you install a drain well directly under the bathhouse, as this can lead to constant dampness in the room.
Washing room floor
Recently, in the washing department of the bathhouse, the floor lining has been made of ceramic tiles. Here you can save on facing materials and buy inexpensive tiles. Since in this room it is recommended to cover the floor surface with rubber mats or install wooden coasters. This is due to the fact that it is very easy to slip on a wet surface of a ceramic floor.
Let's look at some tips for arranging floors in the washing department of a bathhouse.
First, you should fill the floor with concrete; after it hardens, we screed it with cement-sand mortar. It is advisable to insulate the floor. To do this, add expanded clay to the solution and fill it in layers. We place insulation between them. Special felt used in construction can act as insulation. First, it needs to be impregnated with bitumen. In the corners between the floor and walls we treat with bitumen to increase waterproofing.

Important! The floor in the washing compartment must be made with a slight slope in the direction of the drain hole.
When installing a wooden floor, it is necessary to completely cover the entire concrete with roofing felt and install the sheathing. A board is laid on the floor sheathing. If the floor is finished using ceramic tiles, then before laying it is necessary to treat the concrete with mastic.

In some cases, they refuse to finish the floor with any material, and simply lay wooden gratings tightly together. Before this, the slats of the gratings must be carefully sanded so as not to injure your feet with splinters during washing.
Important! You cannot cover the floor surface in the washing compartment of a bathhouse with linoleum. This kind flooring not suitable for use in rooms with high levels of moisture.
Walls and ceiling
The finishing of the walls and ceiling in the washing compartment of the bathhouse can be done with the following materials:
- wood materials;
- ceramic tile;
- natural or artificial stone;
- lining.
Very often materials are combined.
Here are some instructions for finishing the walls and ceiling of the washing compartment in the bathhouse:


Conclusion
Before starting work on the installation of a bathhouse washing compartment, it is necessary to accurately determine all aspects: location, finishing material, drain arrangement. If the instructions given in this article are strictly followed, you can be sure that the bathhouse will delight you for many years without the need to make any alterations.
Every owner of a private house or a good-quality dacha dreams of his own bathhouse, such is the mentality of our people. And if the construction of the box, the arrangement of the roof and the external finishing of the bathhouse, as a rule, is left to professionals, then the internal lining is often done independently - such a useful hobby.
Today we will talk about what options for finishing a bathhouse exist in general, and we will also tell you what you can do from this variety yourself and, most importantly, how to do it correctly.
Steam room as the main room
Finishing in a bathhouse is quite a serious thing; in addition to purely aesthetic appeal, it is subject to a number of practical requirements, neglecting which you risk ruining your bathhouse even before its grand opening.
Material selection
The question of how to decorate the walls in a bathhouse is relevant only for auxiliary rooms or external cladding, we will talk about them later.
As for the steam room, there are no worthy alternatives to the Russian bath or sauna, natural wood not yet invented.

- The type of wood is of particular importance here. At the moment, linden is deservedly considered the most popular finishing material in the steam room. What made it a leader was its reasonable price, high thermal insulation characteristics of the porous massif and light, even color. Thanks to this, if desired, the boards can be decorated with natural stain to resemble expensive types of wood;
- Second in the ranking is aspen. The price is certainly higher, but this type of wood resists high humidity much better. And this quality in the steam room is considered almost the main one;

Important: when covering walls and making sun loungers in the steam room, you should immediately forget about coniferous wood. The fact is that as soon as the temperature in the room rises above 40ºC, such wood will begin to “cry”, that is, resin will flow from it. You understand that sticking to a hot resin drop is a very dubious pleasure.

- Such beautiful varieties woods like oak or walnut are good for. But you shouldn’t make sunbeds out of them. Due to their high density, oak or walnut benches will become very hot. These rocks can be laid on the floor, because the temperature below rarely rises above 50ºC, which is quite comfortable for walking barefoot;
- For gourmets and exotic lovers, there is the overseas abashi tree. Having a beautiful texture, moisture resistance and good thermal insulation properties, this wood is almost ideal for a steam room. The only problem here is the high cost.

Advice: conifers They have a subtle, pleasant and very healthy aroma, so they can be used to make frames for lining and support posts for sunbeds. There, the resin will not interfere with a pleasant stay, plus such a frame will cost much less.

- An important point is high-quality thermal insulation. For its arrangement, soft mats made of basalt or mineral wool are usually used. Keep in mind that cheap glass wool is not suitable here, if high temperature it will simply bake;
- Between layer wood cladding and a heat-reflecting layer of foil is installed as thermal insulation. Ideally, of course, it is better to immediately buy special cotton wool with a foil coating, but its price is too high. Therefore, reinforced foil is mounted here, and adhesive tape made from the same reinforced foil is used to connect the panels.

Tip: from own experience I can advise you to take rolls of regular technical foil and mount it with an overlap of approximately 200 - 300 mm. In this case, the joints are located in the area of the sheathing. The cost will be an order of magnitude cheaper, although this material is quite delicate and you need to work carefully so as not to tear it.
In addition, you need to stock up on mounting fittings for the lining, and also take care of wooden moldings, baseboards and other finishing materials.
Frame installation
The first thing to install on the walls of the steam room is a vapor barrier film. And if we're talking about about a wooden bathhouse, then it must be a vapor barrier so that the walls can breathe. For brick and other block structures, technical polyethylene can be used.

It is not possible to waterproof the walls of the steam room with tar or any other bitumen-based materials. In addition to the fact that they can “float” when the temperature rises, petroleum products will evaporate when heated and release very toxic compounds.
A 50x50 mm block is most often used for the sheathing, but this is not necessary; you can take less. Although in this case it will be necessary to install the load-bearing bars on wooden blocks or aluminum perforated canopies, with the help of such canopies frames for plasterboard are also equipped.
The distance from the wall to the cut of the supporting beam is determined by the thickness of the insulation, often 50 - 100 mm. The structure is fixed on the wall with anchors.

Important: for the middle zone of our great homeland internal insulation 50 mm thick is sufficient. In northern regions, thicker mats should be used or additional external insulation should be installed.
The following instructions look something like this. Insulation mats are literally “stuffed” between the guides. To prevent them from being pushed back over time, the mats on the wall can be fixed with plastic umbrella dowels or using strong thread and a stapler on top wooden sheathing tighten a kind of “lace”, in increments of about 200 mm.

A layer of reinforced or regular foil is attached on top of the insulated sheathing. Accordingly, on reinforced fabric, the joints are glued with tape, and regular foil is covered with an overlap. All this beauty is fixed with a stapler.
For both internal and external cladding, the lining should not be nailed tightly to the base. In this case, the so-called ventilated facade technology is used for installation, i.e. with a gap between the cladding and the base. Otherwise, the tree will deteriorate.
To do this, a wooden counter-latten is placed on the supporting slats. The block here is taken 20x20 mm or 10x20 mm. Theoretically, a gap of 10 mm between the lining and the base is sufficient for ventilation, but the centimeter strip may crack when installing the lining.
Step-by-step installation of cladding in a steam room
Important: the lathing in the steam room is mounted exclusively vertically, since finishing the walls in the bathhouse with clapboard should only be done horizontally.

- At first sight vertical installation lining strips are beneficial because dust does not accumulate in the joints and moisture does not retain, it is easier to handle and clean, but this is true for all rooms except the steam room;
- As you know, in a steam room the difference between the temperature below and the temperature at the ceiling can reach up to 100ºC. As a result, the vertically fixed plank heats up unevenly and serious internal stresses arise in it, which leads to deformation and cracks. Horizontal installation allows you to avoid these troubles;

- The problem of moisture ingress is easily solved; the planks are installed with the groove down. It is more convenient to install this type of installation from above from the ceiling. The starting strip along the upper edge is rigidly attached to the sheathing with galvanized nails; here it is important to set it exactly level, otherwise the entire wall will be skewed. Don’t worry about the nail heads, they will later be covered with the ceiling plinth;
- The visual strip is fixed with a galvanized clamp. Previously, a nail or a self-tapping screw was driven into the side of the groove, but with such fastening, the thin sides often cracked. With the advent of clampers, everything has become much simpler, faster and more reliable. Cleimers cost mere pennies, so you don’t even need to try to secure the bar with nails, it will be difficult without experience;

- Next, the tenon of the next plank is inserted into the groove until it stops, which is also fixed at the bottom with clamps. And so on until the entire wall is sewn up from the bottom.
Important: wood will expand with changes in temperature and humidity, so a damper gap is left around the perimeter, which is then covered with baseboards. But if 20 - 30 mm is enough on top and sides, then near the floor this gap should be about 50 mm. The humidity is highest there.
How to treat wood
Options for finishing a bath with wood can be different. But no matter what you cover the room with, the wood needs protection. For those who do not trust serial protective compounds, we can advise you to treat it in the old-fashioned way, which must be applied at least 3 times.

The recipe is simple; linseed oil or any other refined vegetable oil is used to impregnate the wood. For aroma, the oil can be infused for 2 weeks with mint or pine needles. Here take a glass of the composition for half a liter of oil. You need to insist on dark room and shake occasionally.
Beeswax-based mastic is prepared in a water bath. The main components are the same linseed oil and beeswax, in a ratio of 1:5 (one part wax and five parts oil). The only weak point of homemade compositions made by yourself is that they need to treat the wood about once every six months.

But now there are many factory protective compounds from trusted manufacturers. Among foreigners, the Finnish Tikkurila is considered the leader. The Finns offer Supi Sauna for wood processing in washrooms and steam rooms. Our craftsmen have released “SENEZH Sauna”, which also has an increased bio-protective effect.

For ceilings, a product called Supi Saunasuoya is offered, all from the same Tikkurila. The wood in the dressing room or rest room can be treated with Ässä or the domestic composition, “SENEZH Aquadecor”, which, according to the manufacturers, contains natural beeswax.
Cladding of auxiliary premises
In addition to the steam room itself, any bathhouse must have a shower and a dressing room, which is often equipped as a relaxation room. If the arrangement of the dressing room is not much different from the lining of ordinary premises, then the finishing of the washing room in the bathhouse requires a more serious approach.
How and how to decorate a washing room
Finishing a washing room in a bathhouse is difficult, primarily because this room has perhaps the highest humidity. Hence, appropriate materials must be used. Wood cladding harmonizes perfectly with the steam room, but there are some nuances here.

As in a steam room, it is better to mount the slats horizontally. Only here this is caused by the fact that there is higher humidity below and you don’t treat the wood the same way, it will deteriorate faster there. With a horizontal arrangement, you have the opportunity every few years, if necessary, to replace part of the lower sector. Otherwise, you will have to change the entire cladding.
When choosing a type of wood, you need to be guided, first of all, by moisture resistance; the temperature in the washing room does not rise above 45ºC. Of course, the most the best option There will be installation of aspen or larch, but they are expensive. As a middle option, you can take cedar, but most often they use pine or spruce. In this case, the high resin content protects against moisture.
As for the installation technology, it is practically no different from covering a steam room with clapboard. Only here there is no need to install a foil screen; dense technical polyethylene is used instead. Plus, insulation can be reduced in cost by replacing mineral wool with conventional ones. foam boards. Moreover, they do not get wet, and the gaps between the plates are sealed with polyurethane foam.

The second, much more practical option is finishing the sink in the bathhouse with ceramic tiles. This is an airtight, comfortable, and most importantly strong and durable coating. The whole difficulty lies in arranging a good base for the tiles.
If we talk about walls, then ideal option are block walls or piers. In this case, it is not so important whether it is brick or other types of blocks. But such walls cannot always be folded in a wooden bath; they are quite heavy.
Although our people found an excellent way out of this situation. Thick, 12 mm or more waterproof plywood is installed as a supporting base.
On the walls it is attached to the sheathing, and when constructing partitions, such a shield can be firmly fixed to the floor and ceiling. After this, sheets of expanded polystyrene are glued to the plywood on one or both sides.
Both expanded polystyrene and moisture-resistant plywood can be covered with tiles, but due to the large mass of the structure, glue alone may not be enough; it is advisable to screw the slabs to the base with dowels with wide washers.

Tip: you can reduce the cost of building a shower wall by using foam plastic. Only in addition to good fixation of the sheets themselves, they will need to be primed and a fiberglass mesh should be glued with a starting putty compound. Otherwise, the tiles will not stick to the foam.
The technology for laying tiles is traditionally the same everywhere. Before installation, the tiles are soaked and primer is applied to the base. Cement-sand mortar Nowadays it is practically not used, for this there is a special moisture-resistant glue, which is applied with a notched trowel, both on the base and on the tile itself, only in different directions.

After this, the tile is carefully pressed to the base, excess glue is wiped off, and even gaps between the plates are ensured by installing several plastic crosses around the perimeter. After a couple of days, when the glue has dried, the crosses are removed and the cracks are covered with a special moisture-resistant colored grout.
Finishing a bathhouse shower with plastic panels, in our opinion, is a mistake. Of all the advantages, such cladding has only low price. PVC panels are hollow, and in the heat and high humidity, some living creatures will definitely live in these cells. Plus them mechanical strength leaves much to be desired.

But if you still decide to line your shower with plastic, then its installation can be done either using clapboard cladding technology, the joining system for these materials is similar, or by gluing the plastic onto a flat base like tiles. Liquid glass is used as an adhesive.
Arrangement of floor and ceiling
The decoration in the bathhouse does not end on the walls. An equally important point is competent arrangement floor and ceiling. From a technological point of view, making a ceiling is a little easier.

Cladding a concrete floor slab with clapboard is done in almost the same way as finishing walls. Only on the walls in the steam room the distance between the guides is about half a meter, and on the ceiling this step should not exceed 250 mm. This is caused by the need for more careful fixation of the insulation and foil layer.
If the ceiling is mounted on wooden joists, then the technique will be slightly different. In the case when basalt or mineral wool, it is advisable to fasten foil in 2 layers on the bottom of the logs, on top of which the sheathing is stuffed under the lining and the strips are mounted.
Cotton wool between the joists is laid last. It is light enough and cannot damage the foil. In other rooms, polyethylene is used instead of foil.

But it is much cheaper to insulate with expanded clay. Only in this case, the logs from below are not hemmed with an edged board; you can, of course, also hem with a planed board, but this will be much more expensive. Foil is attached to the ceiling flooring in the steam room, strips are stuffed and lining is installed.
Ideally, it is better to cover the cells between the joists with foil, but if this is expensive for you, then you can use asbestos or fiberglass sheeting. Expanded clay is poured from above to the entire depth. As you understand, for the rest of the rooms everything is done the same way, only without foil under the lining.
With floors everything is more serious, because they will be under load. Let's start with the fact that the floor in the steam room is often made 150 - 200 mm higher than the floor in the shower.
If the base is a concrete slab, then it is carefully waterproofed and extends onto the walls. Here you can safely use bitumen for waterproofing. It’s better to immediately install roll waterproofing.

A layer of thermal insulation must be installed on top. This is especially important, since a bathhouse with a cold concrete floor will be very difficult to heat. Extruded polystyrene foam is good, but it is expensive to use as floor insulation. Now concrete slab It is best to insulate with foam concrete.
Important: just do not confuse foam concrete with aerated concrete. If in the first case the material is not afraid of water and can even float, then aerated concrete will require additional powerful waterproofing, since it absorbs moisture.
After laying foam concrete blocks on a special solution, all you have to do is pour a reinforced concrete screed with a thickness of about 20 - 30 mm and, after it hardens, you can begin installing the floor tiles.

Advice: in bath rooms Where tiled, clinker or other floor tiles are laid on the floor, “transparent” wooden ladders should be laid on top of them. This will prevent you, your family or your guests from slipping. Plus, this approach is more hygienic, because the ladders can always be removed, washed, disinfected, dried and put back.
Installing a wooden floor along joists is similar to installing a ceiling. As indicated in the diagram, small support bars with a cross-section of approximately 40x40 mm are placed on the logs below.
The subfloor is laid and fixed onto these bars. For him, as a rule, it is taken unedged board. The remaining space is filled with expanded clay. You can, of course, use polystyrene foam, but expanded clay is better in terms of ventilation, and then it is cheaper.

The finished floor is made of tongue and groove boards with a thickness of at least 40 mm. Previously, it was joined using a tongue-and-groove system and nailed to the joists. Nowadays, nails have been replaced by clamps. The principle of such installation is identical to clapboard cladding.
There are two options for shower floors. It’s easier to install a shower stall with a tray and make the rest of the space flat.
But it is more practical to install a sloping tiled floor, at the bottom corner of which a drain is installed. By the way, in the steam room the tiled floor is also sloping, and the drain is connected to the shower drain.
To construct such an inclined structure on a concrete base, after installing the insulation, metal beacons are installed, and an inclined screed is laid along them, which is then covered with tiles.

In wooden baths you will have to install inclined logs. Asbestos cement boards or sheets of waterproof plywood are attached to these logs. After which you can begin tiling the floor.
Dressing room finishing
There are no special restrictions on materials for arranging a dressing room. The only weak point here is the wall bordering the steam room. After all, if the sauna is wood-fired, then the firebox comes out from this side.
But even with electric heating elements, covering this wall with wood, much less plastic, is not recommended. Here only tiles or facing bricks are used. Another option is to plaster it.

Important: everything facing materials that will be used to finish the wall bordering the steam room must be heat-resistant. After all, ordinary tiles or plaster can crack or change color.

Conclusion
Equip a bathhouse from the inside with your own hands for talented person who knows how to confidently use the tool, the task is completely solvable. Some aspects of such work are clearly demonstrated in the video in this article. And if this is not enough, then write in the comments, we will try to help solve your problem.