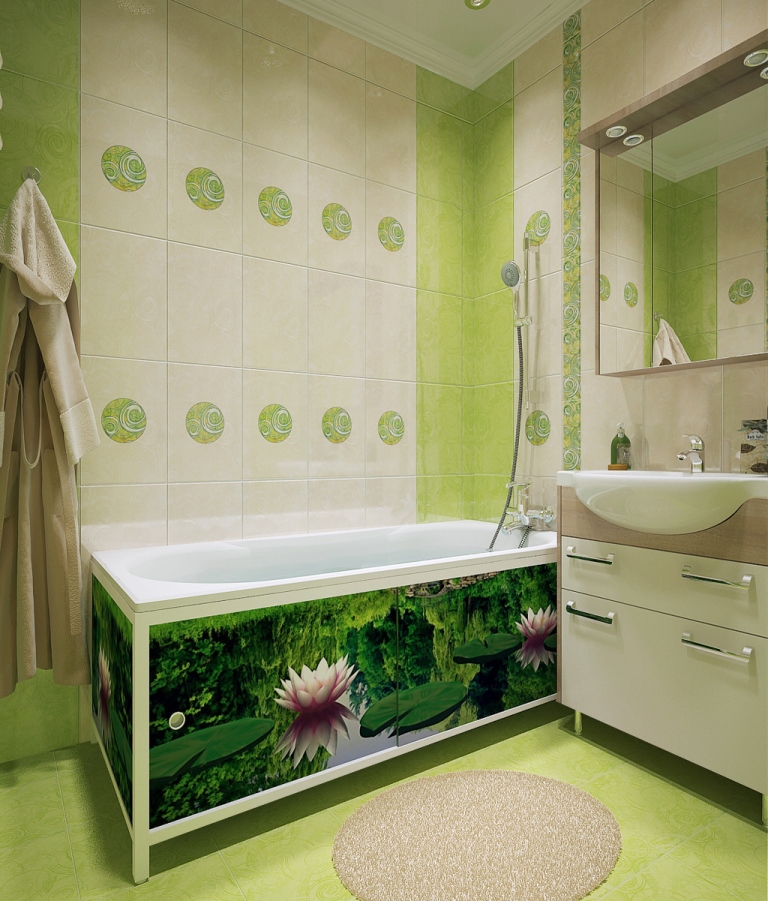
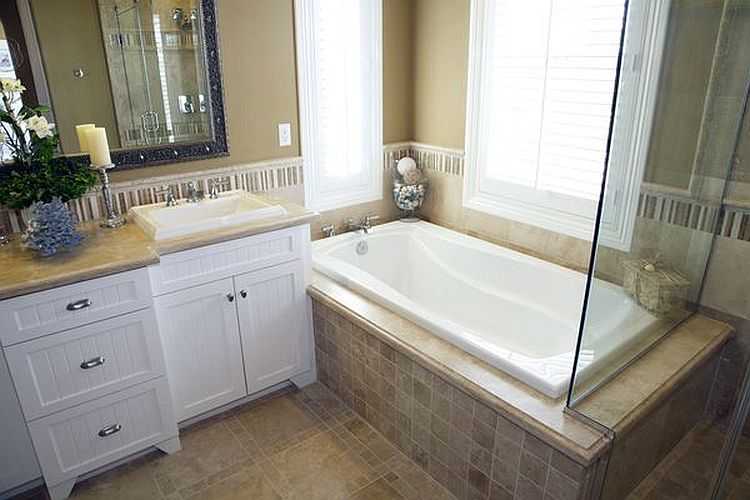
Having installed the bathtub itself, many consider the renovation complete. But do not forget about the need to give the room aesthetic completeness. Here the screen under the bathtub, which hides side panels, legs and other elements. Their appearance does not add advantages to your interior design. Self-production- this is a more than realistic task. Today we will talk in more detail about its implementation.
- 1 Types
- 1.1 Plasterboard
- 1.2 Tongue-and-groove
- 1.3 Tiled
- 1.4 From PVC panels
- 1.5 Ready-made structures
Kinds
If you decide to do the work yourself, you first need to decide on the type of screen for the bathroom. Metacam company is ready to offer a wide range of ready-made solutions, which will significantly simplify the task. The main thing is to find a metacam screen of the size you require.
It’s not difficult to do everything with your own hands. Plus, you yourself will cut out the elements of the material in accordance with the dimensions of your bathroom. The result will be a kind of designer screen for the bathtub, a source of your pride.
Today, the following types of bathroom screens are most widespread:
- Plasterboard;
- Tongue-and-crest;
- Tiled;
- Made from PVC panels;
- Sliding ready-made structures.
Let's look at each type of bathroom screen separately.
Plasterboard
To create a screen from plasterboard, be sure to use exclusively moisture-resistant material, since the normal level of humidity in the bathroom will not be able to withstand. In metacam you will find everything you need for the screen.
The manufacturing sequence is as follows.
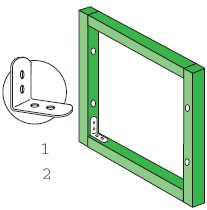
- Take the necessary measurements of length, width, height to cut the required slats for the frame.
- Attach wooden blocks around the perimeter of the bathroom, creating a kind of horizontal staircase along the long side of the bathroom.
- Choose bars of medium thickness so that they fit under the sides of the bathroom.
- Connect the bars to the floor, walls, and each other, thereby forming a strong, reliable structure.
- All that’s left to do is cover the frame with sheets of moisture-resistant plasterboard and install Finishing work on the bathroom screen.
Tongue-crested
 The use of tongue-and-groove slabs has become widespread in the manufacture of bathroom screens. It is not difficult to make such designs yourself.
The tongue-and-groove tile is a material with dimensions of 900 by 600 by 80 millimeters, on the sides of which there are grooves and ridges. Such a screen for a bath will be environmentally friendly, which is an important indicator for many clients.
For some bathrooms tongue-and-groove slabs may be too thick, they take up a lot of space. There is an excellent alternative - to make a screen under the bathtub from gypsum particle board. Its dimensions are smaller - 600 by 300 by 50 millimeters. Metacam is ready to offer a wide range of products.
If the tongue-and-groove slabs still fit, then the sequence of work to create a screen for the bathroom is as follows:
- Clear workplace, remove all dust, dirt;
- Apply a coat of primer to the floor and walls. It is recommended to use acrylic mixtures as primer;
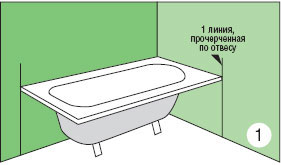
- Use a plumb line to mark the area. Step back 5-6 millimeters from the outer border line and draw another line. This will be the outer border for the screen;
- Set aside space for tiling;
- Begin laying tongue-and-groove slabs;
- For their installation use tile adhesive or gypsum plaster. In the second case, the tiles must be pre-wetted with water;
- Installation is simple, since the design of the material includes grooves and ridges;
- Make sure that the plates fit tightly to each other, the gap is about 5-6 millimeters;
- The cutting of the screen elements is carried out with a simple hacksaw for wood.
The resulting screen for the bathtub will only need to be tiled to match the design of your room and allow time for the adhesive solutions to harden. Or buy a completely finished bath screen from the Metacam company.
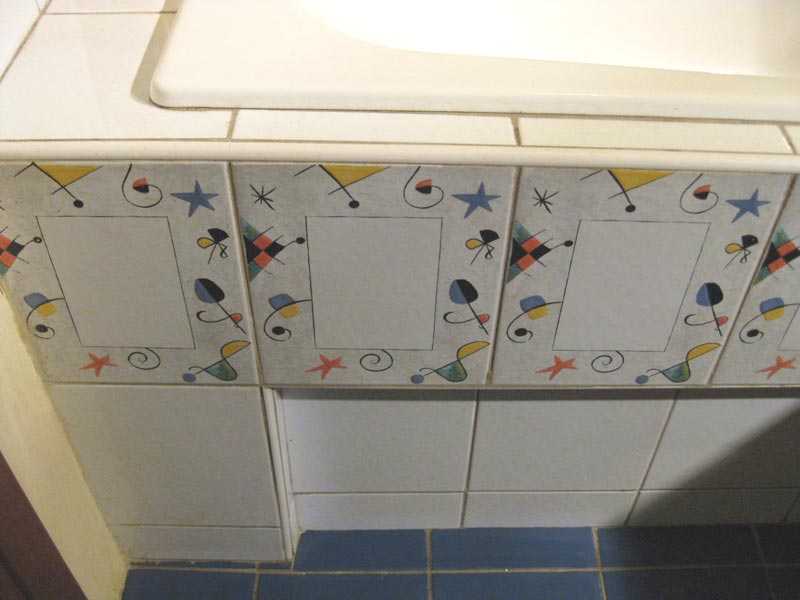
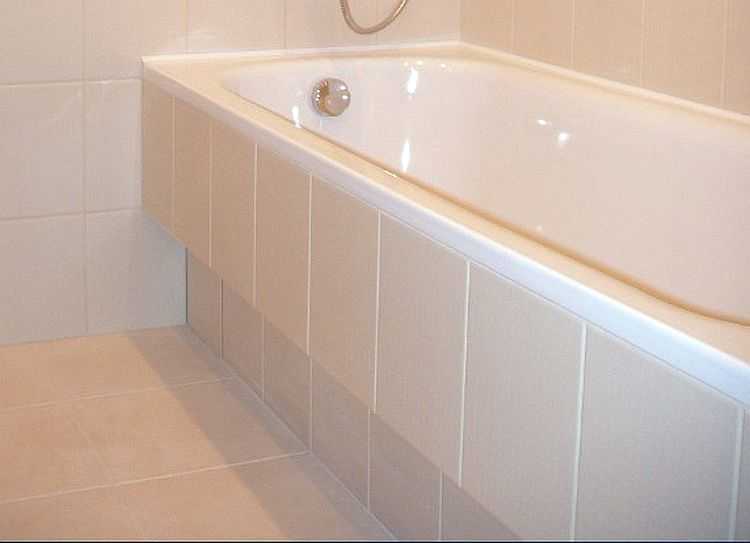
Tiled
Most of those who decide to make a bathtub screen with their own hands choose the option using ceramic tiles. Here the basis is one of the two types of screens that we talked about earlier - plasterboard and tongue-and-groove.
That is, the task is to finish with tiles.
- Approximately 5-10 dots are applied to each tile liquid nail, or tile adhesive.
- The first tile is laid in the upper left corner, leveled with a building level.
- Crosses are inserted between the tiles to ensure an even seam.
- The resulting seams are rubbed down, after which the screen under the bathroom can be considered complete.
If you are going to use heavy, massive tiles, then it is advisable not to use a wood frame. Replace them with special ceiling guides. They are fixed to the surface with self-tapping screws.
Made from PVC panels
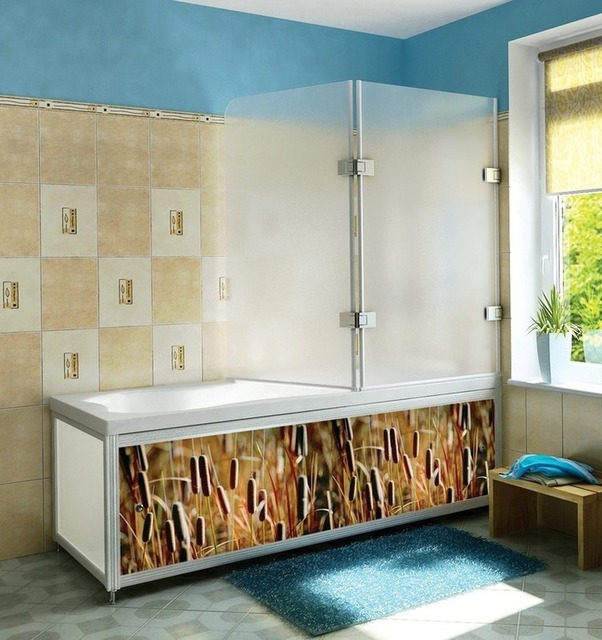
This option is considered a budget option because it does not require large financial costs. At the same time, the design provides the necessary functionality and attractive decor. The Metacam company is ready to offer a wide range of special screens similar to PVC.
The bathroom screen option is relevant if you don’t want or can’t spend a lot of money, plus you want to decorate the bathroom a little. For those who live in rented apartments, this is a great solution.
- The frame must be made using plastic guides. The cladding will be the PVC panel itself.
- A line is drawn on the floor to create a frame.
- The length of the guides, which are cut with a hacksaw, are measured.
- Now measure the distance from the floor to the sides of the bathroom and cut out the corresponding elements from the panels.
- The panels are inserted into the guides, the floor surface is degreased, and the material is attached to liquid nails.
- The upper part of the panel rests against the upper side, and the lower part is attached to the floor.
- The next panel is mounted in a similar way.
- The corners are sealed at the joints, and the joint between the panel and the wall is covered with a guide.
- On last stage just coat all joints with sealant so that water does not penetrate between them and does not accumulate under the bathtub.
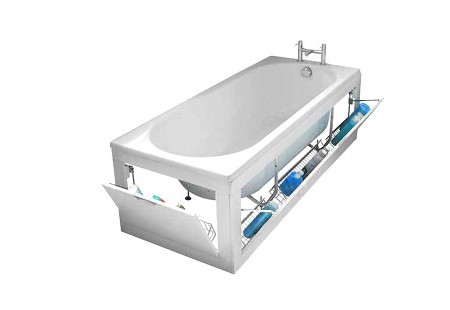
Ready-made designs
But today there are many ready-made solutions, one of the leaders in the production of which is the Metacam brand. With their help, making a high-quality screen for a bathtub will not be any problem. The most important thing is to choose the appropriate sized elements, fasten them together and strictly follow the manufacturer’s instructions.
The finished design has a fairly wide range of advantages when compared with attempts to make a bath screen with your own hands. At Metacam you will find a wide range of products, many of which are made to order based on the dimensions of your plumbing fixtures.
Should you make screens for bathrooms yourself, or make a structure from ready-made elements, which only need to be connected to each other? It's up to you to decide. This is a matter of having free time, desire and ability to work with tools, building materials, and adhesive mixtures.
Sometimes it is much wiser to turn to specialists who will make a screen for the bathtub based on your requirements, wishes, and interior design features.
Add site to bookmarks
You can also finish it using ceramic tiles. But you will need to pre-sheath the frame moisture-resistant plasterboard. But, first things first: so, the first finishing option.
Return to contents
Method number 1: covering the screen with plastic
First of all, you will need to cut the plastic panels to the size of the prepared frame. If they are short in length, then you can mount them vertically in 2 pieces. Adjust them to required dimensions possible using assembly knife. But be sure to make preliminary markings on them to prevent the occurrence of a crooked cut. Then you need to start fixing them with plastic screws. But don’t forget to leave room for the hatch while doing this. Measure its parameters and make a mark on the frame. It will need to be subsequently installed to such a depth that it is in the same plane as the screen. The hatch is fixed to a metal frame. It will need to be secured with self-tapping screws. Then you will need to install the hatch itself and secure its door first with wedges. Then you take metal screws, and use them to fasten it with your own hands through the frame to the frame of the screen.
Return to contents
Method number 2: finishing with tiles
If you decide to make a screen in the bathroom from ceramic tiles, then the course of work will be slightly different. First of all, it will be necessary to install the hatch according to the scheme described above. Then drywall is mounted on the frame. It must be highly moisture resistant. Fixed this material using self-tapping screws. It is necessary to screw in these fasteners at right angles; this is done using a screwdriver.
At the next stage, you can begin installing the tiles. Here you should use special glue. It is easy to use and allows finishing without unnecessary hassle. Apply the adhesive to the ceramic tiles using a spatula. You should use it to create an even layer. After finishing material glued to drywall. When the installation of the tiles is completely completed, you will need to grout the joints.
The bathroom renovation is almost complete. The walls and floor are lined with luxurious tiles, fortunately, today the assortment of them in stores can drive into a stupor not only the average person, but also experienced designer. New faucets sparkle with nickel and gold, shimmering with reflections suspended ceiling, the new bathtub pleases with its extraordinary whiteness. But its facade doesn’t fit into all this splendor: all the unsightly communications, legs, and outer side this modern miracle The plumbing does not harmonize with the interior created with such love.
What to do?
Naturally, something needs to be covered. How? Should I make it myself or buy it ready-made? This is the question that is almost always asked by the happy owner of an updated one according to the latest fashion trends bathroom. And we will try to help. Let's talk about what these designs are like and how to do it yourself, if this wise Solomonic decision was made.
Short review
Why Solomonic? Because it’s not always possible to buy what you want and what will fit the size and, most importantly, the configuration of a new bathtub, which can be quite varied. Therefore, let's talk about what types of this design there are in general, how to make a screen for a bathtub yourself and, of course, what it is made of.
Why is it needed at all? by and large? In addition to being decorative, as mentioned above, a screen under a bathtub can perform several more functions. Firstly, it will protect communications from mechanical influence from the outside, and secondly, behind it you can arrange a warehouse for useful, but not very attractive, appearance of things.
Plastic
This option also does not require special material costs. But you will still have to work longer here. Do-it-yourself plastic bath screens are made either from large panels, the designs of which, by the way, are also very diverse, or from individual pieces of PVC cut to height. 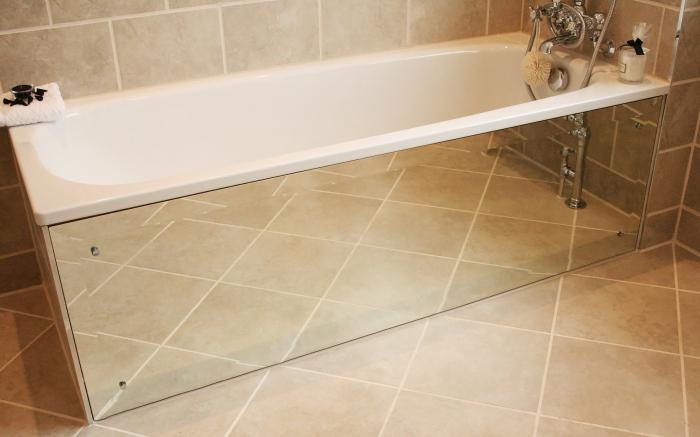
To make such a design, you need to buy, in addition to the main component, a profile specially designed for this purpose, and decorative corners.
Process technology
We cut out blanks of the required height from plastic. We measure the length of the future screen, and then cut off the excess pieces from the guides. We make markings on the floor - draw a line along which we will install the lower profile. Then we directly install the screen under the bathtub. We insert PVC panels directly on the floor into the upper and lower guides. Then we apply glue along the marking line (in our case, these are liquid nails), install the upper part of the structure under the side of the bathtub, and the lower part directly on the glue. We wait until the glue dries, decorate the edges of the screen with corners (we place them on the same liquid nails). You can use it! True, such a screen under the bathtub will only perform decorative function. It is not recommended to use it as a place to store any items - there will be too much fuss to constantly take out and then insert at least one of the panels, not to mention several.
If you still want to have a sliding rather than a solid structure, then it is best to adopt the following method.
A la wardrobe
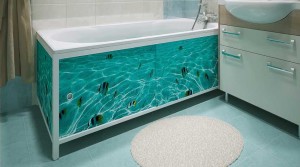
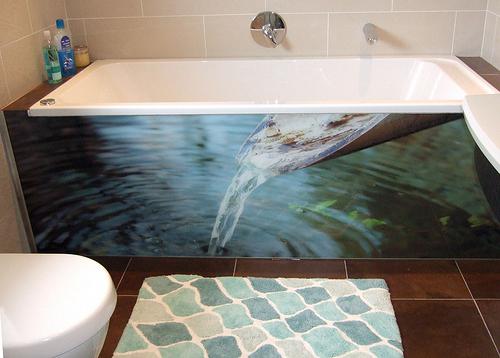
This would be, perhaps, the best option of all that exist. Installing a screen for a bathtub according to the principle of a wardrobe is good in all respects. Firstly, the installation procedure itself is relatively simple, and secondly, the choice of doors for such a design is simply huge. These can be either ordinary MDF panels or mirror or glass sashes. The latter, by the way, can be ordered with a pattern applied in accordance with your own wishes, thanks to which it will be possible to fit the screen into the existing interior as organically as possible.
What to do?
Ride on construction market, having previously measured the height and width of the space under the bathroom. There we find a pavilion that offers all the components for sliding wardrobes and buy guides, appropriate fittings and dowels (regular and “bug”). And then we select the doors. These can be ordinary MDF panels of any color, mirrored, or glass with beautiful prints. Here everything depends on the contents of your wallet and the design idea itself. The store employees will certainly cut out the required pieces for you according to the given sizes, and all you have to do is pay for the purchase. After which we go home with the purchased material, where we begin installation.
Description of work
We cut out the guides in accordance with the width of the opening, then fasten the upper one to the bathroom itself with dowels, and the lower one with self-tapping screws to the floor. We mount the fittings on the doors and insert them into the guides. We check that the wheels fit well into the grooves, since it is thanks to them that the doors will move apart. As you can see, the installation process is quite simple. The only negative is the rather high cost of such material. But the result is worth it.
How to make a screen for a bath: other options
Other methods of making a screen for a bathtub are more labor-intensive. This is the manufacture of a structure made of plasterboard, the installation of which involves creating a frame from profiles, foam blocks, bricks, etc. As a rule, such screens are subsequently covered with ceramic tiles - the same as the bathroom itself, or in a different, contrasting color. It really depends on the wishes of the master himself. Each of these methods is quite labor-intensive and requires a separate detailed description. The only thing I would like to note is that making a screen from plasterboard will be the best option if you have a bathtub of a non-standard configuration. This material is very light and easy to work with, it takes a given shape well, so it can be used to decorate any surface.
So making a bathtub screen with your own hands is not such a difficult task. You just need to pick suitable option, which will match the design of your bathroom and functional features installed plumbing.
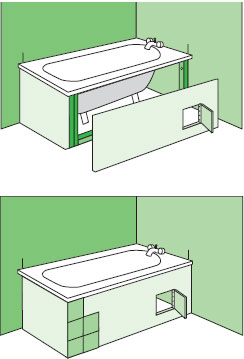
The screen serves as a screen for communications connected to the bathroom. The legs of a bathtub installed on linings, drains, sewer outlets, and pipes are perfectly hidden under it. But in addition to functions related to the aesthetics of space, the screen can also perform other useful work. For example, serve as a support for the stability of the bath or be a cabinet for small items.
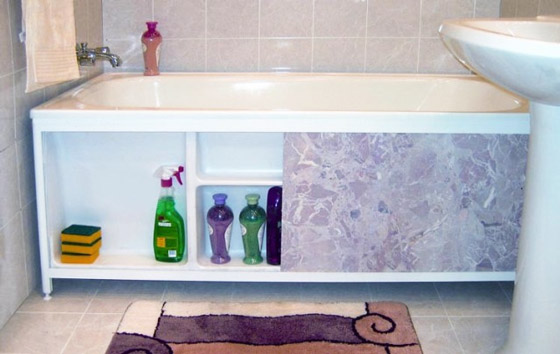
Acrylic bathtubs and other representatives of the latest generation of plumbing fixtures are often immediately equipped with a screen, ideal for hiding dark corners and communications. But what to do if the bathtub is old, and you don’t want to see its shabby sides every day? You can purchase a ready-made screen, and if you don’t want to spend money on a store-bought version or you need the screen under the bathtub to 100 percent meet your requirements, you can make a screen under the bathtub yourself. Here are several ways to create a screen.
The screen providing access under the bathroom is made with sliding doors or with a built-in cabinet for household chemicals; may have vertically or horizontally opening cavities. Vertical structures It is advisable to arrange the openings according to the principle of blinds or equip them with gas lifts and other fasteners that are well known to furniture makers.
Requirements for a bath screen
Materials for the bath screen
The materials that you will use in the bathroom should not be afraid of water, moisture, or temperature changes. It is also important that they are not susceptible to rapid destruction from mold or mildew.
You can make the base of the screen from almost any building material, and then decorate the outside to your liking. Plastic panels or tiles are used for cladding.
Homemade screen options:

The fastest way to do this is to cover the frame under the bathtub with MDF panels. Strips of plastic or MDF are biologically neutral and practical. These materials are easy to cut and fasten together.
After construction, the brick base will need to be sheathed and plastered or tiles glued to it. And before installation wooden frame The wood must be coated with a special impregnation to protect it from moisture.
Plastic screen. MDF sheathing
A screen made of MDF or plastic lining will be the most simple option, which will allow you to immediately obtain a finishing surface. The MDF screen is easy to disassemble, and plastic sheathing the most economical - if any part is damaged, it can be replaced.
Plastic for shielding the space is attached to a frame, for the formation of which it is used wooden beam 40 by 40mm or metal profile. A moisture-resistant primer is required for wood.
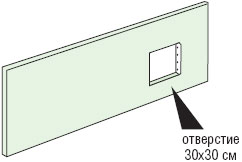
- Cutting MDF and plastic panels is carried out in advance. To work with plastic, it is convenient to use a cutter or construction knife. The surface of the screen is made up of panels, and where there should be a technological hole, a slot is made into which a grille or door is inserted.
In the finished plastic screen, it is also necessary to cut ventilation slots (on the side where there is no “window”). The recommended slot width is 3 by 5 cm. Ventilation hole covered with a plastic grill.
Important! When installing a blind screen, make sure that all communications to which the screen will block access are in good condition.
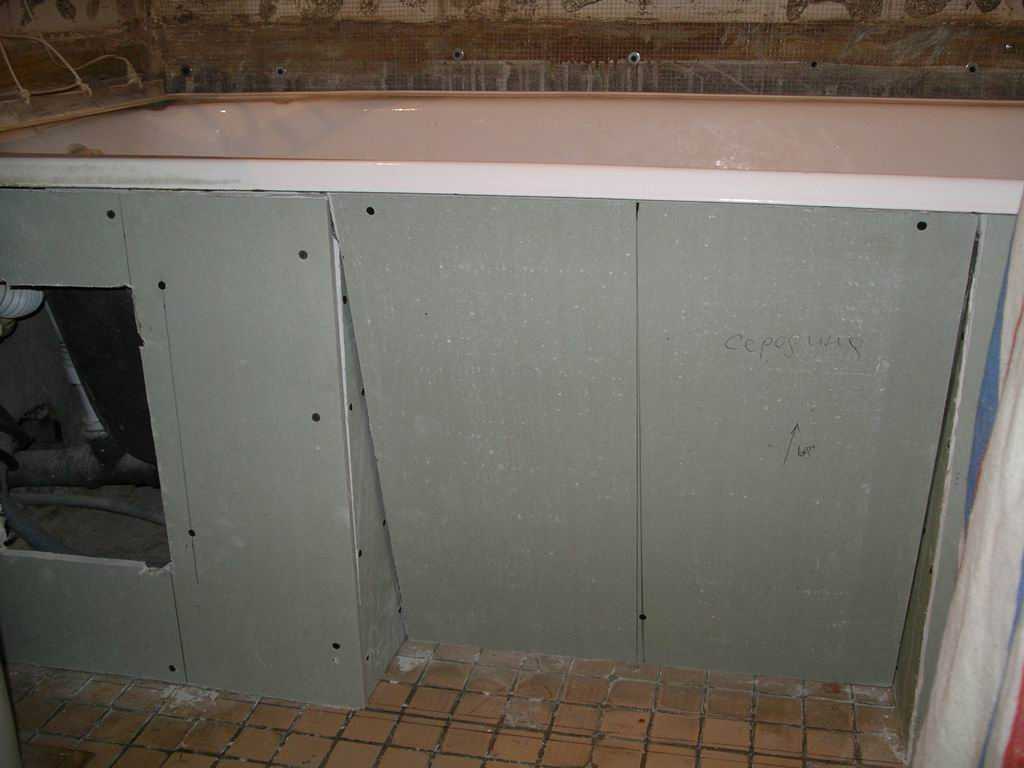
Screen based on plasterboard
The principle of constructing a plasterboard screen is exactly the same as when working with plastic. First, markings are applied to the bathroom floor. Next, a frame is built from metal profile or wood. But there is significant difference: when installing a frame under drywall, you need to take into account that the finishing also has a certain thickness. In particular, if it is planned to finish the screen with tiles, the frame must be “recessed” relative to the surface exactly at the distance that the finishing layer will take. If the facing material does not affect the wall thickness, then the projection of the frame onto the floor is plumb.
Second important point: for work in the bathroom you only need special drywall, protected from moisture. In places where it is most likely to come into contact with water, it should be additionally primed. Drywall sheets are cut in accordance with the height of the screen, minus 2 cm.
The sheets must be secured by moving a centimeter away from the edge of the bathtub and from the floor to prevent swelling of the gypsum sheet. Direct contact with moisture or a wet surface is contraindicated even with special drywall (remember, it is green).

To fasten the sheets, use black self-tapping screws, screwing them in every 15 cm along the upper and lower profile. Pay attention to the dimensions of the screws and the thickness of the profile: damage to the bathtub is not the best option completion of work.
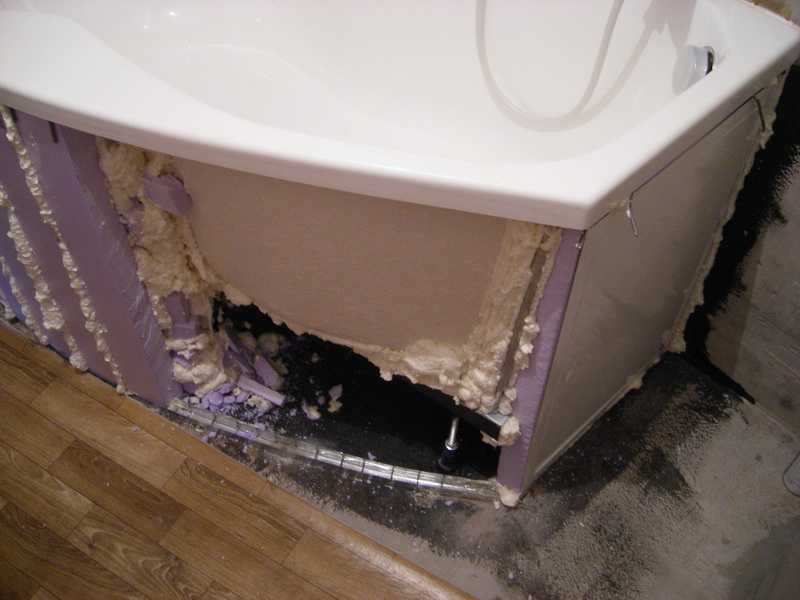
After completing the fastening, the base of the screen must be primed entirely and sheathed with any material. It could be ceramic tile or finishing with moisture-resistant wallpaper, covering with film, decorative plaster. The voids near the floor and at the upper edge of the bathtub are filled with polyurethane foam.

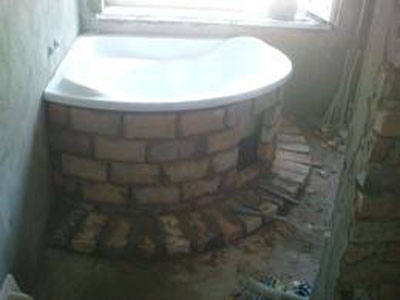
To create a screen on a brick base, you need to build a half-brick thick wall under the bathroom. When making initial markings, it is necessary to take into account the thickness of the brick + 2 cm of glue + the thickness of the tiles, deepening the marks accordingly.
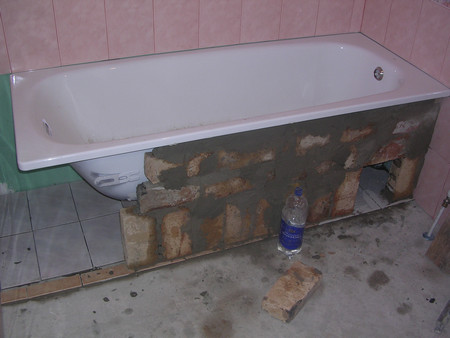
The masonry is done with each next brick offset by half (by the way, you can also read about a do-it-yourself brick bath on our website). This will prevent the wall from collapsing. You need to leave a window to access communications. The door is attached to the technological opening using canopies. The wall being built cannot be a support for the bathroom, since the top row of bricks should be 2-3 cm below the edge of the bathroom bowl. Polyurethane foam is poured into the gap, which seals the joint between the bowl and the wall.
To cover a brick base, tiles or plaster are suitable.
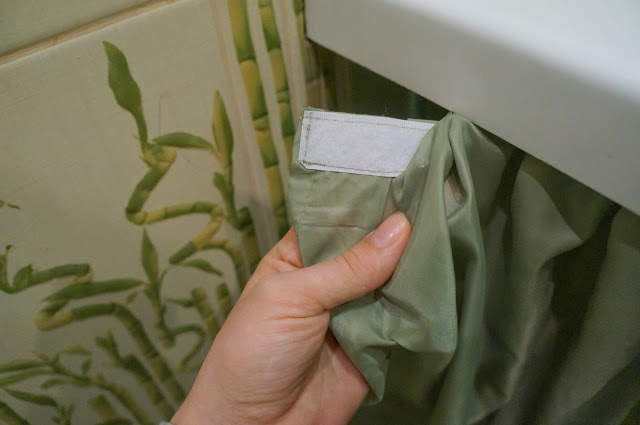
The screen under the bathtub can be made as drapery or covering made of fabric and other similar materials. The main thing is to choose quick-drying polyester fiber fabrics.
- Serve well in damp room polyester materials.
- Fabrics with a membrane structure prevent the formation of fungus, allowing the space under the bath to be ventilated.
- Waterproof nylon materials are ideal for covering the screen.
- A good solution is to cover the frame with artificial leather.
- It is permissible to install panels with any finishing solutions that can withstand dampness.
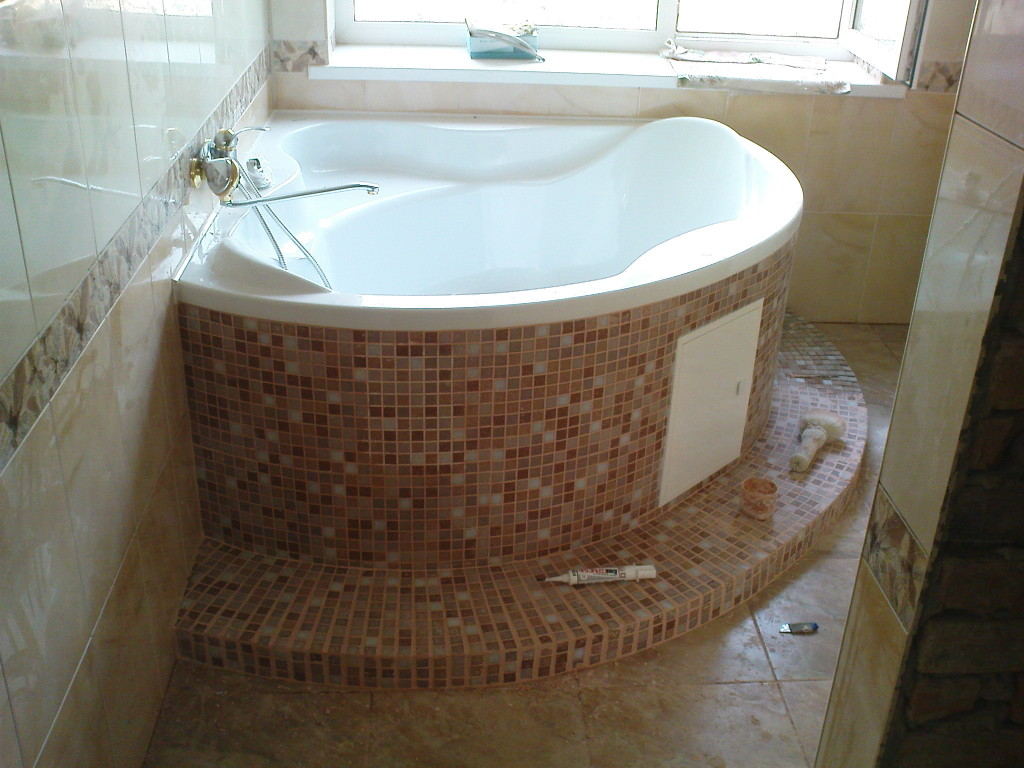
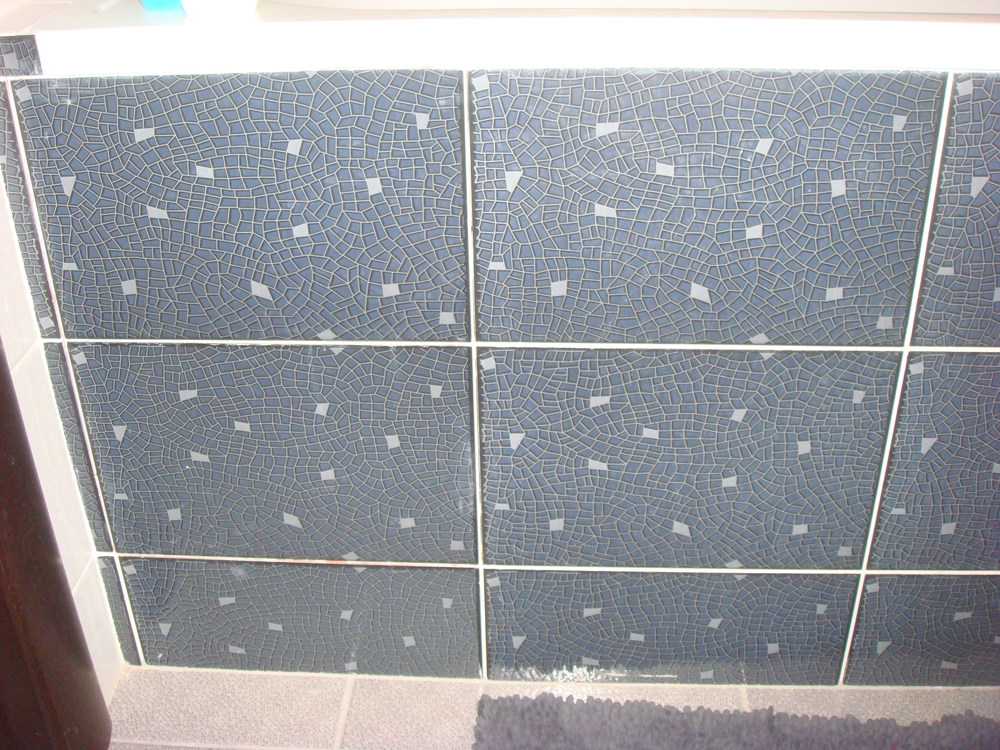
For triangular or corner bath It is most convenient to use plastic or plasterboard shielding. Complex shapes perfectly accepted front finishing mosaic, beautifully emphasizing the contour of the bowl. Installation of curved screens also begins with the construction of the frame and then the trim is adjusted in place, in accordance with the smooth lines and curves of the bathtub.
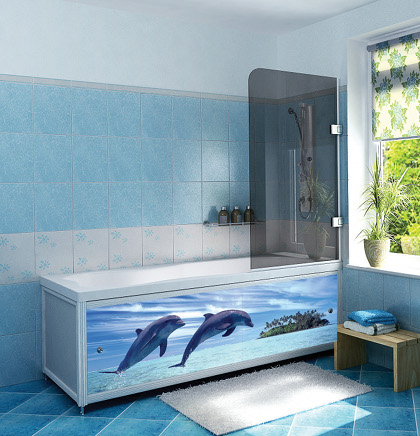
Specific acrylic bath screen
The finished screen is an acrylic shield or plastic construction with two canvases that slide in different sides. It is best to use the profile that comes with the screen for installation. But homemade foundation frames are also acceptable. Also, don’t forget to look at the screen installation instructions to know what methods you can use to secure it (liquid nails or self-tapping screws).
Video - DIY bath screen
Video - How to hide pipes under the bathtub
Video - Screen under the bath
Not every bathtub can have a ready-made screen. For some, it is set high, for others, on the contrary, low, and there are also bathtubs of non-standard sizes. In addition, not everyone wants to install plastic - they don’t trust the material or don’t like the look. In all these cases, you need to make a screen under the bathtub yourself or call a specialist. In any case, it doesn’t hurt to know how everything can and should be done.
Materials and requirements for them
- galvanized profile covered with sheet material:
- moisture-resistant plasterboard;
- moisture-resistant or laminated plywood with a thickness of at least 10 mm;
- GVL ( a good choice, since it is absolutely not afraid of moisture and does not deform);
- bricks;
- aerated concrete 50 mm thick;
- plastic panels and guides for their installation (this option is purely decorative, suitable only for cast iron or steel bathtubs).
All of these designs, except the last one, need finishing. Most often this is porcelain tile or ceramic bathroom.
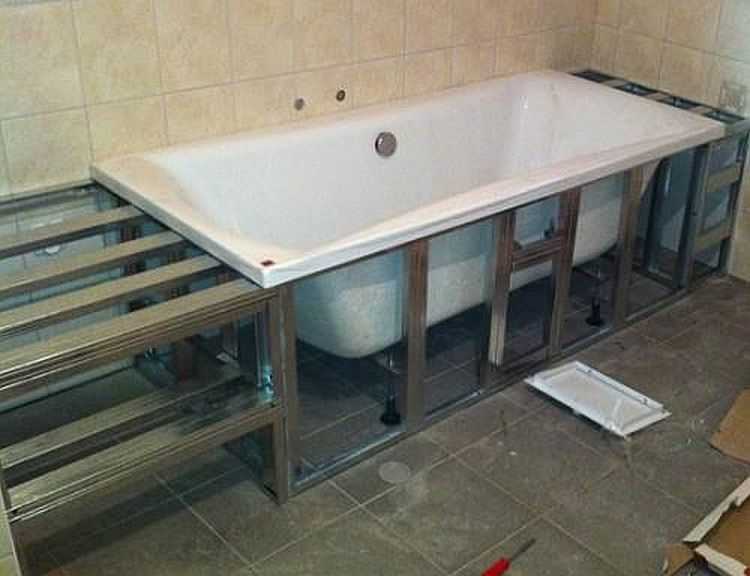
The most common version of a homemade bath screen is made from profiles and drywall. In order for the structure to be reliable and not sag under loads, the profiles must be taken with a thick wall, or reinforced ones can be used. Also required condition — good quality galvanization. If possible, you should take branded profiles so that there are no problems later - after all, in the bathroom high humidity- this is the norm.
Sheet material for the frame must be moisture resistant. This is a must. And even in this case, before installation, it won’t hurt to prime it with a compound that increases water-repellent properties. It’s not bad if this composition is also antibacterial - protection against mold and fungi will not hurt.
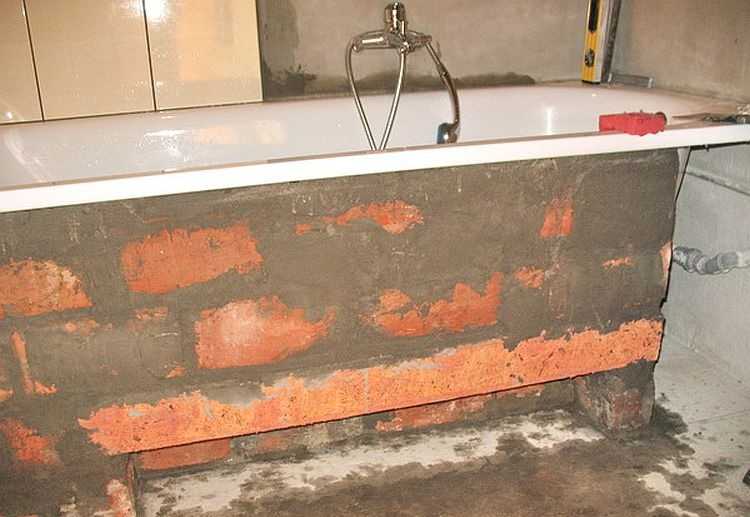
Brick screens are made mainly under acrylic bathtubs- so that part of the load can be transferred to the brick wall. Although, if desired, the profile frame can be made with sufficient load-bearing capacity - double reinforced racks can be made.
If you decide to make a screen for a bathtub from brick, you should use a red ceramic one. It is better not to take silicate because of its hygroscopicity. Ceramic brick It is also hygroscopic, but its absorption capacity is less. To minimize possible problems(coloring by high humidity), masonry with inside It is advisable to cover it with a layer of plaster. This is not easy, but if desired, it is possible to apply the solution as the screen is being erected. No special care is required, the main thing is to protect the brick from moisture.
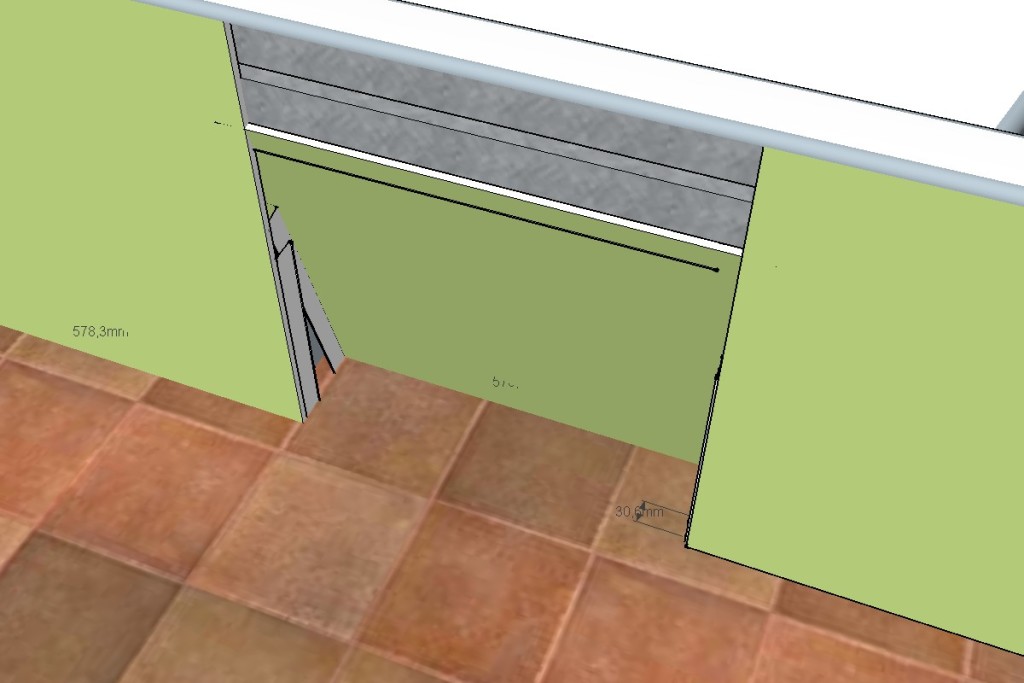
Another option for a bathtub screen that you can make yourself is from aerated concrete. This material is easy to process. The required relief is formed easily, even with a sharp piece of iron, and the block is cut with a regular saw. With all this, the blocks have a good bearing capacity. So this material can also be used for a homemade screen under acrylic bath Yu. In addition, the blocks have big sizes, so this small wall develops very quickly.
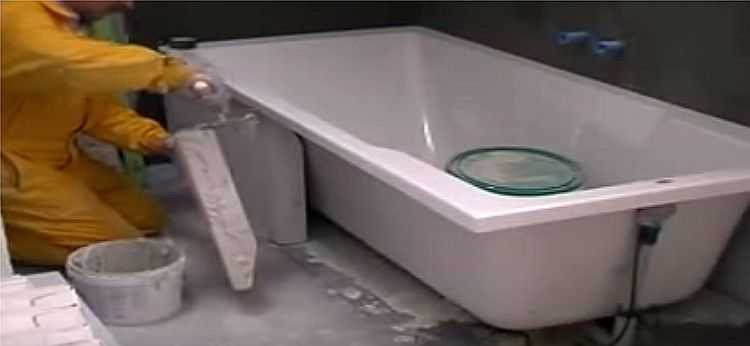
Note! In the photo above you see a block worked on one side. This is done so that after laying the tiles, they will be flush with the sides of the bathroom, and not protrude outward. For the same purpose, when installing, the blocks are recessed a little, leaving a gap equal to the thickness of the tile and tile adhesive.
In the photo, the master is holding the underworked part pointing down, but when laying the block, the block is turned over. In this position, glue is applied to its lower part, which fixes the block to the floor. Glue is applied to another side edge and on the top. This ensures fixation with the side of the bathtub and the previous block. The technology for making a screen for a bathtub from aerated concrete is not difficult; if you have at least some experience in masonry, you can do it.
Constructions
We will talk about how you can make a screen for a bathtub with your own hands so that it is functional, beautiful and convenient. Everyone has their own ideas about convenience and beauty. Therefore we will consider possible options, and you yourself decide how best to do it.
With a wide side or not
Sometimes a wide side is made around the bathroom. It turns out that it is somehow inserted into the case. On the one hand, this is convenient - you can put something on the sides and, from an aesthetic point of view, the bathtub fits more harmoniously into the interior.
But not everyone can afford to allocate a large space. Bathrooms are usually not pleasing with their size and an extra 10-15 cm can be critical. In addition, this type of installation may be inconvenient for older people. To get into the bath, you have to take a long step, which is not always possible for them.
But this option has one more positive point: under the bathtub you can make shelves of large width. They can be open or with sliding/hinged doors.

Similar shelves are made without a wide side, but their depth is much less. Although, maybe this is not a minus, but a plus - there will be less different things collected, it will be easier to take something out and put it away.
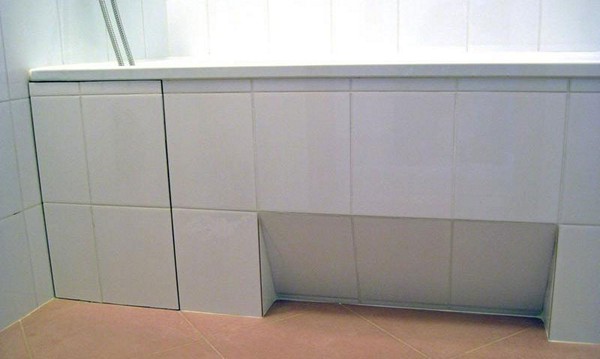
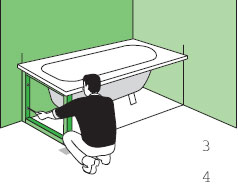
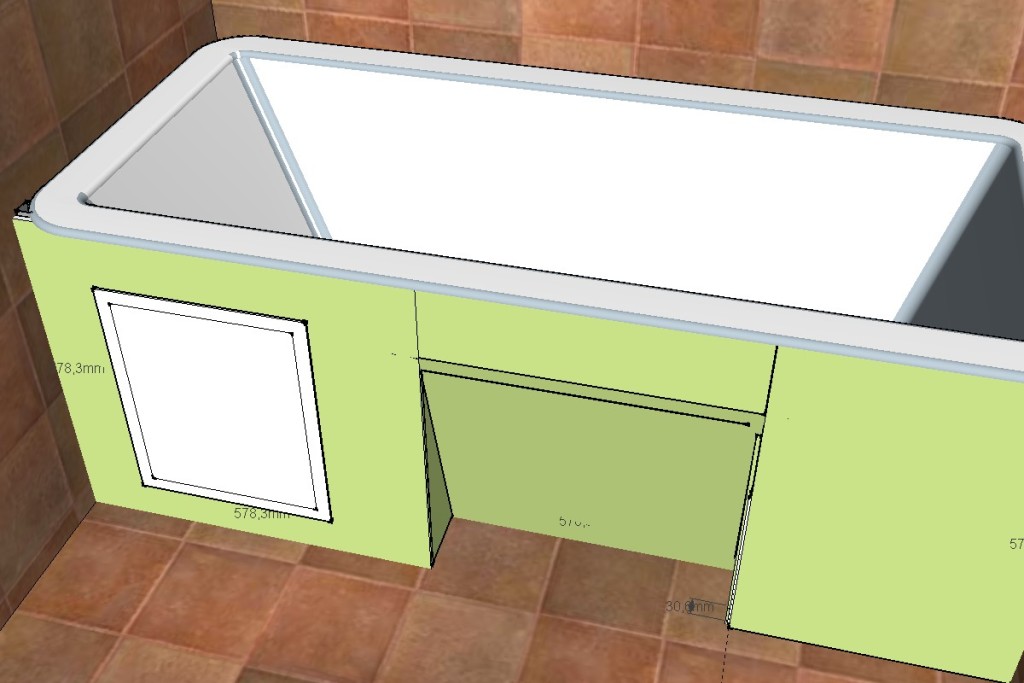
Foot recess
It is more convenient to clean the bathtub or wash clothes in it if the screen has a recess for the feet. Its depth can be small - 10-12 cm is enough, width - about 35-45 cm. Such dimensions allow you to reach the walls and the opposite side without strain.
We’ve decided on the dimensions, all that’s left is to choose what it will look like. The easiest square notch to organize. It can be made from brick, aerated concrete and profile.
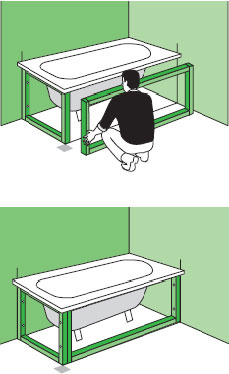
The non-standard variation looks more interesting - the entire screen is made of two levels, with the upper part hanging over the lower part (pictured below). In this version it is possible for illumination. It should be interesting.
On two levels - unusual
The next option is to make part of the screen tilted. In the case of a profile, this is easy to implement; with brick, it is almost impossible; with aerated concrete, it is possible, but difficult.

Another option is to raise the top edge of the screen above the floor a few centimeters. It will turn out to be on legs and there will be no problems with legroom. But there are problems with cleaning. You can’t pull the cladding high - it’s unsightly, but if you leave a small gap, how can you clean it? Problem.
In general, from all these options you can choose something most suitable for yourself, although they also make a blank, flat screen on the floor.
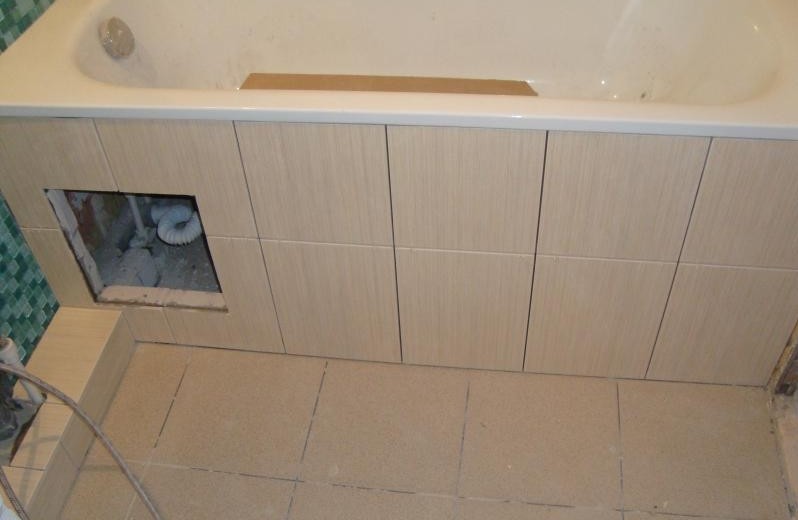
Hatches for inspection
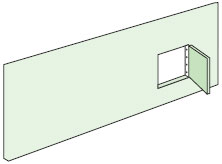
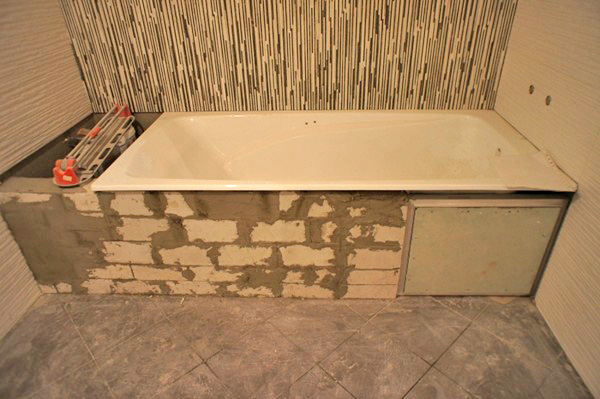
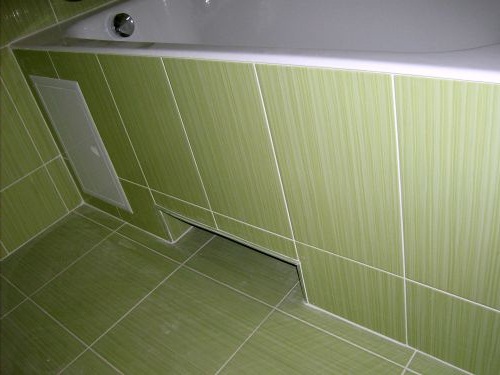
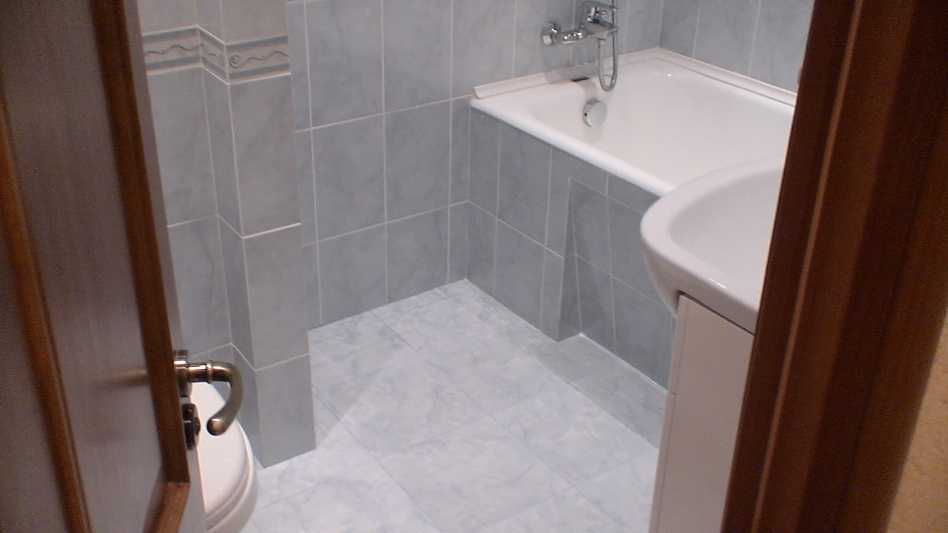
The screen under the bath must have a removable/opening part through which you can access communications. There are several possibilities to do this. The first is to install a plastic hatch. Not everyone likes its appearance, but it is the simplest and cheapest option.
![]()
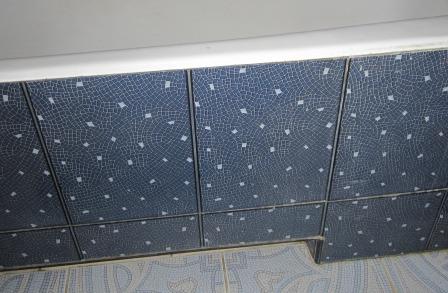
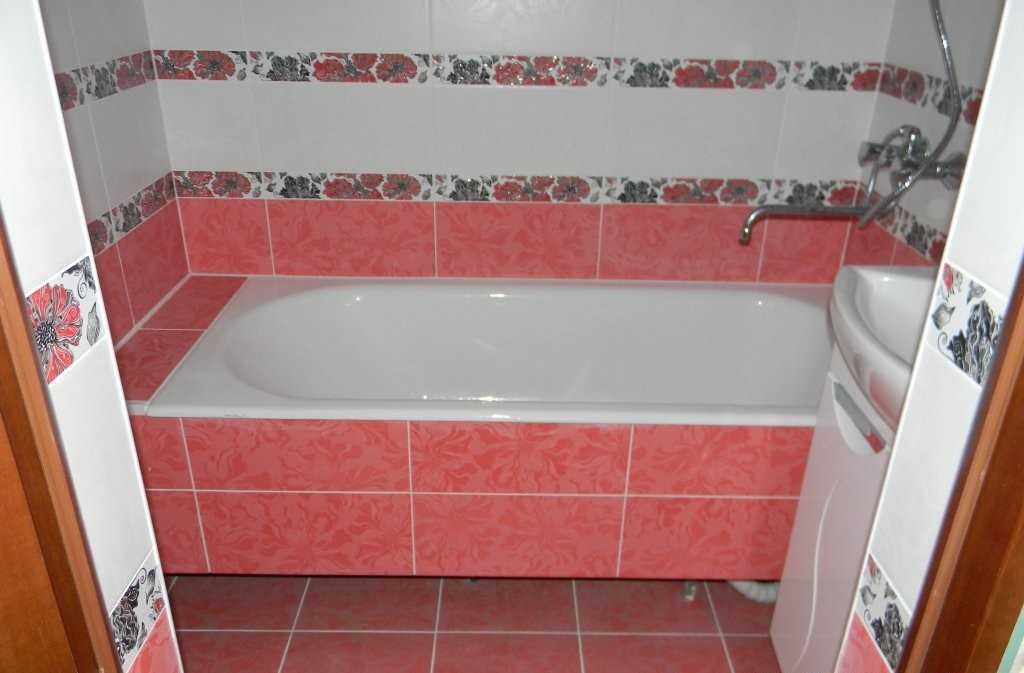
The next possibility is to make a removable panel that will be attached to the frame using magnets. Not to say that this option is difficult to implement, but it requires more experience - you need to calculate the installation location of the hatch so that whole tiles fit on it.

Instead of a hatch there is a removable panel
One thing: if you grout the seams with a light paste, the hatch will still stand out. There is no grouting in this place, but there are small gaps that are very noticeable against a light background.
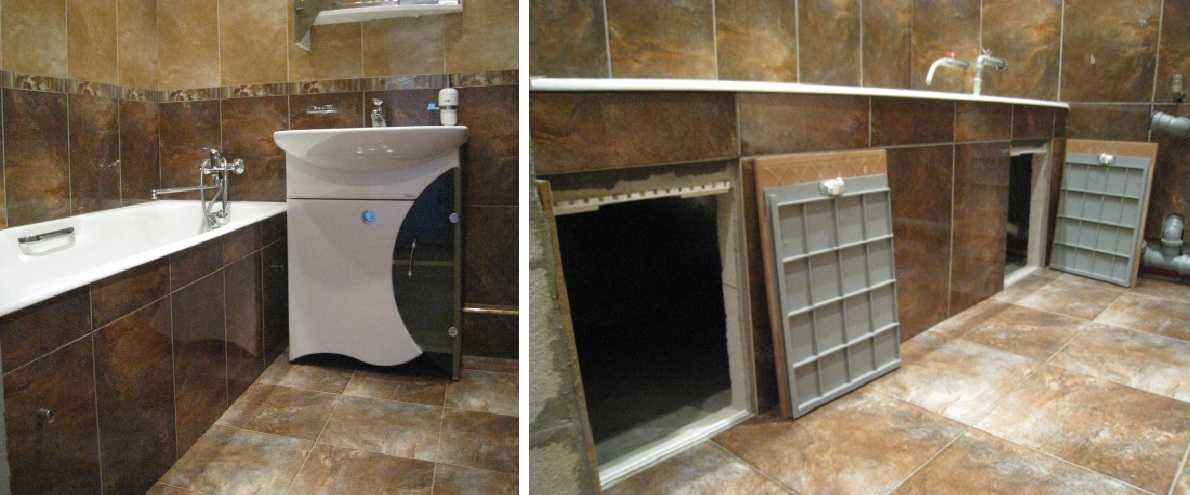
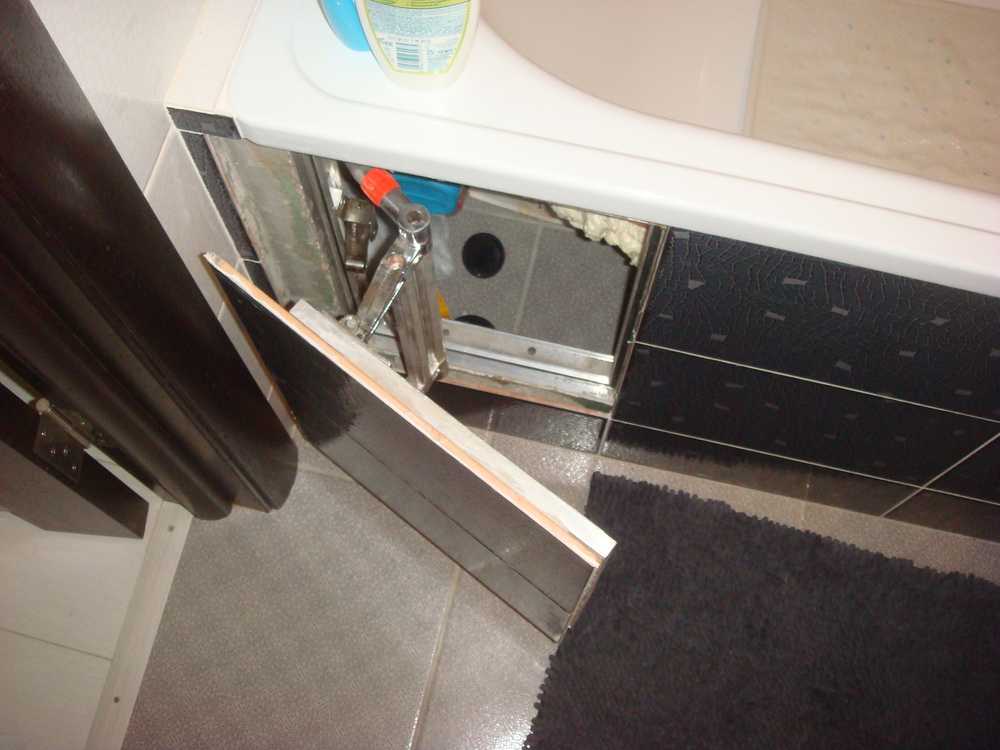
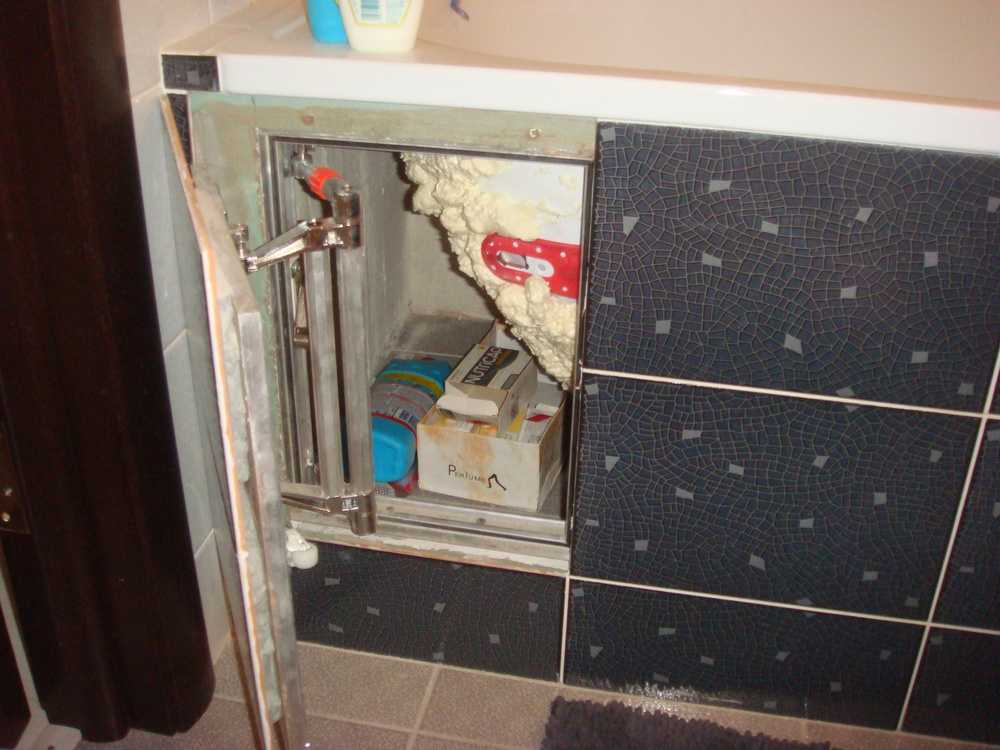
The most technologically advanced, but also the most expensive way is to install special hatches for inspection. They are of two types - folding on chains and rotating.
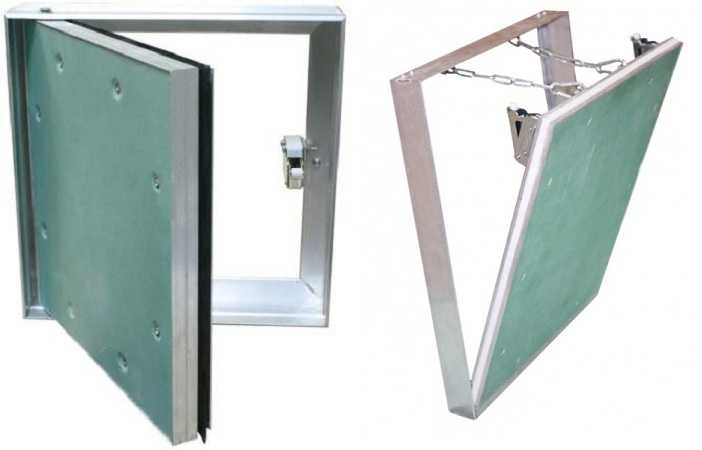
These hatches, unlike plastic ones, are designed for laying tiles on them. If installed well and calculated correctly, it is not easy to see.
How to make a bathtub screen with your own hands
Not always general appearance from the same screen you can guess how to do it. Those who have at least some experience in repair and construction work will probably understand, but ordinary people are unlikely to. To make it easier to navigate, we will post several photo reports on the production of homemade bathroom screens different types and type.
From profile and plasterboard
Making a screen for a bathtub from plasterboard takes place in three stages: first, the frame is assembled, then it is sheathed with plasterboard, and then the tiles are laid on the glue.
The order of work is as follows:
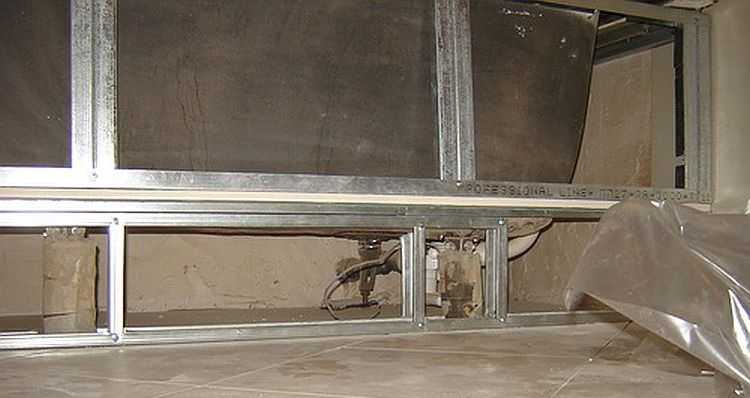
The screen for the plasterboard bathtub is ready.
An interesting version of a more rigid screen design for a bathtub floor is in this video. It will definitely not break even under significant loads. All you need to do is attach the racks to the bathtub body. To do this, glue a piece of profile to the wall of the bath using liquid nails. Then the racks are fixed to this profile using short sections.
For a curved bath
When making a screen for a curved bathtub, the main task is to replicate its smooth curves. IN in this case You can also use a galvanized profile for plasterboard PN 27*28. Instead of drywall, use EPS (extruded polystyrene foam) 50 mm thick, high density (preferably the densest). Since acrylic bathtubs most often have a nonlinear shape, they require more reliable support than a sheet of drywall. Extruded polystyrene foam high density- a fairly rigid material that can withstand the pressure of the walls of a bathtub filled with water.
You will also need a grinder or metal scissors, two or three cans of polyurethane foam. The order of work is as follows:
This technique is suitable for making your own screen for an acrylic bathtub. Polyurethane foam will support the walls and also insulate them. This bath will keep you warm for a long time.
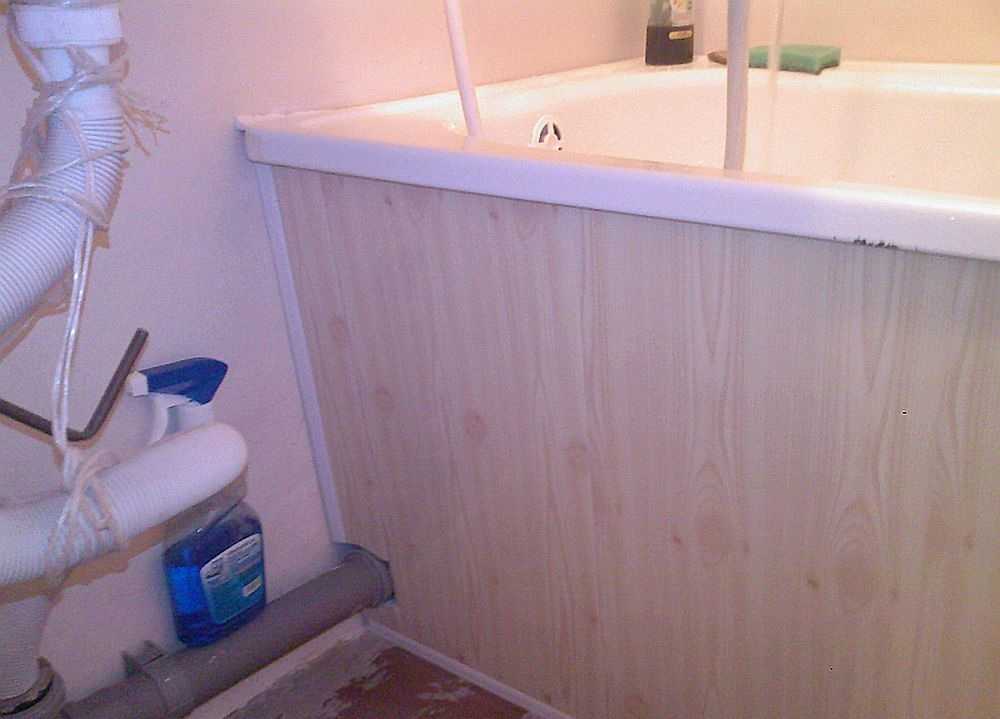
Bath screen made of PVC panels
This product cannot be called durable, but it is built quickly and the costs are scanty. You will need two strips of PVC panels, starting guides for them, corners, and liquid nails. Tools: ruler or tape measure, metal cloth, scissors.
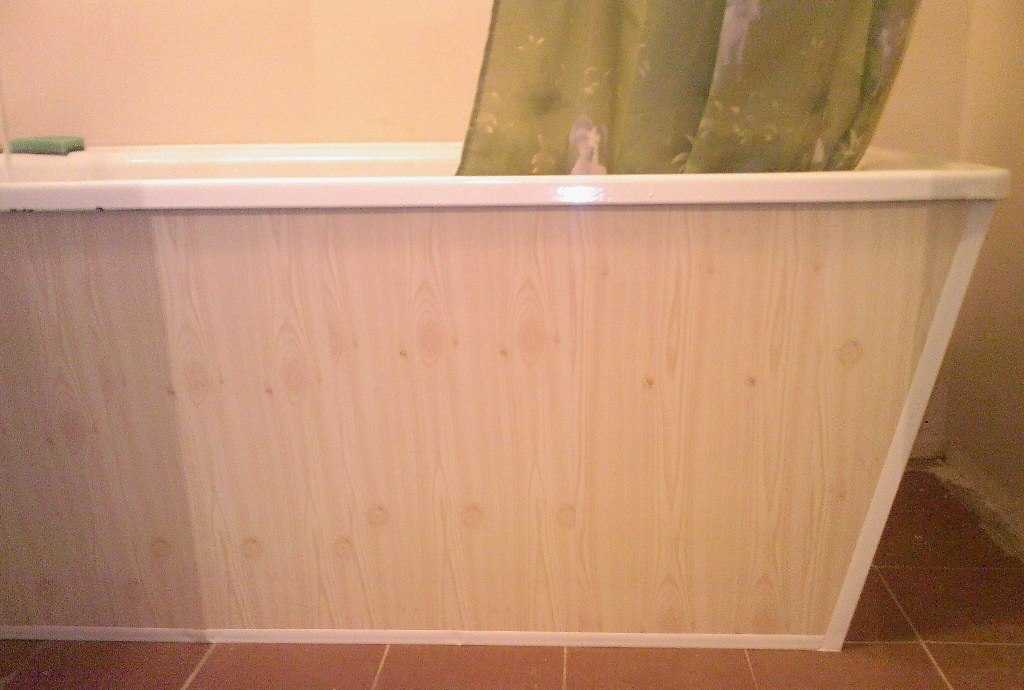
For ease of use, the walls are inclined inward. This design determined the assembly order: if you glue the profiles right away, you won’t be able to insert PVC strips into them. Therefore, first we assemble the plastic wall into a profile, then we put the entire wall in place, gluing the profile (we apply glue, slightly moving the wall back, then we move it into place). This trick was a success with a short end wall.
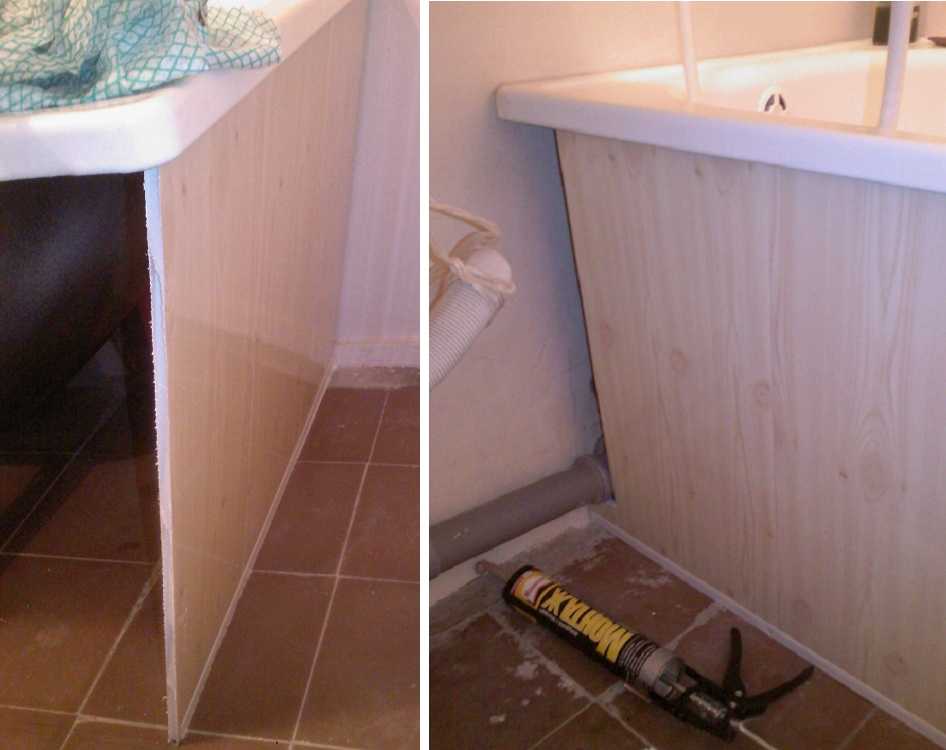
We had to do things differently with the length of the wall. First, we assembled all the pieces locally into a single canvas (without the starting profile at the bottom). The slats rested on the floor and the recess of the side. Then a guide was inserted under the finished wall. This became possible because the strips were cut 1-2 mm shorter than necessary. In general, all dimensions were measured very accurately, all strips are the same length. The wall stands securely and without glue. They did not glue it because it is long, and it is not clear how to return it to its place.
All that remains is to seal the joints with the walls and finish the corner of the screen. We carefully measure the piece that is missing, transfer the dimensions to plastic, and cut it off. We put the cut parts in place.
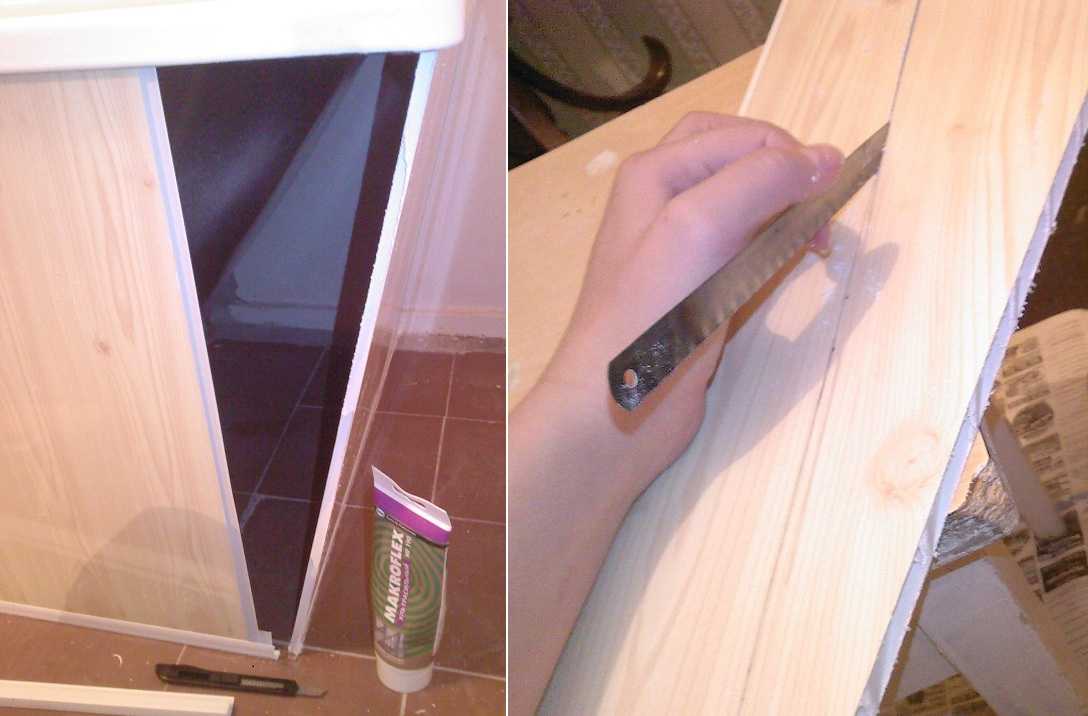
Now we need to refine the joints. Profile guides are slipped under the planks that are adjacent to the walls. They could have been installed immediately during installation - there would have been fewer problems.
I had to tinker with the corner. It is necessary to simultaneously drive two planes into it. This was only possible with the help of a steel ruler. It took a lot of time.

It’s not difficult to make this screen under the bathtub with your own hands. You just need to handle it carefully - the plastic is pressed through very easily. Another minus this option- absence inspection hatch. If there are problems, you will have to disassemble the part.


