For working with drywall use various materials. The most common method is the installation of profile metal frames, however, wooden structures can also be found quite often.
Wood is a natural, environmentally friendly building material, which is why many people prefer it. It is worth saying that wood is susceptible to climatic influences, biological corrosion and is a fire hazard, and therefore requires additional processing.
Wood preparation
They make a frame for drywall from coniferous wood. Timber of various sections is used, the value of which depends on the height of the partition and the method of cladding.
Main physical characteristics:
- Humidity from 12 to 18%.
- For partitions of the W121 brand with a height of 2.8–3 m, timber with a section of 60×50 mm is used for risers and 60×40 mm for sheathing.
- For partitions of the W122 brand with a height of 2.8–4.2 m, timber with a cross section of 60 × 50 mm is suitable for risers and sheathing, and depending on the height, different sheet thicknesses are used: for a height of 2.8–3 m - 2 × 12.5 mm, 3.3–3.6 m - 2×14 mm, 3.6–3.9 m - 2×16 mm, 3.9–4.2 m - 2×18 mm.
- The step between risers in all cases should not exceed 60 cm.
- Fire retardant treatment must comply with the first fire safety group.
- Connections using nails, tenons and self-tapping screws are allowed, with tenons being the most preferred, as they create a rigid and durable connection.
- The thickness of mineral wool sound insulation should be from 50 to 60 mm.
- Wall thickness can range from 85 to 132 mm.
- The insulation index ranges from 41 to 51 depending on the thickness of the wall.
Important!
Before installation, the wood should lie for several days in the room where it is intended to be installed in order to acclimatize.
Use high-quality lumber that meets moisture and fire safety requirements. Make sure you have certificates about the treatment of the material with fire retardants and passing the relevant examinations.

In addition to fire protection treatment, the wooden frame for drywall must undergo antiseptic treatment.
This measure is aimed at combating all kinds of biological risk factors, namely:
- Fungal and mold microorganisms. Wood can serve as a feeding medium for the mycelium of a number of molds, and the wood becomes unusable and destroyed.
- Biological decay. Wood - organic material, which is susceptible to necrobiosis and decay. Preservation requires antiseptic treatment.
- Carpenter insects. There are many known insects that feed on wood and render it unusable.
- Rodents. They also pose a danger to the tree. Treatment with antiseptics repels these animals.
Pests can ruin wood in a short time
Various chemical compounds are used as antiseptics. One of the best is sodium fluoride.
It is a light gray powder, soluble in hot water. The limit is 3.5–4%.
Sodium fluoride penetrates well into the wood and is very weakly washed out. At the same time, the compound does not decompose and does not provoke metal corrosion, has no odor and is not toxic to humans. Quite a strong antiseptic.

Sodium fluoride is also used, often with the addition of soda ash, which converts it into pure sodium fluoride.
The use of oily antiseptics in residential premises is unacceptable:
- creosote;
- coal;
- shale;
- anthracene oils.
These compounds are toxic and can harm the health of people living in the house.
Installation of a wooden frame under plasterboard
Tracing the lines connecting the partition to the walls

To draw lines, use the rule
To do this, measure the distance at which the plane of the future partition should be located and step back the width of the gypsum board sheet from it.
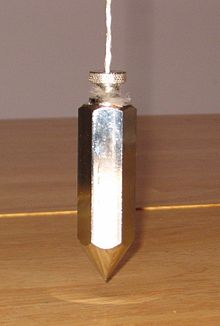
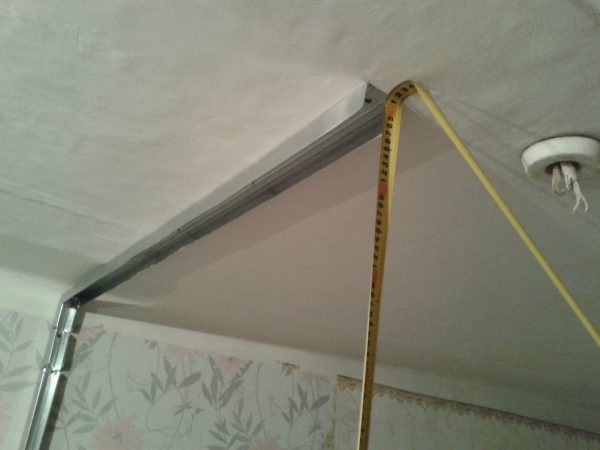
It is better to do this along the ceiling-wall line. Having marked the desired point under the ceiling, it is easy to move it plumb down the wall. To do this, hammer a nail into a point, hang a plumb line and mark the corresponding point at the bottom of the wall, near the floor.
We connect these two points and get the first line. Next, you need to draw a line perpendicular to the wall from the bottom point.
- This can be done by constructing " Egyptian triangle» - a right triangle with an aspect ratio of 3:4:5, where 3 and 4 correspond to the legs, and 5 is the hypotenuse. In this case, we put one leg along the wall from the bottom point, making it a multiple of three.
- From the bottom point we build an arc of a circle in the direction perpendicular to the wall with a radius that is a multiple of four.
- From the other end of the leg, built along the wall, we build a circular arc with a radius that is a multiple of five so that it intersects with the previously constructed arc.
- By connecting the intersection point of these arcs with the original lower point, we get a perpendicular to the wall. We draw a line on the floor along this perpendicular - the second line of our partition.
We connect the two upper points on the walls along the ceiling and get the fourth and last line. Thus, we must draw a rectangle along the lines floor-wall-ceiling-wall, along which the partition will adjoin the room.
Advice!
To build a perpendicular, you can use a trick - attach a sheet of drywall to the wall with the short side, and draw a perpendicular along the long side from the calculated point.
Frame installation
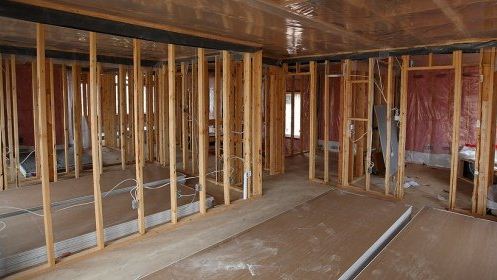
As can be seen in the photo, the frame consists of a frame, vertical and horizontal bars. The installation of the frame should begin with the frame.
To do this, fasten the bars along the lines that we built along the walls and ceiling. If the house is wooden, we fasten them with screws or tenons to ceiling beam, floor joists and walls.
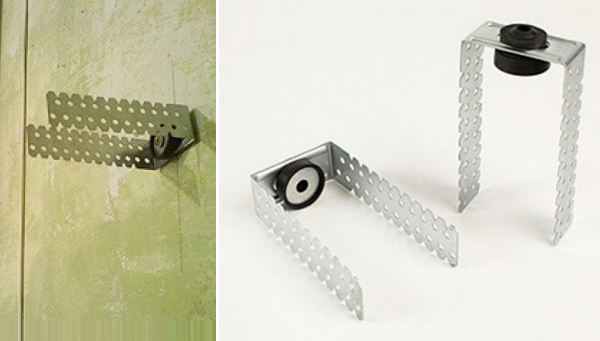
If the building is made of stone, we fasten the bars with dowels and screws. You can also use direct hangers or brackets.
We attach solid bars along the walls and ceiling. Along the floor, the timber should diverge in both directions from the doorway. If the opening is located against the wall, the bottom beam will be solid and will lie on one side of the opening.
So, we attach all the bars and use an impact drill with a concrete drill to drill holes in the walls and ceiling.
Doorway

The doorway is formed by double risers
Instructions for installing a doorway with your own hands:
- To do this, we install two risers on either side of it. The width of the opening should be 4–5 cm wider than the door frame.
- We install risers and strengthen them with additional bars.
- At the height of the door frame plus 2-3 cm, we install a horizontal jumper, which we connect with two vertical bars to the ceiling rail.
- Vertical beams give the structure additional rigidity and are needed for joining sheets of drywall.
Racks

To determine the location of the jumper, we apply a sheet of drywall, which will be located at the doorway, and at the place of its edge we fix the jumper so that the edge of the sheet falls in the middle of the board.
Advice!
To connect the beams, it is better to use metal corners and metal plates intended for assembly rafter systems.
These mounts are reliable and designed to withstand significant loads.
Each part must be checked for level; the racks must be strictly vertical, the lintels must be horizontal.
Try to arrange the racks so that the wall contains the maximum possible number of whole sheets of plasterboard. This will save time and material.

The work of covering the frame with gypsum board sheets is the topic of a separate article. We can only say that drywall is mounted on a wooden frame in the same way as on a metal one.
It should be noted that the price of the profile is lower than that of quality lumber, and dealing with poor quality is more expensive for yourself, so think carefully.
Tool

You will need:
- hammer;
- wood hacksaw;
- screwdriver;
- impact drill with concrete drill;
- construction knife;
- plumb line;
- level;
- pencil;
- roulette;
- square;
- crowbar;
- screwdriver;
- coated thread;
- screws;
- dowels;
- brackets.
If you don't have an impact drill or screwdriver, you can rent them from a hardware store.
Also do not forget about mineral wool, which is necessary for sound insulation. You can use thick mats on a mesh so as not to lay the wool in two layers.
Conclusion
Now you know how to assemble a wooden frame for gypsum boards. In order to more accurately understand the technological and practical issue, our website provides detailed photo and video instructions in which you will find the necessary information on this issue. Good luck!
Apartment renovation always involves a loss of money, time and nerves. Some people start it and cannot stop for several years. They fiddle around little by little, finish one part, start another - and so they can continue indefinitely. Saving money on repairs Now we will not talk about reducing the repair period, but about saving. Think carefully about what exactly you want to get after the renovation is completed. This is to ensure that you don’t give up everything halfway through the process, wasting money and time. Have you figured it out? That is great. Now measure the room and make a list of everything you need to buy. All materials must be purchased at once before starting repairs. Find out in advance where and in what construction stores discounts, promotions, etc. are held. Before purchasing materials, ask your friends casually if any of them have a discount card for the stores you need.
As you know, the bedroom is the most isolated room, which is a room for rest, sleep and privacy. How to place furniture in the bedroom Undoubtedly, every person tries to make a bedroom according to their tastes and needs, to fulfill all their desires and ideas. But only professionals will help you figure this out. With proper and careful design, the bedroom can be turned into a cozy corner of your home, in which an atmosphere of comfort and pleasure will reign. This material will help you create the necessary atmosphere in your favorite room. The standard set of furniture for placement in a room is: an armchair, a bed, bedside tables, chair and dressing table, desk(if there is nowhere else to place it), a mirror, a separate or built-in wardrobe.
We all remember this wonderful age, this bright time, full of ideas, hobbies and all kinds of hobbies. Unique Room Design for a Teenager When you are between 13 and 20 years old, you definitely want to be unique and follow the latest fashion trends. Of course, this desire will not leave you throughout your life, but the time of adolescence is a time of change. Therefore, the design of a room for a teenager should easily change depending on moods and, at the same time, changes should not cause huge costs and hassle. For every teenager, their own room is a place where they can be themselves. A place where he can invite his friends and demonstrate his uniqueness. Therefore, it is necessary to take into account, first of all, his interests when furnishing and decorating the room.
Designers know that it is quite difficult to create something that is both comfortable and, at the same time, comfortable interior V one-room apartment. True, there is no need to be upset prematurely; first of all, you need to clearly understand what the owner wants to have in the apartment, what areas will certainly be needed in it. Decorating a 1-room apartment Before starting work on arranging the interior design, you need to note the primary tasks of the room. First of all, this is the bedroom where the owners of the house will relax. In most cases, another and at the same time key function for the space of the room will be the reception of guests and friends, that is, it will also be a living room. In addition, when guests arrive, the room space should also be a refectory. Therefore, the area of the room should be symbolically divided into two separate zones - an area for relaxation and a guest area.
IN given time Decorating rooms in various types of design, which can often express a national trend, is gaining rapid recognition. Japanese style Among the huge number of available fashionable styles of interior decoration, a special position for a long time occupies the so-called Japanese style, preference is given to it not only for decorating living spaces, but also for creating an extraordinary appearance bath rooms.
A teenager, boy or girl aged 13-19 years. Not yet an adult, but no longer a child. Down with the toys and forward to adulthood. How to furnish such a room and what features should be taken into account when deciding who chooses the design - the parents or the child? So, your child has grown up and is no longer a baby, but a teenager who has a sense of self-worth. It's time to change the interior of the room to something “adult” and “cool”. Room for a teenager First, you need to think about what kind of room design your child would like best, because if parents can dream of classic style, then the teenager will easily call it “old-fashioned”, but, nevertheless, he will still have to live in this room, and not you. Therefore, we choose, listen to the teenager’s opinion, discuss and come to some kind of general decision based on the points below.
__________________________________________________________________________
GKL partitions on a wooden frame
To install the frame of a gypsum plasterboard partition, wood is used coniferous species, before work, be sure to treat it with special impregnations.
The dimensions of the timber are chosen based on the dimensions of the future structure: the higher and longer the frame, the larger in size its elements will be. For vertical posts of an average gypsum board partition measuring approximately 2.5 m high and 4–5 m long, bars with a cross section of 60x80 mm are chosen.
This size is quite sufficient for a stable structure. Vertical posts are spaced at 60 cm intervals to create reliable support for the sheet of material, so that there are at least three bars for each sheet.
If the partition consists not only of entire sheets, but there are also horizontal seams, then additional jumpers must be installed at the places of these joints.
Initially, strapping beams are installed, which are attached to the floor, ceiling, and wall. If the floors are wooden, the task is greatly simplified, since ordinary nails are sufficient to fasten the bars. With a timber thickness of 60 mm, nails 80–100 mm long are sufficient.
If the walls are concrete or brick, covered with plaster, the guides are attached using dowels and nails to the wall and floor, and using anchors to the ceiling. You should start with the ceiling block.
Having marked the extreme points of placement of the partition on the walls, the beam is screwed or nailed to the ceiling, after which you can mark the line of the lower beam of the trim.
This is done using a plumb line. Holding the thread with a finger on one side of the block, the cone of the plumb line is lowered to the floor, its tip should not reach the surface by 1-2 mm. After marking this point, the thread is transferred to the other edge of the upper beam and the operation is repeated.
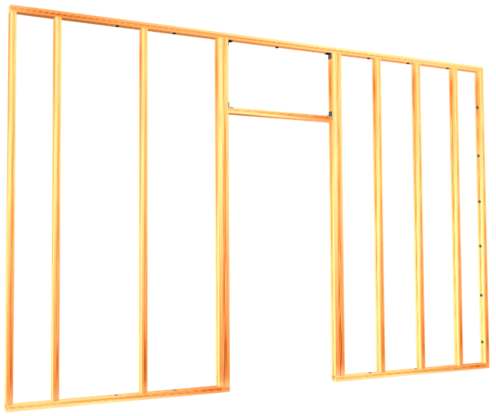
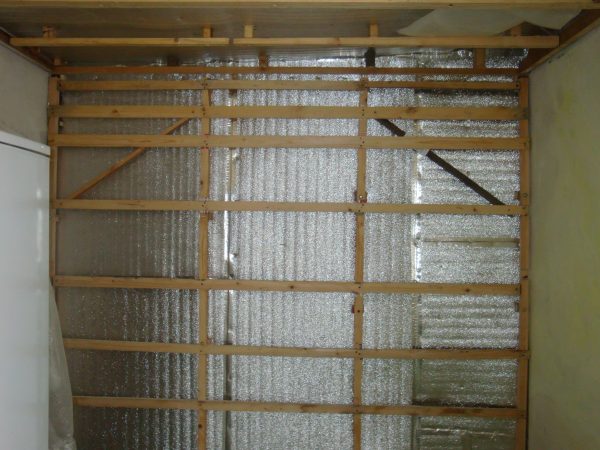
For accurate markings, it is necessary to carry out hanging in three places - at each of the walls and in the middle. The simplest option partitions on wooden frame see fig. 26.
Rice. 26. The simplest partition on a wooden frame
1 - frame; 2 - insulation (soundproofing layer); 3 - drywall
When all the points are ready, the lower beam is mounted to the floor. After installation, you must once again check the verticality of the plane using a rule with a level or plumb line.
Vertical bars are then attached to the wall, connecting the floor and ceiling bars. The frame of the structure must be fastened as securely as possible, since the main load falls on it, so the fasteners are installed in increments of 30–40 cm.
Before attaching dowel-nails to the ceiling, you need to make sure of the strength of the ceiling itself: whether it will crumble under the load of the structure and from the installation of fasteners.
If the walls consist of a loose, fragile substrate, dowels are needed maximum sizes, and it may be necessary to replace the dowel-nails with wooden plugs that are driven into the wall and screws are subsequently screwed into them. The method is old, but proven and reliable.
Another way to attach strapping bars is to use direct hangers. If the walls are sufficiently hard and smooth, then this is the most convenient and quick way.
After the frame of the structure is installed in place and checked using a plumb line or level, it is the turn of the vertical posts. For them, a beam of the same size as the frame of the harness is used, in our case - 60x80 mm. There are several ways to attach racks.
The simplest one is with the help of sawn wooden blocks, which are attached with screws to the vertical stand itself and to the frame of the structure. More reliable way- secure the stand using metal corner, which can be easily made from straight hangers.
Horizontal jumpers are also made from the same timber in those places where the upper and bottom sheets. They are very easy to attach - right through vertical beam a screw is passed through on one side and the other. A direct hanger can be added for added strength.
If there is a door frame in the partition, then it side walls are formed by additional racks, and the horizontal lintel of the top is mounted from timber of the same size.
The bottom of the door frame, depending on the type of door, is formed either by a frame frame, or, if there is no need for a threshold, a piece of it is carefully cut out, and the edges are additionally secured with dowel nails.
In this type of septum the conduction engineering communications almost impossible because internal frame will not allow you to stretch them between the sheets of sheathing, and cutting holes for pipes and wires is unprofitable.
If it is still necessary to carry out electrical wiring, then using special drills in the body of the vertical posts you can drill holes of the required diameter, but it is worth remembering that the cables
laid inside wooden structures using pipe sections or special corrugation - for fire protection and for easy access to them.
As an option for laying communications, carrying out all necessary pipes and wires using a cable duct outside the partition, and not inside it.
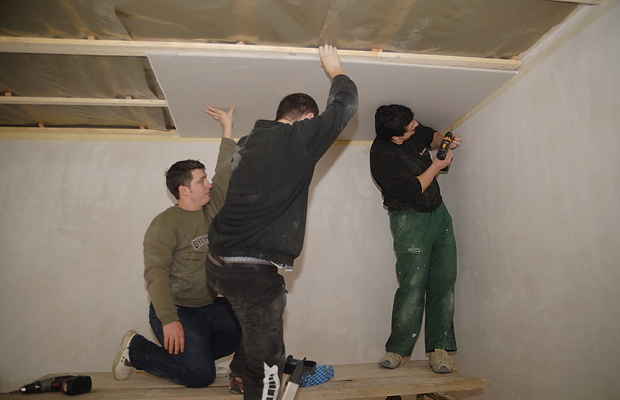
Once the frame is ready, you can begin cladding. The sheets are fastened using screws with a wide head; it is best to choose a sheet thickness of 9.5 mm, for such a design it will be best thickness.
Sheets are cut only if it is necessary to create a doorway, around door and window openings the sheathing should not be joined, this will lead to crumbling of the edges of the sheets.
Where this cannot be avoided, for example over door frame, an additional jumper is installed - a block to which the edges of the sheets are attached.
After the partition is lined on one side, you can begin installing the insulating layer. IN in this case 5 cm thick foam sheets are ideal, cut to width and glued to the underside of the sheet, leaving virtually no gaps.
The remaining hollow space can be filled with foam rubber or mineral wool, first tearing it into long strips and gluing them to the foam using glue. The thickness of the mineral wool layer should be such that it protrudes 10–20 mm beyond the plane of the frame.
The wool is pressed against a sheet of drywall during installation, and the insulation becomes denser and more reliable. In addition, all cracks and grooves must also be caulked with insulation. The combination of polystyrene foam and mineral wool gives an excellent soundproofing effect.
When covering the second layer of plasterboard, it must be remembered that for better fastening and in order to avoid cracking of the frame bars, the joints of the sheets are not attached to the same bar as the opposite cladding, but are shifted one step to the right or left.
At the wall, you can avoid attaching sheet joints by installing additional racks. When installing sheets, remember that there should be a gap of approximately 3–4 mm between the edge of the sheet and the surface of the ceiling.
This gap is subsequently closed with putty and plinth. Installation of sheets to the partition frame must be done sequentially, from one edge, to avoid distortions. The screws must enter the wood to a depth of at least 25 mm.
Such a partition, despite its outward appearance and ease of installation, is perfect for interior partitions, has a good soundproofing effect, its disadvantages are small thickness, fragility and fragility of the frame.
Another option for a wooden frame is a structure designed to carry utility lines through it and even install heating radiators. It is more massive and much wider
first design.
To install it, two trims are installed, thus adjusting the width of the gypsum board partition, in which all the necessary communications will be placed.
All operations are performed in the same way as in the case of the first design. First, the distance at which the two frames will be spaced from each other is measured, then the strapping bars are mounted, followed by the vertical posts.
Between the two planes, after one side is lined, all the desired communications are carried out in a special plastic box - pipes, wires. It is also possible to install a partition and radiators inside, although this is not recommended.
In this case, the batteries are placed closer to one of the sides and special ventilation grilles are mounted opposite them. It should be remembered that when laying pipes with hot water polystyrene and foam rubber
cannot be used.
Mineral wool is used as an insulator. Another design is a middle option between the first and second.
The strapping frame is installed alone, but the vertical posts are mounted not inside the plane of the strapping bars, but outside. In this case, it increases inner space partitions, it becomes wider.
The procedure for installing vertical posts to the frame is simplified; they are screwed to the edge of the frame bar. To give additional properties For sound insulation, a rubber or plastic gasket is placed between the posts and trim bars.
This arrangement of racks is also convenient because it does not require the placement of additional verticals near the walls. In addition to options with single-layer sheet cladding, there are structures covered with two layers of sheets.
CONSTRUCTION WORKS
HYDRO AND THERMAL INSULATION
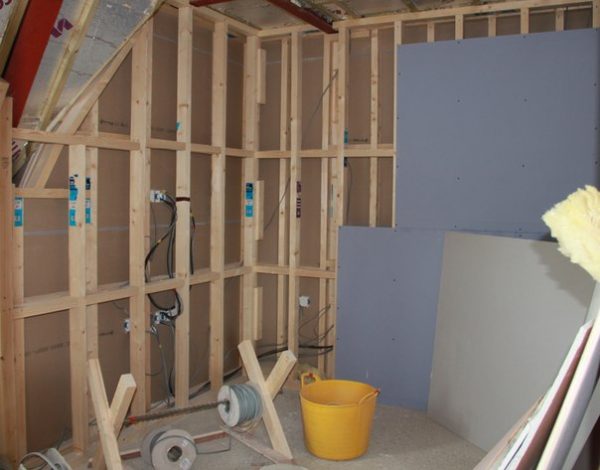
A properly made wooden frame for drywall is in no way inferior in reliability load-bearing structure made from metal profiles.
1
Gypsum plasterboard sheets (GKL) are a fairly complex composite material. It is made from plaster, cardboard and various additives. The latter give drywall special qualities. The main ones are high Fire safety and excellent sound insulation. In addition, when using plasterboard, a minimum of dirt and waste is generated. This sets it apart from other construction projects.
Plasterboard sheets are manufactured in three types:
- standard;
- fire resistant;
- moisture resistant.
Kinds plasterboard sheets
GCR is used for the construction of partitions in residential and office premises, wall finishing and ceiling surfaces. Some modern manufacturers(For example, KNAUF) established in last years production of special plasterboard, ideal for finishing floors. Due to the fact that gypsum plasterboard does not emit harmful compounds during operation (the material is considered environmentally friendly) and is characterized by an acidity index approximately identical to the acidity of human skin, it is often used for repair work in residential buildings.
Among other things, drywall is capable of creating an optimal microclimate in living rooms. He can naturally regulate the air humidity in them. Nowadays, plasterboard sheets are almost indispensable for performing various types repair work. They are made from them simple designs, and luxurious multi-level buildings. Due to this, you can create the most modern, bright and original design in your home.
2
Exist following technologies installation of plasterboard sheets: frameless and framed. In the first case, sheet products are attached to the wall using an adhesive. The second technology involves the preliminary arrangement of a special frame. Drywall is subsequently attached to it.
The frameless method makes it possible to save room space. Its significant drawback is that installation of gypsum boards is allowed only on flat wall. But using the frame method, drywall can be attached to surfaces that have bulges and depressions. But at the same time, the total volume of the room becomes smaller.
Frameless method of installing gypsum boards
Frame technology for installing gypsum boards is a minimum construction dust. You do not need to make grooves in the wall to lay electrical wiring and other household communications; all systems are placed in the free space between the skeleton of the structure and the wall surface.
The frame for the subsequent installation of plasterboard sheets on the wall can be easily built with your own hands. A home craftsman with minimal experience in carrying out repair activities will build a skeleton for a plasterboard in a matter of hours. And then he will also quickly attach drywall to a self-made structure.
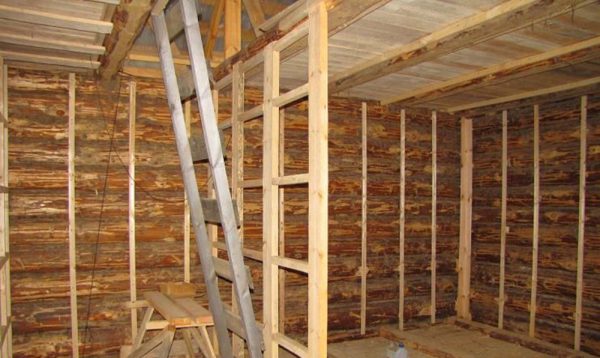
In most cases, the frame is made of metal profile products. But there is a technique that is easier to implement. It makes it possible to build skeletons for gypsum boards from lightweight and easy-to-install wooden products (slats, beams). We will talk about this method of creating a frame structure for drywall with your own hands.
3
It is recommended to build the frame for attaching gypsum boards to the wall from coniferous wood. In this case, the wood must have a moisture content in the range of 12–18%, and also undergo a special fire retardant treatment at the manufacturer of beams or slats. It is also recommended to additionally apply antiseptic agents to wooden products. This treatment will protect the frame from:
- rodents (the smell of antiseptic is good at repelling mice and other living creatures that can damage the structure);
- mold and fungal microorganisms that destroy wood;
- wood-boring insects;
- biological natural decay.
You can do antiseptic protection of wood yourself. For these purposes, you can use sodium fluoride. It is sold as a light gray fine powder. You will need to stir the purchased mixture in well-heated (but not boiling) water (35–40 g of the drug per 1 liter of liquid). Then treat all elements of the future frame for drywall with the resulting composition.

Sodium fluoride for antiseptic protection of wood
Fluoride antiseptic easily penetrates into wooden products and is practically not washed out of them. It is important that it is non-toxic to humans, has no odor, and does not decompose during use. Working with such a composition is simple and safe. An almost complete analogue of fluoride is sodium fluoride. It is allowed to purchase such a drug. But before use you should add a little soda ash (soda ash).
It is impossible to carry out antiseptic treatment of wood with compositions containing the following components:
- anthracene oils;
- coal;
- creosote;
- slate.
The effect of their use will be good. But they are harmful to human health, as they are recognized as toxic substances. Advice from the pros! Before arranging the frame for mounting drywall on the wall, be sure to give wooden products rest in the room where you will build the structure. In 48–72 hours, the wood will fully adapt to humidity and temperature conditions. This process in the language of specialists is called tree acclimatization.
4
The structure we are interested in is made of wooden blocks or slats different sections– from 3x5 cm to 5x6 cm. Specific dimensions of lumber are selected taking into account the expected load on the frame. All work is carried out using the most common construction tools - a hacksaw or saw, electric drill, screwdriver, screwdriver, level. Nails and mounting dowels are used as fastening elements.
Important point! GCR is mounted on frame structure in cases where wall surfaces are characterized by poor-quality coating (plaster or other) and significant roughness. It is also advisable to install such a structure when finishing walls in rooms with a height of 3 meters or more. Implementation adhesive technology installation of gypsum boards with your own hands in such high rooms recognized by professionals as inappropriate.

Installation of gypsum boards on a frame structure
A wooden frame on the wall is created according to the following scheme:
- Analyze the condition of the wall surface. Fill any irregularities found with putty (plaster), and clean areas with peeling old coating.
- Mark the wall. Carry out this operation with strict adherence to levels and angles (use measuring tools).
- The horizontal beam is installed first. It should be secured to the floor base with anchors.
- Attach vertically to installed beam wooden slats. They should be approximately 1 cm from the edge of the sheathing. The distance between individual vertical elements– 60 cm.
- Check with a level that the slats are positioned correctly.
- Install the second horizontal element on the ceiling.
Before proceeding with the installation of gypsum boards, the frame should be leveled. If the floors in the room are uneven, correct position The horizontal beam can be set by placing pieces of wood or scraps of wood chip products under it. After leveling the skeleton, firmly fasten all its parts. That's the whole technology for assembling a wooden frame on the wall. Feel free to start installing gypsum boards on your hand-made skeleton.
5
Installation of plasterboard sheets should begin from the window or doorway of the room or from its far corner. GKL are fastened with self-tapping screws on wood. The installation step for hardware is 25 cm. It is recommended to use self-tapping screws no longer than 3.5 cm.
Installing plasterboard sheets on a wooden frame
Important note: if you are installing moisture-resistant sheets, it is better to secure them to the frame with serrated galvanized nails. Place the first self-tapping screw (nail) at a distance of 1.5 cm from the edge of the uncoated edge of the gypsum board (1 cm from the lined one). Another subtlety of the work is that when fixing drywall, it is necessary to move from one edge of the sheet to the other. In this case, the installation of products is carried out end-to-end. Special edges are provided on the end parts of the gypsum boards. Using them, you can subsequently easily fill in the gaps between the products (first prime them and then treat them with putty).
Let us finally add that fasteners must be installed as carefully as possible. Make sure that the heads of nails or screws do not pierce the front side of the gypsum board. Such fasteners hold sheets very poorly. Over time, plasterboard products will begin to move and become loose, which, quite possibly, will lead to the destruction of the entire structure.
When working with gypsum boards, a variety of materials are used. More often, builders prefer frames made of metal profiles. But there are also floors made of wood.
Plasterboard finishing of a wooden house
Some people prefer to use wooden floors due to the environmental friendliness of the material despite its shortcomings. These are: biological corrosion, flexibility to climatic influences and flammability. Special treatment will increase resistance to the listed influences. When making a wooden frame under drywall, you should know important points, which ensure reliability.
 Installed frame for gypsum board sheathing
 To build a partition with your own hands, use beams coniferous trees With various sizes sections, the choice of which depends on the method of cladding and the height of the partition being built.
Basic requirements, subject to which the structure will last longer:
- The indoor humidity level is less than or equal to 18%;
- For partitions whose height does not exceed 3 meters, the riser is a section of 6x5 cm, the sheathing is 6x4 cm;
- For partitions over 3 m - sheathing and riser with the same cross-section, which is 6x5 cm.
- The choice of gypsum board depends on the height of the partition. The ratio of the height and thickness of the sheet is directly proportional; the higher the structure, the thicker the gypsum board;
- Regardless of the selected height, section and thickness, the step is 60 cm;
- Treatment that reduces the ignition index of the material is carried out in accordance with the requirements of the first fire safety group;
- Fastenings are made using nails, screws, and tenons. Using the latter type of fastener, the connection becomes stronger and will last longer;
- Used for sound insulation mineral wool thickness not less than 5 cm and not more than 6 cm;
- The thickness of the new partition with the highest value is 132 mm and the smallest is 85 mm;
- The insulation index is calculated based on the selected partition thickness. It varies between 41 – 51.
 DIY drywall finishing
 Before installation begins, the wood lies for a couple of days in the conditions in which the frame will be erected. During this time she will undergo acclimatization.
Chemical treatment is no less important than fire treatment. It is aimed at productively combating various factors of biological origin. Let's consider in detail:
- Mold and mildew render the used lumber unusable, which is fraught with further destruction;
- Natural decay - necrobiosis, decay. Antiseptic treatment prevents these natural processes;
- Insects. Many species of these representatives of the fauna render the material unusable;
- Rodents are no less dangerous. Special composition able to scare them away.
 Antiseptic
 There are a variety of antiseptics chemical compositions. Due to its effectiveness, preference is given to sodium fluoride. It is a light gray powder that dissolves in hot water. The structure of the bars allows sodium to pass deep. An indisputable priority is the poor washability of the solution; it does not decompose, has no unpleasant odor, is not toxic and does not have a corrosive effect on metal.
Sodium fluoride is also used, to which soda ash is added. This combination turns the first substance into a pure sodium fluoride compound.
Antiseptics with an oily structure are prohibited for use in residential premises. This:
- Anthracene oils;
- Shale;
- Coal;
- Creosote.
They are toxic and can cause considerable harm to people.
 Wood damaged by insects
 Assembling the partition frame
Installation begins with tracing - marking. It is applied to the floors used for construction - walls, floors, ceilings. Initially, the gap where the partition will be placed is measured. The width of the gypsum board used is additionally measured from the intended line.
For these purposes, it is advisable to use a ceiling-wall line. Having marked the required point on ceiling, it is moved down, this can be easily done with your own hands using a plumb line. At the selected point, a nail is driven in, to which a plumb line is attached, and a mark is made at the opposite point where the plumb line points. Connecting the dots forms the first line. Then a perpendicular is drawn along the wall.
The resulting point, after drawing a perpendicular, is transferred to the ceiling using the same plumb line or bubble level. This creates the third line. The fourth is created by connecting two open points. As a result, a rectangle emerges, which acts as the basis for the partition.
 Tracing
 Frame and features of its installation
Frame is a structure consisting of vertically and horizontally located beams and a frame. Its installation begins with the construction of the frame. The bars are fixed along the previously outlined lines. If the walls in the room are made of wood, then it is better to choose spikes or screws as fasteners. Otherwise it's screws and dowels. The frame is secured with brackets or hangers.
Installation involves the use of integral beams. Especially when it comes to doorway. Wherever it is located (in the middle or near the wall), there must be solid bars on its sides. The holes are made with an impact drill used for concrete surfaces.
Formation of the future door
After the installation of the frame is completed, they proceed to the construction of the opening for the door. In order for the work to be done with your own hands efficiently, follow the sequence of actions:
- The risers are mounted on each side of the opening, taking into account the size of the door being installed. The opening is approximately 5 cm wider;
- The risers are reinforced with bars to provide additional rigidity;
- The horizontal partition is mounted a couple of centimeters above the box by connecting to a rail mounted on the ceiling. To do this, take two beams and install them vertically. They serve as a joining place for gypsum boards and provide greater rigidity.
 Ready frame
 The final stage of work
Installation requires a minimum spacing of 60 cm between the posts. If the size of the gypsum board is less than the height of the ceilings, install horizontal jumpers, which will serve as a place for attaching additional sheets.
It is easy to determine the location of the vertical jumper (above the door frame). It is enough to attach the installed gypsum board and put a mark. The edge of the sheet falls in the middle of the jumper.
For people who do the installation themselves, experts give advice: it is better to connect the beams with metal plates and corners, which are used when assembling rafter systems. They are reliable and can withstand heavy loads.
Maintain horizontal and vertical alignment of lintels and racks. To determine them, a level is used. When installing racks with your own hands, place them so as to attach the maximum number of whole sheets of gypsum board to the wall. This saves material and time.
Collect one wooden structure easily with your own hands, without the help of a second person. The technology for covering a gypsum board wooden frame is similar to that in the case of working with metal structure. Those who have doubts can watch the video and be convinced of the truth of these words.
To construct a wooden partition, high quality lumber is used.
Isolation is necessary
If the partition performs not only decorative function, experts advise insulating it. Installation of insulation is carried out after covering one side of the wooden structure with gypsum boards. Foam materials or mineral wool are more often used.
It is not difficult to complete this stage with your own hands, because the distance between the material and the racks is almost the same. The material is laid and fixed. Rigid insulating materials are fixed to the inside of the lined partition. If cavities are found during installation, they must be filled with mineral wool. This combination will give the partitions an additional soundproofing effect.
In contact with


