It is not always possible to use a centralized water supply, especially if the housing is somewhat remote from the city. But sometimes you have to connect special equipment, such as a pumping station for a home, the connection diagram of which depends on the operating conditions and parameters of the water source (well, well), and in conditions of insufficient water pressure from the central pipeline.
The most important, main components are the pump unit itself and the storage tank. Depending on the version, the mechanism is controlled by an automation unit or float element. The result is that each of the active nodes occurs in different versions. For example, the drive exists in the form of a hydraulic accumulator and a tank. The pumping unit itself may or may not be equipped with an ejector. Moreover, the first of these options can be made with a built-in or external ejector.
Devices with a storage tank have a long list of disadvantages, including the main ones: large dimensions, and therefore difficulties during installation, as well as the lack of forced action on water, which does not contribute to an increase in pressure in the system.
The most common versions today are those with a hydraulic accumulator.. The principle of their operation is based on the features of the main unit, which is divided inside the cavity into two compartments. Both of them are responsible for different functions: pumping air or water.
The pressure level is monitored by a relay, which turns off the device when the pressure reaches a certain level. If the value of this parameter drops to the minimum limit, the relay is activated and the device is put into operation. Despite its popularity, this type of equipment also has its drawbacks, in particular, the tank is not very spacious.
 with hydraulic accumulator
 Basic criteria for choosing a device
Installation pumping station in a private home is preceded by a careful selection of the most suitable model. Among all the functions, including the least important ones, you should first of all pay attention to the following:
- suction depth of the device, which must correspond to the parameters of the well itself, because if these parameters correspond, as well as with sufficient power, you can get highest level productivity;
- water supply speed, also known as productivity;
- power of the device, but you should not choose a model with the largest margin for this parameter, as this will lead to unnecessarily high energy consumption;
- device control type: manual drive or automation;
- the number of people who will use such a water supply system in the future;
- tank volume, which will allow you to use the device for a long time without connecting to the mains.
If we talk about the performance of the device itself, then this parameter will never should not exceed the natural productivity of the water source(wells, wells). If these characteristics do not match, the liquid will be pumped with impurities.
A do-it-yourself pumping station for a dacha is connected based on some information about the composition of the family. So, if the power of the device is not sufficient to provide the required speed of pumping water, then there will not be enough water in the system to supply a large number of people living in the house, which will lead to a weakening of the pressure and uninterrupted operation devices.
For example, in order for a family of 4 to be able to use a local water supply system, a device performance level of approximately 3 cubic meters is required. m/h, however, this figure may vary depending on the level of intensity of water use.
The principle of choosing a site for installation

The main disadvantage of pumping stations is the impossibility of using them in the cold season in unheated rooms or on open area. It happens that users organize additional heating for devices standing on the surface of the earth, protected only by primitive construction. In this case, of course, there will be some effect from such actions, but in reality the result will only be excessive fuel consumption (if an liquid fuel heater is used, for example).
For more efficient and economical use of such units, before connecting a pumping station in a country house or in a private house, it is recommended to adhere to a number of rules:
- choosing a place to install pumping equipment should take into account the possibility of supplying centralized system heating, and the presence of energy sources in the room is not desirable;
- It is recommended to organize free access to the device, which will simplify maintenance even in the event of equipment failure;
- professionals advise install such equipment as close to the water source as possible(well, well).

As you can see, if you plan to purchase such equipment, the connection diagram for a pumping station for a home and cottage from a well or should cover everything possible features, up to the organization of a special room for these needs.
Choosing a system: one-pipe or two-pipe?
In total, there are two options for connecting equipment of this kind, each of which requires the need to take into account several parameters: the installation depth of the equipment, the configuration of the water supply. Thus, a distinction is made between one-pipe and two-pipe systems for connecting pumping equipment. In the first case we're talking about about shallow depths, while the second option is usually used to increase the depth of water suction by a pump from a well.
More specifically, some boundaries can be noted for both cases. For a single-pipe scheme, a threshold of up to 8 m depth is sufficient, for two-pipe system– from 8 m or more. Moreover, the second option assumes use of pumping equipment with an external ejector.
How to connect to a water source (well, borehole)
Usually the location of the well is in close proximity to the home, which greatly simplifies the extraction of water and its supply to the house for the general needs of the family. Accordingly, you will not have to dig an endless trench to lay a pipeline, which is one of the main links in the chain of organizing local water supply using a pumping unit. Main works:
- Preparation of trenches, which are made at a depth below the soil freezing level and with a slight slope towards the water source to increase the efficiency of equipment operation and water supply to the site.
- Preparation of a polyethylene pipe with a diameter of 32 mm from a well (well) for connection with pumping equipment. At this stage, a check valve and a mesh are mounted on its end part. Moreover, installing a pumping station in a dacha with your own hands does not necessarily have to imply independent fastening of these elements, since it is quite possible to purchase a ready-made pipe with a check valve connected to it and a coarse filter (also known as a mesh).
- The connection to the pump unit is made using a coupling, metal corner threaded.
- Next, the pipe leading to the water supply is connected to the pumping equipment according to the principle described above, using a combined coupling with an angle of 90 degrees and an “American” one.
- Before the first start, water is first poured into the pump unit through a special hole.
A detailed connection diagram of the pumping station is shown in the photo.

Organization of connection to the water supply
When connecting a pumping station to a central water supply, connecting elements (fittings) are also used. Attached to each of the holes (inlet and outlet) connecting element, providing a hermetically sealed fastening of the pipeline. The pipeline from the pumping station is connected to the water supply using a special insert or tee.
For better water purification It is recommended to install two filter elements: coarse and deep cleaning . Moreover, there are some nuances when installing such parts. Before connecting to the internal water supply, a deep cleaning filter is installed, and a coarse filter element is mounted at the inlet of the pumping station. After fastening all the elements, the equipment is started.
Thus, in total, not much work needs to be done at the stage of connecting a pumping station for a summer house and home, but it is the preparation that takes more time, for example, digging trenches for laying a pipeline.
For greater convenience, some tricks are often used to smooth out the operation of such equipment, in particular, installing the pump on a concrete or brick base, on top of which a rubber mat is placed. IN in this case the equipment is fixed to the base using anchors. This will somewhat smooth out the effect of vibration during operation of the device.
Additional information on how to install a pumping station at your dacha with your own hands is presented in the video.
Surface pumps are characterized by their small size, ease of maintenance, relatively low cost and economical energy consumption. Perform installation surface pump It’s much easier to do it yourself than to install a deep one. However, success is guaranteed only if the manufacturer’s instructions and specialist recommendations are strictly followed.
- Vortex pumps provide an uninterrupted supply of water with increased pressure; they are used for watering gardens and quickly pumping out the contents of wells and barrels. Vortex-type devices are sensitive to debris and should not be used in polluted water bodies.
- Centrifugal pumps They are characterized by high efficiency and are suitable for organizing water supply on a permanent basis. Self-priming models are not afraid air jams and the formation of air bubbles in the system.
Electrical devices for pumping water can also be divided into stationary and portable. Stationary models are installed in water supply systems, and mobile ones are used for watering and draining flooded cellars and basements.
Mobile electric pump for irrigation
Connecting a surface pump to a well or well
Important! Installation of a surface pump is only possible in wells and boreholes no more than 8-9 meters deep. To work with deeper shafts, a submersible tool is required.
The easiest way is to connect mobile equipment to a country well, which is used exclusively for irrigation. It is more difficult to connect a stationary pumping station to the system autonomous water supply. This will be discussed further.
What is needed to connect the pump to the water supply
In addition to the electric pump, to connect it to the water supply system of the house you must have:
- inlet and outlet pipes or rigid hoses with a cross-section of 32 or 25 mm, the length of the pipe is calculated so that the lower end is immersed in water by at least 30 cm, while the total length should not exceed the size specified in the passport for the device;
- connecting fittings;
- storage tank with a volume of 30-60 liters;
- flexible hoses for connecting the tank to the pump;
- five-pin adapter for the second output;
- pressure switch;
- pressure gauge
In order to reduce the number of starts, it is recommended to connect a self-priming surface pump to a storage tank and an automatic start-up control system. Storage tank also functions as a hydraulic accumulator, regulating the pressure in the pressure system and protecting it from water hammer.

Many manufacturers produce ready-made pumping stations, which include everything necessary equipment. If a separate device was purchased, the missing components will have to be purchased additionally.
Choosing a location for installation
Surface pumps are always mounted on land - water should never get into the device body. Ideally, the electric pump should be mounted as close as possible to the well or well. The room should be dry, relatively warm (positive temperature) and well ventilated. It is possible to install a pumping station in the basement, but in this case you will have to put up with constant noise.
To place the device next to the well, small buildings are built or the equipment is placed in underground caissons - concrete, plastic or metal insulated structures with ventilation, equipped around the well casing. Caissons are built below the ground freezing level. Water pipes In this case, the connection to the house is laid in a trench, also dug in non-freezing layers of soil.

Installation and connection diagram of pumping equipment
Instructions for connecting to an autonomous water supply
This step by step description How to properly install a surface pump in an autonomous water supply system is relevant for all types of pumping equipment. Failure to comply may lead to breakdowns and emergency situations.

- Before connecting the surface pump to the water supply system, it is secured to a fixed base with bolts. To neutralize vibrations, it is recommended to use a rubber mat or special attachments for the legs as a pad.
- A hose is connected to the outlet, to the other side of which a check valve and a coarse filter are connected, sealing the connections with special tape or flax.
- Outgoing pipes leading to the water supply are connected to the second outlet, located in the upper part of the housing.
- The check valve is immersed in water, allowing a slight slope in the line of pipe or hose running from the valve to the pump.
- At the next stage, the system is filled with water through the outlet holes or filler plug. It is important to remove all air from the system!
- Next, connect the pressure part with wiring throughout the house. At this stage, close the filler hole and check the pressure in the accumulator (tank). If the pressure does not correspond to that specified in the instructions, it should be increased (pump up) or decreased (bleed).
- Having clearly completed all the steps, the electrical equipment is plugged into the outlet and started up. The switched on pump should start and fill the system and accumulator with water.
- Turning off the engine indicates that the pressure in the system has reached its maximum (from 1.5 to 3 atmospheres).
- Now you can open the tap and make sure the installation is working.
- If, when the valve is open, the pressure does not correspond to the parameters specified in the instructions, it is necessary to adjust the operation of the relay.

Connecting a check valve and filter to the pipe

Installation features for other water supply systems
Even after reading the recommendations on how to properly install the surface self-priming pump into a well or well, difficulties may arise when connecting the equipment to other sources. These tips will be useful for those who are planning to automate the supply of water from a water column or storage barrel.
Connecting the electric pump to the column
It’s not too late to think about how to connect a surface pump to a column, even after installing a hand pump. It is recommended not to dismantle the manual control, but to supplement it with automation.
For both devices to work, you need to cut under the check valve of the column, install a tee with a check valve and connect the electric pump through a rigid pipe. It is better to replace the check valve on the column or install another one on the tee to prevent air from being sucked in from the side of the column. Between hand pump and a ball valve is inserted into the pipe.

The principle of operation of the combined column is simple: first, the column is raised above the ball valve using a hand pump, then it is closed and the electric pump is started. It is important that there is always water in the “glass” of the column; if necessary, it must be added.
Installation of the device in a barrel
Irrigation barrels help out at dachas and suburban areas, and the use of a pump significantly simplifies the difficult work of the gardener. The electric pump not only automatically supplies water, but also creates required pressure. On sale it is easy to find inexpensive, simplified equipment for barrels and advanced automatic garden models that work with micro-drip irrigation systems.
Before connecting the surface pump to the barrel, it is necessary to connect hoses for water intake and irrigation to the device. Rubber hoses are not suitable for this purpose - they will simply shrink from water pressure and will not be able to perform their task. The device is installed on the ground, as close to the container as possible. Only hoses are lowered into the water - the body of the device must remain out of reach of splashes. After completion, the pump is stored in a dry place.

Compact model for barrel
Compact barrel models were invented especially for summer residents - they are installed on the edge of a container with water. These convenient devices are equipped with filters and pressure regulators. The kit almost always includes hoses.
Understanding the operation of watering devices is not difficult, but self-installation a surface pump for water supply at home can only be started after carefully studying the manufacturer’s instructions. If it contains a lot of incomprehensible information, you should not take risks, it is better to entrust this difficult process professionals.
Home heating installation warm floors, in our climate is becoming increasingly popular. This system must have a thermostat for a water heated floor, since such a heating system is very demanding on the degree of heating.
Regardless of whether heating using a water floor is the main or auxiliary method of maintaining acceptable temperature conditions in the room, it is subject to specific requirements.
The fact is that it must have a limited maximum temperature. In any room there is always dust and it is located, in accordance with the laws of physics, on the floor. It has been established that when the surface of a heated floor is heated, convection currents of heated air are formed.
If the heating exceeds 30 degrees Celsius, then air currents raise dust, and we have to breathe it. This circumstance does not have a favorable effect on the general condition of the human body, as a result of which thermostats began to be used to maintain the desired temperature.
For control temperature regime, the thermostat for the water floor is connected, which belongs to the control devices.
Device and principle of operation
The comfort of staying indoors largely depends on the heating system used. The temperature of the water heated floor is controlled using special devices - thermostats.
Many designs of such systems are used, but in most cases they use only a few fundamentally different adjustment methods.
Watch video - setup process
But, before considering the operating principle and design of thermostats, you need to understand the object of regulation.
What is heating wiring
Heating of the room with a water floor can be carried out different ways. One of them is the use of heat from heated water, which acts as a coolant. The transmission is carried out through pipes. Previously, heating was mainly used steel pipes, now they have been replaced by modern ones plastic materials.
 The heating circuit can be located along the walls in the form of radiators, or it can be located under the surface of the floor, heating it and the air in the room.
Hot water or antifreeze is heated in the boiler, after which, using circulation pump supplied to the heating circuit of the water floor.
Passing through its pipes, the coolant transfers heat into the enclosed surrounding space, heating the surface. The cooled liquid is returned to the boiler system. Depending on the temperature of the “return” in the mixing unit, it is heated or cooled by mixing more cold water from the tank.
And this is where a thermostat is installed, reacting to the amount of heating of the return flow and giving a command to perform one or another action.
In circuits with heated floors, which are connected by a separate circuit, a thermostat is installed for each of them, since they all have their own thermal regime. And the contours radiator heating heat up to a temperature almost twice as high as for a heated floor.
How does the principle of temperature control work?
 The main elements of heating control are servos, temperature sensors and thermostats. This composition of the equipment allows the temperature of the water heated floor to be adjusted steplessly in continuous automatic mode. This happens as follows:
- If a signal about insufficient temperature comes from the temperature sensor, the servo drive opens the valve and more flows into the heating circuit. hot water.
- When the coolant overheats, the cooled water mixing valve opens, reducing the degree of heating in the circuit.
- However, manual adjustment is also possible by setting the tap to a certain position. But this method requires constant visual monitoring, since the factors on which the heating mode depends change repeatedly during the day. Despite the relative cheapness of such devices, they are very inconvenient to use, since each condition in the room requires intervention in the heating operation.
Adjustment options
Watch video - adjusting the power of the temperature sensor unit
Thermostats in the heating system can regulate the following parameters:
- The degree of heating of the floor covering. In this case, the heating sensor is installed in close proximity to it. This type of floor heating device is best suited for small rooms and low-power heating circuits, which are used only as auxiliary, in particular for heated floors.
- Room air temperature - with this control scheme, sensors are used that are mounted directly in the thermostat housing. Correct operation of such a device can only be achieved if all the requirements for insulation of the heated building are met. Otherwise efficient work heating is difficult to achieve - significant energy losses are inevitable. A properly built home with an extensive heating system and thermostat can provide up to 30% resource savings.
- Combined control systems, in which water heated floor temperature sensors are installed both in the heated room and on the mixing unit system. The parameters are adjusted to ensure the most comfortable temperature in the house. Such equipment with a thermostat is used in large rooms. Both sensors or one of them can be used for control.
Types of thermostats
Watch the video - review of sensors for water floors
To create these devices, various principles and Constructive decisions. Let's look at them.

Some manufacturers install an open-closed valve on the thermostat. The disadvantage of this device is the need for constant monitoring - it only works in manual adjustment mode.
Some manufacturers allow serious inaccuracies in the calibration of the temperature scale, so it is necessary to additionally check the device using an accurate calibrated thermometer.
- For a touch-sensitive remote heating floor temperature controller, control and adjustments are performed from the corresponding panel or remote control. These models provide more accurate and reliable heating control, but in some cases these indicators depend on the manufacturer. You should not consider the price of the device as the main selection parameter; in some cases this approach is not justified.


Such a device allows settings for a day, a week, as well as the ability to operate in automatic mode with support for an economical mode when people are away from the house. This allows you to save up to a third of your costs on energy resources.
Such devices allow you to automatically maintain the temperature in individual circuits of a complexly branched heating system with water heated floors. The disadvantages of the device include the high cost and complexity of adjustments. Before commissioning, you need to carefully study the instructions for connection, installation and settings; errors lead to failure of a complex, expensive system.
- Radio-controlled sensors can be considered exclusive due to their high cost. When using them, there are no low-voltage control circuits, since adjustments are made via a radio signal. Each device is equipped with a radio transmitter and a radio receiver for signals that control the operation of the servos. Such devices may be appropriate in luxury cottages to regulate the temperature of a warm water floor if the owners do not want to have bundles of control circuit wires.
How to regulate the temperature in the house - 3 ways and determining the optimal mode
The main task of maintaining temperature conditions is to create comfortable living conditions, subject to optimal use of resources. This can be achieved in several ways.
 First one of them is to set the optimal degree of heating of the coolant in the underfloor heating circuits. The second is the complete cessation of its entry into it.
The easiest way is to use pipes with a maximum operating temperature of 90-95 degrees for the heating circuit. This allows you to install a circular pump with a thermostat in the system, as well as a reverse valve.
The installation location of the pump is the return pipe, and the temperature of the coolant in this place is no more than 70-80 degrees Celsius. If the heating of the coolant reaches critical values, the thermostat turns off the pump and the heating goes into standby mode.
As the floor cools, the circulation pump turns on again, supplying a new dose of hot water into the circuit pipeline. Practice shows that this method is the most effective and reliable for stable heating operation with heated floors.
 Second way adjusting the degree of heating involves the inclusion of a three-way valve or mixing valve in the system. With this approach, chilled water from the return to the hot supply is mixed through a three-way valve. That is, the maximum temperature of hot water from the boiler is reduced by adding cooled water.
If a 3-way valve is used, adjustment can be made manually or via a servo drive. The mixing valve regulates the temperature of the coolant according to a pre-entered control value.
Third way adjusting the heating of the coolant in the home heating system  consists of using a mixing unit. Such a device can be made from the following components:
- 3-way valve;
- circulation pump;
- bypass jumper;
- thermometer;
- thermostatic head;
- maximum temperature control relay.
Considering the composition of the components used, the unit for adjusting the degree of heating in the heating system turns out to be quite expensive.
But the temperature change in it occurs very quickly, because it is produced by mixing water from the return pipe into the main coolant flow. In this case, the combustion intensity in the boiler automatically decreases.
In accordance with the established regulations, the fuel consumption mode is always optimal.  The number of nodes in the combined system can be any, and each will work autonomously in accordance with the established settings.
Thus, it is possible to maintain a higher air temperature, for example, in a children's room and at the same time a lower one in the bedroom of adult members of the family. Such a unit is especially effective for controlling the temperature in the installation of water floors.
To use this method of adjustment there is only one requirement - all heating circuit must be arranged according to European requirements. The temperature of hot water from the boiler should not exceed 67 degrees.
And now we will consider the method of adjusting the thermal and hydraulic conditions using a thermostat. It is installed in a room, and adjustment is made by setting this device to the desired temperature for that particular point. Heating is controlled by a servo drive on a specific circuit.
Watch the video
Such a device works successfully in conjunction with a homemade manifold, a three-way valve and a mixing unit. Its popularity is due to the ease of adjusting the heating mode and the relative cheapness of the device.

Connection diagram for thermostat for water heated floors
In conditions apartment building In the city, installing heated floors is an almost impossible task. The fact is that the low-temperature heating circuit of the floor can only be included in the return pipe and often leads to a critical decrease in temperature in the general heating network.
This becomes the reason for refusal to approve changes in the design of heating systems. This issue is much easier to resolve for individual developers, who are complete owners of their own heating system.
Watch the video - functions and differences of thermostats for screed circuits
In them, the hot coolant from the boiler enters the collector and from there is distributed throughout the rooms by separate pipes. Having given off heat in the radiators, the coolant again enters the collector, completing full cycle.
The control equipment in such devices is installed directly on the collector. It controls servos that receive a signal to operate from thermostats.
A temperature control method is also used using a signal from a sensor located directly in the room where the temperature is controlled.
This method is certainly more accurate, but it is associated with greater costs when installing low-voltage control systems. This will require a large amount of wall gating, because such wires will have to be pulled from each heated room.
And some of them have two, when a combined heating circuit with a radiator part and a heated floor system is installed in the room. When installing a thermostat on the manifold, this is no longer necessary, and the end result is the same.
The pipeline for a water heated floor is quite complex in design, and errors in design and installation are costly. Therefore, it is better to entrust such work to experienced specialists.

Before connecting the water heated floor thermostat, you need to decide on its location in the heating system.
How to choose thermostats for water heated floors
Modern heating devices are controlled using special thermostats. Being combined with a remote temperature meter, this device controls not only the temperature of the floor surface, but also the degree of heating of the air in the room itself.
After all, in the end, all efforts to create a reliable heating system are aimed at creating comfortable living conditions.
Normal use of a heated floor is almost impossible if control equipment is not used. The thermostat circuit for a water heated floor allows you to effectively maintain its temperature in the required range, allowing you to healthy image life.
There are many models of these devices on the market, which experts roughly divide into the following categories:
- Devices that help save energy resources by temporarily turning off the heating system and heated floors in the absence of the owners.
- Devices with programmable timers that allow you to configure the “smart mode” of the heating system depending on the state of the influencing factors. All adjustments from the timer are transferred to the thermostat, which sets the temperature.
The choice of thermostat directly depends on the size of the heated room. For the room small sizes An inexpensive mechanical device with simple and accessible adjustment is quite sufficient.
But most often used electronic thermostats with programming capabilities. In this case, the adjustment accuracy is 0.5 degrees.
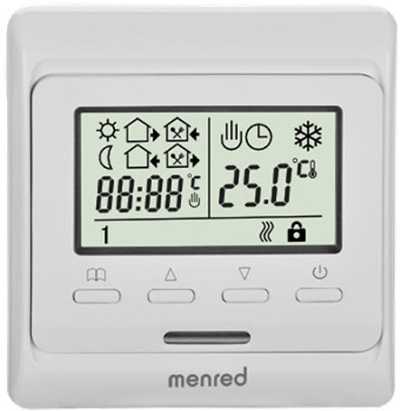
The liquid crystal display of this device reflects the set surface temperature and its actual value at a given time. In addition, a special symbol is displayed while the heating system is operating. There is also a malfunction indicator in case of malfunction of the thermostat or the heated floor system as a whole.
The heating operation is controlled by pressing three keys located on the front panel of the display.
Watch video - water floor automation
Water heating continues to be the most popular method of heating homes, including private ones. Therefore, its management systems continue to develop and improve.
This allows you to significantly save energy resources for heating. Install and connect the thermostat sensor in a system with heated floors when the power supply is de-energized.
Posts Contents:For driving modern systems heating systems capable of maintaining constant comfortable temperature, a thermostat is used for heated floors. Together with an external temperature sensor, it monitors and regulates not only the heating of the floors themselves, but also the air in a given space. Thermostats can be installed in each room where there are heated floors and regulate the degree of heating in each of them. Some models are equipped with touch controls, additional temperature sensors, and can be programmed for different temperature values at certain times of the day or days of the week.
How to choose a thermostat for a heated floor
Normal operation of a heated floor is impossible without a thermostat, which allows you to save a significant amount of energy and Money. When performing the assigned tasks, this device only turns the heating on and off at a set period of time or in accordance with the readings of the thermometer. When choosing a thermostat, it is necessary to take into account its power, which must correspond to the power of the heated floor.
The creation of the most comfortable conditions in the room, as well as the safety of the floor covering, largely depends on the operation of the thermostat. When too high temperature floor coverings can become deformed, crack and lose their quality. Therefore, which thermostat is best to choose for a heated floor is an important issue when installing heating systems.
Among the huge number of models and designs of thermostats, experts distinguish several main groups:
- Devices that provide an economical mode of operation, allowing to reduce energy consumption in the absence of owners. At this time, the heating power decreases by several degrees.
- Models with a programmable timer that allows you to set any time intervals during which the room will be heated with given intensity. All commands from the timer are transmitted to the thermostat, which, in turn, maintains the required temperature level.
- There are highly intelligent designs where entire operating modes can be programmed and set, in which periods of heating and saving alternate. The command from the device goes directly to the heating element at a set time, depending on external factors and specified settings.
- Thermostats using a built-in limiter, which is a special sensor that protects against overheating flooring and the heating element itself. Such devices are most effective, which should not heat above 260C. Otherwise, the release of harmful toxic substances will begin.
The choice of thermostat for a particular room depends on its area. For a small room, a regular device without programming or installation will be sufficient. The use of more complex programmable devices is best suited for larger spaces. Most often in such cases, electronic thermostats with temperature sensors installed inside the floor are used.
Mechanical thermostat for heated floors
The simplest devices include room mechanical thermostats equipped with a panel manual control. This panel in most models is made in the form of a rotary regulator, around which there is a temperature scale. The device is turned on and off using a special key.

When deciding which thermostat to choose for a heated floor, it is necessary to take into account the lack of mechanical devices any electronics. These devices do not require electrical energy to operate, although many models have indicator lights on the panels that indicate the status of the heating process. Some designs are equipped with a mechanical timer that sets the operating time of heated floors at a certain time.
The air temperature in the room is measured by a special built-in floor heating thermostat, the operation of which is based on the properties of gases or bimetallic elements. Under the influence of the environment, they are able to change volume or shape. That is, when the desired temperature is reached, the electrical circuit begins to close or open. In this case, the temperature of the heating elements themselves is not controlled.
Thus, the mechanical regulating device is capable of maintaining desired temperature until it is turned off. If necessary, just turn on the thermostat again and wait for the heated floor elements to heat up.
Electronic thermostat for heated floors
The most widely used are non-programmable electronic thermostats, which allow you to control the temperature level with an accuracy of 0.5 degrees.

The liquid crystal display of the device displays the current and set floor temperature, as well as the room temperature. In addition, a special symbol appears on the screen when the heating system is on. Displayed periodically different kinds technical messages, symbols indicating malfunctions in the underfloor heating system. This function allows you to perform diagnostics in electronic thermostats. Direct control of the device is carried out by three small keys located on the external panel.
Power is supplied to the heating elements in the same way as with mechanical thermostats. It must be taken into account that electronic device can constantly change on and off cycles, saving about 30%. Its work will continue until the warm floors are forcibly turned off by the owners.
Programmable thermostat for heated floors
When heating large areas Energy savings are of great importance, especially when using heated floors. This problem can be easily solved using a programmable thermostat, used not only with cable, but also with film systems.
The operation of programmable thermostats is carried out according to the same schemes as in conventional electronic devices. The fundamental difference is the ability to configure operating modes in accordance with the calendar. In this case, all necessary time intervals and temperature values are set for each day of the week, which leads to a reduction in electricity consumption by up to 70%.
To do this, periods are assigned when the heated floors must operate at full capacity or, conversely, be turned off for a certain time. All adjustment processes occur automatically, after all the necessary settings. For example, days from Monday to Friday and Saturday and Sunday are configured separately. The cycle will be repeated continuously until the settings are changed.
Thermostat for electric heated floors
Thermostats or thermostats are equipped with a temperature sensor, which allows you to maintain a set temperature by periodically turning the circuit on and off. The thermostat for infrared heated floors operating from the electrical network works in exactly the same way.

In most cases, heated floors are initially equipped with thermostats. If such devices are not included in the kit, they can be selected individually, since they are all standardized and suitable for all electrical systems warm floors.
Standard room devices have a power of 3-3.5 kW and are designed for a current of 16 amperes. If the power of the floors is higher than the power of the thermostat, the connection should only be made using a contactor. Each device is equipped with two temperature sensors - internal and external. The first measures the temperature of the floors, and the second measures the air temperature in the room.
To choose best thermostat for heated floors, you must follow certain criteria. First of all, the value of the maximum floor power should be taken into account. Otherwise, the lack of power will cause the heating temperature of the cable to drop. If necessary, the devices are connected to a single network and freely provide a total power of over 3 kilowatts. They are installed separately at different ends of the room.

Another factor is the type of installation, that is, the regulators can be surface-mounted or built into the wall. Installation features of each device are reflected in the instruction manual. When choosing, you should also take into account the type of control. For example, devices that are simultaneously equipped with built-in and remote sensors are considered the most accurate. Great importance given functionality and ease of use.
How to install a thermostat for a heated floor
Before installing the device, be sure to read the attached operating instructions. It indicates the procedure for removing the front panel, that is, the control panel. This procedure must be carried out correctly, otherwise the device will become unusable. For built-in models, a recess is prepared into which the mounting box is inserted. It is recommended to place the thermostat close to outlets at a height of 0.6-1.0 m from the floor. Before starting work, the home network must be de-energized.

Installation of a heated floor thermostat begins with connecting the power wires to the installation box. Further between the thermostat and heating element a temperature sensor is connected, which is placed in a corrugated pipe.
The connection of wires to the thermostat must be carried out according to established scheme connections. The phase and neutral wires are connected to the corresponding terminals, and the wires from the sensor are connected to separate sockets labeled sensor. The device itself fits neatly into the mounting box. If there is interference in the form of wires or corrugated tubes, they must be eliminated. The thermostat is located exactly level. After this, the control panel is installed in its place and secured with screws.
Setting the floor heating thermostat
Various models of thermostats can operate in manual and automatic mode. This factor must be taken into account when choosing a thermostat for a heated floor. All necessary adjustments depend on this. The hours and days of the week are set, and in-depth setup and calibration is also performed. If necessary, one of the temperature sensors can be disabled.
All adjustment steps are described in detail in the instruction manual. Separately, there is a lock against children, who may accidentally change the settings out of curiosity. To do this, press the “up” and “down” keys simultaneously. You need to unlock the thermostat using the same keys.


