If your own bathhouse is still only a dream, then it’s time to leave them and move on to action. In fact, anyone can build a bathhouse in their own yard. The main thing is to know in what sequence and what actions to perform. The article will provide step-by-step instruction, which will allow you to do everything yourself.
Drafting
No building is complete without good project. Regarding the bathhouse, you will need to think about the number of rooms. A steam room will be a must for the bath. Its size will depend on the desired number of people who will be in it at the same time. If it is possible to make a steam room in a bathhouse with a size of 3x2, then you can be sure that six people can comfortably fit in it. In addition to the steam room, a relaxation room is needed in the bathhouse. Usually it occupies the largest space in area. In this room in the bathhouse, as a rule, the necessary furniture is installed for a comfortable pastime.

Another room that is necessary for a bathhouse is a washing room. It can accommodate a shower stall and a toilet. Not required for this room large area. If you separate the bathroom, then the washing room can be an intermediate link between the relaxation room and the steam room in the bathhouse. It is also worth providing a hallway or dressing room in the bathhouse. He will provide air cushion, which will prevent the rapid release of heat.
Step-by-step instruction
Step-by-step instructions describe the entire process of assembling the future structure, indicating the nuances and practical advice. Any construction begins with the construction of a foundation.
Foundation
The frame structure is lightweight due to its features. This means that for such a bath there is no point in pouring a slab or strip foundation. An excellent solution would be to use screw piles. They represent metal pipes, at the end of which there is a small drill. Thanks to the drill, the piles can be easily immersed in the ground to the required depth. The length of the piles must be such that its lower part can pass through heaving soils and be fixed below the freezing level of the soil. In this case, its upper part should protrude above the surface at a given distance.

Some experts do not recommend marking under screw piles, which will serve as the foundation for the bathhouse. The reasoning is that it is quite simple to orient the position of the piles for a bathhouse relative to a fence or other structure. If the construction of a bathhouse is carried out on open area, then you can’t do without markings for piles. The photo above shows how this can be done. According to the developed bathhouse project, the dimensions are transferred to the site where construction will take place.

Pegs mark the places where the piles should be screwed in. The distance between the piles should be 1.5-2 meters. Everything will depend on the load applied, i.e. on the total weight of the structure. After marking, one of the corners of the bathhouse is selected in which the first pile will be mounted.

To simplify your installation task, you need to make a pit. The depth of the pit must be no less than the diameter of the pile screw. It will help to start rotating and deepening the screw pile.

The photo above shows that for high-quality installation you will need three people. Two carry out the twisting using levers, and the third holds the pile in a vertical position. In this case, the use of a magnetic level to track the vertical position is not yet required, since the pile is not firmly fixed in the ground.

After the pile is firmly planted in the ground, you can attach the magnetic level. In the photo above you can see that it is fixed perpendicular to where the tightening levers are located.

Two people continue to tighten the pile, and the third monitors its position by level. Thus, it is necessary to secure all the corner piles of the foundation for the bathhouse. After this, two ropes are stretched between the piles, as shown in the top photographs. They form a shaped channel into which the remaining piles will be mounted according to the markings that were applied. Piles are required not only for the main walls, but also for the partitions. After the piles are installed in place, it is necessary to align them.

To solve this problem, you can use a hydraulic level. You must first set up one of the piles so that it serves as a control. A mark is applied to it, which will be transferred to the rest of the piles. One part of the level is applied to the control point, and the second to the opposite corner pile. Once the water inside the level has stopped fluctuating, you can apply a mark.

To transfer the markings to the remaining piles, there is no need to approach them with a level. It is necessary to stretch the fishing line between the outer piles so that it touches the intermediate supports. After this, a mark is made on the fishing line. The supports are trimmed according to the marks. Next, a metal square with a side of 25 cm is welded onto them. It is necessary to hold the lower frame of the building.

Next, the strapping for the bath is performed. For this you will need wooden beam with a size of 15x15 cm. It is laid on prepared sites on piles for frame bath. The photo above shows how the individual elements are connected at the corners. It is necessary to make a slot for half the thickness of the beam, and also cut out a part that will be equal to its width. The result is a recess with a size of 15x15 cm. The same procedure is repeated for the second log. After this, they are connected to each other and fastened.

The photo above shows how to proceed with the strapping for the partitions. A similar recess is made, but in the middle of the beam. After this, the second part is placed on top and fixed. The result should look something like the one shown in the photo below.

Waterproofing is laid between the metal platform and the timber. The diagonals must be checked to ensure that the walls of the frame bath are even. If the beam for the foundation of the bathhouse has to be increased, then this is done using the same method as connecting two elements and always on a pile so that there is the required stop.

After assembling the trim, SIP panels are laid, which will act as an insulated subfloor. The panels are screwed to the sauna frame with self-tapping screws; this is done for temporary fixation. The panels sag quite easily under weight, so they need to be reinforced with a beam, as shown in the photo below.

In order for the beam to be well fixed in the SIP panel, it is necessary to apply polyurethane foam. A gap of 5 mm is left between the individual panels, which acts as a thermal seam.
Wall assembly
The next stage in the construction of a frame bath will be the assembly of the walls. For these purposes, you will need an edged board with a size of 15x5 cm. The structure is assembled from it, as shown in the photo below.

The distance between the individual vertical posts is equal to the width of the insulation that will be used for the bath. When the assembly is completed, the wall frame for the bathhouse is installed. Individual elements temporarily secured with jibs, as seen in the photo below.

The finished design looks similar to the one shown in the photo below.

It is worth noting that the places where window and door openings will be located are additionally reinforced with vertical and horizontal struts.
Roof
An excellent solution for a bathhouse would be a device pitched roof. Its equipment is somewhat cheaper and also simpler than a gable one. In the photo below you can see that the rafter system has three support points.

The rafter legs are located in increments of 60 cm from each other and are fixed to the upper elements of the wall. To achieve the required roof slope, it is necessary to calculate in advance the height of all walls so that an angle is formed between them. The roof slope angle for a bathhouse is determined individually for each project. Much depends on the meteorological conditions in a particular area, as well as the type of flooring chosen. If it is metal tiles, then minimum slope should be 16 degrees.

In the photo above you can see that the front wall had to be raised a little. To increase its strength, jibs were installed on the sides. Roof overhangs are made at the front and back so that water flows down unhindered. On rafter legs waterproofing, control sheathing and sheathing under the roof deck and the roof deck itself are fixed. A video about the construction of such a bath can be seen below.
Insulation and finishing

Due to the fact that SIP panels are laid on the floor, it does not require insulation. Floor finishing is carried out at the request of the owner. A heated floor can be installed on it and a screed can be poured on top or a laminate can be laid. Walls require a special approach to insulation. First of all outside The walls of the bathhouse are waterproofed so that water does not get on the insulation.

Insulation is installed in the prepared gaps that were left between the racks in the walls of the bathhouse. An excellent option for a bath would be mineral wool. It has a certain vapor permeability, which will facilitate partial air exchange between the bathhouse and the street. The insulation should be inserted with little force so that it is well fixed inside. After the insulation has been installed, vapor barrier of the bathhouse premises is performed. For a steam room in a bathhouse you will need thick foil, as shown in the photo below.

The inside of the bathhouse walls can be trimmed with clapboard, but the outside will look better as a block house.

Installation of both the first and second versions of the bath material is carried out on wooden sheathing. After the cladding, the bathhouse is arranged. A stove is installed in the steam room, interior doors. If the bathhouse will be used all year round, then you should think about an autonomous heating system. Additionally, you can build a small terrace where you can spend time with friends.
Summary
As you can see, building a frame bath has its own difficulties. Some stages of constructing a frame bath cannot be completed without the help of a partner. An important stage of construction is the supply of various communications. These include water, sewer and electricity. All wires inside a frame bath must be double-braided and laid with non-flammable corrugation. Moisture-resistant lamps are used for the steam room in the bathhouse. To keep electricity consumption in the bathhouse to a minimum, you can consider using LED lamps. Can be used as windows for a bath metal-plastic frames with wood finish. They will cost a little more, but will look quite harmonious.
The technology of frame construction at one time made a real revolution, which is why modern DIY frame bath, built in a short time using affordable materials, may turn out to be no worse than large-scale log huts or brick capital houses. Today even a schoolchild knows the stages of construction, and what’s best is that even schoolchildren can build a small house using this technology. So let's take a step-by-step look at what we need to do and why.
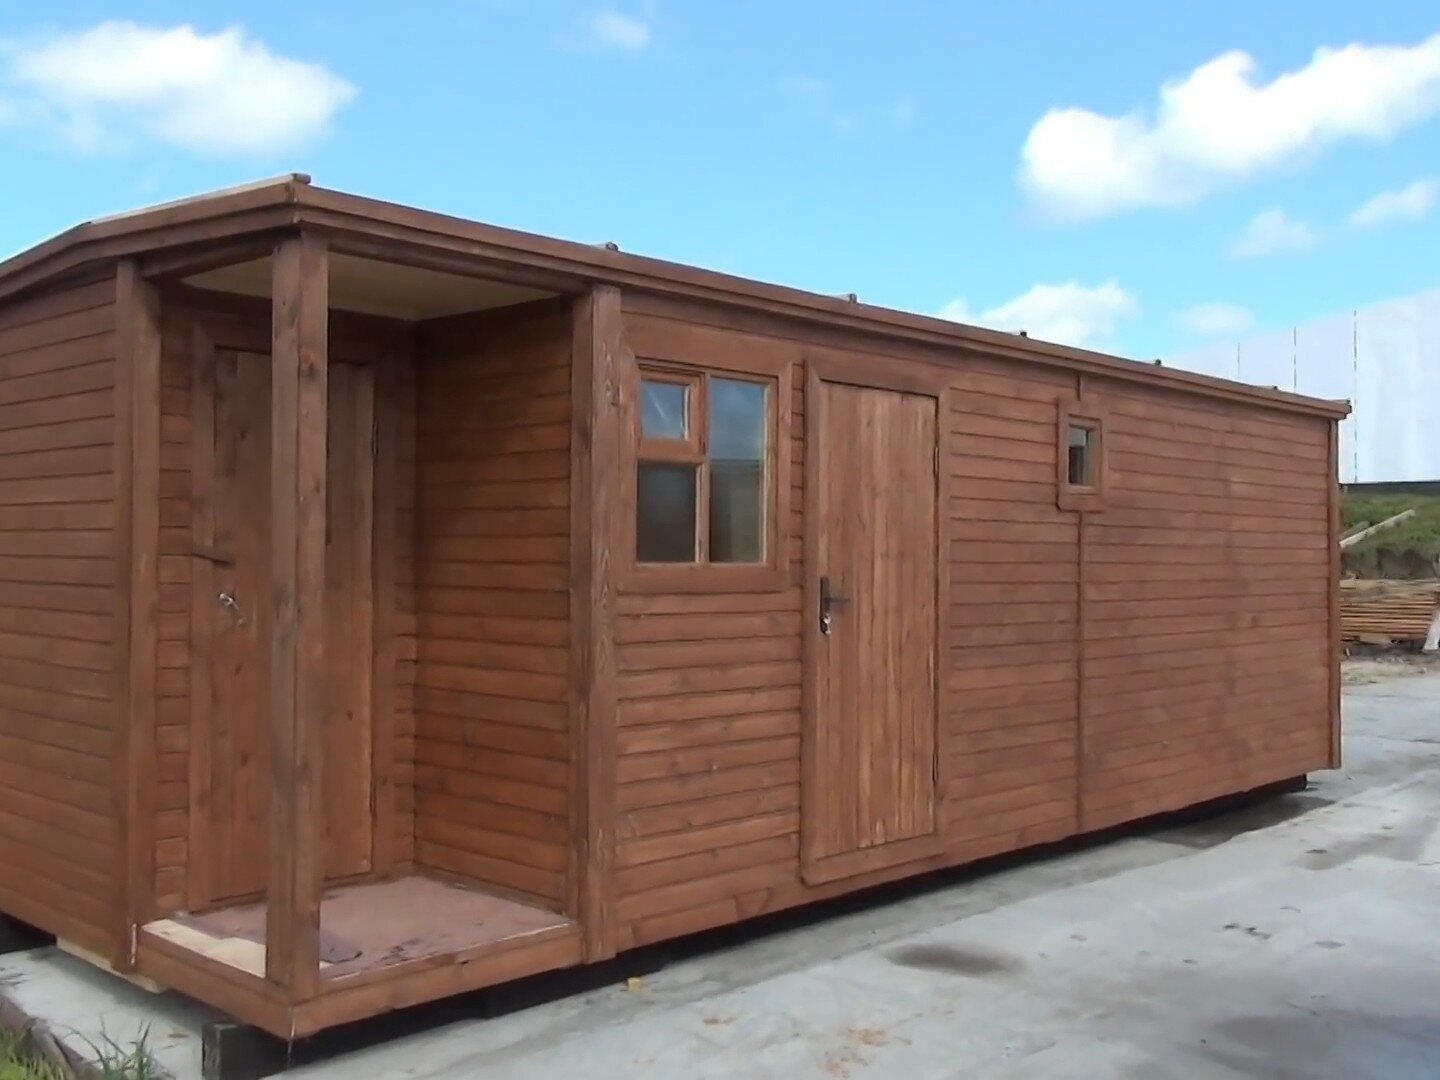
DIY frame bath photo
Appearance do-it-yourself frame baths, photo of which you can see in several examples below, competes in beauty with those models that are made the old fashioned way, using traditional materials typical of our latitudes. And the reduction in cost and simplification of the process allows you to become the happy owner of your own small bathhouse even for those who, for financial reasons, had never even dreamed of such an improvement in their summer cottage.
The revolutionary nature lies in the fact that the assembly of lungs occurs structural elements, which can even be produced separately from the main site. They are mounted, connecting to each other in a certain sequence, to form a kind of skeleton of the structure. After this you can already increase inner layer cake, which serves to protect against wind, rain, and retains heat in the room. For such tasks between wooden walls is installed panel material with certain properties, it is complemented by several more layers various materials, performing the functions of waterproofing, vapor barrier, insulation, and so on. When everything inside is installed, the material inside and out is covered with the last decorative layer, the task of which is not only to hide all the insides frame structure, but also to make it externally indistinguishable from brick or wood.

It turned out that the beams folded together, fastened at the corners and equipped with a sufficient number of spacers, can easily withstand the strongest loads; even several floors of the house are assembled on the same base. And such a building will last no less than a traditional one, and its construction will cost much less. To understand which option you will need to build and overcome on your own, you will first need a preliminary design. On it you can mark not only dimensions, such as the width and height of the building, but also the number of rooms in its plan, their location relative to each other, since the design features of the construction of a bathhouse may depend on the function of one or another part of the building, even at the stage of laying the foundation. You and I will dismantle the construction of a simple one-story do-it-yourself frame bath, projects, photos which you can see in our article. For such a bathhouse, two main functional rooms are used - the steam room itself, as well as the washing room where the shower or font is located. In addition, you can also equip your sauna with a small extra room, in which there will be a table and chairs, such a room for relaxing between trips to the steam room can well replace a guest house.
DIY frame bath projects
Examples of models DIY frame bath, projects its buildings may seem the same, since the technology itself generally allows for few variations. You can add some variety already at the stage of interior decoration, and you can remove the box itself by general scheme. You can make the construction task much easier for yourself if you approach the issue rationally and not just make a sketch to express all your expectations from the future structure, but also a full-fledged project plan, with drawings and dimensions, which should become the main instructions for the entire construction period.

You can order the implementation of such a project from a professional designer or you can master some simple computer program in design, but this requires an understanding of at least the basics of design and load calculations. Having a ready-made project in hand, on which the ratios of all angles and sizes are calculated, you can literally calculate the amount of wood you need down to the last block, and also, already at the purchase stage, ask to cut the timber and board into certain sections, mark them and then assemble them according to the diagram, like a children's construction set.

In addition to this option, you can use ready-made projects on the Web that are designed, say, for a small project. You will just need to slightly change, for example, the size and number of windows, as well as increase ventilation at the stage of laying all utilities.
Do-it-yourself frame bathhouse foundation
As in any other building, they are present at any stage of construction, including at the stage of foundation formation. The debate is not only about the types of uses for do-it-yourself frame bathhouse foundation, but also about its necessity in general, are discussed quite often. On the one hand, the frame design is really very light compared to brickwork generally weightless, does not require any time for shrinkage, like a log house. And technologically it does not require any powerful or complex foundation at all.

But here concerns come into play not only about the reliability of the building, but also about extending its service life. The wood that is at the base of the frame is not the most durable material under conditions of such aggressive use: hot, wet air inside, cold, frosty air outside, and also damp, frozen soil, which is located directly under the floor. The absence of a foundation will not only lead to the fact that the laid floors will be cold, they will also very quickly become unusable from such contact. It is for this purpose that the foundation of the building is formed, and they take into account the climatic characteristics of the region, the level of groundwater, the depth of freezing and the quality of the soil itself on which the building stands.
The simplest option is to make a columnar foundation, for which metal or asbestos pipes with grillages. For small house you can make piles at the four corners and one additional pile in the middle of each straight line at the base. If the building has large area, then the number of pillars is calculated based on future loads. The first harness will be attached directly to the posts and laid on top of them.

The second acceptable option is the use of concrete blocks, which replace the pouring of tape concrete base using formwork. This simplified method is suitable for warm, dry soils that do not freeze more than one meter deep. Well, the most common method is to pour a strip foundation, which runs along the boundaries of the plan of the future house. It allows for high-quality waterproofing of the base of future walls, which will protect them from rotting and damage. Filled between the tapes additional insulation, for example, under wash room often a mixture of sand and gravel is poured so that the water that will flow from here into the soil quickly leaves and does not stagnate. In addition, be sure to reinforce with a concrete pad that part of the future steam room where a heavy wood-burning stove will be installed.
DIY frame bath step by step instructions

Laying the first layer of piping on the foundation is the first stage of the immediate start of construction do-it-yourself frame bath. Step-by-step instruction in this case it really is a set simple tasks, which need to be completed one after another. For example, connect vertical beams to the base, attach support beams to them, which are located at an angle, make correct harness in the middle, as well as at the height where the doorways and windows will be located.

The advantage of this choice is that if there are enough workers, all stages can be carried out simultaneously. While one part of the workers is pouring the foundation, the second part is assembling the wall frame right on the ground. Then they can very easily be lifted and mounted in a fully assembled form, and their height can even reach the second floor.

Ready frame with base for do-it-yourself frame bath roofs– this is only half the battle. The remaining stages will be labor-intensive, but there is nothing complicated in them either. Boards of panel material are nailed onto the frame, for example, it could be OSB or similar, but since we are disassembling special case construction of bathhouses, premises with high humidity And design features, then any panel material must be moisture resistant, with special properties. From the inside it must be completely covered with a vapor barrier film, both simple foil and more advanced materials, waterproofing must be done, and cladding must be made wooden board. Natural wood necessary not only for the task, but also for the complete, neat trim walls In addition to aesthetics, this will create the correct microclimate in the room. When choosing any waterproofing materials and vapor barriers, consult about their behavior when heated, whether they emit bad smell or harmful substances. It is better to avoid purchasing low quality materials.

better done with flexible bitumen shingles, which will not put excessive load on the foundation.

DIY frame baths video

Exterior finishing for DIY frame baths, video which you must find on specialized resources, must be carried out carefully. No gaps are left for atmospheric moisture to penetrate inside the walls; the entire timber is completely processed and impregnated, and then covered with a good layer of insulation to obtain the effect of a thermos. And the most pleasant part is the cladding, which will help give the entire structure a finished look, making it look like a log house (as is the case with a block house) or a wooden cottage (vinyl siding).
Reading time ≈ 6 minutes
Everyone knows about the benefits of a bath, so it’s rare to find country cottage area, the owners of which have not installed and do not intend to install a bathhouse. The practice of constructing such structures spans hundreds of years. Therefore, for most people, a do-it-yourself bath is not a fantasy, but a simple everyday occurrence. Those willing to devote time frame construction You can find step-by-step instructions below on how to make your own sauna. The submitted photos, videos, and drawings will help in the work.
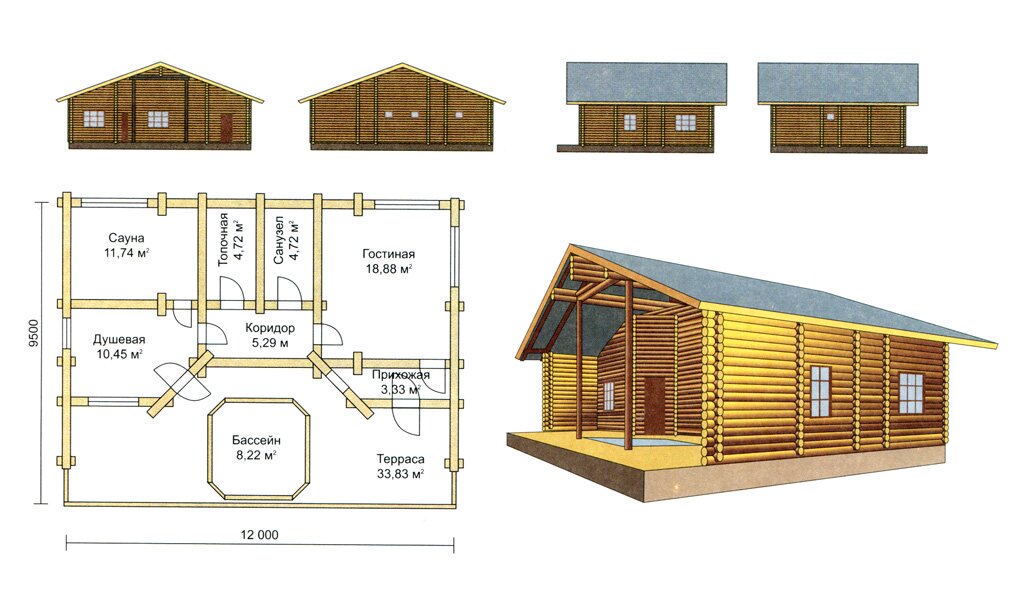
Bathhouse project
To meet the cost of 350 thousand rubles, you can build a 4x4 m frame bathhouse, adding a 4x1.8 m veranda to the main structure. In this case, you can equip a 2.1x1.6 m steam room, a 3.8x2.1 m relaxation room, and a shower room - 1.6x1.6 m.
Construction of the foundation

The depth of laying the foundation is determined by the level of soil freezing in the area, in in this case- this is 60 cm. To determine its parameters, you need to look at the bathhouse design. If not project documentation, prepared by specialists, the type of foundation is determined depending on the material of the walls.

If you decide to install a frame bathhouse, it will be enough to make a small strip foundation. To arrange it, a square formwork made of 2 parallel boards is installed on a prepared, flat surface. They are fastened with self-tapping screws; additionally, cross members are used to subsequently lay the block.

You also need to take care of the ventilation of the foundation and make appropriate bookmarks. In order not to make a mistake with the size and direction of the trench under the foundation, it is more advisable to first make the formwork, and then dig a trench in the space between the boards. It is better to immediately pour the excavated soil into buckets and take it away from the site to prevent contamination.

The formwork is installed around the perimeter and under internal partitions, as well as where the stove will be installed. This way the load will be distributed more evenly. It is also advisable to carry out reinforcement. The trenches are filled first with sand to reduce the load on the base, and then with concrete mortar.


When it hardens, all that remains is to unscrew the screws and disassemble the formwork. Usually after 5-7 days the concrete gains strength. In dry and hot conditions, it is recommended to water the foundation.

Arrangement of the bath floor
First you need to roll out roll waterproofing between the foundation elements and along the foundation itself. This may be ordinary roofing felt. It is also used for waterproofing in foundation recesses intended for logs that will become the base of the floor.


To prevent the logs from bending during operation, they are additionally reinforced with intermediate supports. The upper part of the foundation is also waterproofed. Next, it remains to lay the floor board, starting from the edge of the foundation. It must be treated with an antiseptic.


Frame making
The next stage of building a frame bathhouse with your own hands is making the frame itself. 4 separate wall blocks made from edged boards, leaving holes for windows and doors. The workpiece must be collected on the ground, on a completely flat area.


When the blanks are ready for installation, they are installed vertically and fastened in pairs with self-tapping screws. It is very important to maintain the correct connection angle and monitor the level. Externally frame racks look like hollow structures made of vertical and horizontal elements. After installation, you need to check the evenness again, and only then begin to build the roofing system.


Roof arrangement
The next stage of the step-by-step instructions is the construction of the roof of a frame bathhouse.


Its installation begins with the installation of logs on the 2nd floor. Next, a layer of flooring boards is placed on the resulting beams. Then the rafter system is installed. We must not forget that the chimney has to be removed, so rafter system adequate space must be left. Next, waterproofing is installed, a counter-lattice and sheathing are made. In progress.


Space under gable roof can be actively used for storing brooms and other useful things.
Bathroom wall cladding
The voids in the bathhouse frame are filled thermal insulation material. You can use mats and rolls. But the mats are much more convenient; they are simply inserted into the existing voids of the frame. Roll material will need to be cut according to the dimensions of the intermediate elements of the frame rack.


When arranging walls, do not forget about vapor barrier and waterproofing. When the film is fixed, begin external finishing bathhouses at the dacha blockhouse.


Interior decoration
The inside of the bathhouse is lined with another layer of thermal insulation, as well as a vapor barrier. The joints must be taped with adhesive tape. On top of this, the walls are lined with clapboard.


When decorating the walls of a steam room, you will need to make 3 layers:
- mineral wool;
- foil;
- lining.


Currently, it is difficult to imagine a summer cottage without a bathhouse on it. Taking a steam bath in a warm bathhouse is a real Russian tradition, with its roots going back centuries. A bathhouse can be built not only in a country house, but also in the city: the availability of a plot is an excellent opportunity to implement this initiative. Moreover, a frame bath is a modern high-tech design that does not require large expenses.
You can build a frame bathhouse with your own hands, without the help of specialist craftsmen. This type of construction is the fastest and most affordable: a frame bathhouse requires several times less materials than structures made of timber or logs of similar dimensions.
Where to start building a frame bath?
First of all, you need to decide on the location of the bathhouse. It may be an extension to the house, or it may be separate from it. Before starting to lay the foundation for a future bathhouse, it is necessary to determine the type of soil on the site and plan the construction itself: the number of floors and rooms, dimensions, interior.

Before building a bathhouse, a plan must be drawn up, where it is necessary to take into account the specifics of the structure and estimate the volume and duration of work. All elements must be noted in the plan ventilation system, chimney, roof features and others important aspects. You can also attach a veranda or terrace to the bathhouse.
In order for the bathhouse to be comfortable and able to accommodate several people at the same time, its dimensions must be appropriate. Most best option for a steam room - 240x200x220 centimeters.
At the discretion of builders or customers, the bathhouse can be equipped with a billiard room, a relaxation room or an additional steam room.
The plan for the future bath should be drawn up as accurately as possible and taking into account the smallest details- this way the construction process itself will be much simpler. The bathhouse project can be ordered from specialists. They will do everything competently and clearly, which will help avoid major mistakes during construction.
Also, when planning a bathhouse, a table is drawn up to record all the materials necessary for construction, which is correlated with the plan.
Materials required to build a frame bath:
- cement for pouring the foundation;
- sand;
- beams for mounting the frame and ceiling;
- beams;
- insulation material in a roll (mineral wool, ready-made mats, polyethylene, roofing felt, glassine);
- waterproofing film for walls and ceilings;
- lining for internal lining walls;
- roofing material for the roof.
What foundation to choose for building a frame bath?
Since the frame bath itself is very light, a strip foundation, which is poured directly under the walls along the entire perimeter of the structure, will be sufficient for its construction. A columnar foundation is also a common option, but its installation requires stable soil, otherwise the structure may collapse.
Due to the lightness of the frame bath, the foundation for it is poured according to a fairly simplified scheme.

When the main points are determined, you can begin the construction itself.
- Pouring the foundation.
Step one. The perimeter of the future bathhouse is determined in advance; special pegs are driven into the ground along its edges, within which it is necessary to dig a ditch 60 centimeters deep and 40 centimeters wide.
Step two. The ditch is filled with sand to one third of the depth. The sand is poured from above with water and thoroughly compacted.
Step three. After compacting the first layer, finely chopped red brick or gravel is poured over it.
Step four. A layer of broken brick or gravel is covered with a layer of sand, which should be level with the ground level.
Step five. Formwork is assembled from reinforcement. The entire structure is poured with concrete and insulated on top thin layer roofing felt
Important! Before building a frame bathhouse, at least a week should pass so that the foundation has the opportunity to properly settle.
- Construction of walls.
Step one. Lumber prepared for a frame bath must be thoroughly dried before starting work. It is not recommended to use birch wood for construction, as it quickly rots. The most the best option there will be linden, aspen or larch. The wood of these species is able to maintain its shape for a long time and has thermal insulation properties, which is very important for a bathhouse.
Step two. After everything construction works will be completed with inside the boards should be coated with an antiseptic solution, and the outside with furniture varnish, in two layers. This procedure must be done around the entire perimeter of the room, avoiding only the steam room and the washing compartment.

Step three. The bottom trim, made of a reliable beam with a cross-section of 10x10 centimeters, must be fixed firmly enough, after which the beams should be properly fastened at the corners with nails. It is recommended to place the racks on metal pins so that during the construction of the walls they cannot change their location and knock down the structure.
Step four. Corner posts must be embedded in concrete.
Tip: The pillars - the basis of the walls of the future bath - should be placed directly under load-bearing walls, corners, stoves - that is, in those places where the load is greatest.
Step five. Along the perimeter of the walls, intermediate racks are installed, made of the same timber as the main structure.
Step six. To make the floor waterproof, it should be laid out with timber made of any wood, with a cross-section of 15x15 centimeters.
Step seven. To cover the bathhouse outside and inside, they use lining, which is affordable and easy to use. To ensure that there are no gaps between the sheets of lining located in a horizontal position, they should be overlapped. This procedure is very scrupulous in nature, but it can protect the walls from excess moisture.
- Let's move on to building the roof.
Step one. You need to take 8 special ceiling beams rafters cut at an angle. To begin with, you should set up only the outer rafters, and only after that fix a couple more pieces in the center of the future roof. The remaining rafters are connected to the main structure, first on one side of the roof, then on the other (through the ridge).
Step two. After the rafters, vertical posts are installed, and if necessary, an exit to the attic is also made.

Step three. On the rafters located at the edges, beams are cut out and nailed to them. front boards, after which the battens are attached on top.
- It is necessary to insulate the walls.
The most common material for this purpose is roll insulation about 50 millimeters thick. In some cases, mineral wool or ready-made mats are used. The insulation is placed between the vertical wooden stands, after which slats are nailed to them. For thermal insulation of the room, it is recommended to use polyethylene or glassine.
Advice: it is not recommended to use roofing felt for wall insulation, as under the influence high temperatures it begins to emit an unpleasant odor.
For floor insulation, it is better to choose expanded clay or other types of backfill, and for the ceiling - polystyrene foam. If the insulation is selected correctly, heat will be lost several times less. Thanks to this, the cost of heating the bath will also be reduced.
After the walls and roof are built, you can begin installing windows and doors in the openings previously left for them. Upon completion of this work, it will be possible to enter the finish line.
The final stage of construction of a frame bath
For a bathhouse to be a pleasure to use, it must not only be comfortable and well designed, but also have a beautiful interior decoration. Therefore, after completing the main work inside the bathhouse, finishing work must be carried out.
First, you should protect the walls and ceiling from the adverse effects of moisture and high temperatures. Coniferous upholstery is perfect for this purpose. Then you can proceed directly to installing the most important part of any sauna - the stove. It must be installed in accordance with all safety requirements. It is recommended to make the wall separating the steam room and the relaxation room from brick - this way it will let in less heat.

To make the walls look more attractive, it is recommended to cover them with clapboard. For this purpose the best way Linden wood is suitable.
What are the main pros and cons of a frame bath?
- Acceptable price. The construction of a frame bathhouse costs several times less than its analogues.
- Ease of construction. You can build a frame bathhouse with your own hands, without the help of specialists.
- Light weight. The frame bath box is quite light, its weight is acceptable for areas with soft soil.
- Short construction time. Building a frame bathhouse is not only easy, but also quick: to take a steam bath in it, you don’t even have to wait until next summer.
- Difficult to care for. Insulation materials may become unusable under the influence of moisture and high temperatures, and replacing them will be quite problematic.
- Unsuitable for therapeutic purposes. Due to the fact that the walls of a frame bathhouse do not emit useful substances, bathing procedures in it cannot help with health problems. If there are any, it is recommended to build a different type of bathhouse.
Despite the fact that the advantages frame structure Much more than there are disadvantages, you should come to a decision on building a bathhouse of one type or another, focusing only on your own taste and based on your capabilities - both material and physical. The condition of the soil and the location of the future bathhouse are also important.
There is nothing complicated or impossible in the construction of a frame bathhouse. The instructions given in this article will help everyone build the bathhouse of their dreams in short time without spending large amounts of money.
There is only one way to build a bathhouse quickly and inexpensively - frame. If you follow the basic rules, the construction will be in no way inferior to its brick and timber counterparts.
We design a bathhouse - different space options
We begin work on the bathhouse with design. At this stage, it is necessary to decide on the size and configuration of the future structure. If your requirements are minimal, you can build a 3x4 m bathhouse. It will have enough space for a steam room for several people with an area of 6 m2. The remaining space can be allocated to a rest room. If you sacrifice the rest room, there will be enough space for a locker room and a vestibule. And if you equip such a bathhouse with an attic floor, you won’t have to give up the rest room.
If the bathhouse will be used as a place to hang out with friends, it is better to make it larger, for example, 6x4. In this case, you can equip it with a fairly spacious recreation room with an area of about 14 m2, as well as a steam room of 5 m2 and a small bathroom.
And if you make a 4x6 bathhouse with an attic, then on the ground floor there can be a steam room and a washing room, as well as a relaxation room and a terrace. All attic floor, which is about 20 m2, can be allocated for a rest room.
If the size of your plot allows, and the budget is not very limited, make an attic bathhouse measuring 6x6 m so as not to deny yourself anything. There's room for everyone necessary premises, as well as for a terrace and a spacious balcony.
Large steam rooms are much more difficult to heat to the required temperature and then maintain temperature regime on the same level. Therefore, if there is no need for a large steam room, it is more advisable to allocate no more than 4-5 m2 for it. This will save fuel and time for heating the room.
In order not to rack your brains over the layout, you can take as a basis finished projects offered on our website. If necessary, adjust the layout as desired. When the plan is ready, be sure to draw up a drawing diagram of the frame of the walls and roof.
The frame of the walls is quite simple - it is based on racks, which are located in increments of 600 mm, if measured from the centers, or 575 mm, if measured between the racks. The top and bottom of the racks are connected by strapping - a horizontal beam or board. In the corners, the racks are reinforced with braces. Above doorways, as well as above and below window openings horizontal jumpers are located. Floor beams are calculated and laid in the same way as in the construction of ordinary houses.
Having such a drawing in front of you will prevent you from making mistakes during the assembly process. In addition, it will allow you to calculate in advance required amount lumber.
Columnar foundation - building the foundation
Since a frame bathhouse is light in weight, in most cases a columnar shallow foundation is sufficient for it, provided that the soil is stable. On unstable soils it is better to make a pile-screw foundation. If you are planning a cellar or arranging other premises, you will need a strip foundation. In other cases, it is better to abandon it, since the construction of such a foundation is very expensive and labor-intensive.
Regardless of what kind of foundation you are going to build, first prepare the site - first of all, you need to properly outline it. Be sure to make sure that the diagonals of the site are the same length. Then get rid of the plant layer. To prevent plants from sprouting under the bathhouse in the future, treat the soil with fungicides.
Now you can begin building the foundation itself. If the base is columnar, you will need the following materials:
- sand;
- crushed stone;
- cement mortar;
- concrete foundation blocks(can be replaced with brick);
- bitumen mastic;
- roofing felt;
- timber 150x150 mm.
After preparing the materials, mark the area for the posts, which should be spaced in increments of 1.5–2 m. Then dig holes to a depth of about 40 cm. Cover the bottom of the holes with crushed stone and sand 10 cm thick. Compact each layer thoroughly. Level the surface of the embankment in a horizontal plane.

Place two in the pits concrete blocks, then apply the solution and place two more blocks with dressing on top. When laying blocks, make sure that the pillars are installed strictly vertically. Then work the blocks on top bitumen mastic and put a couple of layers of roofing felt.
After this, you need to make a grillage, i.e. lay timber around the perimeter of the foundation and fasten it together. During installation, make sure that the angles of the grillage are 90 degrees. Gusset It is advisable to make the grillage beam “in the paw” or at least “in half a tree”. Then you need to lay the floor beams on the posts and cut them into the grillage.
A pile-screw foundation is even simpler - piles are screwed into the ground according to the principle of a conventional drill. Their depth must be at least two meters. During the deepening process, you need to ensure that the piles are positioned vertically.
The tops of the piles are then trimmed so that the edges are at the same horizontal level. After this, a grillage is welded to the piles, which is usually made from I-beams. The same beams are used for flooring.
On metal beams you need to secure the 150x150 mm beam with bolts. It will serve as a strap for the frame posts.
Assembling the frame - materials and installation
To build the wall frame you will need the following lumber:
- timber 150x150 mm;
- timber 100x150 mm;
- board 150x40 mm;
- steel corners;
- wooden dowels.
Be sure to treat all lumber antiseptic impregnations. They will protect the tree from negative biological influences and also make it more resistant to moisture.
The work begins with the installation of racks in the corners of the building, which are made of 150x150 mm timber. At the end of each rack, drill a hole for the dowel with a depth of 80-100 mm. Make the same holes in the grillage at the corners of the building. Then hammer the dowels themselves into the grillage and place the racks on them. Additionally, strengthen the racks with steel angles and self-tapping screws.
Then the racks must be strengthened with braces, as shown in the diagram above. To make braces, use 150x40 mm boards. Cut the ends of the braces at the angle at which they will adjoin the frame and posts. To fix the boards, use self-tapping screws and corners.

Next, install intermediate wall posts with a pitch of 600 mm, made of 150x40 mm boards. To attach the racks, use steel corners, which should be located on both sides of the brace. In addition, connect the intermediate posts to each other as well as to corner posts using jumpers made from the same boards. Place the jumpers in a checkerboard pattern, i.e. at different levels.
Tie all the racks from above with a strapping, which is made from 100x150 mm timber, it will also serve as a Mauerlat for the roof. Then install horizontal strips above and below the openings. For the slats, use the same board as for the racks.
Then install the racks using the same principle interior partitions– connect them from above and below with strapping, and also strengthen them with braces and jumpers. This completes the construction of the frame.
Now you need to lay the floor beams, for which you can use 100x150 mm timber. Place them with the edge on the harness and secure with the corners. The pitch of the beams must correspond to the pitch of the rafters - this is usually 900–1000 mm.
Installing an attic roof
As an example, let's consider a roof, since it allows you to get an almost full second floor with a minimal increase in financial costs. If you are interested in or, check out other articles on our portal.
For mansard roof you will need the following materials:
- timber 100x150 mm for racks;
- boards 150x50 mm for rafters;
- boards 150x20 mm;
- slats;
- superdiffuse membrane;
- roofing material.
The work begins with installation supporting structure. For each truss, two racks are installed, which are connected at the top by beams. Those. Under each truss there is a U-shaped supporting structure.
When installing the supporting structure, it is necessary to correctly determine the position of the racks. Since the rack with the lower rafter and mauerlat (floor beam) forms a rectangle, the distance from the wall to the rack depends on the height of the attic and the angle of inclination of the lower rafter. Knowing the angle of inclination of the rafters and the height of the rack (determines the height attic room), you can calculate at what distance from the edge the stand is installed using the Pythagorean theorem, i.e. you need to find out the length of the smaller leg.

Secure the posts to the frame and floor beams with self-tapping screws and angles. Additionally, reinforce them with braces. Then connect both posts with beams. Using this principle, install U-shaped parts on all floor beams. Connect all the resulting load-bearing elements at the edges with purlins, as shown in the diagram above.
Now you can install the lower rafters. They are cut from below and attached to the harness, and from above - to the purlin, in which the grooves are pre-cut. Next, you need to secure the racks in the center of the jumpers of the U-shaped parts. The height of the racks determines the angle of inclination of the upper rafters. Connect all the posts with a ridge girder.
To complete the attic frame, install the upper rafters, which rest on the lower and ridge purlins. First, cut the grooves for the rafters in the purlins. Immediately waterproof the roof - secure the super-diffuse membrane to the rafters with a stapler. Place a special self-adhesive tape over the staples to ensure a tight connection. Please note that the membrane sheets should overlap each other by 20–25 centimeters.
A superdiffuse membrane is capable of transmitting moisture in one direction. Therefore, it should be located on the roof with the smooth side outward and the rough side inward. If it is not secured correctly, moisture can penetrate deep into the insulation, as a result of which it will lose its thermal insulation properties.
Be sure to secure the slats on top of the rafters, which will serve as a counter-lattice. Then attach 150x20 mm boards perpendicular to the slats. As for the sheathing pitch, follow the manufacturer’s recommendations roofing material, which you purchased for the bath.
Mounted on top of the sheathing roof covering according to the standard scheme - sheets of material must overlap each other lengthwise and crosswise. Screws or nails are located at the crest of the wave.
We insulate the walls, roof and floor of the bathhouse
To insulate the walls you will need:
- basalt wool 150 mm thick and density 25-35 kg/m 3;
- vapor barrier film;
- moisture-windproof membrane (super-diffuse);
- wooden slats.
To vapor barrier a steam room, it is more advisable to use foil vapor barrier material. It will not only protect the structure from moisture, but will also reflect heat into the room.
Let's start with insulating the walls from the inside. To do this, apply self-adhesive double-sided sealing tape to the racks. Then glue the waterproofing film to the tape. Be sure to place the canvases with an overlap of at least 15 centimeters. Seal the joints with double-sided sealing tape. Additionally, secure the foam with a stapler. The result must be an absolutely sealed circuit, otherwise moisture will penetrate inside the walls and the frame will quickly become unusable.

Then lay the slabs into the frame space mineral wool. Make sure that the insulation fits tightly to the structural elements and to each other. Carefully fill all the resulting cracks with cotton wool scraps.
Next you need to secure the moisture-windproof membrane with outside walls It is installed according to the same principle as a vapor barrier - a sealant is glued to the racks, then the membrane itself is attached using a stapler. On top of the film on the racks it is necessary to fix slats with a thickness of at least 20 mm. Place the same slats on the racks on the inside of the walls; they will serve as lathing for the lining.
The same technology is used to insulate the roof - mineral wool is laid between the rafters, then covered from the inside with a vapor barrier. A lathing for lining or other finishing materials is mounted on top of the vapor barrier.
The floor is insulated a little differently - first of all, you need to make a rough flooring between the floor beams from the boards. Then a waterproofing film is laid on the beams and flooring (you can use a regular vapor barrier). Logs are laid on top of the film as when installing a regular floor.
Insulation is placed in the space between the joists. You can use any material, both slab and bulk, such as ecowool or expanded clay. Another layer of film is laid over the logs and then the flooring is made of boards.
To insulate the ceiling, attach a vapor barrier on the side of the first floor, and then make a rough ceiling from the boards. Then, on the second floor side, you need to fill the space between the beams with insulation. A vapor barrier and plank flooring are laid on top of the beams.
Sheathing the walls - the final stage
For exterior wall cladding, it is best to use OSB-4 with a thickness of 12-15 mm. The sheets need to be cut so that the edges fit on the rack. There should be no hanging edges. In the locations of window and doorways You need to make cuts using a jigsaw or hacksaw.
To fasten the sheets, use phosphated self-tapping screws 60-70 mm long. The distance from the edge of the sheet to the screw should be 10 mm. The fastener spacing along the edges should not exceed 150 mm. In the center of the sheets, the screw pitch can be increased to 300 mm.

Be sure to provide a distance of about 5 mm between the edges of the sheets, i.e. so-called expansion joint. If this is not done, the sheathing sheets may become deformed as a result of thermal expansion. All seams must be filled with foam.
Cover the gables of the building in the same way. Then the walls can be finished with any “dry” façade finishing materials, such as lining, siding, thermal panels, etc. Line the walls with clapboard on the inside. If you do not know how, dedicated to this topic.
That's all the main points. Even if you are a beginner, you can build a small sauna box in one to two weeks.