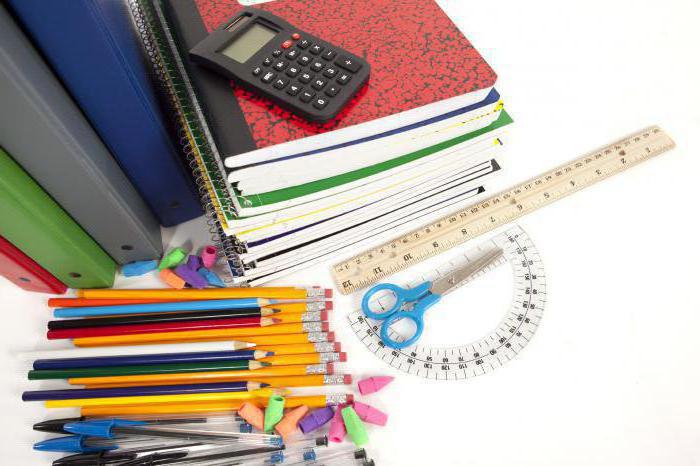
What instruments to use to measure production objects, their side lengths and calculate their overall suitability in connection with the presence or absence of compliance certain parameters accepted in this area?
A ruler for measuring angles, as well as straight sections and surfaces, must accompany not only professional needs or production needs.
This device has modifications. For example, a hydraulic level. It is always based on the following physical law: the level in interconnected vessels filled with liquid (water, for example) will always be the same.
It differs from the previous one (its predecessor, so to speak) by the prefix before the word - “hydro”, which, with some changes in translation from Latin, means “water”. This determines the basis or principle of operation of such a device.
One hose filled with water, but not completely, will always provide the same water level due to pressure equalization outside and inside. Devices based on this principle may vary in design.
But in any case, the most important thing is to prevent air bubbles from entering the communicating vessels themselves, no matter what they are.
Vernier calipers can also be classified into the currently highlighted category measuring instruments(and not, but straight lines). It is considered universal and can accurately store in kind the size of the segment.
How else do you measure angles and segments?
What does accurate measurement mean? Simply, the legs of the device are fixed at the beginning and end of a segment or measurement of an object. Then you can, by applying these two “clamps” to any ruler with any units of calculation, find out its value.
It has a caliper, like other similar devices with the prefix “bar…”, not one scale with divisions, but two. The first is the main, measuring one, and the second is the vernier. The latter is intended for the smallest changes in the measurement of distances, segments, and hole depths.
By the way, on German the word “caliper” is translated as something like a sliding ruler. And it is used there as a meter for circles or their images, and large ones at that. This has been the case since ancient times, this is a historical fact.
Calipers are one of the interesting representatives of measuring instruments. It looks a little like a compass, but has a slightly curved legs(ends). Calipers are used where it is necessary to measure hard-to-reach objects or parts of objects, as well as to carry out similar measurements with voluminous objects.
A level is a large-scale instrument that is needed to determine levels associated with large ones on the ground. Its purpose is connected with surveyors.
The level helps with planning building structures to see points on a specific area with differences and not flat structure, see these “differences” in height above the horizon.
To determine these indicators, the device makes a hairline.

This is a straight line that begins the countdown, that is, it is the start for the specific measurement process being carried out.
You can watch the video in detail about the Malka digital goniometer:
The ruler is very similar in appearance to a mechanical stopwatch, only it does not have a clock mechanism, and instead of buttons there are rotating heads, with the help of one we turn the hands, with the help of the other - a movable dial.
Unlike ordinary slide rules, it does not allow you to count logarithms and cubes, the accuracy is one digit lower, and you can’t use it like a regular ruler (and you won’t scratch your back), but it is very compact, you can carry it in your pocket.
Fast calculations
The attached (below) instructions suggest multiplying and dividing in three movements: by rotating the moving scale to the pointer, rotating the arrow to desired value, and rotating the dial to another value. However, it is much more interesting to use both dials, movable and stationary with reverse side rulers, and do calculations in two movements. In this case, it is possible to obtain the entire range of values at once, simply by rotating the dial and immediately reading the values.
To do this, on a fixed dial you need to set either the multiplier (in the case of multiplication) or the dividend (in the case of division) with the arrow, and, turning the ruler over, by rotating the movable dial, set the second multiplier on the arrow, or the divisor on the pointer, and immediately read the result.
Project “Corners in my house”
Continuing to rotate the dial, we immediately read other function values. A regular calculator cannot do this.
Inches to centimeters
For example, we need to convert centimeters to inches, or vice versa. To do this, by rotating the head with the red dot, we set the arrow to 2.54 on the stationary dial. After this, we will look at how many centimeters there are in our 24" monitor - by rotating the head with black dot On the moving dial we set the value 24 on the arrow, and read the value 61 cm from the fixed pointer (2.54*24=60.96). In this case, you can easily find out the reverse values, for example, we find out how many inches are in our 81 cm TV, for this, by rotating the head with the black dot of the movable dial, we set the value 81 on the fixed pointer, and read the value 32" on the arrow (81 ⁄ 2 .54 = 31.8898 ).
Fahrenheit to Celsius
On the fixed dial we set the value to 1.8, subtract 32 from degrees Fahrenheit in our minds and set the resulting value opposite the fixed pointer, read the degrees Celsius on the hand. To do the reverse calculation, set the value on the arrow, and add 32 in your head to the value on the pointer.
20*1.8+32 = 36+32 = 68
(100-32)/1.8 = 68 ⁄ 1 .8 = 37.8 (37.7778)
Miles to kilometers
We set the value to 1.6 on the fixed scale, and by rotating the moving scale we get miles in kilometers or kilometers in miles.
Let's calculate the acceleration speed of the time machine in the movie "Back to the Future": 88 * 1.6 = 141 km/h (140.8)
Time and distance from speed
To find out how long it will take to travel 400 kilometers at a speed of 60 km/h, set the fixed dial to 6, and turn the movable dial to 4, we get 6.66 hours (6 hours 40 minutes).
Instructions for the ruler
The instructions for the line I have are very tattered, because it was produced in 1966. Therefore, I decided to digitize it for safekeeping in electronic form.
Complete instructions for the slide rule “KL-1”:
Circular slide rule "KL-1"
- Frame.
- Head with black dot.
- Head with a red dot.
- Movable dial.
- Fixed pointer.
- Main scale (counting).
- Number square scale.
- Arrow.
- Fixed dial.
- Counting scale.

ATTENTION! Pulling heads out of the housing is not allowed.
The circular slide rule “KL-1” is designed to perform the most common mathematical operations in practice: multiplication, division, combined operations, cladrate, extraction square root, finding the trigonometric functions of sine and tangent, as well as the corresponding inverse trigonometric functions, calculating the area of a circle.
A slide rule consists of a body with two heads, 2 dials, one of which rotates using a head with a black dot, and 2 hands, which rotate using a head with a red dot. Opposite the crown with a black dot above the movable dial there is a fixed pointer.
There are 2 scales on the movable dial: the internal - main - counting scale and the external - scale of squares of numbers.
There are 3 scales on the fixed dial: the outer scale is a counting scale, similar to the inner scale on the movable dial, the middle scale is “S”-values of angles for counting their sines, and the inner scale is “T”-values of angles for counting their tangents.
Performing mathematical operations on the “KL-1” ruler is as follows:
I. Multiplication
- Rotate the head with the red dot to align the arrow with the “1” mark.
- Against the pointer on the counting scale, count the desired value of the product.
II. Division
- By rotating the head with the black dot, turn the movable dial until the dividend on the counting scale aligns with the pointer.
- Against the pointer on the counting scale, count the desired value of the quotient.
III. Combined actions
- By rotating the head with the black dot, turn the movable dial until the first factor on the counting scale aligns with the pointer.
- By rotating the head with the red dot, align the arrow with the divider on the counting scale.
- By rotating the head with the black dot, turn the movable dial until the second factor on the counting scale aligns with the arrow.
- Count the final result against the pointer on the counting scale.
Example: (2×12)/6=4
IV. Squaring
- By rotating the head with the black dot, turn the movable dial until the value of the squared number on the counting scale aligns with the pointer.
- Against the same pointer on the square scale, read the desired value of the square of this number.
V. Extracting the square root
- By rotating the head with the black dot, turn the movable dial until the value of the radical number on the square scale aligns with the pointer.
- Against the same pointer on the internal (counting) scale, read the desired value of the square root.
VI. Finding Trigonometric Angle Functions
- By rotating the head with the red dot, align the arrow above the stationary dial with the value of the specified angle on the sine scale ("S" scale) or on the tangent scale ("T" scale).
- Against the same arrow on the same dial, on the outer (counting) scale, read the corresponding value of the sine or tangent of this angle.
VII. Finding inverse trigonometric functions
- By rotating the head with the red dot, align the arrow above the stationary dial on the outer (counting) scale with the given value of the trigonometric function.
- Against the same arrow on the sine or tangent scale, read the value of the corresponding inverse trigonometric function.
VIII. Calculating the area of a circle
- By rotating the head with the black dot, turn the movable dial until the value of the diameter of the circle on the counting scale aligns with the pointer.
- Rotate the head with the red dot to align the arrow with the “C” mark.
- By rotating the head with the black dot, turn the movable dial until the “1” mark aligns with the arrow.
- Against the pointer on the square scale, count the desired value of the area of the circle.
Technical and sales organization "Rassvet" Moscow, A-57, st. Ostryakova, house No. 8.
STU 36-16-64-64
Article B-46
Quality Control Department stamp<1>
Price 3 rub. 10 kopecks
Ruler size:

Currently, slide rules are produced only in wristwatch. Humanity has lost something by completely switching from analog computers to purely digital ones.
P.S.: the photos are not mine, taken from the Internet. On last picture On the dial there is a factory marking MLTZKP, if anyone knows what this abbreviation means, please let me know. I was able to decipher only part of it: “Moscow L? T? Control Devices Plant", produced this line "Moscow Experimental Plant control devices"Control device".
Which are used when performing graphic works, to facilitate the work of the draftsman and create convenience and increase productivity:
— drawing board with drawing accessories located on it

Drawing supplies and instruments
— drawing board- serves for pinning a sheet of drawing paper (whatman paper) to it with buttons. She represents wooden shield, consisting of longitudinal planks, pulled together by external end strips and fastened with glue. work surface They are longitudinal planks made from soft wood - alder or linden. Boards are made various sizes. For example, drawing board No. 2 is 1000 mm long, 650 mm wide and 20 mm thick. For more convenient work with a leveling board, it is advisable to stick white celluloid strips on the edges of the board with a straight, uniform scale with a division value of 1 mm.
- crossbar - consists of a long ruler and two short crossbars.

Drawing supplies and instruments
One of the crossbars is fixedly connected to the long ruler, the second can be rotated in relation to the large ruler at any angle. Thus, using a crossbar, you can draw parallel horizontal and inclined lines.
— measuring ruler- used to measure lengths in the drawing.

Drawing supplies and instruments
It is made from solid wood and cross section has the shape of a symmetrical trapezoid. The ruler is equipped with white celluloid strips glued on its inclined edges and having a straight, uniform scale with a division value of 1 mm.
— squares— are used to work with them separately or in combination with a crossbar. With their help, you can perform various geometric constructions: drawing a series of parallel lines, constructing mutually perpendicular lines, drawing angles and polygons, dividing a circle into a given number of equal sections.
— pattern- used for drawing curved lines.

Drawing supplies and instruments
It is a thin plate of a curvilinear outline, making it possible to draw curved lines that cannot be made using a compass. Patterns are made with different curvature of lines. To draw a pattern curve, the pattern is selected so that its edge coincides with at least four points of the curve; in this case, only two of them are connected with a line and then the pattern is moved to subsequent points.
— protractor- used to measure and plot angles in a drawing.

Drawing supplies and instruments
— stencils and templates— used to reduce labor costs and time for performing certain types of graphic work. They can be very different in form depending on their purpose. Using stencils and templates, inscriptions can be made, circles, rectangles, corners, and signs can be drawn.
intended for copying drawings

Drawing supplies and instruments
— Photocopier— used to reduce labor costs and time for performing graphic work.
The power of the light source should be 150 - 200 watts. The glass is 3 - 4 mm thick; its edges must be treated with emery stone. This measure will protect against cuts on your hands. The drawing sheets, the original and the copy, are fastened together to avoid shifting relative to each other and secured to the glass with tape or using magnets. The front panel can also be installed in a landscape position; this will require longer rear bars, which give the structure the necessary strength. Also, the front panel can have a position not only close to vertical, but also close to horizontal if the photocopier is placed on the rear bars.
Drawing device includes two rulers set at 90° to each other

Drawing supplies and instruments

Drawing supplies and instruments
— drawing instruments— serve to facilitate the draftsman’s work and reduce the time spent on graphic work. Currently applied various designs drawing instruments. They allow you to replace a gauge, a protractor, a square, and a ruler at the same time.
A pantograph type device is shown in the top figure. Using a special rotating head, the rulers can be positioned at different angles of inclination to the given lines. The head is connected by a system of movable levers, which allows it to be moved around the drawing field, with a bracket-clamp, with the help of which it is attached to the drawing board. The carriage type device is shown in the lower figure.
Cat word weaver level 324. A tool for plotting and measuring angles?
The head moves across the drawing field using carriages - one moves along the top edge of the board, and the other along a movable vertical guide. The use of such a device reduces the time spent by approximately one quarter compared to the execution of drawings using a grid.
— hatching device- serves to draw a series of parallel lines that serve as shading for individual sections of the drawing. It consists of two rulers, one of which is hinged at its end to the other with the ability to move the hinge along the second ruler by a given amount.
Every self-respecting carpenter and builder frame house uses a Svenson square or its equivalent in its work. Let’s try to understand why this invention is so necessary and important in construction in this article.
History of the Swenson Square
The first copies of the Swenson metric square appeared at the beginning of the 20th century, when this invention was made in 1925 by American carpenter Albert J. Swenson. The author patented this invention, and his family company began selling the angle not only in the United States of America.
However, some errors in the patent registration procedure allowed unscrupulous competitors to produce analogues of the square for marking stairs and rafters and to establish sales of these products.
On a note
In the original, the square produced by Swenson's company has a special diamond-cut diamond-shaped hole, which is not produced by competing manufacturers.
Albert Swenson's company later grew into a family-owned corporation headquartered in Frankfort, Iowa, USA, and to this day it produces some of the best Swanson squares, measuring levels, tape measures and more. construction equipment in the world.
Metric Swenson square
So what is good about the original Swanson speed square and what does it represent? In the classic version, this square also combines a protractor in order to most accurately mark parts during production rafter system frame house, system of stairs and flights of stairs.

Svenson square from Aliexpress
Also, the Svenson metric square is simply irreplaceable in the construction industry in the production of various products that have complex shape, furniture elements, plumbing work, when it is necessary to measure the constituent elements and install them at different angles of inclination.
Main functions of the Svenson square
- Carrying out measurements of various types;
- Using a Svenson square as a measuring device;
- The ability to transfer the necessary lines and angles from the project to the workpiece parts;
- The functionality of the surface planer is to mark marking and base lines;
- Combined building level and plumb line;
- Necessary for trimming boards using circular saw or manually.
The abundance of functions in one device makes it simply irreplaceable when carrying out major construction or design.
Description of the Svenson square
Description of the Svenson square
The appearance of the device has been modernized over time, but in its classic form, the Swanson speed square is an isosceles right triangle made by stamping from aluminum alloy, which makes it both light and durable compared to plastic and wooden counterparts.
A fairly thick sole measuring 5 mm is made in the form of a double-sided stop, and the edges - the legs and hypotenuse - have carefully gone through the milling process for best quality drawing lines and taking measurements. Using milling, the main divisions and numbers are stamped on the product with a depth of about 0.5 mm.
In original squares, to prevent erasure of numbers, divisions and marks, the notches are made with a slightly greater depth and clarity of execution.
The division scale is applied on both one and the other side of the square. The basis of the measuring system is the classic inches adopted in the United States for marking wood products. However, versions according to the metric system are also produced, but without applying millimeter divisions. Angle in degrees can be measured in divisions from 0 to 90.
Externally, the metric square is painted black with paint markings white. Available in two variations:
- Convenient pocket-type square - 7 inches in inch version, 178 mm in metric version.
- Option for work in a hospital setting, without moving - in inch version size 12 inches, in metric size - 30.48 cm.
Instructions for use Swenson's square

The main purpose of the Svenson square
In our country, the Svenson square is always accompanied by instructions in Russian for ease of use. What kind of work and how can you do it with its help:
- Check compliance right angle between connections - checked by applying a square to the surface.
- Apply perpendicular lines by placing a corner on the part close to its edge - alignment with one of the straight edges of the product occurs.
What is the name of the tool for measuring angles?
Thus, the sharp part of the device will show in which direction the line needs to be drawn.
- Reading and transferring angles of varying complexity onto the surface of products - the angle is measured on a model or plan and transferred using a protractor and a pencil line.
- Using a square to guide the blades of a circular saw. The square is applied to the board, jointly secured using special clamps, and a cut is made parallel to the location of the Svenson square.
- Parallel lines are transferred to the product by applying the device to the part, measuring the required distance and moving the square along the surface of the product in a straight line. The pencil movement is made in the same direction.
- One of the main functions of a square is to use it as an ordinary tape measure or ruler.
On a note
The instructions for the Svenson square will help you use it at almost all stages of repair and construction, or in everyday life.
However, the cost of the original can be quite high, taking into account delivery from the USA, so it is quite possible, using video tutorials, to make a Svenson square with your own hands.
Svenson's square on aliexpress
Save a lot on your purchase of this device You can use Chinese sites, such as the widespread Aliexpress. In Moscow, the Swanson square can be evaluated in a touching showroom on the square of three train stations, and on the Internet, by searching for “Swanson square swanson” you can get results in the price category from 178 rubles to 2.8 thousand.
What to pay attention to when ordering a Svenson square on aliexpress:
- Product size – see in the product description;
- Seller rating - beware of unscrupulous persons;
- Delivery of goods - timing and cost, it is possible to order a free or paid, but accelerated option;
- Reviews from other customers about product quality, packaging and delivery.
Answer to a scanword or crossword puzzle for the question: goniometer
4 letters
Limbo— 1) A flat ring with degrees marked around the circumference for goniometer instruments
5 letters
Octane- angular-reflective nautical instrument
6 letters
Octant(in maritime affairs - octane) goniometric astronomical instrument
7 letters
Compass 2) A device for controlling artillery fire, which is a connection of a compass with a goniometric circle and an optical device
Quintana— Marine protractor
Goniometer— A device for measuring angles to determine angular dimensions cutting and measuring tools, machine parts and the like
8 letters
Quadrant Antique goniometer astronomical instrument for measuring height heavenly bodies above the horizon and angular distances between the luminaries
Sextant(from the Latin sextans - sixth), in maritime affairs, a sextant, an astronomical goniometric instrument used in nautical and aviation astronomy
9 letters
Heliotrope The most important part heliotrope is a flat mirror that reflects Sun rays from one geodetic point towards another geodetic point, at which goniometric measurements are made with a theodolite
Pantometer— Lightweight goniometer tool used in topographic surveying
10 letters
Astrolabe- a goniometric instrument invented by Hipparchus, which served from ancient times until the beginning of the 18th century to determine the position of celestial bodies
Triquetrum(from the Latin Triquetrus - triangular), triquetra, parallactic ruler, an ancient astronomical goniometric instrument used to measure the zenith distances of celestial bodies
Goniometer— Designed for measuring angles
Popular queries 1 Latest requestsWords by length: A - E F - L M - S T - H Sh - Z
HOW TO MEASURE AN ANGLE?
May you find this or that goal as a result of careful and skillful observation.
Obviously, this is not enough: we need to determine the location of the target so that our artillery knows where to shoot. How to do it?
The location of the target is usually determined in relation to a landmark, namely in relation to the landmark that is closest to the target. It is enough to know two coordinates of the target - its range, that is, the distance from the observer or from the gun to the target, and the angle at which the target is visible to us to the right or left of the landmark - and then the location of the target will be determined quite accurately.
Let's assume, for the sake of simplicity, that the target is the same distance from us as the landmark. We know the distance to this landmark in advance. Let it be equal to 1000 meters. One target coordinate is therefore already determined. It remains to determine another: the angle between the target and the landmark. What and how do artillerymen measure angles?
IN everyday life You have had to measure angles more than once: you measured them in degrees and minutes. Artillerymen, on the other hand, have to not only carefully measure angles, but also quickly in their minds find linear values using angular values and, conversely, find angular values using linear values. In such cases, it is inconvenient to use the degree system for measuring angles. Therefore, the artillerymen adopted a completely different measure of angles. This measure is the “thousandth”, or, as it is otherwise called, the division of the protractor.
Let's imagine a circle divided into 6000 equal parts.
Let's take one six-thousandth of this circle as the main measure for measuring angles and try to determine its value in fractions of the radius.
It is known that the radius ( R) of any circle fits approximately 6 times along its length, therefore, we can assume that the circumference is equal to 6 R. We divided the circle into 6000 equal parts; hence 6 R= 6000 parts of a circle. Now it’s easy to find out what part of the radius one six-thousandth of a circle will be. Obviously, it will be 6000 times less than 6 R, that is, it will be equal to or one thousandth of the radius. That is why the artillery measure of angles - the division of the protractor - is called “thousandth” (Fig. 212). This measure is very convenient to use for measuring angles. (243)
Remember that in the field of view of the binoculars you saw a grid with divisions, that is, short and long lines that are located to the right, left and up from the crosshair located in the center of the field of view of the binoculars (Fig. 213). These divisions are “thousandths”. Small division  The grid (between the short and long lines) is 5 thousandths, and the major division (between the long lines) is 10 thousandths.
In Fig. 213 these divisions are designated not just by the numbers 5 and 10, but with zeros attached to the left - 6-05. and 0-10. This is how artillerymen write and pronounce all angular values in “thousandths” to avoid errors in commands. For example, if you need to convey in a command an angle equal to 185 thousandths or 8 thousandths, then pronounce these numbers as a telephone number: “one eighty-five” or “zero zero eight”, and write 1-85 or 0-08 accordingly .
Knowing now how the binocular reticle works, you can use it to measure the angle between two objects (terrain points) that are visible from your observation point. Look again at Fig. 213.  You see that between the intersection of roads, where the crosshair is directed, and separately standing tree(to the right of the road intersection) two large divisions and one small division are placed, that is, 25 “thousandths” or 0-25. This is the angle between the road intersection and the tree. In the same way, you can determine the angle between the road intersection and the house (to the left of the road intersection). It is equal to 0-40.
Tool for plotting and measuring angles
A grid with divisions, approximately the same as in binoculars, is also present in the field of view of a stereo scope. But the stereo tube for measuring angles also has a goniometric scale on the outside.
 In Fig. 214 shows those parts of the stereo tube (the dial and the dial drum), with the help of which it is possible to measure horizontal angles more accurately than using a grid.
The circumference of the dial is divided into 60 parts, and a rotation of the stereo tube by one division of the dial thus corresponds to 100 “thousandths”. The circumference of the dial drum is divided into 100 parts, and with a full rotation of the drum, the stereo tube rotates by only one division of the dial (i.e., 100 “thousandths”). Consequently, the division of the drum does not correspond to 100 “thousandths”, but only to one “thousandth”. This allows you to refine the dial readings 100 times and makes it possible to measure angles with an accuracy of one “thousandth”.
To measure the angle between two points, using the dial and drum, first align the crosshairs of the stereo tube with the right wheelbarrow; to do this, bringing the dial indicator to division 30 and drum division 0 to its indicator (Fig. 215), turn the pipe in the desired direction using the fine-tuning handwheel (see Fig. 214). Then, by rotating the dial drum, the crosshair of the stereo tube is aligned with the left point. At the same time, the dial pointer will move and show a new reading. The difference between the received reading and the initial setting (30-00) will be equal to the desired angle (Fig. 215).
But it is not only with the help of these complex instruments that angles can be measured.
Your palm and your fingers can become a good goniometer, if only you remember how many “thousandths” are in them, or, as artillerymen say, what the “price” of the palm and fingers is. Although different people They have different widths of the palm and fingers, but still their “price” will not differ much from that indicated in Fig. 216. By extending your arm in front of you to its full length, you can quickly measure the angle between any points on the terrain (Fig. 217). To not do big mistakes When measuring angles using this technique, you need to check the “value” of your fingers. To do this, you need to extend your hand at level (245)

 eye and notice what part of the space was covered by a finger (or the palm of the hand), and then measure this space using a stereo tube placed in the same place.
It is clear that a similar simple “goniometer” can serve as any object whose “price” you have determined in advance. In Fig. 218 shows such items and their approximate “price” in “thousands”.
Having familiarized yourself with the methods of measuring angles, you can now be convinced that, using “thousandths”, you can very simply determine linear quantities from angular quantities, and angular quantities from linear quantities. To do this, let's look at two examples. (246)
 First example (Fig. 219). From your observation post you can see the enemy's wire fences ahead; they stretched in a strip from the mill to the left to the dry tree. You determined the distance to the mill, and therefore to the wire fences, from the map; it is equal to 1500 meters. You have been given the task of finding out the length of the observed strip of wire fences. How to do it? The map will not help you here, since there is no dry tree on it, there is only a mill on it.
 To solve this problem, you first of all determine the angle at which the strip of wire barriers is visible from the observation post, that is, the angle between the directions to the mill and to the dry tree. You measured this angle using the binocular reticle; it turned out to be the 100th thousandth, or 1-00.
Then the problem can be solved simply. You just need to imagine that your observation point is the center of the circle, which is described by a radius equal to the distance from you to the mill. This radius is 1500 meters. An angle of one “thousandth” corresponds, as you know, to a distance equal to one thousandth of the radius, that is, in in this case 1.5 meters. And since the angle between the mill and the dry tree is equal to not one, but 100 “thousandths,” this means that the distance between the mill and the dry tree is not 1.5 meters, but 150 meters. This will be the length of the wire fence strip (247)
Second example (Fig. 220). In a ditch near the highway you found a machine gun, which you decided to open fire on. You need to calculate the distance to a machine gun or, what is the same, to the highway.
To solve this problem, use the telegraph poles on the highway; their height is known - it is 6 meters. Now, using the vertical reticle of the binoculars, measure the angle at which you see the telegraph pole (the angle between the top end of the pole and its base). Then you will have all the data to determine the distance.
Let's assume that this angle turns out to be 3 thousandths. Obviously, if an angle of 3 “thousandths” from this distance corresponds to 6 meters on the ground, then one “thousandth” will correspond to 2 meters, and the entire radius, that is, the distance from you to the highway, will correspond to a value 1000 times greater. It is not difficult to figure out that the distance from you to the highway will be 2000 meters.

In the examples discussed, you were convinced that the measure adopted in artillery for measuring angles allows you to easily find one “thousandth” of any distance. To do this, you just need to separate three signs on the right in the number expressing the distance. All this is done very quickly in the mind.
But this is what would happen if we take as the measure of angles not the “thousandth”, but the usual measure of angles used in geometry: one degree or one minute. An angle of one degree would correspond to a linear value equal to 1/60 of the radius, and an angle of one minute would correspond to 1/3600 of the radius; therefore, when solving any of the above problems, it would be necessary to divide the numbers expressing the distances to the targets not by 1000, but by 60 or 3600.
Try to do this division with any number chosen at random and you will immediately see that you cannot do without a pencil and paper. That is why the artillery measure of angles is practically incomparably more convenient. (248)
Which are used when performing graphic work, to facilitate the work of the draftsman and create convenience and increase productivity:
- drawing board with drawing accessories located on it
- drawing board- serves for pinning a sheet of drawing paper (whatman paper) to it with buttons. It is a wooden shield consisting of longitudinal planks, pulled together by external end strips and fastened with glue. The working surface consists of longitudinal planks made from soft wood - alder or linden. Boards are made in various sizes. For example, drawing board No. 2 is 1000 mm long, 650 mm wide and 20 mm thick. For more convenient work with a leveling board, it is advisable to stick white celluloid strips on the edges of the board with a straight, uniform scale with a division value of 1 mm.
Reisshin - consists of a long ruler and two short crossbars.

One of the crossbars is fixedly connected to the long ruler, the second can be rotated in relation to the large ruler at any angle. Thus, using a crossbar, you can draw parallel horizontal and inclined lines.
- measuring ruler- used to measure lengths in the drawing.

It is made of hard wood and has a symmetrical trapezoidal cross-section. The ruler is equipped with white celluloid strips glued on its inclined edges and having a straight, uniform scale with a division value of 1 mm.
- squares- are used to work with them separately or in combination with a crossbar. With their help, you can perform various geometric constructions: drawing a series of parallel lines, constructing mutually perpendicular lines, drawing angles and polygons, dividing a circle into a given number of equal sections.
- pattern- used for drawing curved lines.

It is a thin plate of a curvilinear outline, making it possible to draw curved lines that cannot be made using a compass. Patterns are made with different curvature of lines. To draw a pattern curve, the pattern is selected so that its edge coincides with at least four points of the curve; in this case, only two of them are connected with a line and then the pattern is moved to subsequent points.
- protractor- used to measure and plot angles in a drawing.
![]()
- stencils and templates- used to reduce labor costs and time for performing certain types of graphic work. They can be very different in form depending on their purpose. Using stencils and templates, inscriptions can be made, circles, rectangles, corners, and signs can be drawn.
intended for copying drawings

- Photocopier- used to reduce labor costs and time for performing graphic work.
The power of the light source should be 150 - 200 watts. The glass is 3 - 4 mm thick; its edges must be treated with emery stone. This measure will protect against cuts on your hands. The drawing sheets, the original and the copy, are fastened together to avoid shifting relative to each other and secured to the glass with tape or using magnets. The front panel can also be installed in a landscape position; this will require longer rear bars, which give the structure the necessary strength. Also, the front panel can have a position not only close to vertical, but also close to horizontal if the photocopier is placed on the rear bars.
Drawing device includes two rulers set at 90° to each other

Drawing supplies and instruments

Drawing supplies and instruments
- drawing instruments- serve to facilitate the work of the draftsman, reducing the time spent on graphic work. Currently, various designs of drawing devices are used. They allow you to replace a gauge, a protractor, a square, and a ruler at the same time.
A pantograph type device is shown in the top figure. Using a special rotating head, the rulers can be positioned at different angles of inclination to the given lines. The head is connected by a system of movable levers, which allows it to be moved around the drawing field, with a bracket-clamp, with the help of which it is attached to the drawing board. The carriage type device is shown in the lower figure. The head moves across the drawing field using carriages - one moves along the upper edge of the board, and the other along a movable vertical guide. The use of such a device reduces the time spent by approximately one quarter compared to the execution of drawings using a grid.
- hatching device- serves to draw a series of parallel lines that serve as shading for individual sections of the drawing. It consists of two rulers, one of which is hinged at its end to the other with the ability to move the hinge along the second ruler by a given amount.
Every schoolchild knows what a protractor is. This seemingly unsightly tool performs very important functions not only in mathematics lessons. We will tell you further about what it is, as well as how to use it correctly.
What is a protractor?
A protractor is an object with which each of us can not only measure angles, but also construct them. Outwardly, it resembles a semicircular ruler with a scale and divisions. Below, on a flat surface, there is a straight ruler familiar to us for measuring segments. In the upper part there is a semicircle with a double scale for measurements. In each direction, the scale is distributed along the protractor from 0 to 180 degrees.
Terms of use
At school they explain what a protractor is in math lessons. This is where measurements are needed.
In order to find out what one degree is equal to, we need to divide the circle into 360 equal parts. One of these parts will be equal to 1 degree. The size of the circle will not affect the degree in any way! This is easy to check.
Let's draw two circles different diameters and divide each into 360 equal parts. Then we will superimpose the smaller circle on the larger one and see that the lines coincide.
Measuring the angle
A protractor helps construct and measure an angle. A degree is a generally accepted unit used to measure angles. There are several types of angles:
- Spicy. This is called an angle of up to 90 degrees.
- A right angle is an angle equal to 90 degrees.
- varies from 90 to 180 degrees.
- represents a straight line or 180 degrees.
- A full angle looks like a circle and is 360 degrees.

It's not difficult to figure out how to measure an angle. In order to find out what the size of the angle is, we need to install the protractor so that its center is located at the apex of the angle, and the straight side coincides with one of its sides. The scale will tell us the number of degrees of a given angle. Like this in a simple way we can find out what's around the corner in front of us.
To construct an angle with a given degree, you should attach the straight part of the protractor to the line, and its center to the beginning of the line. Subsequently, this point will be the vertex of the angle. Then we find on the scale given number and put an end to it. Now the protractor can be removed and connected with a segment from the beginning of the line (vertex of the angle) to the marked point.
School stationery produced by different companies differs in material, color, and size. So: for those whose protractor turns out to be longer than the length of the angle, and it is not possible to determine its value, the side of the angle must be extended using a straight ruler.
Schoolboy set
It is no wonder that junior students are not familiar with the protractor. When using it, a certain knowledge base must be laid down. For full-fledged work In class with him, the kids study a number of related subjects. Before learning what a protractor is, schoolchildren must master a straight ruler, draw straight lines, learn addition and subtraction, master a compass, know geometric figures, and so on. This whole process takes time, and only after finishing primary school, the student can add a protractor to his
Students are now offered school stationery at huge selection. The protractor is no exception. Manufacturers try to satisfy the most demanding needs of customers. Tools are made in different color scheme. Bright colors Children always like it. Sometimes even in the same class you cannot find identical protractors, which makes it easier to find them if they are lost. Everyone chooses shapes and sizes to their own taste.
Most of these products are made of plastic, and this significantly reduces its cost. But there are wooden and even iron protractors. As practice shows, metal ones, although opaque, are more practical in the sense that the scale is not erased, and this allows it to be used in action for much longer, accurately determining angles.
The protractor is not as popular among schoolchildren as the ruler, but it accompanies students right up to the final exam. Some of the school's graduates choose specialties that involve measuring and constructing angles, designing buildings and structures, and working with drawings. Due to their professions, they constantly have to deal with protractors and its derivatives. But even former classmates of current engineers, sometimes even with the deepest humanitarian bias, can easily remember their skills in handling this subject and determine the number of degrees at any angle.

Bottom line
Today, modern children are accustomed to getting any information from the Internet. However, it will not help in measuring angles. Only the ability to use a protractor will make it possible to correctly identify them. Future engineers and designers will undoubtedly find this useful in their work, and every educated person should have the skills to work with protractors, so everyone should be able to use such a tool!
A ruler is the simplest measuring tool, also used for drawing, which is a thin long plate with a printed scale with marks in millimeters, centimeters and meters. Since the sides of the tool are completely straight, it is used in drawing to draw straight lines. Rulers are usually made of metal, plastic or wood.
Varieties of rulers
This tool can be available in various designs. Its shape is customized for specific purposes. There are several ruler designs:
- Regular.
- Check room.
- Logarithmic.
- Drobysheva.
- Pattern.
- Protractor.
- Square.
- Officer's.
Regular
Represents the simplest design. This tool is sold in office supplies. This is what schoolchildren use in geometry and drawing lessons. This tool is a thin strip of metal, wood or plastic. On one side there is a scale in millimeters and centimeters, which allows you to measure length over short distances. Often the part opposite the straight side is made in the form of a wave, for drawing wavy lines. The length of ordinary stationery rulers can be 10, 15, 20, 25 and 30 cm. Also, longer tools are sometimes made especially for drawing, adjusted to the parameters of whatman paper.
Checking
In mechanical engineering, as well as in the production of machine tools and other equipment, test rulers are used. Often they do not have a length scale, since their main purpose is to check the evenness of workpieces. Such a tool is applied closely to the surface, and a visual assessment of the presence of bends on it is carried out. These devices are made exclusively from metal or durable plastic, since wood can bend when in contact with water, so you cannot count on one hundred percent preservation of the geometry of the instrument. In addition, the rulers are thicker, so they do not bend as much as regular stationery rulers.

Logarithmic
It is a rather unusual ruler with many marks on its surface. This device can be used not only to draw straight lines, but also to calculate the root of any number. This is a ruler old design, which is practically no longer used thanks to the advent of calculators.

Such rulers were used until the mid-eighties of the last century, after which they were replaced by calculators. Slide rules can be elongated in length or made in the shape of a circle. Now they are practically not produced. On some models swiss watches The shape of the dial is made in the form of a round slide rule. The markings applied to the watch provide a wide range of calculation possibilities, in addition to determining the value of trigonometric functions.

Drobyshev's ruler
This is a tool that is designed to construct a coordinate grid. It is made in the form of a steel strip with slots applied, the distance between which is 10 cm. They are used for pencil marks. Using this device You can apply a grid to whatman paper much faster than applying a regular ruler. This design was invented in 1925 by Fedor Vasilyevich Drobyshev, in whose honor it received its name. Now this device, like the slide rule, is a thing of the past and is now of interest only to collectors who collect antiques.
Pattern
This is a figured ruler, which in most cases does not have a scale with markings. The instrument is a flat plate curved by waves. It is used as a template for the construction of various geometric shapes, such as parabola, ellipse, hyperbola, and also spirals. With the development of computer graphics, this tool has ceased to be used by engineers, and is now used only by clothing designers and seamstresses to create fabric patterns before stitching them.

Protractor
This is a special design of a ruler that is used to measure angles in degrees. The device may have different shape. It is usually round, semicircular or triangular. With this tool you can not only measure angles, but also construct them. On the flat part of the protractor there is a scale as on a regular ruler, and also markings are made in a circle in degrees. Semicircular models have a scale from 0 to 180, and fully round ones from 0 to 360 degrees. The instrument is believed to have been invented in ancient Babylon. It is indispensable in geometry, and was also used in shipbuilding for correct laying ship routes. The protractor is still relevant and can be found in any office supply store. They are used by schoolchildren in geometry lessons, as well as by architects and engineers.

Corner
Angle ruler, or square, is a tool made in the form of a right triangle. It comes in two types. The first is made in the shape of an isosceles triangle, one angle of which is 90 degrees, and the other two are 45 degrees. There are also tools with angles of 90, 30 and 60 degrees. Squares are used to construct angles when drawing, but only those in the shape of which it is made. Typically, such a tool is used for drawing with high accuracy. With its help you can draw perpendicular and parallel lines.

The square found its use not only in drawing, but also in carpentry. Joiners and carpenters use it to assemble furniture and other wooden structures when it is necessary to maintain a 90-degree angle between the parts being connected. The carpenter's square is much larger than the one used in drawing. In addition, its design is much stronger, since often when assembling furniture, the ruler takes on the function of supporting the workpieces, so the flimsy plate can become deformed, which will lead to failure of the correct angle.
It is worth noting that in carpentry, a construction corner is also used, which consists of two strips connected to each other at right angles. This design inferior to the square, since with prolonged use, play may appear at the connection of the plates, which changes the shape by several degrees.

Officer's
This ruler is a multifunctional tool for various measurements and drawings. It is made from transparent plastic, which can have different dimensions. Most often, such rulers are a plate measuring 20 by 10 cm. On two sides, which form a right angle, there are markings in millimeters and centimeters. The rest of the part is made in the form of a stencil, outlining the contours of which you can draw various figures, as well as numbers in large printed fonts. This tool is used to determine coordinates, as well as calculations on topographic maps. This design is designed specifically for military officers. Its dimensions are adjusted for convenient placement in a tablet with documents and office supplies. Most officer rulers that are now on sale also have a scale scale.

The best material for rulers
Rulers are usually made of metal, wood or plastic. The properties of these materials are different, so tools made from them have different properties. Metal rulers are considered the best because they can withstand deformation and are not destroyed by impacts. Such tools fully comply with GOST standards and can be used to perform precise drawings.
Wooden rulers quickly become dirty, so the scale printed on them may be difficult to see. When struck, they crumple and can also crack. In addition, upon contact with moisture, the wood becomes wet and begins to bend. The main advantage of such rulers is their pleasant surface, but the service life of this tool is minimal. If you place a wooden ruler unevenly and press it down with some kind of weight, then if you remain in this position for a long time, it will bend and retain its irregular shape.
Plastic rulers are the cheapest. They are lightweight and are not at all afraid of moisture, unlike wooden and metal ones, not made from of stainless steel. Their only drawback is their low impact resistance. Such a ruler can be broken, and when struck by an edge, small fragments of plastic break off from it, so further use of the tool for drawing straight lines becomes impossible.


