Installation of electrical wiring in wooden house- a more important undertaking than laying conductive routes in a brick or concrete structure. This is due to the specifics of the material: wood burns, even if it is impregnated with a composition that prevents ignition from an accidental coal.
The importance of correct installation
The temperature of the electric arc, which occurs when a short circuit of conductors carrying a current of standard 220 V, can reach 5000 °C (!). No fire-prevention impregnation helps against the temperature that melts steel.
 Despite this, wiring in a log house made of rounded logs or a frame country house is often done “carelessly,” if not carelessly.
This is usually motivated by a reluctance to tinker a lot with the dacha, where they live for two to three months a year. But you should understand: poorly made internal wiring wooden house can leave you without this very home.
Please note that “poor quality” primarily means “not according to the rules provided for a wooden house.” The usual practice of installing a household electrical network in an apartment or brick house not suitable for wood due to the flammability of the building material.
What the regulations say
The rules for the construction of electrical installations - PUE - give an unambiguous answer to this question. Hidden wiring in the voids of partitions made of combustible materials is permissible only in metal pipes, possessing the property of localization.
SNiP gives a more vague formulation, so it is recommended to be guided by the PUE. By flammable material we mean wood, even if it has fire-resistant impregnation.
Under the metal pipe is a steel or copper pipe of square or round profile, having a regulated wall thickness of at least 2.8 mm for any cable with a conductor cross-section of up to 4 mm.
For cables with a cross section of 6-10 mm, the pipe wall thickness should be 3.2 mm.
In this case, it is forbidden to tightly “clog” the pipe with cables - the cable should occupy no more than 40% of the clearance.
To insert a cable from a power line into a wooden house, only a thick-walled steel sleeve is used.
This requirement is due to the following situation. If a short circuit occurs due to a cable breakdown, only a thick-walled pipe can withstand the flash until it self-extinguishes or the circuit breaker is triggered.
The use of metal hoses or other “armor” made of corrugated metal or plastic for hidden wiring in a wooden house is unacceptable for the following reasons:

The main “unofficial” rule for high-quality wiring in log wooden houses is the prevalence of safety over external beauty.
Laying in pipes
Wiring in steel or copper pipes ah, observing the requirements specified above, is possible only at the stage of building a house “from scratch”.
For example, when installing electrical wiring in a house made of laminated veneer lumber, the installation of a system of such pipes, junction boxes and sockets (also metal) is carried out at the stage of installing the frame.

The rules for hidden wiring of power cables in a wooden house do not allow laying the cable in metal or plastic corrugation in sawn grooves. inside the walls of a wooden house in thick-walled pipes acceptable, but difficult due to the need to bend pipes and make complex connections using couplings, fittings or welding.
There are a number of requirements that must be met when installing hidden wiring in a wooden house.
 Inner surface steel pipes should be painted or galvanized to avoid corrosion, copper - painted to protect against oxides.
The use of metal hose/steel corrugation on bends and transitions makes the entire structure meaningless - transitions are provided threaded connections or butt-to-butt welding.
Horizontally, electrical wiring pipes in a wooden house are laid at a slight angle to allow condensation to escape; at the lowest point, a hole is made for liquid drainage (not inside the wall). The entire system is provided with a grounding connection that is separate from the grounding provided by the wiring.
In wooden houses, only metal sockets are used for sockets and switches. The connections between the junction box and the pipes entering it must be sealed.
To avoid damage to the cable sheath by a sharp edge when exiting the pipe, the edge must be rolled or provided with a protective plastic plug.
Open wiring - installation features
If a wooden house has already been built, but there is a need to replace the wiring in it, then this can be done without sawing the grooves in wooden partitions, which are often not very thick and durable themselves.
Let us remind you that aluminum wire, the most popular among electricians in past years, is categorically unacceptable in a wooden house due to its tendency to fracture and fire hazard.
Open wiring in a wooden house is quite possible. Here are some options.
You can run the cable directly along the wall of the house, enclosing it in standard plastic corrugation or metal flexible armor.
Open way allows this wiring method, since the source of fire in the event of a short circuit will be immediately visible. There will be no fire inside the wall.
Wall mounting is carried out with ordinary corrugation clips.
 Wiring in standard cable channels is the same method as for an apartment, only between the cable channel and wooden wall a non-flammable lining made of asbestos or, for example, felt should be provided. A variation of such wiring is wiring disguised as a baseboard.
A fresh look at old methods. The wiring is mounted on the wall of a wooden house using ceramic or plastic (non-flammable) insulators, maintaining a clearance of at least 10 mm from the wall.
A special, “antique” twisted power cable and sockets of the same style are used.
An open installation of a system made of metal pipes is also possible.
Advantages and disadvantages of open installation
All these wiring methods for a wooden house have their advantages and disadvantages. Installing wiring on a wooden wall of a house in a corrugated pipe is the easiest way; there are no problems with wiring in the junction box.
The downside is that this method is unaesthetic, as well as the need to remove the entire corrugated pipe in order to gain access to one cable.
In this regard, the cable channel is preferable, fortunately, now on the market you can find the color of the box “like wood”, and choose an individual shade to match the color of your internal coating.
The cable channel is convenient for installation - it is easy to open and close, and is relatively safe for a wooden house, since it itself is made of non-flammable plastic.
If desired, you can hide the wires by selecting the “bottom” wiring in the cable channel, disguised as a baseboard.
Please note that it is unacceptable to embed wires under a real baseboard!
 Lighting or connecting sockets with a load of no more than 16 A can be done using “antique” wiring.
For this purpose, specially stylized wires, insulators between the wall and the wire, sockets, and the like are produced. But keep in mind that for a powerful load like welding machine It is necessary to provide a socket to which a suitable cable with a cross-section of at least 2.5 mm is connected.
General installation rules
Open wiring in a wooden house must be carried out in compliance with the following standards:
- the point of entry of the cable from the power line into the wall, as well as the point of passage of the cable through the internal ceilings only in thick-walled metal sleeves;
- the distance from the cable to the wall when installed in an open way is not less than 10 mm;
- Grounding must be installed;
- Only a cable with a non-flammable sheath is used;
- socket boxes and distribution boxes in a wooden house are made only of metal;
- connecting wires to each other only in mounting boxes, and only using spring/screw terminals or soldered twist, which is closed with a casing or cap;
- Unsoldered twisting is unacceptable.
It is imperative to install an RCD for protection against leakage currents, as well as separate circuit breakers for short circuit protection for each group of consumers.
Cable selection
An important stage of wiring work is the selection of the main cable. Choosing the right cable for wiring means solving the main problem regarding the safety of a wooden house.
According to modern requirements, a so-called SIP cable - a self-supporting insulated wire - is used to extend from the power line to the house.
It uses aluminum conductors with a cross-section of at least 16 mm, and also contains a steel reinforcing cable (for rigidity).
The sheath of this cable is designed to withstand exposure to adverse external factors for a minimum of 25 years.

But the SIP cable can only be laid up to the wall of a wooden house. On outside walls through special insulators, or better yet hermetically sealed clamps, it is connected to a copper cable, for example VVGng (ng - non-flammable).
The VVGng cross section is selected as standard - 1.5 mm on the lighting line, 2.5 mm on household appliances, 4 mm - for powerful consumers such as an electric stove, electric heating line or welding machine.
Direct twisting of aluminum SIP conductors with copper conductors of internal wiring is prohibited.
Only copper is used for wiring inside a wooden house. When choosing a brand of wire, use either the already mentioned VVGng, VVGng(P) marked “GOST”.
These types of single-core copper cables equipped with double non-flammable insulation, while having sufficient flexibility for convenient internal wiring.
You can use a German NYM cable - it is equipped with triple non-flammable insulation.
Switchboard design
The general distribution board for wiring in a wooden house must have a metal casing.
Inside the switchboard there is an input circuit breaker, an electric meter, and one or more RCDs (depending on the number of groups of internal consumers). There are also circuit breakers responsible for individual groups - the same number as the RCD.
It is the automation that is responsible for protecting the wiring from short circuits and current leakage, which can lead to electric shock. There are rules for calculating the choice of protective devices based on characteristics, and it is better to leave this choice to a professional.
But it is worth knowing that in most cases the rules are as follows. Power consumption should not exceed 5.5 kW, the general input circuit breaker is single-phase, 25 A, type C.
The machines are installed according to separate consumer groups (selected according to the wire cross-section). A 16A circuit breaker must be installed on a cable with a cross-section of 1.5 mm (lighting). For a 2.5 mm cable - 20A.

There are separate rules for selecting RCDs. The main one is that the current limit for an RCD should be an order of magnitude less than for a machine.
That is, a 16 A machine is equipped with a 20 A RCD, and so on. Three-phase input for wiring in a wooden house is used very rarely.
Agree that a private country house made entirely of wood is, of course, cool and beautiful. A wooden structure has numerous advantages. It is warm and durable, with an ideal level of humidity, and when it comes to environmental balance, no other building material even compares to natural wood. But despite all the advantages, such a house has one significant drawback: firefighters call such buildings “combustible material.” And since fires are often caused by electricity, the most actual problem there was, is and will be wiring in a wooden house. According to statistics from fire organizations, it accounts for half of all fires in buildings built from wooden beams.
Main requirements for wiring
Installation of electrical wiring in a wooden house has special requirements. Due to the fact that wooden buildings are classified as fire hazardous, the conditions for laying power cables and wires are completely different. Therefore, you should not think that since you know how to distinguish “phase” from “zero” or change sockets with switches, then you will be able to do all the electrical work in a wooden house with your own hands.

It is advisable that the entire scope of work (from connecting electricity to the house and up to installing the last lamp) is carried out by professional electricians. But since among people in this profession there are also many hacks, it will be useful for every owner of private wooden house construction to know the basic principles, requirements and rules for installing electrical wiring in order to later evaluate the quality of the work performed.
- The wiring of a household electrical network in a wooden house is carried out with a cable that has a non-flammable sheath and a low level of smoke emission. You can easily distinguish such a cable by its markings; its abbreviation must contain the letters “ng” (non-flammable). Its outer shell is made of non-flammable polyvinyl chloride; this quality is achieved through the use of special plastic compounds in the manufacture. Conductors of this type have a reduced level of smoke emission; during fires, it is a particularly dangerous factor, because a smoke screen impairs light transmission and interferes with emergency rescue operations.
- The wiring must be done in such a way as to completely eliminate the possibility of damage electric shock people and pets.

- It is prohibited to lay electrical wiring in a wooden house near heated surfaces (chimneys, stoves, fireplaces).
- It is necessary to completely eliminate the possibility of the cable catching fire and the fire spreading to wooden surfaces in the event of a short circuit.
- Installation of hidden electrical wiring in a wooden house is carried out only on fireproof structures.
- Conducted cables and wires, as well as installed switching devices must be with such performance characteristics, in order to have sufficient margin for the total power consumed.
- Heating of conductors and connecting electrical components is not allowed.
Important to remember! You should not improve the interior design of wooden housing construction by reducing the level of safety. Trying to solve aesthetic problems can cause catastrophic consequences.
Main stages
Step by step, the entire process of installing electrical wiring in a wooden house can be divided into several main steps:
- Calculation of the total power that will be needed for all electricity consumers (household electrical devices, power tools, lighting network).
- Before making wiring in a wooden house, it is mandatory to draw up a schematic design.

click to enlarge
- Based on the diagram and calculated data on the load, materials (wires, cables, switching devices, protection elements) are selected and purchased.
- Carrying out input from the main power line to the house.
- Installation and assembly of the distribution panel.
- Installation of internal wiring (in a wooden house, hidden and open wiring options are used).
- Installation of switching equipment and lighting elements (sockets, junction boxes, switches, chandeliers, lamps, sconces).
- Installation of protective grounding and RCD.
- Laboratory tests, checking the operation of the household electrical network and preparing the relevant documentation.
Project
Do-it-yourself electrical wiring in a wooden house begins with drawing up a project.
Essentially, this should be a house plan that indicates all lighting elements, installation locations for sockets and switches, as well as household electrical appliances that require an individual line (air conditioner, hob, oven, water heater).
It is advisable to indicate the maximum power of electrical appliances on the drawing.
The lighting load is connected by a separate line to an individual circuit breaker (if the house is very large, there may be several of them - for each room or for each floor). It is necessary to provide a separate machine for yard lighting.

click to enlarge
Also, individual lines power the sockets in different rooms. If the house is small and there are few rooms, all sockets can be connected from one machine. The exception is the kitchen, which has so many powerful household appliances that a separate line is required.
Thus, you divide the entire household electrical network of your home into groups, now calculate the maximum load for each of them. To do this, the power of all electrical appliances that can be turned on at the same time is summed up. Based on the obtained figures, the power of the input and output machines is selected.
Entering the house
The introductory section, from the main power line to the distribution panel, is considered the most critical. There are two ways to properly supply electricity to your home.
Laying cables in the ground
It's more reliable way, because the conductor is completely hidden and is not exposed to any external influences. In addition, in the event of a short circuit and fire, there is no possibility that people or property will be harmed. Due to such high fire safety, underground input is especially recommended for wooden housing construction. Moreover, it does not spoil at all appearance plot.

At the same time, considerable costs will be required. It will be necessary to dig a trench at least 0.8 m deep. If access to the house will be through the foundation, the installation of a thick-walled metal sleeve will be required. And it is advisable to protect the cable itself from chemical exposure soil, microorganisms and rodents, pressure from vegetation roots. To do this, it is not simply placed in a trench, but is pre-stretched in a metal pipe or corrugation.
It is advisable to use the underground method at the stage when new house It’s just being built, so you can think about the passage of all communications in advance.
Cable laying over the air
If the building has already been erected, then a cheaper, more convenient and easier option would be overhead line. A tap is being made from the nearest support of the main power line.
Remember the main thing! Neither you nor your friends, even with the highest electrical engineering education, have the right to climb this support to make connections. This work is done by electricians from the staff of the energy supply organization servicing this power line (they have a special permit for this).

Its insulating layer is made of a material that can withstand temperature changes, sunlight and precipitation. Under the insulation layer, the SIP wire has not only conductive cores, but also a steel cable, which will ensure good tension. If you use another cable, it will need to be fixed with clamps on an additional supporting cable, also stretched between the support and the house.
Another important nuance. If the span is more than 20 m, then additional support must be installed, otherwise the sag will be large, which increases the mechanical load on the wire.
The air supply enters the house through a hole drilled in the wall into which a piece of metal pipe is mounted. It is very important that there are no tall bushes, trees or outbuildings in the path of the wire.
Distribution panel
Now Energonadzor requires in private country houses install two distribution panels. One of them should be located outside the house; an electric energy meter should be installed in it. This is done so that the controller can come and check the meter readings at any time.

The second panel is located inside the house, it is connected to the one outside by an electric cable. It will contain input and output circuit breakers and residual current devices (RCDs).
In wooden buildings, curtains should be installed distribution boards, which need to be protected from moisture and dust. The shield must always be freely accessible.
Exposed internal wiring
Open electrical wiring in a wooden house (it is also called external wiring) can be done in three ways. Let's look at each of them briefly.
Corrugated electrical pipes
Nowadays it is not a problem to buy corrugated flexible pipes. The material they are made of is a special plastic that does not support combustion. It is necessary to conduct a cable in them, and two, and if necessary, more conductors can be placed in one pipe.
Open wiring in a wooden house is quickly and easily done with your own hands, but it has significant disadvantages. It is unlikely that several rows of corrugated pipes will add aesthetics to your room. And taking into account the current loads and how many different household electrical appliances there are in the house, there can be five or more such rows.

Moreover, when in corrugated pipe already stretch the cable, it will practically not be possible to lay it evenly, it will not be taut like a string, and sagging will still appear in several places. Such curves also do not look very nice.
Another drawback is that the corrugated pipe perfectly collects dust on its surface, which can only be removed with a vacuum cleaner, but this is not convenient to do everywhere.
Electrical box
Such electrical boxes are also called cable channels. The most common boxes are made of plastic, which does not support combustion and does not emit harmful substances when melted. They are affordable and have different color scheme, come in one or more sections (in these you can lay several cables at once that go in one direction).
Another advantage of the boxes is that with the help of them, electrical wiring in a wooden house can be done with your own hands without any problems or labor costs. You don't need any special tools, devices, experience or skills. Electrical boxes can be glued to the wall surface (most often liquid nails are used for this) or holes can be drilled and secured using self-tapping screws. After this, the conductors are laid in the cable channels and closed on top with a snap-on lid.

But electrical boxes also have a lot of disadvantages. The most important one is related to the fact that a wooden house will inevitably shrink over time. This will lead to squeezing of the boxes, as a result the lids will fly off, and the cable channels themselves will crack.
To accurately install the boxes, you will need all kinds of additional parts - turns, joints, corners, plugs. And we can’t say that this gasket will decorate your room; the look still turns out to be somewhat boring, similar to an office one.
Open cable
Open wiring in a wooden house, made with an unprotected cable directly along the wall surfaces, is considered the most the best option. But this appearance turns out to be completely dull, because a metal or asbestos gasket must be mounted under the cable.
You can comply with all safety requirements and at the same time make the room original with the help of retro wiring, which has recently been gaining popularity. A special cable is laid on porcelain insulators, it turns out beautifully, especially if your interior design matches the retro style.

Hidden internal wiring
In general, hidden electrical wiring in a wooden house is not recommended, but if all fire safety requirements and standards are met, then this method is quite acceptable. It’s worth noting right away that it will cost more in terms of material costs. But if you are not experiencing financial difficulties, you can use one of two hidden wiring options.
Metal pipes
The most important advantage of metal pipes is that in the event of a cable fire, they reliably protect wooden surfaces and structures from fire.
They are laid in hidden cavities and voids behind the cladding of walls and ceilings. Or, recesses in the form of channels are drilled into wall surfaces, into which pipes are then laid. And already inside them a cable or wire is stretched.
It is advisable to use galvanized pipes to protect them as much as possible from corrosion. And in order to avoid damaging the insulating layer of the cable on the sharp edges of the metal pipe when pulling it, you must use special plugs made of plastic, or thoroughly clean and sand the cut areas.
Copper pipes are considered the most technologically advanced; they bend well without special tools.

This is especially true if the hidden wiring in a wooden house has a complex branched circuit. But here, as they say, it’s a double-edged sword - installation is simplified, but the price increases several times; copper pipes are far from cheap. However, it should be remembered that it is better to spend money on high-quality electrical wiring once than to count the losses from a fire later.
Under plaster
There is another way of hidden wiring - under plaster. Now it is used less and less. The technology is painstaking - you need to criss-cross the timber with shingles (these are wooden slats 3-5 mm thick), and on top put a layer of clay plaster at least 10 cm thick. Then the cables are laid in corrugated pipes and another layer of plaster on top to hide the wiring . About 30-50 years ago this method was popular; now it is unlikely that owners of wooden buildings from beautiful timber they will want to throw thick layers of plaster on it, at least it will look strange.
Remember the main thing! Installation of hidden wiring in wooden houses through voids and ceilings in corrugated pipes or plastic boxes is prohibited.

There are two good reasons for this:
- During installation, the insulating layer of the conductors may be slightly damaged.
- Rodents can damage the corrugated pipe along with the cable insulation (believe me, mice will gnaw PVC material won't be difficult).
Both of these cases will result in exposed conductors. And when you start using the wiring at full capacity, in places where the insulation is damaged, the cable will begin to overheat, which will lead to a short circuit and fire.
Selection of switching devices
When choosing switching devices for a wooden structure, the first criterion should be their fire safety. Perhaps this will turn out to be expensive and will not completely fit into your design, but think again about the consequences that occur with the slightest spark in an outlet, when there is only one tree around.
Sparking in switching devices must be excluded, so buy high-quality products from well-established companies.
It is undesirable to install switches and sockets in wooden houses, the working part of which is fixed to technical porcelain. This ceramic dielectric is cheap, does not burn, but is very fragile.

When the switching device is turned on and off, it periodically heats up and cools down, that is, it experiences temperature-dynamic loads. In this case, the porcelain becomes covered with cracks and at a certain moment may burst. Due to this, the working part becomes mobile, which entails deterioration of contact, the formation of sparks and even arcs.
Therefore, buy sockets and switches, the working part of which is mounted on heat-resistant plastic; it is resistant to dynamic influences and does not deform over time. Try not to buy a fake made of cheap plastic, which will begin to melt in the event of an emergency heating of the socket. High-quality heat-resistant plastic can easily withstand temperatures up to 130 degrees.
Protective grounding
Electrical wiring in a wooden house must have protective grounding. This work can be done with your own hands. Below is step-by-step instruction grounding installation:
- Dig a hole in the shape of a triangle with equal sides 1 m each, a depth of 30-40 cm will be enough.
- At the corners of the triangle, drive metal pins or corners at least 3 m long into the ground.
- Using corner pieces 1 m long, weld these pins together.

- Drill a hole in one of the corners and secure the grounding conductor using a bolted connection.
- Take this conductor out to the distribution panel and connect it to the grounding bus. You will then connect all grounding conductors to the same bus.
According to operating conditions, such grounding is required by most household electrical appliances whose housing is made of metal.
Test work
Do-it-yourself electrical wiring in a house necessarily requires a complex test work. You will need to call specialists, and they will make all the necessary measurements and tests:
- perform insulation resistance measurement;
- the machines will be loaded;
- measure the resistance of the grounding conductor;
- check the phase-zero loop;
- will perform an RCD check.
After all the tests are completed, they must issue a report indicating the values of all measurements and a verdict that the electrical wiring is suitable for further use. This protocol will be needed for representatives of the energy supply organization when they come to seal the electricity meter.
You can clearly see the nuances of electrical wiring in a wooden house in the video:
As you can see, the power supply of a wooden house has a number of special requirements and nuances. Therefore, even if you are well versed in electrical engineering, do not rely only on your knowledge and strength. In some cases, consultation with professionals is simply necessary.
When planning to install wiring in the house, conduct additional lighting or adding a couple of outlets without resorting to the services of professionals, you have to deal with many questions.
The essence of these questions comes down to one thing - how to choose from the variety offered the only option that will serve faithfully for many years.
In this article we will tell you how and which wire is best to choose for wiring in the house.
The first thing you need to decide is which wire to use for wiring in a wooden house - copper or aluminum. Although you can use both, experts still prefer copper:
Aluminum has only two advantages over copper:
- he's more flexible, which makes installation easier,
- he is much cheaper.
In all other parameters, aluminum is inferior to copper:
- oxidizes quickly(and the oxide conducts current less well and this place will heat up quickly),
- after a few bends may break, therefore, aluminum wires must be laid with greater care than copper wires, you will have to avoid bending them multiple times in the same place,
- screw terminals aluminum slips out over time, loosening the contact, and all places where there are clamps require periodic inspection.
The core can be made of aluminum copper - inexpensive composite material , which on the one hand combines good properties both materials, and on the other hand, it is inferior to each of them in terms of performance.
Wires differ in the number of cores (single- and multi-core, each core can be single- or multi-wire), cross-section and rated operating voltage; they are manufactured with insulation for 380, 600 and 3000 V alternating current. The conductors can be enclosed in a sheath made of vinyl plastic, PVC or rubber.To protect the wire from mechanical damage, it can be covered with a cotton braid. If it is intended for installation in places where there is a possibility of mechanical damage, it is additionally protected with a braid of galvanized steel wire.
Despite the fact that aluminum wires are cheaper, recently copper is increasingly replacing them because many homeowners prioritize reliability.
 Would you like to know how to make grounding in a private house? In the next review we will talk in detail about all the nuances, as well as what it should look like.
Read about the rules for installing hidden wiring in a wooden house here.
Retro wiring is not only functional, but also a decorative solution for those who want to decorate their home and make their wiring attractive. Detailed and helpful information.
Marking
The marking contains information about the material from which the conductors are made, the degree of flexibility, insulation and design of the protective sheath:
 For example, 4x2.5-380 means a 4-core wire with a core cross-section of 2.5 square meters. mm.
 Let's figure out what kind of wire is needed for wiring in the house. It is necessary to choose, taking into account the maximum amount of current consumed during the load, which determined by the formula P/220, where P is the rated power of the connected devices. So, for a 100-watt light bulb, the current will be 0.5A. Knowing the total power of all connected devices, you can calculate whether the selected wire is suitable or whether you need to select another one.
The choice for a home is made on the basis that For every kilowatt of load you need 1.57 sq. mm. You should adhere to the power characteristics:
- for copper 8 A per 1 sq. mm;
- for aluminum 5 A per 1 sq. mm.
Diameter of current-carrying core measured with a micrometer or caliper and calculated using the formula S = 3.14D2/4, where D is the diameter in millimeters. If the core is multi-wire, then the result is determined by adding the cross-sections of all the wires.
When installing wiring, you can focus on the following cross-section indicators:
- 2.5 sq. mm- sockets, air conditioning, washing machine, storage water heater;
- 6 sq. mm- electric stove;
- 1.5 sq. mm- lighting.
The load must also correspond to the installation method. : open wiring cools better, rubber insulation allows heating no higher than 65 degrees, plastic insulation - 70 degrees. Here's how the type of wire depends on the way the wiring is laid:


Practicing electricians It is recommended not to save money, but to use stranded copper wires even where you can get by with single-core, because multi-core, with the same cross-section as monolithic, withstand overloads 5–10% better.
In addition, it is technically impractical to counterfeit a stranded wire, and in a “monolith” there is a danger of running into a counterfeit - an alloy with the addition of copper. But any advice from a specialist has some bias, so it is still better for the home owner to decide for himself what is more important - the economy of aluminum or the quality of copper.
If to this approach the critical stage of repair accordingly, you may never know what melted insulation, fire or short circuit is. You need to take a particularly responsible approach to the arrangement of baths and saunas - there elevated temperature and humidity, which leads to rapid wear of the insulation.
By following safety rules and GOST recommendations, you can protect not only your own home, but also your life from fire.You can learn how to choose a wire for electrical wiring in a private house or apartment from the video review:
Major repairs or construction of a country house or country house, the construction of service outbuildings is usually completed with electrical supply and interior finishing. Do-it-yourself electrical wiring in a wooden house requires special attention, as well as compliance with a number of special instructions, standards and requirements. This is due, firstly, to fire safety rules for electrical installation in wooden houses and, secondly, to the low thermal conductivity of wood and its hygroscopicity.
Installation of electrical appliances and electrical wires V wooden building has a number of features that must be taken into account during construction or repair. Electrical wiring in a wooden house, installation and fastening rules electrical outlets, automatic switches, electric energy meters have a number of differences compared to the electrical equipment of a brick house.

Correctly installed electrical wiring in a wooden house with your own hands will help ensure trouble-free operation of the power supply system at home or cottage.
Step-by-step instructions for performing the work include a number of mandatory actions:
- determining the type of power supply - overhead line or underground cable;
- production of a power supply diagram for the premises, taking into account the power of all consumer electrical appliances;
- layout plan for the electrical panel, circuit breakers, electric meter;
- marking the location of lighting devices, stationary electrical appliances and electric heaters;
- determining the location and number of electrical sockets and switches. Layout plan for the electrical cable to each connection point, indicating the length and required cross-section of the electrical wire.

Drawing up a diagram and power supply plan
When drawing up a power supply diagram and an electrical cable installation plan, the following must be taken into account:
- The distribution panel with an electric meter and circuit breakers should be installed near the front door at a height of about 1.5 m. This is determined by ease of access to the panel and safety conditions.
- An input safety circuit breaker is installed in front of the electric meter.
- For each group of consumers, a separate circuit breaker is installed to protect against overloads.

The optimal height for lighting switches is 1.5 m; they must be located in the entrance area on the side door lock or door handles. Electrical sockets are placed, as a rule, at a height of 0.8 - 1 m above the floor level; their number and location are determined by the number of electrical appliances used. When drawing up a plan for the location of sockets and switches, you should also take into account the arrangement of furniture so that pieces of furniture do not block access to them.
Do-it-yourself wiring in a wooden house imposes increased demands on the electrical cables used in the work. For wooden buildings, it is necessary to use only a cable with a copper core, double or triple insulation made of non-flammable material, as well as the section corresponding to the load.

The diagram and layout of electrical appliances will allow you to calculate the total required amount electrical cable and auxiliary elements. These include distribution boxes, connection blocks, sockets and switches. After purchasing the necessary materials, electrical wiring in a wooden house can be installed quite simply and quickly.
Various installation methods
Electrical wiring in a wooden house (see photo) can be installed in various ways:
- external wiring on brackets or porcelain insulators;
- hidden wiring in cable channels;
- laying hidden cable in a hose or pipe;
- wiring in the cable plinth.
External or open wiring in a wooden house of an electrical cable using fastening brackets or porcelain insulators is one of the simplest and available ways installation The disadvantages of external wiring include:
- unaesthetic appearance;
- danger of damage to exposed cable;
- possibility of damage to junction boxes.
Most often, external installation of electrical wiring on mounting brackets is used for service and auxiliary premises, as well as for installation of power supply to outbuildings. Fastening wires on porcelain insulators is used like retro wiring in a wooden house when decorating a home in an antique style. More labor-intensive, but the most aesthetic and reliable is hidden wiring in a wooden house. This type of installation includes laying wires in special cable channels fixed to the wall surface. They are easy to attach, have an aesthetic appearance, and you can also purchase channels that have the color and texture of wood. Such products look very good on walls made of timber, logs or boards. Hidden cable routing also includes wiring in the electrical baseboard. This plinth is made of plastic and has compartments for fastening power or signal cables. To route the cable from the baseboard to the socket or switch, use either cable channels or laying between the load-bearing wall and the decorative finishing panel. Laying the cable in a metal hose or plastic corrugated protective pipe is used for hidden power distribution. It is produced in the space between the load-bearing wooden wall and the decorative wall panel. Installation of the house's power supply begins from the main circuit breaker and the input panel according to a pre-drawn diagram and layout plan for consumer electrical appliances. The entire installation is divided into separate sections, each of which is equipped with its own marked circuit breaker. Separate installation sections can be divided into various rooms, outbuildings, street lighting, individual high-power electrical appliances, etc.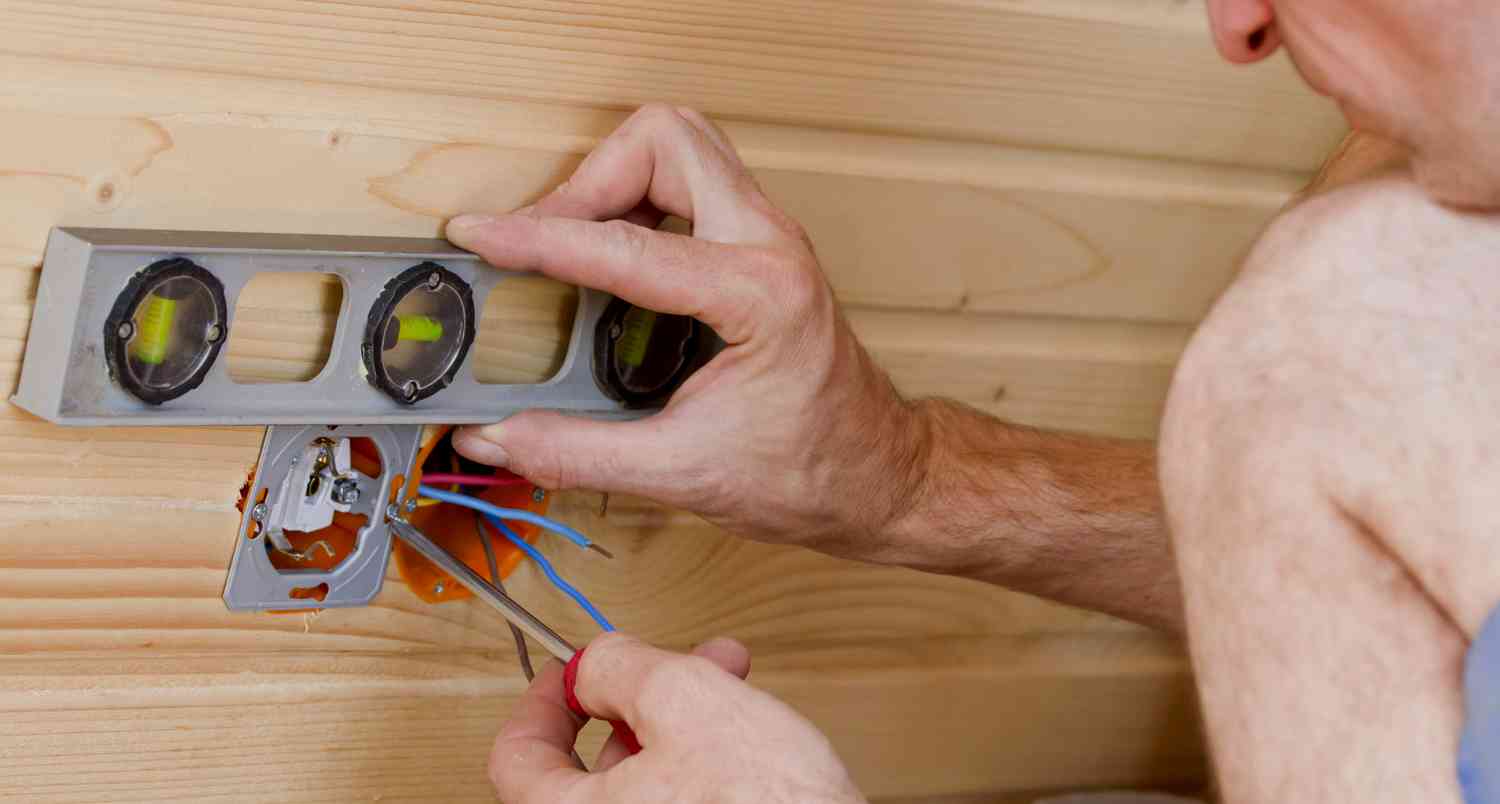
Hidden wiring in a wooden house
Electrical wiring installation procedure
What is attractive about the idea of building a wooden house? This is the ecological purity of materials that can provide a comfortable and healthy microclimate in the premises of the home and, of course, the desire of homeowners to follow the traditions of Russian architecture. The modern building materials market allows you to build a house made of profiled and laminated timber, as well as rounded logs. In contrast to all the advantages inherent in houses made of wood, a problem arises with the arrangement of electrical wiring. The option of open wiring laid in cable channels does not always meet the requirements of an attractive interior design; the homeowner is faced with the question of how to make hidden electrical wiring in a wooden house with his own hands. We will talk about this further.
Advantages of hidden wiring
The undeniable advantages of installing hidden wiring in a wooden house are:
- The absence of cable channels on the walls, which have a detrimental effect on the premises and significantly complicate the process of applying wallpaper.
- Minimizing the risk of mechanical damage to cables and electrical wiring.
- Possibility of replacing the cable laid in the pipe.
- High degree of electrical fire safety, provided that installation work is carried out correctly in accordance with the requirements of regulatory documents.
Special safety requirements
Hidden installation electrical wiring in a wooden house is very complex and requires strict compliance with standards fire safety, PUE requirements and compliance with GOST R50572 1-93. A person who does not have electrical installation experience should not attempt to do this work with their own hands. The homeowner who has invited specialists to install the installation needs to know the basic provisions about installation methods in order to control the progress of the work and in no case take this material, as step-by-step instructions.
When designing a home's electrical circuit, the main emphasis is on ensuring fire safety, even if this goes against the aesthetic component. The finished project must be agreed upon with specialists. The hidden wiring diagram should provide for a minimum of turns of the electric main. Considering the high risk of fire wooden structures, the wiring must be laid in such a way that even a tiny section of the power line does not come into contact with the wood. The cable must be laid in steel or copper pipes. It is allowed to lay electrical wiring in a corrugated metal hose, as well as in PVC corrugation, provided they are protected with plaster or asbestos gasket.
The diameter of the pipe is selected taking into account the fact that the hidden electrical wiring laid in it should occupy 40% of its internal cavity, the thickness of its walls should correspond to the cross-section of the conductive wires. Pulling an electric main through pipes can cause mechanical damage to its shell, so it must be done after each such operation. Special requirements are imposed on the brand of cable; its shell must be made of non-flammable three-layer material, and the marking of domestic samples must necessarily contain the letter symbols “NG”. For example, VVGng-p. The imported analogue is the NYM cable.

Pipes must be securely joined by threading, welding or soldering. Places for interroom transitions, as well as installation points for wiring elements, should be equipped with metal boxes or glasses, wrapped in asbestos and secured with alabaster plaster. We talked about this in more detail in a separate article.
Installation features
The most labor-intensive operation when laying hidden electrical wiring in a wooden house is installing pipes in the body of the wall. The process is quite labor-intensive, requiring the greatest possible accuracy and precision. To carry out this work, special practical skills and special high-tech tools will be required.
To install insulating pipes into walls, drilling will be required, both horizontally and vertically. Vertical holes are drilled during the process of laying the frame, horizontal holes are drilled when the walls are already erected. After the pipes are fixed in the body of the wooden walls, a wire is inserted into them, which will serve as a conductor for pulling the wire. The seats are carefully cut out to fit the dimensions of the wiring elements, and insulating metal boxes are attached to them.


An alternative option is wiring over the ceiling. Is it possible to avoid such a labor-intensive process associated with installing pipes into walls? Many homeowners when settling hidden electrics wooden house they practice laying wiring along the ceiling in attic. Fire safety requirements for this method of electrical installation remain the same; the electrical main in the attic is insulated with metal pipes or trays, only descents to switches and sockets are made through grooves or vertical drillings in the walls, as shown in the photo below:

Another option is hidden wiring in the plaster. You can take the simplest route and lay the electrical wiring between the layers of plaster. The method is primitive and inexpensive, but not very safe. Plaster actively absorbs moisture and also cracks over time, causing it to lose its insulating properties.
Helpful information
For laying hidden wiring in wood, experts recommend one developed in Germany, with three-layer insulation made of non-flammable material. The shell is so strong that it can be installed without PVC corrugation.

The home electrical network must have a TN-S or insulation system that makes it possible to ground metal pipes, trays, ducts and boxes.

It is better to equip the electrical equipment of the house with protection against short circuit currents, as well as with RCD functions.

Now you know how hidden electrical wiring can be done in a wooden house with your own hands. We hope that our installation tips, as well as the rules and requirements provided, helped you understand the essence of the work!
Materials
Installation of equipment in the panel
Having completed the external electrical installation of a wooden building, it is customary to lead the input cable through a metal sleeve into the room. To receive electricity and distribute it in the house, an input distribution board is used, which must be installed in safe places to ensure easy access.

The shield must not be installed in rooms with high humidity
Residual current devices and circuit breakers are installed in the switchboard. Special attention is given to the selection of automation. It is recommended to use products only from well-known and reliable manufacturers.
Laying the internal network
Internal wiring in a wooden cottage is considered a guarantee of the safety of residents. Unskilled electrical installation often causes fires. There are two methods of installing wiring inside a wooden building - open and hidden. These names make it clear what these transactions look like.
Open installation method
The safer of the two methods exposed wiring in a wooden house. In addition, performing such electrical work will be cheaper. Wires are laid along inner surface buildings, attached to ceilings, walls and other structural elements. You can hide the cable various methods: decorated with a retro cable or placed in a PVC box.

Open wiring in a wooden house: the cable is placed in self-extinguishing channels
Electrical wiring is laid in self-extinguishing channels. The modern range of similar products allows you to choose the desired color of the box, which imitates wood, to suit any design. Such boxes are usually used in houses made of clapboard and rounded logs, where the walls have a flat surface.
Wiring in a cottage using a retro braided cable is another method of laying material externally. The cable looks like a twisted cord and is fixed on ceramic insulators. This installation method is considered safe because the cable has an outer insulation made of natural silk and two outer insulations made of PVC plastic. The main advantage is the gap between the surface and the cable. In addition, this type of wire can decorate any log house.
Features of hidden wiring
Hidden installation of electrical wiring is characterized by the rather inaccessible nature of the wires in the case of modernization and renovation of housing, higher prices for services and a much greater required time expenditure for work. However, the lion's share of customers prefer this technique, citing aesthetic appeal. The owners of wooden cottages do not want to spoil the interior and expensive finish of their home with electrical panels and wires.
Hidden wiring in a wooden house it is usually laid at the stage of assembling the house. To comply with all safety standards, the cable must be enclosed in a painted metal or galvanized pipe. All climbs to lighting fixtures, switches and sockets are made in special holes.

Hidden wiring in a wooden house is a very complex and expensive process, justified only by aesthetics
When installing electrical networks in wooden houses, it is recommended to comply with certain requirements and use special materials to ensure maximum safety and protection against fire. In the ceilings of a wooden building, the cable is placed in pipes made of non-flammable plastic, and care is taken to ensure that there is no mechanical impact on the pipe and cable.
Hidden electrical wiring can be located in grounded metal hoses and metal pipes. Log houses are subject to “shrinkage”, so it is recommended to take this into account, preventing the logs from affecting the wiring in the metal hoses. The wire passes through the wall through special metal sleeves. Both methods of installing electrical wiring have advantages and disadvantages, so a combined wiring method is often practiced.
Marking of devices, panels, cables
After completing the electrical supply project, you need to mark the cable lines and locations for switches, sockets, dimmers, panels and lamps. It is necessary to approach the markings carefully so that you do not have to redo the work performed in the future. Electrical wiring in a wooden house should be planned so that cable routes do not interfere with the installation of furniture in the future.
The wire in cable channels will look most harmonious and aesthetically pleasing. You can choose any pattern, any shade of wood. For such channels you immediately need to buy tees, plugs, and adapters. And although the price of these parts is twice as high as the boxes themselves, it is not advisable to save money, since no one will fit the non-joint areas of the boxes perfectly.

When purchasing channels, you should pay attention to the thickness of the walls and the lock of the box. Carrying out work on installing wires in miniature boxes that have thin walls and double locks, electrical installation companies do not think that in most situations, servicing electrical wiring in such boxes provokes a break in the locks if the channel covers are opened.
To add cable to the box, you will have to buy new channels and re-install the wiring and boxes. Double lock needs to be used specialized tool, which can open the lid, but absolutely not all electricians think about this. It is better to choose a box with a technologically consistent profile geometry, large walls and a single lock.
When the electrical wiring diagram in a wooden house has been studied and the cable lines have been marked, you can begin installing switches and sockets. All switches, dimmers and sockets, the bases of sconces and lamps must have a metal platform for attaching the electrical installation product to the ceiling or wall, because wiring electrical equipment on metal platforms is the most fireproof option.

After installing all the platforms, you should begin installing the cable boxes. No matter how accurate a specialist’s eye is, all electrical work must be done using a level.
Passing through wooden surfaces
All wiring passes through wooden walls, partitions, bases must be made through metal pipes, which are called feed-through sleeves. Before proceeding with the electrical installation of wires through combustible walls, it is recommended to drill them, then insert a metal sleeve into the hole so that its edges extend on both sides from the combustible base by at least 1 centimeter.
It is recommended to pay special attention to ensure that such sleeves are equipped with plastic bushings at the edges that can protect the wire from cuts during installation and further operation of the power supply system, in other words, they will help preserve the cable insulation from damage. After this, the cable channel must be mounted in such a way that the end of the metal sleeve enters the box.
How to choose an electrical cable
Installation of electrical wiring in a wooden house requires a certain cable. The wire for power supply to a private home should be purchased with the index “NG”, which means “cable that does not support combustion” and with the designation “LS”, which stands for “low smoke emission”. For wiring in a wooden building, it is preferable to choose a wire that meets all existing fire safety requirements and also has all the necessary quality certificates.

The choice of wiring cross-section depends directly on the power consumed by the electrical equipment. Designers usually include 3 by 1.5 millimeters for lighting in their electrical supply projects, and 3 by 2.5 millimeters for groups of sockets. To organize power supply for electric stoves, you will need a wire with a cross-section of at least 6 millimeters square. It's better not to skimp on cable. Rosette lines must be calculated with a minimum number of outlets located on one group. If a wire is laid from the switchboard to a block that consists of 4 sockets, then it is not recommended to connect anything else to it. Only then will the electrical wiring last long years. The relationship between the cable cross-section and the power of electrical appliances can be found in the corresponding tables.
After performing such work as installing electrical wiring in a wooden house, you need to immediately measure the insulation resistance of the wiring.

This manipulation is done to ensure that the conductor insulation is not damaged during installation work. It is recommended to carry out such electrical measurements once every 3 years to protect a wooden house and its easily combustible foundations from short circuits in the wiring.
Video about electricians in wooden houses
Thus, the problem of installing electrical wiring is as follows: often inexperienced craftsmen believe that the cable in a wooden building should be the same as in a simple apartment. This is unacceptable, because the wiring of a wooden structure must have increased fire safety characteristics. If you follow installation work According to the above instructions, the wiring in your cottage will last for many years.


