Garage doors are evolving: the usual swing doors have given way to sliding doors, and sliding doors have given way to overhead doors. The latter option is rightly considered more reliable: it is difficult to break open gates.
In addition, lift-type gates do not take up space in front of the garage, which means you can maneuver more freely when entering the garage. Installation is easy if you have the tools and assistants.
Types of overhead gates
 There are two types overhead gates:
- Rotary
- Sectional
Lifting swing gates are arranged in cases where:
- The garage door has a lintel that is too low (or absent altogether)
- There is a need to give the gate structure increased strength
- High demands are placed on door design

Sectional doors can be installed if there is space in the garage for the transition of the structure from a vertical to a horizontal position under the ceiling. They, just like rotary ones, are mounted with inside opening. The door panel consists of several sections, movably fixed relative to each other. During opening, the sections rise up along guides fixed to the walls and ceiling of the garage.
Manufacturing of overhead gates
We start by developing a drawing of a lifting gate with our own hands. It will look something like the following picture.
 Pivot gate size calculations
 Before you pick up a pencil and ruler, take some measurements. You need to measure:
- Opening height H
- Opening width B
- Ceiling height h (distance from the top of the opening to the line where the ceiling meets the wall)
- Distance from the opening to the side wall (left quarter b1 and right quarter b2)
- Garage depth L
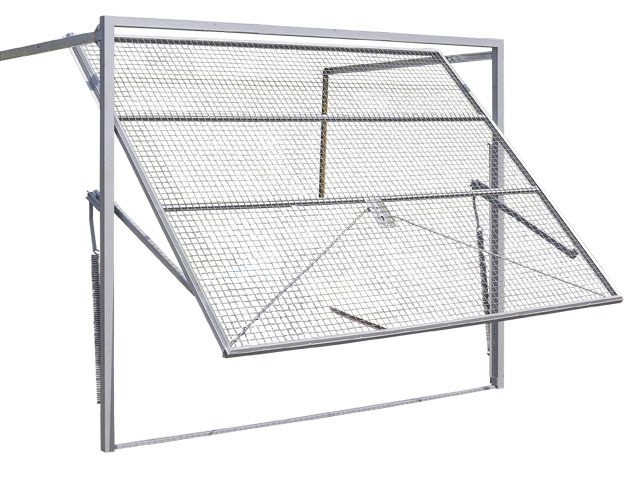
Having prepared the drawing, you can begin making the frame. If you have an old gate, you can use the frame from it. Or you can make it from wooden beams. No matter which option you choose, the end result of your work should look like the following image.
 Gate fastening diagram
 Designations:
- 1 - horizontal guide rail beam
- 2 - guide rail
- 3 - horizontal gate frame beam
- 4 - vertical box stand
- 5 - gate frame
- 6 - bracket for mounting the spring
- 7 - hinge corner
- 8 - spring
- 9 - lifting mechanism lever
- 10 - lever bracket
To make a wooden box you will need:
- Beam 2.3 m long, cross section 120x80 mm - 2 pcs.
- Beam 2.75 m long. the same section - 1 pc.
Between themselves the bars are fastened with metal corners(or plates).
 The frame for the gate panel can be welded from a 35x35 mm corner. It can be sheathed on the inside with a board, and on the outside with a steel sheet. The size of the frame depends on the dimensions of your garage opening. The standard panel is 2.5x2.1 meters.
The spring support (bracket) is made from channel No. 8. Bracket length - 70 mm.
The guide rail can be welded from a pair of 40x40 mm corners. The length of the rail should be equal to the width of the gate panel. At one end of the rail there is a plate welded for attaching it to the horizontal beam of the box. At a distance of 12 centimeters from the other end, a piece of channel 100 mm long is welded (the lower flange of the channel is closely adjacent to the lower plane of the rail). Through the upper flange of the channel, the rail is attached to the ceiling beam using a bolted connection.
To make a hinge unit, take a corner and drill a hole with a diameter of 9 mm in it. Weld it to the frame, and weld a plate with the same hole to the lever. Plate dimensions - 50x40x5 mm.
We have given a description of the main work. They are simple, but it is inconvenient to work alone: it is better to invite an assistant.
Installation of sectional doors
You should not make them from scratch, as they have a complex design. But install factory-made gates yourself home handyman quite capable. You just need to follow some rules:
- During installation, do not replace factory consumables with cheaper ones of questionable quality.
- Gate installation should only be carried out according to the manufacturer’s original drawings.
- Place all design parts as accurately as possible
Installation sectional doors consists of several important stages.
First thing the opening should be prepared in accordance with the requirements of sectional door manufacturers. And they promise trouble-free operation of their products if the lintel and shoulders of the opening are strictly in the same plane, and its verticals and horizontals are not skewed and form a regular rectangle. You can check perpendicularity and parallelism using a measuring level.
Necessarily check whether the panel will fit inside the garage when the opening is fully open. This, by the way, must be checked at the design selection stage.
The minimum depth of the garage should be equal to the height of the gate with an allowance of 500 mm - unless you plan to automate the structure. If automation is used, then 1000 mm must be added to the height of the gate.
Please note that the ceiling and lintel will bear the main load from the weight of the gate. They must be made of durable building materials. The same applies to the shoulder pads, as the gate guides will be attached to them.
If you are well versed in electrical equipment, then creating one will not be difficult. For those who do not have a garage on the site, it will be useful to learn about installing sliding gates with your own hands, and with an automatic drive.
Having properly prepared the opening, you can begin marking the fastening and installing the guide elements.
Assemble the sections into a single fabric, starting from the bottom panel. Carry out the work carefully, avoiding distortions or gaps between the individual parts of the gate. No filling with polyurethane foam or planks is allowed here.
Any deviation from the instructions regarding assembly accuracy will negatively affect the operation of the gate.
 After installing the canvas in place, adjust the tightness of its fit using adjustment brackets.
Usually included overhead sectional doors There are seals made of rubber and polymer rubber. The rubber seal is installed on the part of the panel that is in contact with the floor, and the rubber seal is installed on the top and sides.
Upon completion of installation, handles, locks, bolts, other accessories and the automation system are secured.
Thus, do-it-yourself installation of overhead gates and overhead sectional doors is different. The choice depends on your desire and the size of the garage.
Video of installing overhead gates with your own hands
In the video you can watch the process of making and installing overhead gates with your own hands.
Detailed video instructions (diagram) for installing sectional overhead doors with your own hands.
Most experienced car enthusiasts prefer old swing or sash gate options, considering them the most secure and reliable due to the heavy weight and thickness of the metal. But, as practice shows, sash systems have a worthy competitor, namely, hinged Garage Doors. The popularity of the tilt-up design is such that today it accounts for approximately three-quarters of garage doors sold. It is worth understanding the reasons.
Advantages and disadvantages of overhead garage doors
To understand the difference in using lift-and-fold systems and the old swing structure, you need to try them out in practice at least a couple of times to knowledgeable person the difference is visible to the naked eye:
- The hinged door system allows you to avoid the formation of a “blind” zone when leaving the garage. Lift systems do not have doors that block the view, which is why dozens of cars crash in garage cooperatives every year;
- The absence of swing doors when opening the doors increases the space for maneuver in front of the gate; there is no need to park the car a couple of meters from the doorway in order to be able to open and close the garage.
For your information! Often, drivers decide to change regular gates to folding ones for only one reason: in a strong wind, there is a chance of getting hit by the gate on the car body at the time of departure.
Folding gates are cheaper to manufacture, they are more convenient to use, and the simple device allows you to build them yourself. But it is not possible to install such a system in every garage; at a minimum, you need free space in the ceiling above the entrance to the garage.
We build folding garage doors with our own hands
The structure and operating principle of the gate are clear from the diagram and drawing below:
- Structurally, the gate consists of two frames - the shield itself, or the panel covering the doorway, and the load-bearing support frame with guide elements;
- When opened, the top folding gates deflects and moves on rollers or bearings along two guides until the panel is completely on two horizontal beams;
- The bottom edge of the panel rises up and is fixed in this position.
The plane of the folding gate makes a movement reminiscent of rolling around a conventional cylindrical surface of large radius. To make it easier to lift steel or wood panel folding gates, the design uses compensation springs or counterweights in the form of a load suspended on cables.
Important! Unlike swing systems, folding gates do not have external hinges that can be easily cut with a grinder. In this case, the panel covering the doorway is adjacent to the supporting frame from the inside, so it is much more difficult for attackers to pull out the garage door with a cable hooked to the tow bar of a pickup truck or tractor.
Manufacturing of hinged gate assemblies
The easiest way to make a hinged gate design is from a steel angle and channel. Initially, you will need to measure the dimensions of the doorway, cut it from the channel and weld the frame of the garage doorway.
At the top of the frame, two horizontal corners with a flange width of at least 40-50 mm are welded. The length of each corner is more than two meters, so perform welding work and the assembly of the entire structure must be “on the ground”, before installing the folding gate system in the doorway.
The angle of attachment of the corner to the frame must be adjusted to the building level. After welding to the frame, each corner is strengthened with a temporary brace made from a board or wooden slats to avoid deformation of the structure at the time of its installation in the garage doorway.
If a lift in the form of loads suspended on cables will be used in the folding gate system, one pin with a groove roller with a diameter of 30-50 mm must be welded to the upper part of the frame.
Particular attention should be paid to the manufacture of the main panel of the folding gate. Structurally, the folding panel is a frame made of a pipe or a metal tubular profile with outriggers-brackets welded to the lower and upper parts.
The tubular frame of the panel must be marked and welded exactly to the dimensions of the stationary frame. The main condition is to carry out welding in three steps so that the frame of the folding panel does not turn out like a “propeller” due to overheating.
First, the cut pieces of the profile are laid out on a flat area and fixed together spot welding. At the second stage, the joints are boiled on one side of the folding frame, after 30 minutes they are turned over and boiled from reverse side. If the panel frame turns out to be strictly in one plane, you can attach sheet metal, otherwise you will need careful straightening using blowtorch and sledgehammers.

Assembly and installation of folding gates
Before installing the tilt gate system, you will need to perform preliminary assembly of the structure. To do this, a stationary frame with welded corner guides is laid out on a flat horizontal platform. A freshly welded movable panel is placed on top of the frame, its position is aligned so that it will stand in closed position V doorway garage.
To connect the two parts of the gate, you will need to weld oblique brackets with roller or bearing rollers to the upper profile of the panel.
The reliability and smooth operation of the lifting mechanism depends on how accurately the supports are installed. Groove rollers are placed on the studs welded to the stationary frame. Additional L-shaped brackets are welded to the bottom beam of the panel, to which the support gate lift-lift cable will be attached.
All that remains is to install the stationary frame in the garage doorway and secure it with anchor bolts to the side walls of the garage. Subsequently, the fastening points will need to be carefully filled concrete mortar and plaster. Until the stationary frame is finally fixed, it will be necessary to align its position with the building level. Next, you need to make a U-shaped device, with which the ends of the corner guides are fixed to the ceiling.
For many people, the garage has become a second home, and they really want everything in it to be beautiful and comfortable. Do-it-yourself overhead garage doors are a step in the direction of convenience and reliability.
In order for you to have peace of mind about your car left in the garage, you need to install reliable and durable gates.
When professionally manufactured, such designs have long won the sympathy of car enthusiasts with their beautiful design and relatively reliable protection. One thing I can't be happy about is the cost. Do-it-yourself overhead garage doors are a rather complex design, but people with little welding and plumbing skills are quite capable of making them. And in terms of their parameters, they are not much inferior to factory designs.
Design principle
The main task of any overhead gate is to open the passage by lifting the leaf upward and holding it in this position. The simplest option, from which the design of such systems began, is a rotary (hinged) one: the sash is hinged and freely rotated, and in the upper position it is fixed with racks (supports). Naturally, few people will like this design, since it requires significant space to lift the entire sash and considerable effort, taking into account its weight.

Currently, do-it-yourself garage doors are mainly installed in one of two types: sectional and swing-up. Both options solve another problem: laying the gate leaf in its upper position without going beyond the dimensions of the garage.
Sectional overhead garage doors have a leaf made of several separate longitudinal strips up to 0.5 m wide, hinged to each other. The principle of operation is based on the fact that when the gate is lifted upward, each section moves along guides in two directions: first vertically up the rack, then horizontally along the guides on the ceiling. The sectional design of the door leaf allows for its bending at the top point. The main advantages of this design:
- safety in operation;
- small size.
Disadvantages: possibility of hacking, difficult to do with your own hands.
Tilt-up garage doors consist of a solid leaf that rotates and is simultaneously pulled upward along guide runners. When open, the sash is placed horizontally on the ceiling within the dimensions of the garage. Main advantages: increased strength and security against burglary, ease of control both manually and mechanized, the ability to do it yourself. Disadvantages include relative bulkiness and the likelihood of jamming if used incorrectly.
Design of overhead gates
As a homemade lifting gate, the swing-and-lift system is most widely used.
Overhead gates consist of the following main elements:

Figure 1. Design of overhead gates.
- door frame;
- horizontal ceiling rails;
- sash;
- swivel mechanism;
- compensation system.
The door frame is made of durable wooden or metal beams in the form of two vertical posts and an upper lintel (horizontal beam) and is installed in the garage opening. Mounted on both vertical posts metallic profile, which is a guide for the vertical movement of the sash.
Horizontal ceiling rails have a guide metal profile for moving the sash in the horizontal direction. They hold the canvas on the garage ceiling when the door is opened.
The gate leaf is made in the form of a single piece (shield). The following materials can be used: a metal sheet, sandwich panel, profiled metal sheet, wooden shield, lined with metal. It is advisable to cover the inner side of the canvas with a heat-insulating layer. In the upper part of the sash, rollers are fixed on both sides to move along the ceiling rails.
A rotating mechanism and compensation springs are installed on the vertical posts. Springs allow you to reduce the force required when lifting the gate by pulling the leaf in the direction of its horizontal movement.
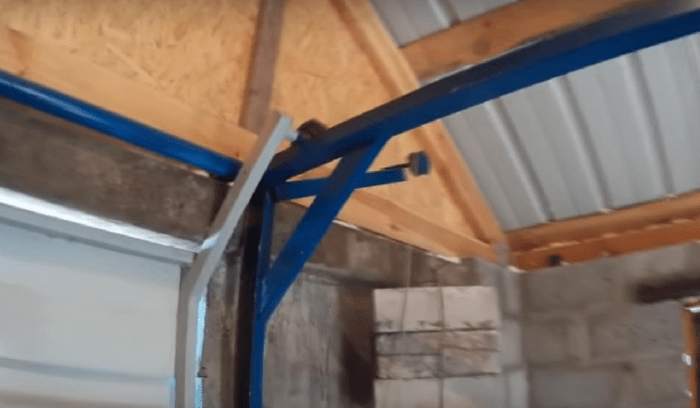
Gate swing mechanism

One of the main elements of overhead gates is lifting mechanism, which ensures their movement in the vertical direction. Two types of devices can be considered basic: lever-articulated and counterweight-based.
The lever-hinged mechanism is the most widespread and is distinguished by its simplicity and reliability. This mechanism is mounted on a vertical stand in its middle part. It contains a lever whose arm is attached to the bottom of the gate leaf. When the gate is lifted, the lever, which is hinged at both ends, sets the direction of movement of the gate, while making a circular movement around the attachment point of the mechanism on the post.
The lifting and turning mechanism on counterweights consists of a cable, one end of which is attached to the bottom of the gate leaf. The cable is passed through a block and has a counterweight at the other end. When lifting the gate, the cable provides vertical movement, which is guided by runners on the posts. The mass of the counterweight is selected sufficient to impart movement to the sash panel. This system is usually used with a heavy gate structure and requires increased strength of the vertical posts.
Manufacturing of overhead gates
Quite simple swing gates can be made in the following order. First of all from wooden beam A U-shaped box with a cross-section of 8x12 cm is assembled, which is attached to the garage using metal pins or anchors. Bottom part vertical bars fixed in concrete screed. The sash leaf is made according to the specified dimensions of the opening.

A U-shaped profile is used to manufacture the guide rail.
Reason for rotary mechanism formed from a steel angle 35x35 mm. On one side of the corner, 2 holes (8-10 mm in diameter) are drilled for installation on the box stand, and on the other side, 3 holes are drilled for attaching the spring compensator bracket. It is advisable to make this bracket from a 43x80 mm channel. A similar base is made to attach the lever on the other side, which is welded to the lower corner of the sash leaf.
Two wooden beams measuring 10x10 cm are fixed to the garage ceiling. The guide rail is made from two 40x40 mm corners by welding together to form a U-shaped profile. With the help of bolts, the rails are firmly fixed to the beams with the profiles directed towards each other. The distance between the rails must correspond to the width of the sash, taking into account the rollers. Plates with holes are welded to the ends of the rails to install stops that prevent the sash rollers from moving outward from the guide.
At the upper corners of the gate leaf, an axle with a roller with a diameter of about 5 cm is welded at both ends. The rollers must be secured through bearings to facilitate movement when lifting the gate.
Necessary tool
When manufacturing and installing homemade overhead garage doors, you will need the following tools and equipment:

- welding machine;
- perforator;
- Bulgarian;
- electric drill;
- Grinder;
- hacksaw for metal;
- set of taps and dies;
- file;
- hammer;
- chisel;
- chisel;
- pliers.
Installation process for overhead gates
The installation of overhead gates begins with the installation of the swing arm. It is best to use a standard rotary-joint mechanism with mandatory adjustment of the length of the lever attachment.

It is advisable to find an adjustment based on the jack principle. If the lever is made homemade, then it is necessary to provide a mounting plate with grooves that allow you to change the length of the lever attachment up to 10 cm.
After installing the rotating mechanism and preliminary securing the lever, the compensation spring is fixed using brackets made of channels. Then the sash rises vertically and is inserted with its rollers into the profile of the rails on the garage ceiling.
Stoppers (of any available design) are installed to prevent the rollers from slipping out of engagement with the rails. The sash rises as high as possible and the final fixation of the turning mechanism levers and the final adjustment of the compensation spring are made. On the sash leaf with outside A conveniently designed handle is attached at the bottom.
Strengthening the structure of overhead gates is achieved by replacing the wooden beam with a metal profile.
Garage owners decide to install do-it-yourself overhead gates. Buy ready-made option– this is not a cheap pleasure, but anyone can assemble the structure themselves. You just need to familiarize yourself with the drawings and the principle of operation of the mechanism. Photos and videos will help you understand how overhead garage doors work and design them yourself.
Lifting garage doors step by step according to drawings and diagrams
Making a garage door with a lifting mechanism with your own hands is quite simple if you have a simple drawing and photo of the assembled mechanism. Standard design contains the following basic elements:
- The frame on which all the gate elements are attached. It must be strong enough and securely attached to the walls of the building.
- Vertical and horizontal rails along which the structure moves.
- Mounting bracket return springs lifting mechanism.
- Rollers and levers on which garage doors are fixed to the rails.
- Automatic drive for sash movement.

Installing do-it-yourself overhead gates is the dream of many garage owners.
The frame is made taking into account the dimensions of the doorway in the garage. The base is steel sheet, which is outside sheathed plastic panels. The inner part is insulated. Recommended to use basalt wool or other fire-resistant insulation materials. To set the mechanism in motion, a hinge-lever device is most often used.

Overhead garage doors have a number of advantages
When assembling the structure with your own hands, we recommend using the drawings and following this sequence of work step by step. These include:
- Assembling the frame and installing it in the garage opening, maintaining horizontal and vertical alignment. All structural parts are attached to the walls using anchors.
- Installing ceiling tracks is an important step. In this case, you need to check the reliability of the fastening.
- Attaching hinges to door leaves and installing gates on rails.
- Installation of springs for smooth opening of gates. Next, the springs are adjusted and adjusted to open the garage without much physical effort.

Scheme of a garage door with a lifting mechanism
We invite you to watch a video about the rules for installing garage doors equipped with a lifting mechanism:
Advantages and disadvantages of overhead gates
Overhead garage doors have a number of advantages and disadvantages. Experts consider the following aspects to be the main advantages:
- high degree of protection and safety;
- durability and reliability of the design;
- good tightness;
- small size;
- presence of a system against hacking.

The assembled garage door lift mechanism is heavy.
However, the assembled lifting mechanism has disadvantages. Among the main ones, it is worth mentioning the large weight of the structure. Given this feature, you need to pay due attention to the strength of the frame and the reliability of the fasteners. If the quality suffers, vibration during movement may result in a fall or damage to the mechanism and guides. For owners of large cars, a significant drawback will be the loss of about 30 cm in the height of the opening. Some garage owners, if the blade breaks down or is damaged, are forced to completely dismantle the mechanism for repair, which is time-consuming and labor-intensive.

Drawing of a garage door with a lifting mechanism
Video on how to assemble a garage door with a lifting mechanism with your own hands:
If you decide to make a garage door with your own hands, the drawings, videos and recommendations in the article are guaranteed to help even people without experience and skills in the field of construction and repair cope with this feasible task. Undoubtedly, overhead gates are reliable, high-quality and aesthetic designs that every owner of a country house should have.
Technologies do not stand still, which directly affects many designs. This statement is also true for garage doors. At one time the most common option was swing gates, but gradually they began to use sliding models instead, which after some time replaced lifting models. Speaking about the latest version of garage doors, it should be noted their high reliability, due to which they become an impregnable barrier for burglars.
 An important feature of overhead gates is that they do not require extra bed when using the garage. This allows the owner to have greater freedom to maneuver when he needs to enter the garage. Despite the fact that many companies offer overhead garage doors, every car owner is able to make this design themselves. You just need to prepare necessary tool, take care of assistants and become familiar with the technology of performing the work.
Types of overhead gates
All overhead garage doors presented today can be divided into two types:
- rotary;
- sectional.
Installation of overhead gates seems the most reasonable solution in a situation where:
- the level of placement of the lintel of the garage opening is too low or it is missing altogether;
- the owner is faced with the task of ensuring increased reliability of the gate design;
- The owner had a desire to equip his garage with a more modern version of the door in terms of design.
It makes sense to think about installing sectional doors when there is enough space in the garage to move the structure from a vertical to a horizontal position. In terms of installation technology, they are similar to rotary ones: the location of their placement is the inside of the opening. The basis of the gate panel design forms several sections, which remain mobile relative to each other. When using such a design, access to the garage is opened by moving the sections up along guides installed on the surface of the walls and ceiling of the garage.
How to make up-and-over gates with your own hands?
 The first stage of work is the development of a drawing. This the sketch is standard, so you can easily find it on the Internet.
Based on the example drawing, you can start taking measurements to obtain the necessary data to create your own sketch. For this we need a pencil and a ruler. During measurements, it is necessary to determine the following parameters:
- opening height;
- opening width;
- lintel height (meaning the distance starting from the top point of the opening and ending at the level where the ceiling adjoins the wall);
- the distance at which the opening is removed from the side wall;
- garage depth.
Once the drawing is created, you can proceed to creating the frame. The frame from an old gate can serve as a basis for it. You can also do it differently - make the frame yourself, using wooden beams as the material.
Frame design
The standard version requires the following components:

To make wooden box, you should ensure that you have the following materials:
- beam having a length of 2.3 meters and a cross-section of 120 X 80 mm - 2 pcs.;
- timber having a length of 2.75 meters and a similar cross-section as the first - 1 pc.
For connecting bars use metal corners , which can be replaced with plates.
 A 35 x 35 mm corner can be used as a basis for the door leaf frame. Inner part such a frame is sheathed on the inside with boards, and on the inside with steel sheet. When determining frame dimensions you should focus on the dimensions, which the opening of your garage has. Most often, the canvas has the following dimensions - 2.5 X 2.1 meters.
To create a support for the spring, channel No. 8 is used. This element must have a length of 70 mm.
To make a guide rail, it is permissible to use several 40 x 40 mm angles. It is very important that the length of the rail exactly matches the width of the gate panel. One end of it must have a plate with which the rail will be installed to the horizontal beam of the box. Having stepped back 12 cm from the other end, they begin to fasten by welding a piece of channel, the length of which should be 100 mm. The installation of the rail to the ceiling beam is carried out through the upper flange of the channel, for fixing which a bolted connection is used.
The hinge joint is made from a corner. To do this, you need to make a hole in it with a diameter of 9 mm. Next, it is fixed to the frame, after which, using welding, a plate with a similar hole is installed. The plate used must have the following dimensions - 50 x 40 x 5 mm.
These are the main jobs that need to be done when making up-and-over gates with your own hands. Large there won't be any difficulties here, however, it will be easier for you to perform operations if you have an assistant.
Installation of sectional doors
 If you have an idea to make sectional doors with your own hands completely from the very beginning, we recommend that you abandon this idea. They are distinguished by the presence complex design, and therefore you are unlikely to be able to manufacture these gates as required in accordance with the technology. It will be much easier for you if you buy ready-made gates, which any owner can install on their own. To avoid problems while performing this work, there are some important points to keep in mind:
- installation work should be carried out using factory Supplies. The use of cheaper analogues of unknown quality may negatively affect the quality of the installation;
- during installation you should refer to the original drawings manufacturer;
- make sure that all the elements are in their place. Errors in their placement may affect the operation of the installed gate.
Sectional door installation process
 Work begins with preparing the opening, following the requirements of sectional door manufacturers. It should be remembered that, according to their assurances, purchased from them products will demonstrate trouble-free operation provided that the lintel and shoulders of the opening are located exactly in the same plane. In this case, it is unacceptable to skew the vertical and horizontal of these elements, which should form a regular rectangle. To make it easier to comply with the requirements of perpendicularity and parallelism, you should use a measuring level.
You need to make sure that in the garage, when the opening is fully open, there will be enough space to install the panel. A similar check should be performed when you decide on a design option.
The depth of the garage must match the height of the door. In this case, an allowance of 500 mm is allowed if you do not intend to equip the gate with an automatic opening mechanism. If you want to add automation to the design, you will need to increase the height of the gate by 1000 mm.
It is also important to remember that the weight of the gate will put pressure on the ceiling and lintel. For this reason, materials of increased strength should be used for their manufacture. The material of the shoulder pads should also have the same properties, since they will act as the installation site for the gate guides.
 You can easily handle the installation automatic gates do it yourself if you have experience working with electrical equipment. If you have not yet managed to acquire a garage on your site, then Alternatively, consider sliding gates, which can also be equipped with an automatic drive.
Having finished preparing the opening, you can choose a place for fastening and guide elements.
It is very important to assemble the section correctly. The bottom panel should be installed first. Try to do everything as carefully as possible, paying attention Special attention for distortions and gaps between separate elements structures that should be missing. It is forbidden to eliminate them using improvised means in the form of polyurethane foam or planks.
Try follow the assembly instructions exactly, since if there is a violation, there is an increased likelihood that at some point a malfunction will occur in the operation of the gate.
Next, you can proceed to placing the canvas in its place. Pay special attention to ensure that it fits as tightly as possible to the base. This is done by changing the position of the adjustment brackets.
 The standard version of the design of overhead sectional doors provides for the presence of seals, which can be made on the basis of rubber and polymer rubber. Installation location rubber seal the side of the panel adjacent to the floor will protrude. As for the rubber element, it should be attached to the top and to the sides.
Having completed the installation of the gate, you can begin attaching handles, locks, bolts, as well as other elements and the automation system.
Do not forget that the DIY installation procedure for overhead and sectional doors has its own characteristics. To choose the most suitable option, proceed not only from your own preferences, but also from the size of your garage.
Pay special attention to the material from which the guides will be made. It must be metal of sufficient thickness, then the elements will be able to cope with the weight of the door leaf. High must have reliability and door leaf , however, if you wish, you can decorate its outer part with plastic. Thanks to such a decision, you will give it modern look, which will make it as similar as possible to the factory version.
 Be especially careful with the rollers, as among all the structural elements they are the least protected. When installing them, make sure they are secured as securely as possible. However, first you need to decide suitable option rollers. Considering that they act as a moving element of the gate structure, their strength characteristics will be the lowest.
Most owners are most often limited to installing one or two rollers. It is best if you choose a caster system consisting of more elements. By acting in this way, you can count on their high reliability, and if one roller breaks, this will not affect the operation of the entire structure. The gate will function without any visible changes, and you will have the opportunity to find a suitable replacement.
Do-it-yourself installation of overhead gates - effective solution garage protection problems, which, among other things, will provide you with comfort when using them. Any owner can do this work. But here, as in any other matter, it is important to pay especially careful attention to the nuances. When you decide to make a lift-type garage door with your own hands, carefully select the materials that should have high performance strength.
Also it is important to strictly follow the installation technology, taking into account the features of the garage. If you follow all the recommendations, you can expect that your new garage door will serve for a long time without requiring much attention to its maintenance.


