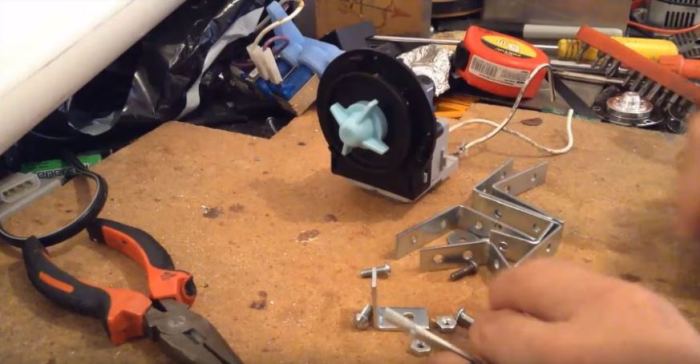
In this article, we will consider a model of a powerful generator made of magnets, which is capable of generating electricity with a power of 300 watts. The frame is assembled from 10 mm thick duralumin plates. The generator consists of 3 main parts: housing, rotor, stator. The main purpose of the housing is to fix the rotor and stator in a strictly defined position. The rotating rotor should not touch the stator coils with magnets. The aluminum body is assembled from 4 parts. The corner layout provides a simple and rigid structure. The body is made on a CNC machine. This is both an advantage and a disadvantage of the development, since for a high-quality repetition of the model you need to find specialists and a CNC machine. The diameter of the discs is 100 mm.
You can also buy a ready-made electric generator in an online store.
Rotor of the electric generator I. Belitsky
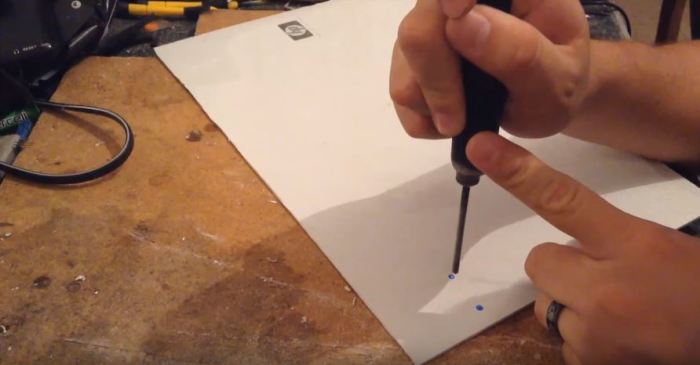
Rotor is an iron axle. There are 2 iron disks with neodymium magnets located on them. An iron bushing is pressed between the discs on the axle. Its length depends on the thickness of the stator. Its purpose is to ensure a minimum gap between the rotating magnets and the stator coils. Each disk contains 12 neodymium magnets with a diameter of 15 and a thickness of 5 mm. Seats are made for them on the disk.


They need to be glued epoxy resin or other glue. In this case, it is necessary to strictly observe polarity. When assembled, the magnets should be positioned so that opposite each one there is another from the opposite disk. In this case, the poles must be different towards each other. As the author of the development himself (Igor Beletsky) writes: “It would be correct to have different poles, so that the lines of force would come out of one and enter the other, definitely S = N.” You can purchase neodymium magnets in a Chinese online store.

Stator device
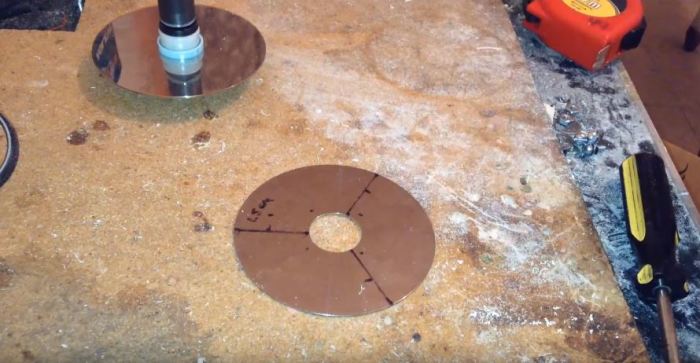
A sheet of textolite 12 m thick was used as a base. Holes were made in the sheet for the coils and rotor bushings. The outer diameter of the iron coils that are installed in these holes is 25 mm. The inner diameter is equal to the diameter of the magnets (15 mm). The coils perform 2 tasks: the function of a magnetically conductive core and the task of reducing sticking when moving from one coil to another.


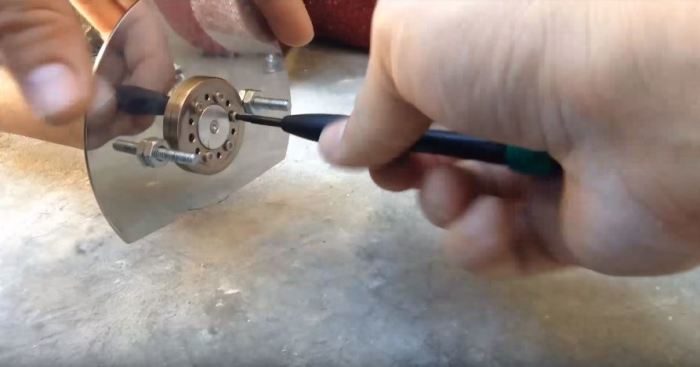
The coils are made of insulated wire 0.5 mm thick. 130 turns are wound on each coil. The winding direction is the same for all.
When creating a powerful generator from, you need to know that the higher the speed that can be provided, the higher the output voltage and current of the device will be for free energy.
There is a way to get electricity absolutely free. It is enough to make and install a wind generator on your site. Today, this cannot replace traditional sources of electricity, but it will add a few pleasant percentages of proud independence to the household. The most important thing is that you can “concoct” a full-fledged generator from literally any old trash and garbage.
We will need
First of all, you need to get a pump from an automatic washing machine. It is used to pump water from the drum into the sewer and is located at the very bottom. You will also need four faulty hard drives, a long pole to install the structure, numerous bolts, nuts, and washers. Finally, we need wires.
What is a pump for?

The pump will be used as the same generator that will generate electricity. The pump consists of a movable rotor with permanent magnets and a movable stator with a U-shaped magnetic core, as well as a coil that is attached to this structure. The rotor can be easily pulled out. Thanks to the mentioned permanent magnets, such a pump makes an excellent generator, capable of producing a voltage of up to 250 V.
Generator manufacturing process

It is best to secure the pump using a clamp, which is most easily made from steel corners. They will likely need to be trimmed accordingly. You can safely make an additional hole in the magnetic core of the pump for more reliable fixation. That's basically all that needs to be done at this stage.
The manufacturing process of blades and their fastening

Blades for a wind generator can be made from PVC pipes. To do this, cut it into three equal parts lengthwise. From such blanks you can then make more “elegant” elements. In the places where the blades are attached, do not forget to make suitable holes for subsequent fastening. It is also necessary to make a tail blade from a similar material, which will guide the generator.
We will fix the blades on two disks from the HDD. The whole difficulty of this stage of work is to make holes in the disks in suitable places, and then screw the blades to them using prepared bolts and washers.
Swivel unit

Small but very important detail. To produce a turning angle, you can use a motor from hard drive. It has very good bearings, and therefore this element will perfectly cope with the task. It is on this element that the disk with the generator will be mounted.
General assembly
Now all that remains is to collect wind generator, attach the wires to our pole, install a rotating element on it, and also lift and place the “mill” in suitable place. After completion of the work, it is good to carry out small tests. Of course, the wind generator will not provide a maximum of 250 V, but the result of the work will still be pleasant! Detailed Process the assembly can be seen in the video below.
I want even more interesting and useful tips For summer cottage for next season? How about we find out and turn it into something useful for the household.
You will definitely like this material, as in it we will look at a way to obtain a simple generator from an old computer CD/DVD drive.
First of all, we suggest you familiarize yourself with the author’s video
Let's look at what we need:
- old CD/DVD drive;
- wire cutters;
- soldering iron;
- any plastic case;
- wires;
- hexagon;
- washer.
According to the author homemade generator, the idea is quite effective, since the ratio of the gear ratio to the motor that drives the gear that extends the disc tray is quite large. Thus, it is possible that at low revolutions of the same gear, good revolutions will be obtained on the electric motor, and we will be able to obtain a generator. We will find out at the end of the review whether our plans will work out or not, but now let’s get to work.
First you need to unsolder the board on which the motor is mounted.

Next, we cut off the part of the plastic drive housing that holds the motor, as well as the gear we need. Later we will derive a handle from this gear so that we can turn it and generate electricity.


We take the first wire and solder it to one of the motor contacts.

Solder the second wire to the second contact.

To test the generator, the author of the idea uses UBS inputs, which are installed in a plastic case. Therefore, he glues a piece of the drive with a motor and gear into this body using a glue gun.

To make a handle you will need a hexagon and a washer. These parts need to be attached to each other. The author does this by soldering.

Solder the wires to the pins of the USB connectors.

On the second half of the plastic case you need to make a hole for the gear protrusion.

Finally glue it homemade pen to the gear lug. Our generator is ready.
We continue to recycle plastic bottles. I propose to consider making a vertical rotary windmill from four bottles. The rotation unit used can become a generator of weak currents or an excellent wind speed sensor for a homemade anemometer. Photos and videos of the windmill are shown. The assembly diagram is detailed below.
How to make a windmill from PET bottles with your own hands
1. Necessary tool: heat gun, scissors, drill, knife and screwdriver. Materials used: four identical PET bottles with caps from 0.2 to 2 liters each, a hard drive motor, a plastic vitamin jar, an old sink siphon and a wooden pole of the required length.
2. Disassembling a computer hard drive is considered. To operate, you will need a motor and an overhead plate for fixing the disk plate with fasteners. Fasteners can be used with a Phillips screwdriver, but more often with an asterisk.
3. We begin the work with the most labor-intensive and important unit - installing a rotation unit in the lid of a vitamin jar. To do this, under the end of the engine, strictly symmetrically, with your own hands, cut a hole in the plastic lid of the can with a knife.
Electric motor Can lid Hole
4. We mark mounting holes along the overhead strip and drill them.
5. Install the rotation unit into the cover.
The holes are marked. The rotation unit is fixed.
6. We mark the jar into four sectors and use a well-heated hot-melt gun to symmetrically glue the four lids. Glue is generously applied to the lid and the lid is glued to in the right place. There should be no labels on the jar, and it is advisable to clean the glued areas with emery cloth.
7. Screw the PET bottles into the corks and use a permanent marker to mark the cutouts in the jar. The position of the cutouts determines the direction of rotation of the windmill. The cutouts should be on the same side as shown in the photo, that is, when rotating, the windmill tries to tighten the lid.
8. Cut out the bottles one by one and immediately screw them into place. Screw the jar into the lid - homemade windmill ready. It is useful to check and, if necessary, balance the wheel with a piece of plasticine.
Lids are glued9. The issue of installing a wind turbine initially caused difficulty, but was unexpectedly easily resolved. The inch standards of the hard drive and the siphon from the sink turned out to be the same, and the motor was perfectly fixed with a union nut on the siphon; if necessary, you can add a rubber washer. Before installation, the engine was disconnected from the cover, inserted union nut and the lid of the can was secured back. To evaluate the generating capabilities of the motor, wires are soldered to the motor windings.
10. The end of the pole is tightly inserted into the siphon and the entire structure is installed for testing. The windmill is quite sensitive and in a calm wind it immediately began to rotate slowly.
The rotation unit is fixed


