As they gain experience, many gardeners begin to feel inclined to experiment. Carrying out vaccinations is both a creative process and an indicator of skill. In addition, this manipulation has great practical significance. In the article we will tell you how to graft currants onto cherries, trunks, gooseberries, and plums in the spring, and what types of grafting to use.
All types of currants are easily propagated vegetatively and can be easily grown throughout almost the entire territory of Russia. What practical benefit could there be from grafting these crops, other than the pleasure of the process and satisfying curiosity?
Grafting currants allows you to perform the following tasks:
Growing currants on a trunk expands the possibilities of using this crop on the site.
Timing of currant grafting
According to established practice, currants are grafted either in early spring or during the summer. The choice depends on what goal the gardener is pursuing and what material for the scion he has at his disposal. In the spring, grafting is carried out with lignified cuttings prepared in advance in the fall or winter.
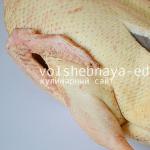
The specific date is determined by the weather, and middle lane usually falls in the last ten days of March. It is important to catch the moment when sap flows on the rootstock, but not to wait for the buds to open. The moment of sap flow begins can be determined by the state of the buds on the rootstock. They should be swollen and well defined.
Tip #1. The beginning of sap flow is also determined by the ease of separation of the bark. If the bark comes off well on a cut branch, it’s time to graft. If it sits tightly, the right moment has not yet arrived.
3 mistakes gardeners make when grafting currants
In order for the graft to take root and begin to grow, it is important to avoid the following mistakes:
Mistake #1. Wrong choice of term.
If you graft ahead of time, the rootstock will not be able to nourish the grafted cuttings, the graft will quickly dry out and will not take root. Delaying the deadlines also leads to rejection of the grafting material.
Mistake #2. Wrong selection rootstock
Don’t get carried away with “one-size-fits-all” vaccinations. Before starting the operation, it is necessary to familiarize yourself with the principles of compatibility of scions and rootstocks.
Mistake #3. Violation of vaccination technology.
Vaccinations must be performed quickly, accurately, and with a well-sharpened instrument. The vaccination site must be well protected from drying out, overheating, frostbite and infections.
 The grafting material must be healthy, not overdried, with buds without a green cone.
Necessary tools for currant grafting
A good tool is a third of the success of grafting. A standard “garden surgeon” kit should include:
 The steel of the grafting knife blade should hold an edge well.
How to choose a rootstock for currants
For currant grafting, both currants and some plants of other species are used:
| Scion | Compatibility | Characteristic |
| Golden currant | Excellent | A rootstock for all types of currants, tested by Michurin’s experiments and the extensive practice of gardeners. Gives frost and drought resistance to plants, increases crop yield. |
| Black currant | Excellent | Black currant can serve as a good rootstock for different varieties of black and red currants. Increases the yield and quality of fruits of the grafted crop. |
| Cherry | Average | An option for experimental gardeners. Despite information about successful foreign experience grafting of currants onto cherries; in practice, numerous graft rejections are observed. In successful cases, the resulting plant has fairly large fruits with an unusual taste. |
| Rowan | Average | Vaccination is justified if there is no more suitable rootstock. The survival rate is low, the grafted material does not adhere well to the rootstock. |
| Gooseberry | good | Gooseberries and currants are physiologically suitable for each other, but it is more advisable to graft gooseberries onto currants, and not vice versa. |
Thus, ideally, for currant grafting, it is better to purchase golden currant seedlings. Especially if grafting is planned for the purpose of growing a standard form. If this is not possible, you can use black currant. All other options are considered only on an experimental basis.
 Golden currant is an unpretentious ornamental crop that produces excellent rootstocks for fruit varieties of currants.
Preparation and storage of cuttings for spring grafting of currants
To plant currants in the spring, cuttings must be cut in the fall after the end of the growing season and the arrival of the first frost. Thus, it will be possible to obtain guaranteed dormant material that will be well stored until spring if you create it the right conditions. The shoots from which cuttings are taken should not be thin. Optimal diameter– 4-5 mm. The cut off shoots are divided into parts 3-4 buds long, sections on both sides are filled with molten paraffin, and the material is tied into bundles according to variety.
Storage of cuttings in winter is carried out in the cold. Optimal temperature from 0 to 30C. Humidity – 65-70%. In regions with snowy winters, gardeners most often place cuttings in bags and bury them in a snowdrift. Another option is a rodent-proof basement. As a last resort, you can try to keep the cuttings in the refrigerator, wrapped in moistened flannel.
Tip #2. To avoid getting the bark of cuttings wet when stored in a snowdrift, it is advisable to place the bunches in plastic bottles or tubes.
Review of currant grafting methods
Any currant can be grafted known method. When choosing a technology, you need to focus on the purpose for which the operation is performed.
| Method | Advantages of the method | Disadvantages of the method |
| Simple copulation | Grafting “branch to branch”, with an ideal match of the diameters of the scion and rootstock. The technique consists of simply connecting slices. The method gives a high survival rate. | It requires sufficient practical experience and manual dexterity to hold the scion and rootstock in position while the wrapping is being done. The junction of the scion and rootstock is not strong enough. |
| Improved copulation | An improved type of copulation that prevents the scion from “sliding” from correct position. Adhesion to the rootstock is excellent, survival rate is high. The technique is accessible to beginners. | The operation requires a little more time compared to simple copulation. |
| Budding | From one cutting you can take more material for grafting. Thanks to small area, the rootstock is almost not injured. The procedure is quick and easy. The survival rate is very high. | Not quite suitable for spring vaccinations. |
| Into the cleft | Scion and rootstock can be different diameters. The technique is suitable for regrafting old bushes. The survival rate is high. | Not detected. |
| For the bark | The scion and rootstock can be of different diameters. The method is used for regrafting old bushes. | The survival rate depends on the accuracy of the procedure. Required great experience to perfectly match the cambial layers of the scion and rootstock. |
| In the side cut | Scion and rootstock of different diameters. The method does not require cutting the rootstock; it just makes a cut in the bark. Trauma to the rootstock is minimal. | The junction of the scion and rootstock requires additional protection from a fracture. |
| Ablactation | The scion material is not separated from the mother plant. The essence of the method is the fusion of two shrubs on their own roots. Used to create decorative green hedges. | It has no practical meaning in terms of increasing crop yield or plant stability. |
 The best survival rate is observed in cuttings with 2-3 internodes.
Currant grafting: step-by-step instructions
Despite the fact that currant grafting can solve many different problems, most often this operation is performed to create currant trees. Vaccination in in this case is performed using the improved copulation method according to the following plan:
The improved copulation method is used not only for the formation of standard currants. As practice shows, this method of spring grafting of currants is also effective for achieving other goals. Read also the article: → “Caring for currants in spring - important rules.”
 Improved copulation increases the contact area between the scion and the rootstock, increasing the likelihood of fusion.
Caring for currants after grafting
After grafting, the currant bush needs careful care.
| Event | Purpose and execution |
| Watering | Immediately after vaccination and then continuously. The tree trunk circle must be mulched to prevent the soil from drying out and the formation of a soil crust. |
| Top dressing | The first feeding is given 2 weeks after the procedure. At this time, nitrogen should predominate in the composition. In the future, complete mineral compositions are used. |
| Trimming | It is important to remove shoots below the grafting site if a standard currant is formed, or to pin the side shoots on a bush one. The procedure is necessary so that the grafted cuttings receive the maximum amount of moisture and nutrition. |
| Loosening the harness | It is necessary from time to time if non-special stretchable material was used. If this is not done, over time a constriction will form, making the grafting site prone to fractures. |
You can remove the harness no earlier than after a year, but it is better to wait longer. If the grafting has taken root successfully and produces large annual growth, it is necessary to forcibly slow it down by tweezing - this way the plant will be better prepared for winter.
Current questions about currant grafting in spring
Question No. 1. Is it possible to budding currants in the spring?
The method of budding on currants is used mainly in summer time. In summer, the condition of the buds and shoots is more obvious and it is easier to monitor the survival rate of the graft. However, you can use this method in the spring. The main thing is to plant the eye on an area of the rootstock protected from the sun.
Question No. 2. From which branches should cuttings be taken to graft currants?
For spring grafting, cuttings are taken from annual shoots in which vegetative buds have formed well and the wood has matured. In terms of survival, cuttings taken from the southern, well-lit part of the crown of the mother plant are more effective. It is better to choose them from the middle part of the crown (not from below or from above).
Question No. 3. Why take cuttings in the fall? Is it possible to take them in the spring, just before vaccination?
The point of harvesting cuttings in autumn is to reduce the risk of suitable shoots freezing. In spring there is no guarantee that the mother bush was not damaged by frost. But if the winters in the region are not too severe and the temperature does not drop below -200C, harvesting cuttings in the spring is possible.
Question No. 4. How long does it take for a cutting to take root when grafting currants in spring?
If the operation was successful, after 2 months the scion fuses with the rootstock. This is noticeable in the state of the grafted cuttings - it opens buds and begins to grow actively. At this time, the plant must be protected from infections and pests - they willingly land on currants that are not yet strong after the operation. If the harness is not tight, it is better to keep it longer to reduce the risk of fractures.
Cherry is one of the most frequently grafted garden crops. Both the timing and method of vaccination are important. According to the timing, vaccination is usually divided into spring and summer.
Grafting belongs to the category of vegetative methods of plant propagation, which are based on combining parts of several garden crops. The technique is in demand when it is necessary to propagate fruit or berry trees and bushes.
Purpose of vaccination
The peculiarity of combining the plants themselves or their parts is the ability to obtain the optimal combination of qualities of the strongest and most resistant to weather conditions and diseases of the plant with high performance and quality characteristics harvest of another.
It should be remembered that the resulting vaccinations hybrid plants are not able to form fruits with similar quality indicators, and seed material will be produced exclusively on the upper part of such a plant.

The concept of scion and rootstock
The plant from which the stem part and root system is preserved is usually called the rootstock, or base.
The part of the plant represented by the stem, leaves or fruits that is grafted onto the first plant, or rootstock, is the scion, or tip.
For optimal result you should choose one of the following types of rootstock:
- Forming rootstocks have lower indicators of resistance to climatic conditions and damage by bacterial microflora, but are characterized by high rates of formed yield.
- Vegetative rootstocks more resistant to weather changes, but have some fruiting disadvantages. They are optimal for use in long and warm seasons.
To determine the most optimal variety for use as a grafted plant, all qualities of the rootstock should be assessed.

Harvesting cherry cuttings in spring
The success of a procedure such as grafting directly depends on the density of contact of plant tissues on the rootstock and scion, which are represented by the vascular cambium. It is for this reason that you should prepare the material used correctly and in a timely manner and make sure that plant tissue high quality and suitable for vaccination.
- Cuttings of any fruit plants should be carried out in autumn period, closer to winter, but before the onset sharply negative temperatures.
- Cuttings harvested from apple and pear trees can be stored in moistened sawdust on the bottom shelf of the refrigerator.
- Cuttings taken from stone fruit plants are well preserved when frozen. Freezing should be carried out in frozen sawdust, having previously wrapped the cut cuttings in a damp rag.
How to graft a cherry onto a plum into a cleft (video)
Vaccination methods
Currently, several grafting methods are actively used. Knowing the features and technique of each grafting method, the gardener can choose the most optimal and convenient option in each specific case. It should be remembered that it is advisable to carry out such activities in the morning or immediately after sunset.
Copulation
The method is quite easy, but requires strict adherence to the execution technology.
Choice of scion and rootstock
- The scion and rootstock cuttings must be dormant and have the same diameter, varying from seven millimeters to one centimeter.
- The standard length of the cutting should be about thirty centimeters.
- The cuttings must have at least three and no more than five buds.
Preparation of scion and rootstock
- Remove the terminal end on the scion.
- Make a bevel cut at the base of the scion.
- Make a similar bevel cut on the rootstock.
- Cut suitable “tongues” to secure the scion to the rootstock.
- Combine the scion with the rootstock and fix it using a special grafting tape or other elastic material.

After four weeks, the wrapping should be removed from the grafting site so as not to limit the growth of the wood. Below the grafting site, all growth should be removed regularly.
Budding
The most popular and widespread method of vaccination. Budding can be done even by a novice gardener.
Preparation of the rootstock
- Cut the area into a quarter of the rootstock at an angle without removing the bark.
- Cut a small section, aligning it with the corner cut until you have an indentation and remove the bark.
Scion preparation
- According to the size of the cut section of the rootstock, cut a scion cutting with a bud in the central part.
- Try the scion on the rootstock, adjusting the dimensions if necessary.
Direct grafting
- Place the scion in the recess on the rootstock, making sure that there are no gaps and that the fit is as tight as possible.
- Secure the scion to the rootstock with any elastic material.

The best option is the use polyethylene film. When fixing, you should not wrap the scion area with the bud with film. The retainer must be removed after four weeks.
At successful execution the bud will begin to grow, and next year You will need to make an incision a centimeter above the awakened bud on the scion and remove any growth below the scion.
Into the cleft
Preparation of the rootstock
- Make a perpendicular cut on the lower branch, the length of which is at least fifteen centimeters.
- Make a central split of the rootstock to a depth of fifteen centimeters.
Scion preparation
- Cut off the end part and base of the scion cuttings.
- Make a bevel cut on the scion, the length of which corresponds to the depth of splitting of the rootstock.
Direct grafting
- Having widened the split on the rootstock, insert a beveled cut of the scion there.
- Seal with wax garden varnish or emulsion all exposed wood after grafting.
Any growth that appears under the grafting site should be promptly removed. A scion that has not taken root or is too weak also needs to be removed.

On the bark
Cuttings are taken from healthy and productive plants, and the grafting itself must be carried out in accordance with installed technology. The method is relevant when there is a rootstock that is too large for standard copulation.
Choice of scion and rootstock
- A high-quality cutting has three branches at rest with at least three and no more than five buds.
- The length of the cutting should be about thirty centimeters.
- The rootstocks should be straight and smooth and have a diameter of five centimeters.
Preparation of scion and rootstock
- Trim a viable branch with healthy wood for the rootstock.
- Cut scions, the length of which should be about twelve centimeters, with five healthy buds.
- At a distance of seven centimeters from the end of the scion, make a beveled cut extending to the base.
Direct grafting
- In accordance with the size of the scion cuttings, make using sharp knife marks on the rootstock.
- Cut off the bark of the rootstock according to the markings made with a knife.
- Place the scion cuttings on the indentations in the rootstock and, aligning them tightly, secure each scion with a pair of nails.

The cut area on the rootstock should be carefully treated using a special wax composition, garden varnish or emulsion. Any growth that forms under the grafting site must be removed.
What can you graft cherry onto?
Initially, you should grow or select a high-quality rootstock, healthy, strong and young. The thickness of the stem part can vary from three to ten centimeters. It is allowed to use viable and maximally strong branches with a diameter of at least ten centimeters. In addition, plant compatibility should be taken into account.
Cherry
Grafting cherries onto cherries is the most optimal and common option. The most successful is to carry out spring vaccination. Both regular varieties of cherries and options combined with felt cherries can be used.
Cherries
This combination is often successful, which is due to the use of rootstock and scion from representatives of the same species. When vaccinated correctly, optimal timing The cuttings take root quite quickly on the rootstock. Any variety of cherries can be used.

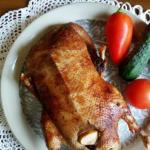
Currant
Interesting way Currant grafting onto cherry rootstock became widespread in Bulgaria. Here the cuttings are prepared in early spring followed by storing the material under the snow or in cellars. In the last ten days of March, grafting is carried out using the butt or split method.
Bird cherry
A very popular option. Bird cherry is widespread in the central zone of our country, it is a very unpretentious and winter-hardy plant, which allows you to obtain the highest quality, frost-resistant and viable rootstock.
Cherry plum
Gardeners quite often use cherry plum as a grafting material., which is due to the presence of this fruit tree very strong and hardy root system, which has enough high level frost resistance. Of course, it is also possible to carry out the reverse version of grafting: cherry plum to cherry.
Cherry on plum
The best option is to use semi-wild plums or sloe, which are characterized by easy adaptation to unfavorable climatic conditions and resistance to most diseases.

An interesting option is the grafting of felt cherries onto sloe or plum trees. As a result, it is possible to obtain a low-growing tree with a wide, spreading crown and a variety of flowers resembling cherry blossoms.
When too warm winter It is possible to harvest cherry shoots for grafting. The cuttings are cut in mid-March and stored wrapped in a damp rag on the bottom shelf of the refrigerator. The technique for grafting any stone fruit plants involves using an exceptionally clean and sharp budding or copulating knife.
All actions during vaccination should be performed as quickly as possible. For fixation, it is recommended to use a special grafting tape, which can be replaced with polyvinyl chloride or polyethylene film.
Cherry: budding (video)
Strict adherence to the rules allows you to get a healthy, fully fruit-bearing and viable tree after grafting.
Everything you need to know about cherry grafting
Experienced gardeners know that trees need to be grafted periodically, preferably in the spring. But for those who are not sure about the reasons for vaccinations, let us explain. It is necessary to graft trees in order to create new varieties of trees or update existing ones; with the help of grafting you will get rid of the variety that you planted, but for some reason you didn’t like it, and also, importantly, this procedure is the most quick way propagation of a tree variety in which the quality of the fruit and yield do not suffer.
Cherry grafting using copulation method
There is another secret that the grafting conceals - rapid fruiting. For example, in the case of cherries, they usually begin to bear fruit in the 5th year, but when grafting is carried out, the tree will begin to bear fruit in the 3rd year, or even in the second. In this article we will tell you:
- about the types of vaccinations and their characteristics;
- about combinations for cherry grafting;
- about the time when cherries can be grafted;
- compatibility of cherry with plum, apricot, apple tree.
How can you vaccinate cherries?
In gardening, there are many possibilities for grafting trees, but for stone fruit trees, and especially for cherries, three methods are recommended:
- cherry grafting using improved copulation method;
- grafting cherries into clefts;
- grafting onto tree bark;
- kidney grafting, budding.
Let us immediately make a reservation that all of the listed types of vaccination are best carried out in the spring. The method of improved copulation is used when the grafted branch (scion) and trunk (rootstock) have the same thickness. This happens when the cherry tree is still young, and the cut branches ready for grafting are also selected in thickness and size. In this method, identical cuts are made on the scion and on the rootstock, then the rootstock and scion are joined, secured with garden varnish (or oil paint), and then tied.

Cherry grafting into cleft.
When carrying out this type of grafting, it is important that the exposed cambium layers on the rootstock and scion are in contact with each other. The cuts on the rootstock and scion should be oblique, about 2.5 cm deep, and towards the ends of the cuts you need to make cuts about 1.5 cm deep. Remember that the knife, hands and all tools that are used in this process must be perfect clean. Otherwise, there is a risk of infection of the tree, and the infected plant will never be able to be grafted, since all its energy will be spent on treating its own diseases.
Let us explain what cambium is. The cambium is a layer in a tree trunk that is responsible for the plant's ability to heal its own wounds. It is thanks to this property that vaccination became possible. Cambium is the third layer of the trunk from the outer edge, which comes after the bark of the tree, and a thin layer that follows the bark and is called phloem in biology. This substance is released best and most in the spring, hence the advice to start vaccination in the spring.
If the rootstock is much thicker than the branch being grafted, the split grafting method is used. You can, if necessary and if there is sufficient space in the trunk of the rootstock, prepare two cuttings for grafting. In this method, the rootstock is split in two and cuttings are inserted into the cut site, which are then tied. In this type of grafting, the rootstock stem must be split to a depth of 2-3 cm.
With the bark grafting method, two scions can also be used. This method is used when the trunk is much thicker than the cuttings and it is possible to place the cuttings under the bark of the trunk. Longitudinal cuts 2-3 cm long are made in the bark and cuttings, previously cut 2 mm above the rootstock itself, are placed under the bark, at the cut points.

Cherry bud grafting
Not only in spring, but also in summer, you can graft cherries with buds. This method is also called budding. About a week before grafting, all shoots (side shoots) must be cut off on the rootstock. Cuttings can be cut directly on the day of budding. When choosing cuttings, pay attention to the buds; they must be formed. On the day of budding, after collecting the cuttings, it is necessary to cut off the buds with a knife so that a small dent remains. Then the rootstock and cuttings at the place of such a cut are connected in a T-shape.
What is the best way to graft cherries?
Experienced gardeners say that you can graft anything and with anything. Indeed, there have been cases of grafting cherries with currants. The result of such an original crossing is a currant tree with large fruits of a strange taste. Therefore, it is still necessary to correctly combine cultures when grafting.
A simple rule of compatibility is to combine better views and varieties in the same breed. Cherry is a stone fruit tree, and that is why it will not go well with currants or apple trees, but things will be better with apricots. Although, this does not exclude experiments in combining seemingly incompatible cultures. But even within the same breed there are inconsistencies. For example, it is generally accepted that cherry plum is suitable for all stone fruit crops, but this rule does not apply to cherries.
The ideal combination for cherries and sweet cherries is a graft to the cherries themselves, and also to bird cherry. But what about grafting cherries onto cherries, you ask, because the question of combining cherries with cherries is also often of interest to many gardeners, and not only because these crops are so similar. Our answer is simple - you can combine! You will get delicious large berries that are well suited not only for juices and jams, but also as a dessert, in in kind Same.

Cherry bark grafting
When is the best time to graft cherry trees?
Cherry grafting time is spring and summer. Spring, because it is at this time that sap flow in the tree occurs best, which means the cambium, which was mentioned at the beginning of the article, will be produced in abundance by the tree.
If for some reason the spring cherry grafting is missed, then the summer grafting also does not threaten that the cuttings will not take root. By the way, summer vaccination carried out when spring vaccination was not successful. Nothing prevents you from carrying out this procedure again if the tree is healthy and not infected with anything. Vaccination is not usually practiced in winter, and we would not recommend it. In cold weather it is impossible for cuttings to take root. Some gardeners look at moon calendar before proceeding with such procedures.
Grafting cherries to tree species from other crops
Since many people are concerned about the possibility and success of grafting cherries onto apricots, plums and apple trees, we will consider this issue. Apricot and cherry are not compatible, only because apricot has very fragile branches. But with a skillful approach to this matter, you can achieve positive results. If you really want to graft an apricot onto a cherry, follow all the usual grafting rules, and the result will not be long in coming.
This desire is quite understandable, since one of the reasons for cherry grafting is the aim to obtain more large fruit, and apricot immediately comes to mind. The apricot will give the cherry not only its large shape, but also the color it has. Things are better with plum trees, and when grafting these two trees, it is best to give preference to cleft grafting. You should know that plum goes well with almost all stone fruit trees.

Keep an eye on the food in the hives. There should always be reserves. Spread 200 g of honey on the film and feed the bees. Repeat every 8-10 days. Read about spring work.

We are engaged in selection. We hatch queens. Strong families We don’t touch those that gave a good honey collection. There is nothing to worry about if they gain strength only for the spruce bribe.

Start cleaning the bottoms. Health and development of families will help you in good honey collection. In some hives it is easier to replace the trays. Heavy soiling washed with hot lye.

Exhibition of hives.
When the honey plants begin to bloom. then the flight radius will be still small. Choose a suitable place with a good microclimate. Read more about the place of choice.
http://roypchel.ru Recently, it has become popular to grow familiar crops using new technologies. Standard currant
not only looks beautiful, but is in many ways superior to ordinary berry bushes. To grow such a plant on your site, you need to know a number of important requirements.
Standard currant - varieties Grow on your own personal plot You can have red, black, white and golden currants. U standard shrubs
- There are a number of advantages that cannot be ignored:
- As a seedling, you can use a cutting with one bud at the top.
- You can plant bushes at a distance of about 30 cm from each other.
- Varieties of standard black currant, as well as red and golden ones, give a rich harvest, which is much easier to harvest. The berries have a more pronounced taste.
The lifespan of the plant is longer than that of the shrub form and is 15-18 years.

This is only the main list of advantages that standard currants have, but such plants also have disadvantages. The bushes are not protected from strong winds, and they do not tolerate prolonged frosts. Periodically you will have to remove unnecessary shoots and pinch off the tops. The productivity of a standard plant drops sharply due to the lack of rooted shoots.
Black standard currant This variety is popular because the berries are not only healthy, but also sweeter. It is worth noting that standard blackcurrant, compared to other varieties, is more sensitive to frostbite on branches, so it cannot be grown in areas with cold climates. The best varieties

in order to grow them in a standard way: “Stork”, “University”, “Memorable” and “Monastic”.
Red currants on a trunk

Red berries contain many useful substances and are often used in cooking. This species, when compared with the previous one, is less whimsical, so it can be grown in different areas without fear of frost. Red standard currants grow well if you use the following varieties: “Viksne”, “Bayan”, “Natalie”, “Rondom” and others.
In Europe, this species is highly valued, which not only serves as a decoration for the territory, but also produces a rich harvest of delicious berries. In order for currants to grow on a trunk without problems, it is best to use the “Imperial Yellow” variety, which is characterized by large berries. Unlike black currants, yellow varieties They bloom later, which helps protect the flowers from frost.

Standard currant - how to grow?
It may seem to many that it is difficult to grow a tree on your own plot, but if you know a number of rules, then you can achieve results. Before you figure out how to grow a beautiful currant tree, you need to decide suitable place. It is better to choose slightly acidic, sandy loam and other soils with good moisture holding capacity. It is first recommended to thoroughly drain the soil and prepare drainage ditches. In the fall, it’s worth digging up the ground well, spreading out organic fertilizer, for example, manure or peat.

How to plant standard currants?
There are certain instructions that you should follow to get the desired result:
- In early August, plant a thick, bare summer shoot and pinch off the top. Please note that seedlings must be planted deeper than for ordinary currants. You can plant standard currants in the spring, but only when there are no longer night frosts.
- When shoots appear at the top next year, you should pinch them off in August. This must be done on each branch. Shoots and leaves that are located below the established trunk length should be removed. This also applies to root shoots.
- In the third year, a dense crown should form and in order for it to form beautiful shape, it is recommended to pinch the top of each branch. Don't forget to remove root shoots and shoots. If the standard currant develops well, then this year it will be possible to get the first harvest, albeit in small quantities.
- Next year, fruiting will be abundant and the trunk itself will already be well formed, but this does not mean that pinching should be abandoned. It is carried out as indicated above. Old branches that have no leaves or have turned black should also be removed. Similar procedures must be carried out every year.

How to form standard currants?
It is difficult to make a standard from an adult bush, but if you follow a number of tips, the result will be achieved.
- The formation of standard currants should begin in the spring, before the buds open. Inspect the bush and select one shoot, which should be straight and thick. Another important point– it should grow at right angles to the ground. If there is no such branch, then select the option that is as close as possible to the specified criteria.
- The selected shoot with buds and branches remains, and all other branches are cut out at soil level.
- You should also remove branches, except for the very top ones, and they should be removed right down to the base, that is, there should be no stumps left.
- After all these manipulations, the base for standard currants is ready. It is recommended to dig supports nearby so that the plant does not break from the wind. In addition, it will help the currant branch straighten if necessary.
- In summer, if growth appears from the ground, be sure to remove it. If side branches appear on the trunk itself, do not forget to cut them off.
- In autumn, another mandatory procedure is carried out - pinching the tops of branches. This is necessary in order for the dormant buds to awaken and new shoots to form.

How to plant currants on a trunk?
To get vaccinated, follow these instructions:
- Prepare an annual seedling that needs to be prepared in advance (in early spring). It can be stored in the cellar, protecting it from drying out. Kidneys should not be allowed to appear.
- To get a currant tree, grafting is best done at the end of March. Take the scion and make a longitudinal smooth cut. Drawing the knife away from you. The length of the cut should be 2-3 cm. Repeat the same action on the rootstock. Try to keep the cut identical to the previous one.
- The height of the copulation depends on the desired height of the trunk. The end of the scion cutting needs to be trimmed, leaving 3-4 eyes, and lubricate the cut.
- Connect the cuttings with sections, using a special film for grafting for fastening.

Caring for standard currants
Recommendations regarding proper care, are identical to those that are acceptable for the bush form of currants. By following the rules for growing standard black, red, yellow and white currants with your own hands, you can get a rich harvest of tasty and healthy berries every year.
- The ground around the trunk must be regularly loosened and weeds removed. From time to time it is recommended to carefully dig up the periphery trunk circle. Can be done using grass clippings or compost.
- Standard currant is a moderately moisture-loving plant. In hot weather, bushes should be watered more often.
- Feeding is important for proper development. It is recommended to use mineral water several times a year. organic fertilizers. It is important not to exceed the dose nitrogen fertilizers. In the fall, each bush should be fertilized with a mixture of 100 g of superphosphate and 30 g of potassium chloride, and then mulched with a mixture of peat and rotted manure. In spring, it is better to fertilize the soil, using 15 g for every 1 sq.m.
- It is important to remember that standard currants do not tolerate wintering well, so it is recommended to protect its crown. A covering material, for example a jute or lutrasil bag, is suitable for this purpose.

How to propagate standard currants?
To get another currant tree, you need to follow these tips:
- In July, a cutting should be cut from the middle part, which should have five eyes. He needs to be dropped off at open ground, leaving only one top bud at soil level.
- In the fall, before the onset of cold weather, it is important to cover the cuttings with foliage.
- In order for the propagation of standard currants to be effective, in the spring it is necessary to remove the lateral shoots to obtain one shoot. It is important to regularly water and feed the plant, and at the beginning of summer the fertilizer should be nitrogen, and at the end phosphorus-potassium.
- Next year in the spring you need to trim the shoot so that its height does not exceed 85 cm. 3-4 buds should remain at the top, and remove the rest.