Grouting joints tiles in the bathroom is both a simple and responsible task. Knowledge of the correct implementation of this process and correct selection grout mixtures.
Improper technology for grouting tile joints will lead to an unsightly appearance, as well as the appearance of mold and mildew due to increased humidity levels.
Purpose
Tile grout is a dry, cement-based material. It is used to fill the seams between laid tiles, which gives the surface a decorative effect and protects it from moisture penetration.
Before using grout, tile joints are prepared and thoroughly cleaned of tile adhesive. Floor tiles must be vacuumed. The grout mixture is diluted with water to a creamy consistency and applied to the joints using a spatula.
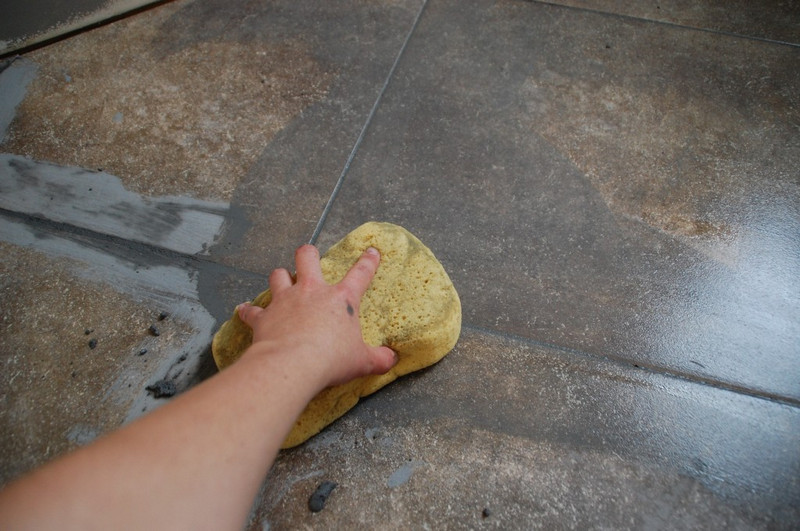
Then, using a sponge or damp cloth, the grout is given a concave shape and smoothness. All grout residues are removed from the surface of the tile before it hardens.
Correct choice of composition
Necessary grout mixture is selected after familiarization with its composition and properties. When used in a bathroom, its moisture resistance is very important.
Currently, there are two types of grouts on the domestic materials market. The first is made on a cement basis, and the second consists of epoxy resin.
Cement
They allow moisture to pass through and are afraid of cleaning agents. chemicals. In terms of color, such grouts are available in gray and white.
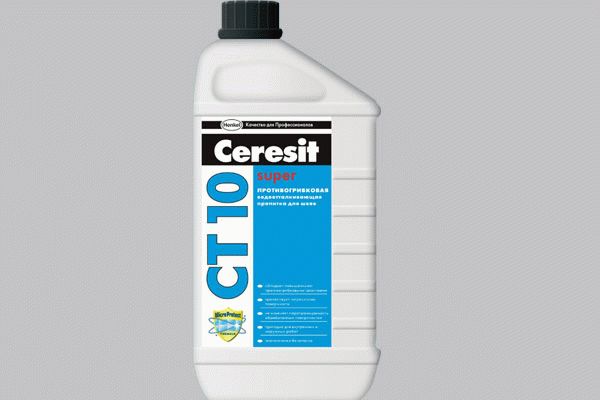
When using cement grout in the bathroom, use a water repellent that makes the surface moisture resistant.
Epoxy
They consist of resin and a kind of hardener. Seams made from this grout are resistant to various damages and applications. chemical substances. They retain color for more than 50 years. The cost of such grout greatly exceeds the price of cement-based material, so it is rarely used in domestic conditions. Most often, this grout is used for joints wider than 6 millimeters.

With latex
Stores also sell grout for joints with the addition of small quantity latex, which after application requires coating with a moisture-resistant varnish. In this case, the grout retains its natural color for a long time.

Leading manufacturers
Today, dry grout mixtures are supplied to the domestic market by many manufacturers.
Almost a third of the domestic market is occupied by the company producing grout mixtures Knauf. Sales of this manufacturer's products are increasing year by year. This company has been known in Russia for more than twenty years. Its branches are located all over the world.
Dry grout mixtures from the manufacturer Volma are quite widely known to Russian consumers. They come in dozens of names. The company is in second place in the domestic market of grout mixtures. It has five operating factories.
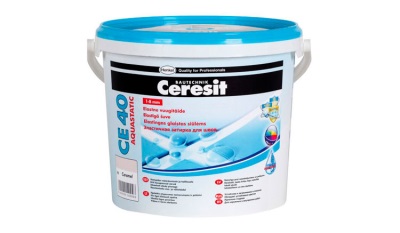
The most renowned manufacturer modern line grouting tile joints is considered German company called Henkel. He produces a whole range of finishing materials called Ceresit. All products of this popular brand are of excellent quality, which is quite typical for German production.
Grout mixture "Ceresit" does not absorb various pollution and has increased frost resistance. This allows it to be used outdoors, as well as in rooms with high humidity levels. This grout is also used when tiling modern heated floors in any room.
The manufacturer of modern cement-based mixtures is a group of companies called Yunis, which is in second place in terms of total production volume. All company products have a five-year guarantee on the results obtained. finishing works using manufactured materials.
Branch of the famous French manufacturer Saint-Gobain located in Russia produces large volumes of high-quality dry grout mixtures. The company's products are in demand in more than 42 countries around the world.
Porous tiles
When repairing, grouting tiles with a relief pattern is done carefully, because the grout that gets on the surface of the tile clogs the applied relief and leads to damage to the material.
When working with this view modern tiles The grout mixture should be applied with a finger wearing thin rubber gloves. Any grout remaining on the tiled surface should be washed off immediately.
For the first batch of work, a small part of the wall or floor covering should be allocated. If a positive result is obtained in this area during the work, then you can safely complete the entire amount of work.
Selecting the color of the mixture for the seams of ceramic tiles
The color of the grout used to grout the seams of ceramic tiles is of great importance. To everyone modern manufacturer a wide range is produced color range grout mixture, with the help of which the desired color is selected.
The seams of tiles that have standard parameters are most often treated with a mixture of a contrasting color, giving the surface a strict and expressive look. If the tiles are laid poorly, this color will highlight all the shortcomings that have arisen.
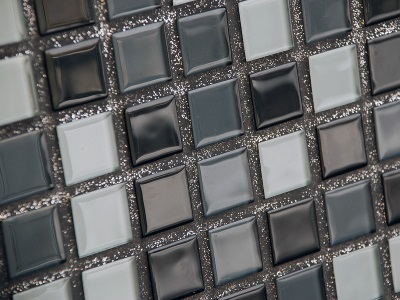
For a fashionable smooth mosaic with a relief structure, the color of the grout mixture is selected in one tone, which allows you to make the structure noticeable. At the same time, the contrasting color emphasizes the size of such tiles. Glass modern mosaics are most often treated with a transparent grout mixture.
To easily determine the color, purchase a piece of ceramic tile and match the grout to it. If it goes well with the tiled surface, you can purchase it for the entire area to be treated.
Transparent tile grout
The clear grout consists of a hardener, glass chips and epoxy resin. It must be remembered that this grout is not completely transparent.
Due to the fine glass chips in the composition, light passes through the grout, transmitting the color of the material inside the joint. This grout is very convenient for processing small joints of about 2 mm in mosaic compositions. Sometimes mosaic tiles can stick to the grout.
The main purpose of this grout is to preserve the excellent appearance of the tiled mosaic, the seams of which do not stand out, so it looks natural. The transparent grout solution is prepared in small portions using electronic scales. This is required for uniform, correct application and convenient leveling, as well as for timely cleaning of the tiles from material residues.
If this is not done, within 24 hours the epoxy grout will harden and a whitish film will appear, which can only be removed with an acidic chemical cleaner. After two days the residues are removed only chemical acids. After a week, only a grinder will help remove the remaining grout, which will damage the interior. Work carried out with such grout requires slowness and accuracy. It must first be carried out using a probe.
Instructions
When repairing, tile seams are rubbed down in several stages:
- The materials are mixed to obtain a solution.
- The mixture is aged for better wetting.
- The mixture is re-mixed.
- The working solution is distributed.
- The tiles are cleaned of excess grout.
Grout for tile joints prepared in the following way:
- Liquid is poured into a dry bucket.
- Dry material is gradually added and mixed using an electric mixer, which must be completely immersed in the solution to prevent air from entering the mixture.
- After mixing the entire mixture with the added liquid, the resulting solution settles for ten minutes.
- The grout is thoroughly mixed until the lumps disappear.
Grouting of tiles is carried out as follows:
- The prepared material is laid out in a slide on the tiled surface.
- The solution is distributed on the surface with a grout float, which is held at an angle of 30 degrees relative to the tile.
- Then, using a trowel, the working solution is pressed into the seam to fill it more densely.
Grout fills all the voids near the tiles formed after applying the adhesive layer.
Finally, having chosen suitable tiles to the bathroom, you have completed a long and difficult process its installation But as if something was missing, the seams between the tiles look sloppy and this really spoils the overall picture. In order to fix this, it is necessary to do one more operation - grouting the tile joints. We will tell you about it today.
Types of grout for tiles
It must be said that today the market for construction and finishing materials offers many different types of grout. After all, grouting ceramic tiles in the bathroom not only performs aesthetic functions and smooths out defects, but also serves as protection against moisture, mildew and mold. In this case, you need to choose the right grout. 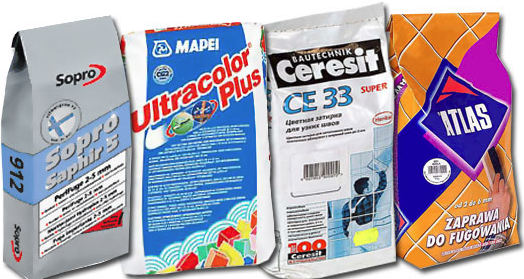
There are two main types of grout used: cement-based or epoxy resin-based grout. Each type has its own characteristics. It must be said that for DIY repairs, a cement-based composition is most often used (it is also called silicone grout for bathroom tile joints). This grout is made from a dry mixture that must be diluted with a liquid (it can be water or latex). The resulting composition is very convenient to use, it can fill even the smallest cracks and does not require special skills to work with it.
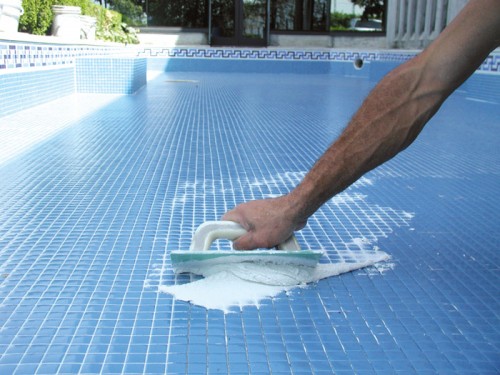
Resin grout for bathroom tile joints is very durable and resistant to any impact. But working with it requires some special skills, since the composition is very viscous. In addition, this type of material is characterized by a fairly high cost. Therefore, it is still more often used for finishing special-purpose premises with a high degree of humidity, for example, swimming pools. If you decide to use this type of grout in your bathroom, keep in mind that it is only suitable for tiles with a thickness of 1.2 cm or more.
What else do you need to know to choose grout? In order for you to get a cohesive design, it is very important to choose the right grout color. Manufacturers offer us a wide range of grout colors. The most popular option is choosing grout to match the color of the tile. But some people with original thinking, on the contrary, choose a contrasting color.
When choosing a color, it is important to remember that white is not very practical; it will quickly become gray shade. Light shades mask unevenness better than dark shades. Before using grout, you should apply it to a small area and wait until it dries completely, as its color may change. Moreover, given high humidity indoors, you need a moisture-resistant grout for bathroom tile joints.

The price offered by manufacturers for grout material varies depending on its type, volume, and manufacturer. We recommend that you choose only trusted manufacturers who have proven themselves in the market for the production of construction and finishing materials; in this case, the quality of the materials will not disappoint you.
Instructions for grouting tiles in the bathroom
Grouting the joints in the bathroom should begin no earlier than 24 hours after the tiles are laid. This is necessary for the glue to dry.
Before starting work, you should thoroughly clean the seams between the tiles from dust and dirt. At the same stage, you need to carefully remove the tile separators, since the grout in these places will most likely change color if they are not removed.
In addition, you will need a small list of tools, including a bucket or any other container for the grout solution, rubber and metal spatulas, a sponge, and a clean rag.
When you have prepared everything you need, you can proceed to diluting the grout. The dry solution is diluted with water in the proportion indicated on the package. Moreover, first you should pour water, and then pour the mixture into it and carefully mix with a metal spatula. Keep in mind that the consistency should be similar to thick sour cream.
It is also worth noting that you should not dilute the entire package at once, in this case the composition may harden while you rub the seams. It is better to dilute a small part of the mixture, and as it is used, dilute another part.
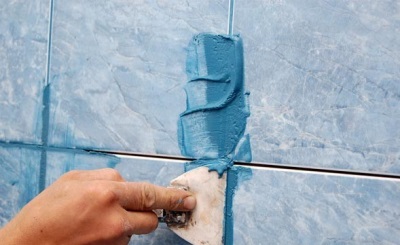
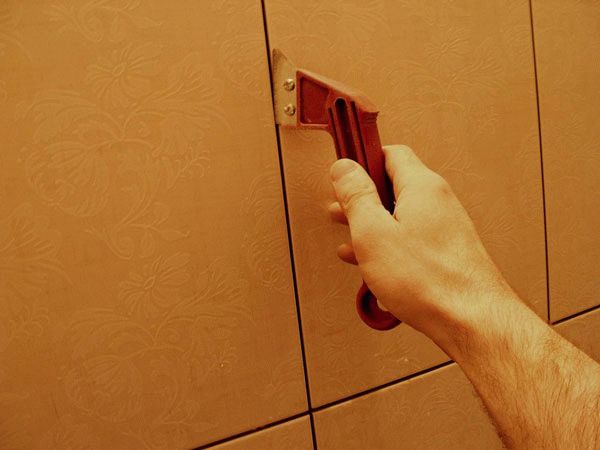
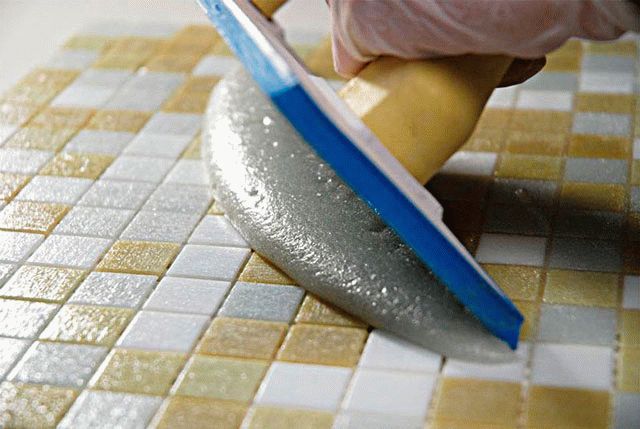
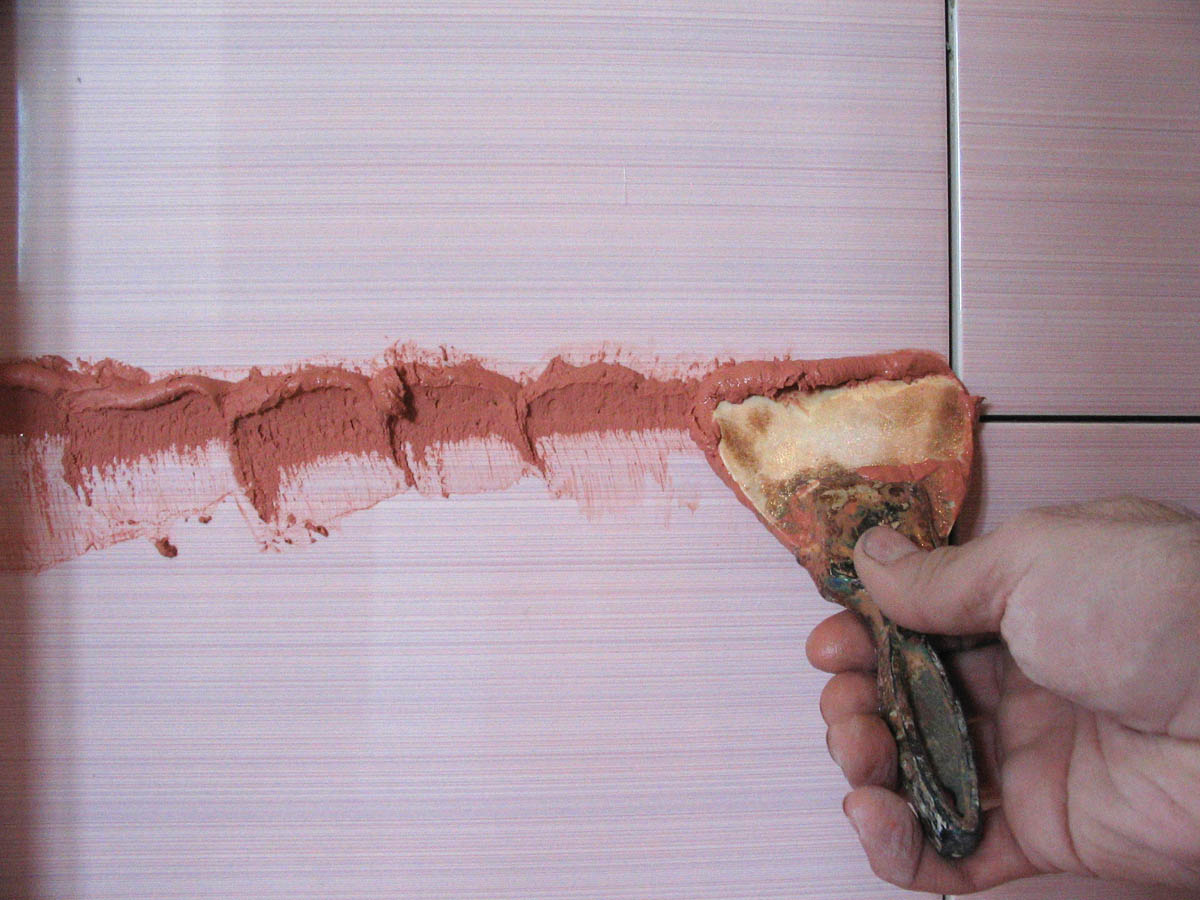
To apply grout into the seams, it is most convenient to use a rubber spatula. Using this tool, the mixture must be gently pressed into the seam of each tile. You can see how to do this in the photo below.
The remains from the tiles should be collected with the same spatula and carefully distributed further along the seam. So you need to process all the tiles sequentially. After you have spread the grout into all the seams, you should leave the mixture to dry a little (half an hour will be enough).
After the mixture has hardened a little, you can wash off the excess from the wall. You should not leave the grout for too long; in this case, cleaning it will be very problematic.
In this case, the grouted seams are flat. If you want to give them a concave, rounded shape, you should use, for example, a piece of cable to press the grout inward.
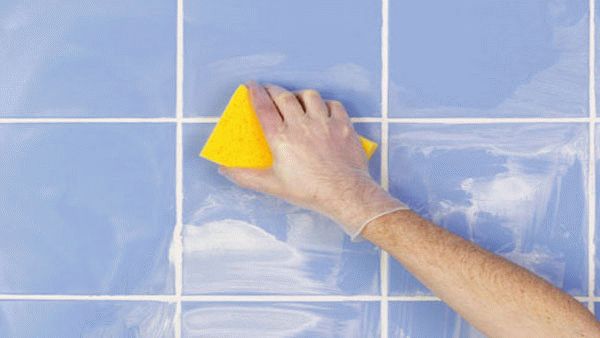
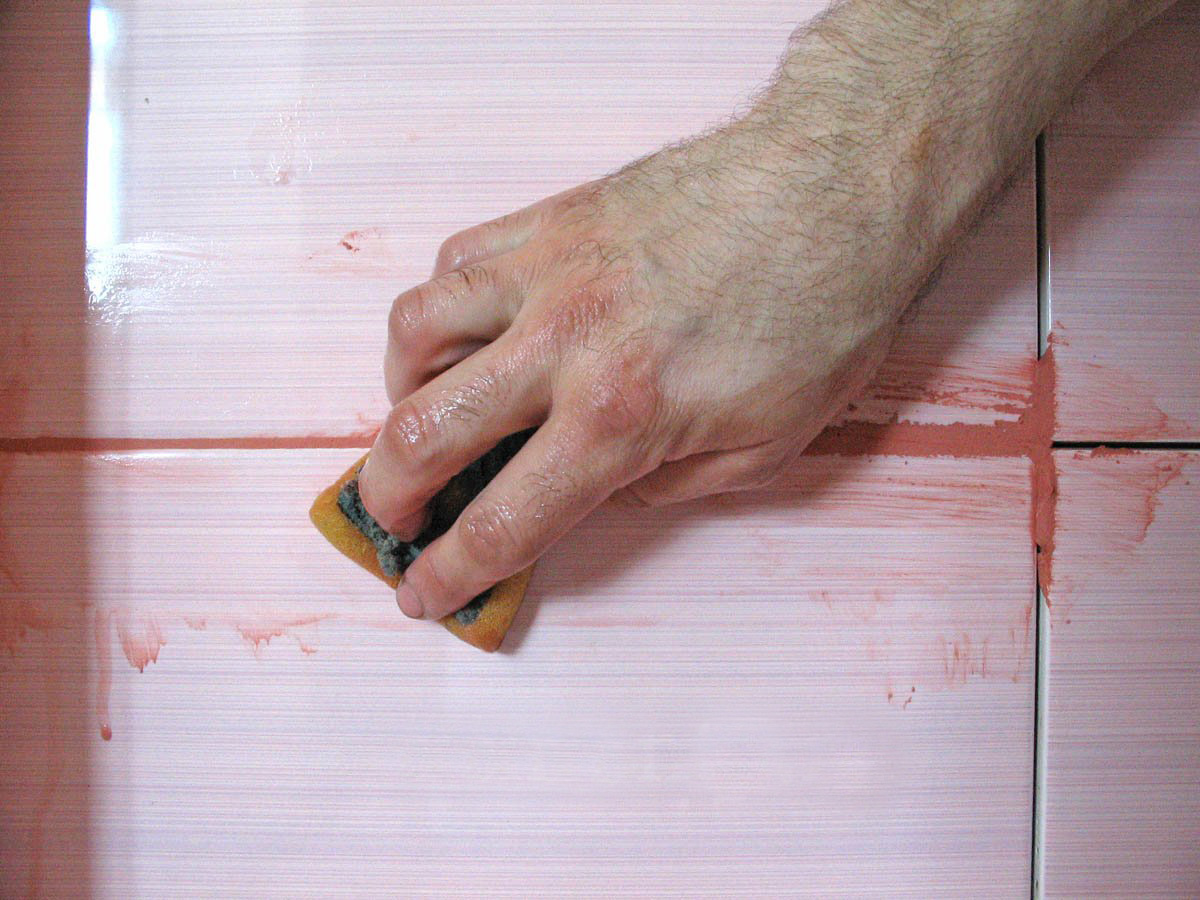
Now you will need a bucket and a sponge to remove any remaining grout from the tiles. This should be done very carefully, otherwise you may remove excess. The sponge should be wetted as often as possible so that there are no streaks left on the tiles.
After the tiles and grout have dried, you should go over them again with a dry cloth, this will give the tiles shine and remove any remaining dust.
It must be said that professionals, in addition to using grout, recommend using a sealant at the final stage. It will protect your bathroom from mold and mildew, and will prevent moisture from penetrating into the seams and joints between the tiles. But, of course, the sealant cannot replace the grout, so it is worth using these materials together.
Grouting seams - video in this article.
youtu.be/WEKlGW_rWlg
As you can see, grouting tiles in the bathroom is a very important process, not only creating an aesthetic appearance for your bathroom, but also protecting it from various harmful effects. But you can easily do it yourself if you follow all the instructions and recommendations. Have an easy repair!

Construction Metal cabins or trailers for temporary residence consist of a supporting metal frame, sheathed on the outside with sheet metal...
It is not for nothing that they say that water is the source of life on Earth. After all, we use water every day for a wide variety of purposes: maintaining the viability of...
Polyurethane foam. PPU Spray foam. The use of polyurethane foam allows you to simply and quickly insulate a cabin. For interior decoration use vapor-tight...
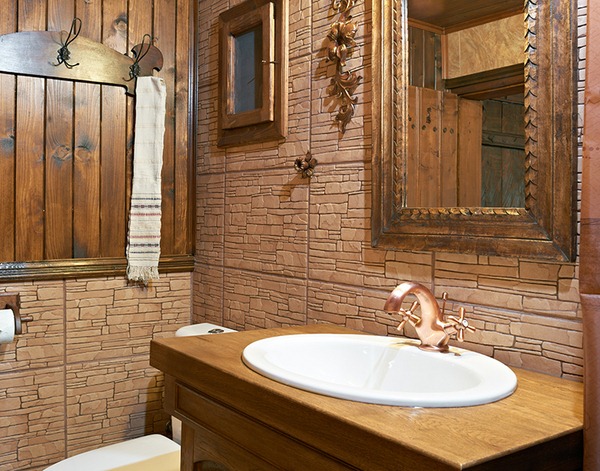
More and more often you can see the decoration of a bathroom with wood because of its environmental friendliness, attractive appearance and unique properties. When finishing...
Ventilation grilles: types, main functions The ventilation grille is a ventilation element that performs a decorative, protective function. It is necessary for the correct distribution of air...
Nowadays, drywall is 100% one of the most popular finishing materials. Drywall is very convenient to work with. When during repair work...
Country houses are becoming more and more popular cottage villages, like mushrooms, grow in the vicinity of large cities, one after another. And at the same time...
Typical apartment renovation Typical apartment renovation If you are facing a typical apartment renovation, think over its sequence and prepare in detail for each stage. And...
The issue of equipping a children's room in anticipation of the joyful anticipation of a new addition to the family is especially acute today. On the one hand, this is due to the special...
As you know, one of the main requirements for residential buildings is the ability to retain heat. Therefore, the use of thermally efficient technologies...
Let's talk about roofing work, or rather about liquid roofing. Our latitudes are known for their harsh climate, the main inconvenience is not so much the low temperatures...
Polycarbonate carports for cars and swimming pools Polycarbonate carports in a cottage or private house allows owners to refuse...
The bathroom requires close attention when carrying out finishing work. The main material is often tiles, the final stage of installation of which is grouting the tile joints. The aesthetic appearance of the room will depend on this. It also forms reliable protection from exposure to moisture. If DIY installation Since the tiles did not cause any particular difficulties, grouting the tile joints in the bathroom with your own hands will be quite easy and quick. You just need to follow simple instructions and follow basic rules.
Sometimes it is believed that grouting does not play a significant role, and there is only one goal - to give a beautiful cosmetic appearance. This misjudgment can lead to serious trouble.
- Tiles rarely have same size. Therefore, it is necessary to make compensation joints that can level out minor defects. But they should be sealed special compounds, each of which is selected for a specific situation.
- The bathroom must be completely sealed. Any open area instantly filled with moisture. This leads to mold and mildew appearing. It is very difficult to remove them.
- The grout mixture prevents deformation ceramic products and protects them from damage.
A well-sealed seam is the key to peace of mind long years, and sometimes decades.
Which mixture to choose
Currently, seams in the bathroom are sealed mainly with two compositions: cement-based with the addition of polymers and epoxy. They differ significantly from each other:
- Cement mixture with polymer additives. This material is used most often. It is quite easy to apply even without any experience. It is worth paying attention to the fact that there is a similar grout, but it does not contain synthetic substances. It cannot be used for work in the bathroom.
- Epoxy mastic. Great blend that packs a punch positive qualities. Proven to work in harsh conditions. To use it, experience in sealing joints is required. The fact is that it hardens quickly. The disadvantage of this solution is its high price.
Of course, there are other grouts on the market now. For example, polyurethane. It has similar qualities to epoxy mixture, but is much easier to work with.
On a note! There are special additives that can give the material improved qualities. They are introduced directly during mixing.
Separately, you should consider purchasing impregnation or varnish. They are needed for cement compositions. They additionally treat the space between the tiles to give it protection from moisture.
Working with the surface
Before starting the process of sealing seams, it is necessary to prepare the surface. To do this proceed as follows:
But sometimes another problem arises. Sometimes work has to be done on the old coating. This is due to the fact that the seams have lost their original appearance, and in some places even collapsed. Therefore it is necessary. The order is:
- The impregnation is made from a mixture of water and vinegar. The material being removed is soaked in it. This must be done carefully so that nothing gets on the tiles.
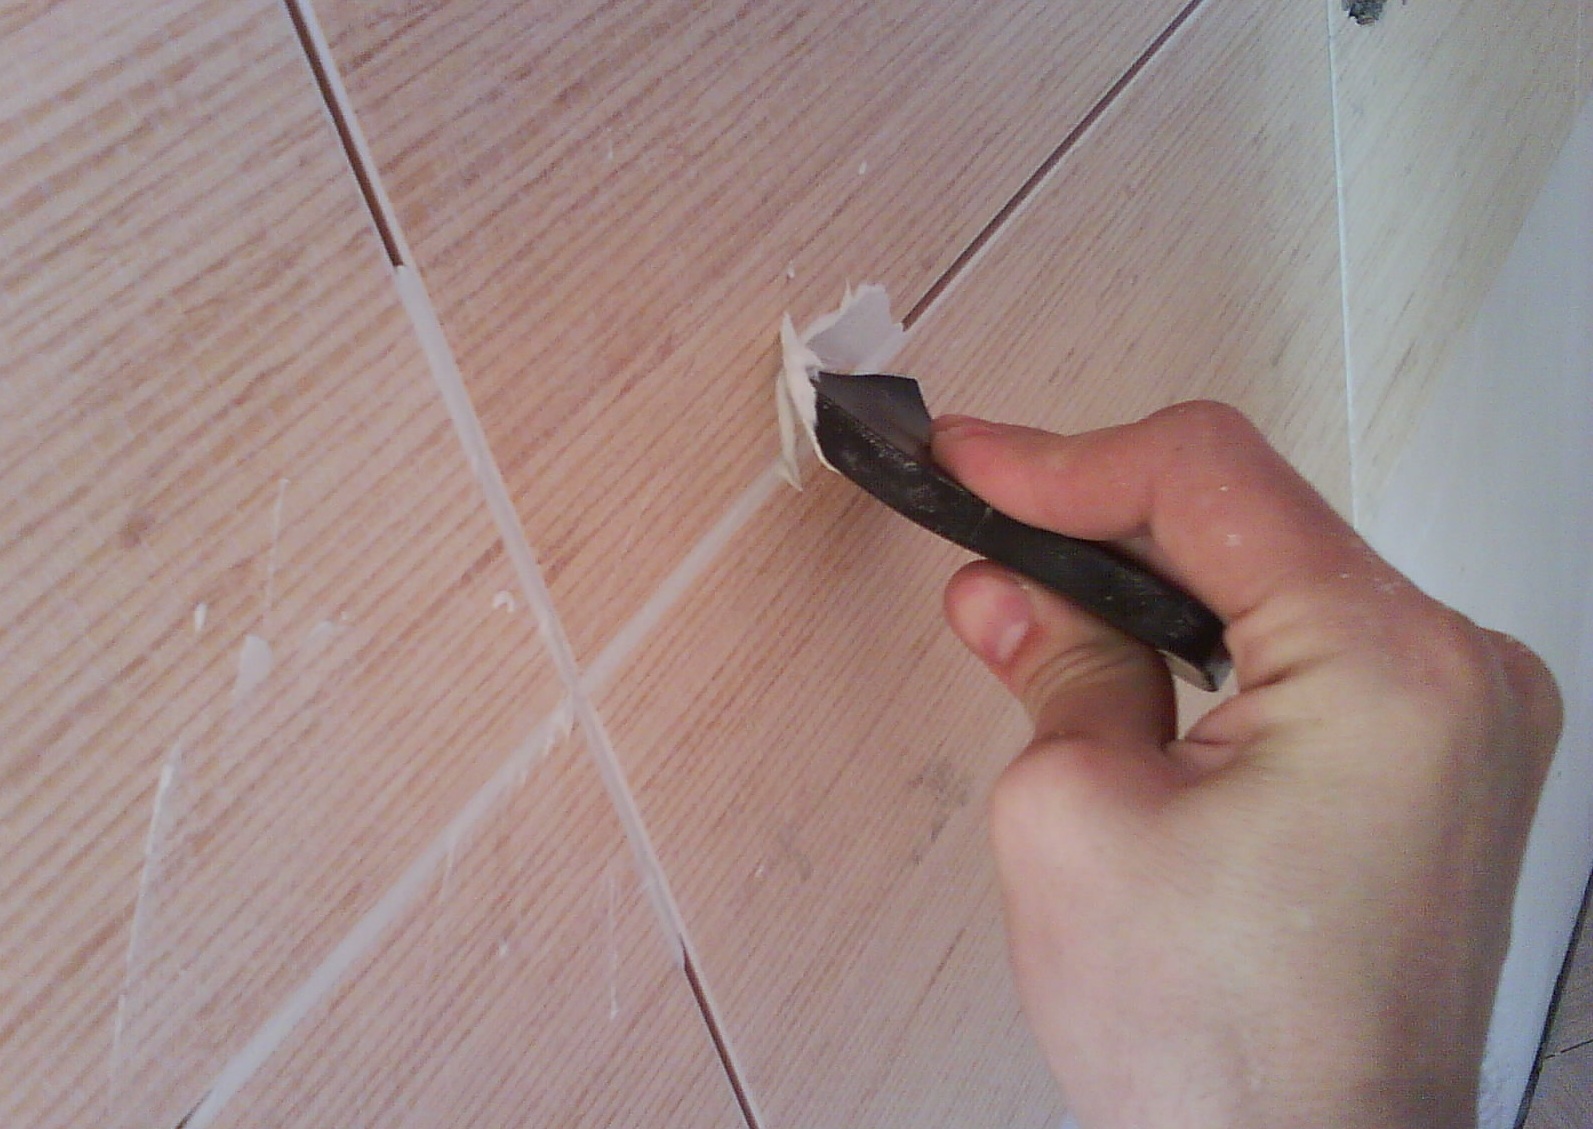
- Then using construction knife a central incision is made along the joint. It should be all the way down.
- Now the seams are cut. That is, they clean from each side towards the center. It turns out that old material falls out in chunks.
- The resulting gap is cleared of residues.
The main process can begin.
Grouting joints
The necessary material is prepared in advance. And also the tool:
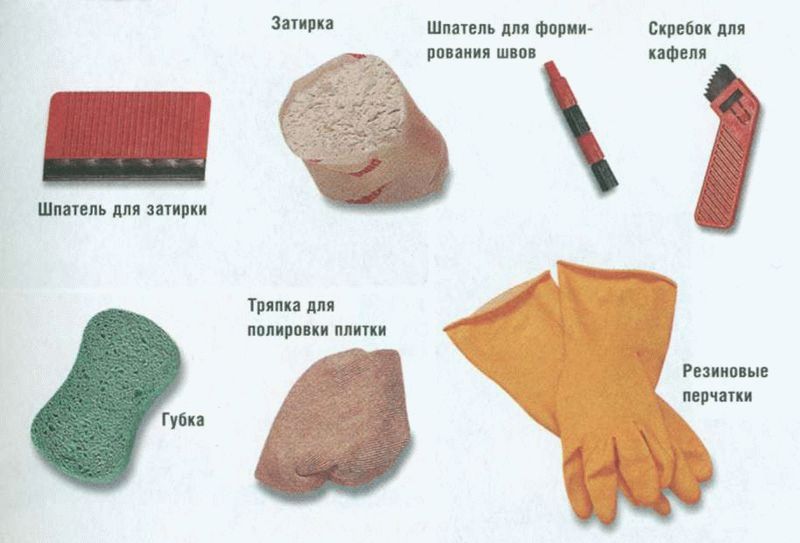
- Rubber spatula.
- Grater.
- Sponge and container with water.
- Spatula for forming seams.
On a note! If varnish will be used in the process, it is better to choose a colorless one.
The works look like this:
- Depending on the mixture chosen, it needs to be prepared. The most difficult thing is with dry ingredients. Their mixing occurs in several stages. First, water is poured into the bucket and the required amount of dry matter is added. Next, mix everything well and leave for a few minutes, and the kneading process is repeated again.
- The joints are moistened with water, but not very much.
- Scoop up with a spatula required quantity solution. It is placed at a slight angle to the surface and moved along the joint. The mixture should completely fill the desired area.
- Excess is immediately removed. This is done so as not to pull the already processed gap.
- This is how the entire front of the work is completed. The result should be a surface that is completely covered with grout. Any defects, voids will spoil appearance and violate the protection.
- Now you need to let the solution dry a little. It should stick well between the elements. This often takes about thirty minutes. It all depends on the specific material and additives used.
- Next, a sponge comes into play, which should be large enough to work comfortably. It is thoroughly moistened with warm water and squeezed out well. Using circular movements, begin to wipe the treated surface. You must not exert excessive force. Once it becomes a little dirty, it is washed and wrung out again.
- After processing with a sponge, all defects will become visible. They are immediately filled with the remaining material.
- To form a beautiful seam, it can be processed with a special spatula. It looks like a piece of eclectic cable. The rounded end is applied to the desired area and carried out from top to bottom. This creates a small depression.
There is another technology. But to use it, you need to use a mixture for grouting that is completely elastic and does not contain any fines. Otherwise, it is very easy to damage the entire tile. So:
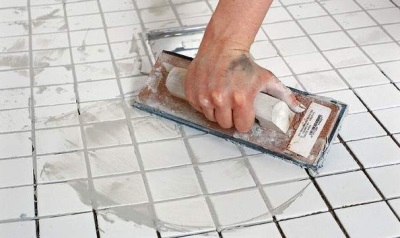
- The work is done with a grater. I wet it a little so that the solution sticks less.
- The suture material is collected with a tool.
- The grater is placed at a slight angle. But movements towards the seam are made diagonally.
- This way you can quickly fill all the empty areas. Further activities repeat the process with a spatula.
Final stage
The main stage of grouting ceramic tiles in the bathroom has been completed. But the process does not end there. Leave the surface for several hours; each manufacturer indicates the specific time. And then:
- take a soft rag, it cannot be wetted, this will disrupt the entire technology;
- eyes and respiratory tract are protected from dust;
- begin to clean off all remnants of the mixture;
- Small inclusions that may remain on the seam are also removed.
It seems that everything worked out as planned. Although we must not forget that you additionally need to apply impregnation or varnish (this is done after 5-7 days):
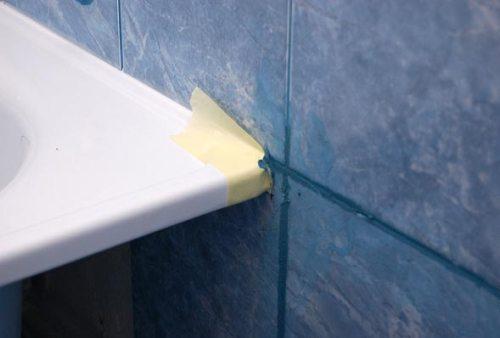
- The edges of the tiles are covered with masking tape.
- Take a thin brush. It is moistened in the selected substance and immediately applied to the joint.
At first glance, the grouting of tile joints is not the best important work in the bathroom, however, when the tiles are laid, it becomes clear that without grouting the renovation will look unfinished.
When tiling a bathtub with your own hands, you should know that the effect of the repair will largely depend on the quality of the seams.
It is this factor that affects the tightness of the finish, its service life, provides protection against mold and mildew, and of course gives the finished look to the interior. Read this article on how to properly seal seams.
Grouting - purpose, types
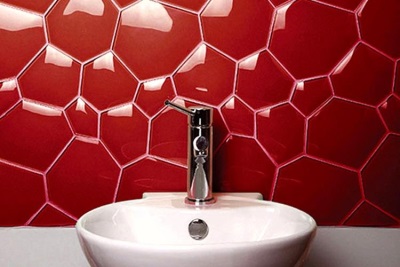
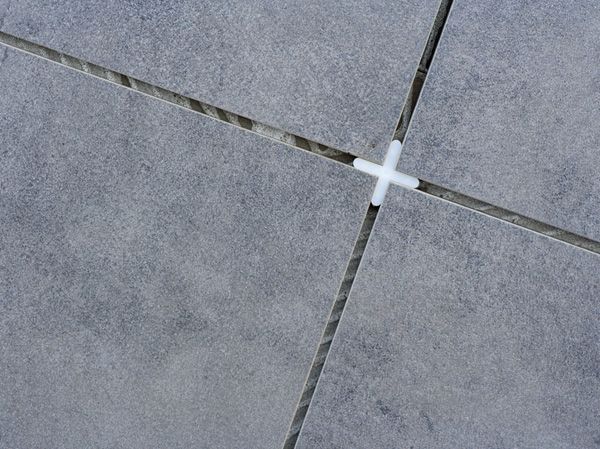
Floor and wall tiles are not laid hermetically; during the installation process, gaps are formed between the tiles, the covering and the wall, in corners, on the floor, at the junction with the shower cabin or bathtub, and with baseboards. They need to be wiped down in order to:
- hide small flaws and irregularities that arose during the installation of the flooring;
- prevent the ingress of dust and moisture;
- compensate for the expansion of tiles when heated - when laying heated floors under ceramic tiles;
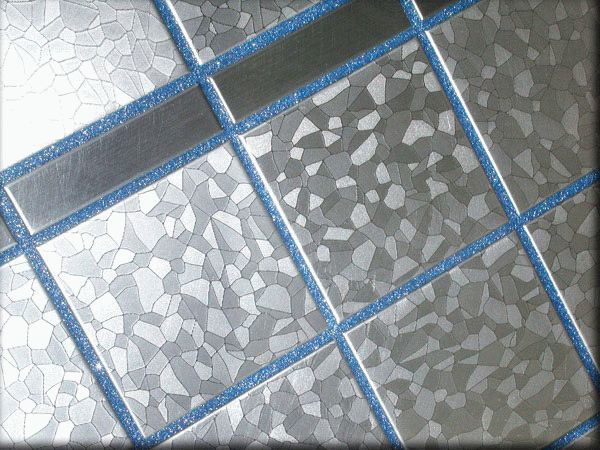
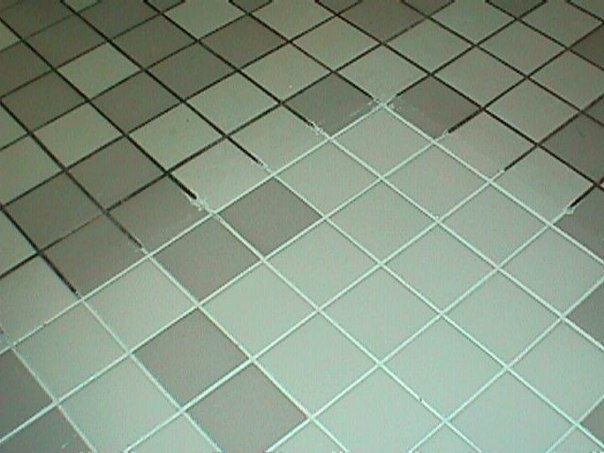
- give the finish a finished, neat look (see photo).
![]()
What types of mixtures are used for grouting joints in the bathroom:
- for narrow joints up to 5 mm wide - epoxy moisture-resistant mixture based on cement with the addition of various additives, plasticizers, improving its properties. After application to ceramic tiles, it shrinks, so it is used only for processing narrow joints;
- for wide gaps - grout for joints with the addition of sand, synthetic resins, which does not produce sediment when drying (although as experts advise, it is better not to leave such large gaps);
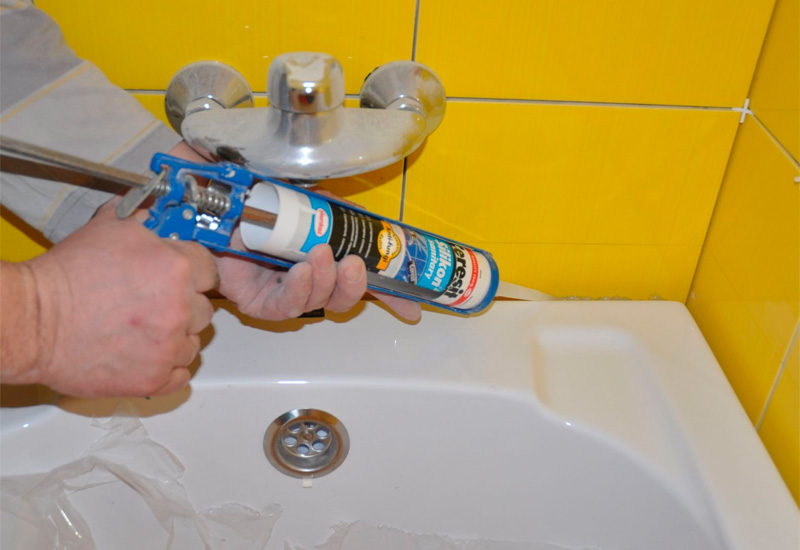
- for corner joints of clinker tiles and places of their contact with plumbing fixtures - elastic silicone mixture, sealant with increased moisture resistance.
Advice: when choosing a grout material for a bathroom, you should pay attention to its antifungal properties, because a bathroom is a room with high level humidity.
The price for grouting joints for a bathroom is not high; the price for a bag of dry mixture weighing 2 kg ranges from 150-200 rubles. There are higher cost options, you can choose to suit every taste.
There are brands of white grout or colored grout, which can be matched to the tone of your tiles (black, blue, red, light blue, brown - almost all colors).
Popular brands are: Ceresit (ceresit), Mapei, Baulux, Knauf, Atlas. The main factor influencing the cost of a material is its specifications and consumption per 1 m2.
For small areas, ready-made liquid solutions in jars are also sold; they do not need to be mixed, but their price is several times higher. As reviews show, ready-made grouts are much more convenient, but if you need to process large area, then it is better to buy the dry mixture.
Grouting technology
Preparatory work
Before processing, old seams between tiles must be cleaned of glue and dirt. Think in advance about what plastic tools and rags that do not leave marks or scratches on the coating may be useful to you in this matter. Immediately before grouting, the joints should be slightly moistened with water - this will reduce the consumption of the mixture.
Attention: sealing of seams is carried out no less than 24 hours after installing the tiles in the bathroom.
Devices for work
To work you will need the following tools and devices:
- tank for mixing the mixture;
- container with clean water;
- rubber spatula, steel;
- grout gun;
- sponge.
The dry mixture is diluted with water to the required consistency - the proportions are indicated by the manufacturer on the packaging. The solution is kneaded with your own hands until smooth, either manually or using a mixer.
After this, you need to wait 5-10 minutes for the mixture to ripen, and then stir it again. Ready solutions It is also necessary to stir so that they are homogeneous.
Grouting process
Grouting or replacement of seams performed by a master costs 500 rubles per square meter. However, prices can be significantly higher. Obviously, you can save a lot by doing this work yourself. Detailed description Read the process below.
The mixture is applied to a steel spatula, then a small amount is scooped up with a rubber spatula and the seam is filled at an angle to the full depth. Then the remaining material must be removed by running a rubber spatula parallel to the gap.
Experience will show how much of the mixture to put on a rubber spatula at a time. The remaining areas are treated in the same way, not missing even the shortest openings. This technology allows you to reliably grout the ends of the tiles. See photos and videos for an idea of how to grout.
Tip: If the mixture shrinks, apply a fresh coat on top.
After filling all the seams, you need to wait some time (20-30 minutes) for the grout to set. Next, the gaps are corrected and the surface is cleaned with a sponge. It is moistened in warm water, wrung out well, and the laid light tiles in a circular motion, ensuring the removal of excess composition.
Important: you need to rub in a circle, and not along the seam, so as not to wash the grout material out of it, but only to remove the residue. This is especially true for mosaic tiles.
If unfilled areas appear during the cleaning process, they must be filled with the mixture and allowed to dry. After this, the surface is wiped with a sponge again. During the cleaning process, the sponge should be rinsed regularly with water so that no streaks remain on the tiles.
After the grout for the joints has completely dried, wipe the entire tiled surface with a dry cloth, giving it shine. You can additionally apply varnish to the seam. After this, the coating will acquire a neat aesthetic appearance. You can find out how long the grout takes to dry on the mixture packaging, usually at least 24 hours.
Watch the video with visual instructions:
By the way, you can always update old waterproof grout yourself by cleaning the old one as thoroughly as possible before doing so. You can replace it with a more modern one and a more suitable color. Alternatively, you can use grout paint.
Sealing the seam between the plumbing and the sink
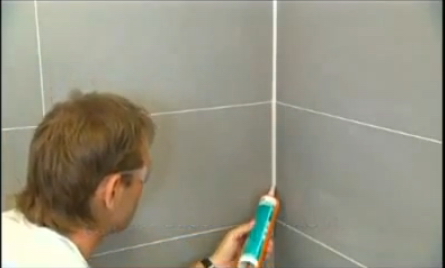
The joint between the bathtub and the wall can be sealed using:
- sealant;
- plastic baseboard;
- ceramic corner;
- self-adhesive tape.
If the sink is installed in a cabinet, it is not necessary to seal its joint with the tiles. In another case, it can be treated with sealant - this will prevent water from entering.
The sealant is poured into the cleaned, dry joint, leveled and trimmed slightly, forming a smooth connection between the surfaces. The seam between the shower stall and the wall is processed in the same way.
Calculate the cost of your renovation! For free!
By filling out the form and clicking the “Continue” button, our specialists will calculate the approximate cost of the work and, if you need it, will suggest good specialists.
At the moment, calculations are made only for residents of Moscow, Moscow region, St. Petersburg and Leningrad region:

Grouting the tile joints in the bathroom is the final step, so you need to approach this process with the utmost care. In this article we will look at both tiles and ceramic floor tiles.
In order to floor tiles over a long period of time did not lose its aesthetic properties and did not lag behind the base, it must be laid in a high-quality manner in compliance with all necessary technologies.
One of the important stages in this process is the processing of tile joints.
The peculiarity of flooring, compared to wall finishing, is the increased requirements for strength and tightness. Therefore, the grout for joints must be moisture-resistant and resistant to mechanical stress, and also have good elasticity. The use of low-quality grouting material can lead to the accumulation of debris and dust in the space between the tiles. Moisture will contribute to the formation of fungus.
How to prepare grout from a dry mixture
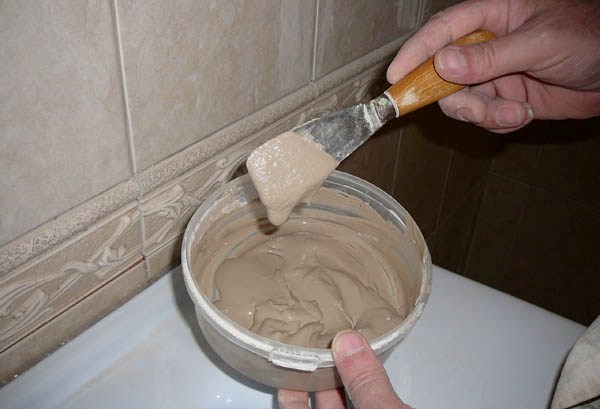
Not only the ease of its application, but also the subsequent durability of the joints depends on the correct preparation of the grout. Therefore, it is not recommended to deviate from the instructions proposed by the manufacturer. The most common is a mixture of the Ceresit brand.
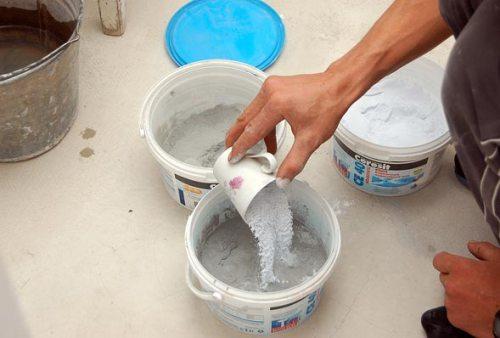
You need to pour a certain amount of water into the container, the temperature of which should be at least 5 and no more than 20 degrees. Dry mixture in required quantity added to the water and stirred thoroughly. In general, the preparation of the mixture can be compared to.
The entire cooking process can be divided into three stages:
- primary mixing;
- allowing the solution to settle for 10 minutes;
- re-stirring, adding a small amount of water if necessary to achieve the correct consistency of the solution.
To mix the grout, you can use a regular rectangular trowel. If you use an electric stirrer, then it must be deeply immersed in the solution, not allowing air to penetrate into the mixture. If you neglect this rule, then air bubbles will simply weaken the solution. In addition, air bubbles can form at high speed of rotation of the blade. Ready mix must have a homogeneous structure, free of lumps.
Calculating the amount of moisture-resistant grout to purchase for a bathroom based on its consumption is not so simple. The norms per 1 m2 indicated on the packages often do not coincide with the actual material costs. In order not to encounter an unexpected lack of mixture during work, you should initially proceed from:
- tile texture, since a textured surface is much less amenable to removing excess mixture from it, and, consequently, grout consumption increases;
- sizes of ceramic tiles - the smaller the fragments facing material, the more seams, the filling of which requires many times more mixture;
- the width of the seams, which is determined by the size of the plastic crosses used.
The color of the grout is most often matched to the color of the tile. Deviations in shades, of course, can be allowed, but the color of the grout should not differ significantly from the color of the tile covering. If grout of the required color is not commercially available, you can make it yourself. In such cases, use a color designed for water-based paint, which is mixed into the white mixture, achieving a certain shade.
![]()
If you lay tiles on the floor white, then it is best to use light gray moisture-resistant grout for it. This is due to the practical impossibility of maintaining ideal whiteness of the seams on the floor in use.
Grouting tile joints - instructions
Grouting of joints can be done no earlier than a day later or on the walls, since the tile adhesive must have time to dry. And for its complete polymerization you need to wait about three days. However, it is not recommended to postpone this process for long. This is determined by the following reasons:
- the day after laying ceramic tiles adhesive composition has not yet had time to fully harden and “set”, which makes it easy to clean missed areas of the surface from contaminants;
- The moisture that has not had time to evaporate and absorbs the grout mixture contributes to the formation of a single surface. If you wet the completely dry seams, the amount of liquid in the grout will increase significantly, which will reduce its elasticity;
- seams left open for a long period will be susceptible to contamination. Ensure the cleanliness of the floor covering, especially if other work is being carried out in the room at the same time. renovation work, is almost impossible, and dust and particles of debris caught in the tile joints will lead to complications during the process of applying the grout.
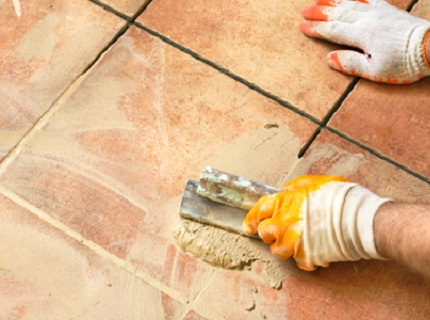
After the seams in the bathroom are cleared of glue residues, the crosses and other distancing elements are removed, you can begin the process of filling the space between the tiles. By using rubber spatula The grout mixture is applied to the surface and pressed into the seams so that all the cracks are tightly filled. At the same time, it is not necessary to try to do this with special care so as not to stain the tiles, since you will still have to wash them after finishing the work.
When the tile joints are evenly filled, it is necessary to remove the remaining grout from the surface of the tile. The composition should be allowed to dry for 20-30 minutes. It may take longer if the quality finishing material Porcelain stoneware was used for the floor. After a white coating appears on the surface, the tiles should be wiped with a foam sponge soaked in water and squeezed out. This process requires special care, since any careless movement can lead to the grout being washed out of the seam. It is recommended to change the water as often as possible.
For the final formation of tile joints, it is customary to use a round spatula, which can sometimes be sold complete with a grout mixture. If this is not available, you can use a round tube relatively small size. More often, this procedure is necessary in cases where there is a wide gap between the tiles.
Experienced craftsmen advise covering worn seams with special water-repellent compounds that have water-repellent properties. This is especially true for floor coverings in kitchens and bathrooms.
Watch the video for instructions on grouting:
- the spatula on which the grout mixture is applied should be applied to the surface at an angle of 30 degrees, and the solution should be applied diagonally to the seam;
- the seam must be processed several times so that the mixture is guaranteed to fill the entire space;
- You should not grout a large number of seams at once, otherwise you may not have time to remove excess mixture from the surface before it dries completely;
- It is not recommended to mix a large amount of moisture-resistant grout at once, as it will dry out and become less flexible.
After all the seams have been rubbed and processed, the final drying process begins. If the average daily temperature in the room is about 16-26 degrees, then the surface will dry within an hour. However, at lower temperature conditions or elevated level humidity will take much longer. And if we talk about the readiness of the floor for use, then even under the most favorable climatic conditions, at least three hours should pass before ceramic tiles It will be possible to walk around and even more so to arrange furniture in the room.
Finishing work
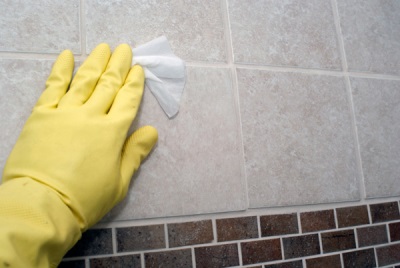
After the grout has completely dried, all that remains is to remove the resulting white coating and completely tidy up the floor surface. The amount of plaque remaining at the final stage depends on the frequency of water changes during operation, as well as on the thoroughness of rinsing the sponge. But even if the surface is very dirty, it is quite easy to clean it.

The most the best way, of course, is a hose-directed jet running water. However, in cases where this method is not possible, they resort to an equally effective dry cleaning method using a felt rag. Use it to carefully clean off the remaining mixture. However, this method does not always allow for high-quality cleaning of grooved or textured tiles. To solve this problem, you may need special cleaners, often found on the shelves of hardware stores.
Unsatisfactory conditions environment can cause the grout in the bathroom to begin to crack over time. Therefore, when choosing a material for a particular room, you must carefully study the manufacturer’s instructions. If the type of material does not correspond to the operating conditions, then there is no point in purchasing it.
Calculate the cost of your renovation! For free!
Only for residents of Moscow, Moscow region, St. Petersburg and Leningrad region:


