
IN modern construction clay plaster gave way to professional finishing materials. But as before, it remains in demand among people living on their land. In this article we will tell you in what proportions a clay solution is prepared, and how to plaster the walls and ceiling with this affordable and environmentally friendly material.
Where is clay plaster used?
 Long years clay plaster was used, perhaps, only for laying partitions indoors, as well as for finishing and laying stoves and fireplaces. But, if you look at old buildings plastered with clay compounds, you can be sure that it is still in good use.
Red brick partitions are also very durable, in the masonry of which cement-clay mixtures are often used. Moreover, unlike fragile drywall, you can hang heavy racks on them without fear of them falling.
Clay-sand mortar is most often used to plaster wooden and clay (adobe) walls not only outside, but also inside the house. In principle, any surface can be plastered with clay. The main thing is to prepare them correctly, as well as select the fat content of the clay and maintain the proportions with additives (sand, sawdust, straw) in the solution.
This one is environmentally friendly pure material able to absorb excess moisture and release it as needed. Clay plaster with the inclusion of flax or straw fibers looks original, so designers and craftsmen are increasingly using it as decorative finishing.
Advantages and disadvantages
Plastering walls with clay has many advantages:
- Environmental friendliness; clay does not contain harmful impurities.
- Fire resistance: it is absolutely not afraid of fire.
- This material easily sticks not only to concrete or brick, but even to wood. In the latter case, shingles are used to secure it.
- Even a non-professional can work with plastic clay mortar.
- It is able to “breathe,” that is, absorb moisture from the air and release it when the relative humidity changes, which is very important for creating a comfortable microclimate.
- Adsorption. It has been noticed that allergy sufferers feel more comfortable in rooms decorated with clay plaster. After all, clay can absorb odors and bind harmful substances.
- It costs absolutely nothing: you can dig it up with your own hands in the nearest quarry or in your garden.
- Good sound insulation and heat conservation.
 Despite the obvious advantages, clay plaster also has disadvantages:
- Duration of surface drying - a layer only 1 cm thick will dry for 5 days. Thicker 5-10 cm layers dry in 2-3 weeks.
- Moisture capacity. Due to their ability to absorb water, clay surfaces require additional protection.
- Low strength. Of course, it cannot be compared with cement mortar. Clay is easily scratched and chipped.
Specifications
By thermal conductivity Clay-sawdust coating ranks second after gypsum-perlite mortar - its thermal conductivity is 29 W/m ×°C. IN pure form the thermal conductivity of clay is 69 W/m ×°C, that is, almost 1.5 times lower than that of a cement-sand mixture.
Another important indicator for plaster is vapor permeability. After all, moisture must be removed from the premises to avoid condensation. Vapor permeability coefficient for clay = 0.11-0.15 mg/(m*hour*Pa). This is more than that of log walls. Therefore, clay is excellent for plastering wooden houses.
Density(mass to volume ratio) for clay is 1700 kg/cubic. m. Brick has a similar density.
Consumption of clay plaster with a layer thickness of 1 cm it is equal to 15 kg per 1 sq. m.
What clay is suitable for plaster?
 The ratio of clay and sand in the composition directly depends on the fat content of the clay. Very oily clay requires much more sand. Proportions can vary 1:5 (clay-sand); 1:4, 1:3 (for clay of medium fat content) and even 1:2. If the clay is very thin, then sand may not be added at all. Please note that you need to measure components not by weight, but by volume. To do this, it is more convenient to use a bucket or large jar.
To select proportions clay mortar you need to determine the fat content of the clay. This is done as follows.
Prepare 4 types of the indicated solutions with different sand contents and try to roll a small ball of 3-4 cm in size from each of them. Now throw each of them from a height of about 1 m.
The “correct” ball, when dropped on a hard surface, should not change its shape much or be damaged. If it is flattened, the solution is too fatty. It will crack as it dries. If it crumbles, then the clay is thin, and you need to increase its ratio in the mixture, otherwise the plaster will be fragile.

Also, to check the readiness of the solution, you can place a clay ball on a hard surface and flatten it, reducing its height by half. Ideally, small cracks should appear along the edges of the sample. If they don’t appear at all, then more sand is needed. If the cracks are deep, then, on the contrary, clay is added.
You can try to roll out the prepared solutions into a long rope 20-30 cm long with a cross-section of a couple of centimeters. By experimenting and selecting the ratio of sand and clay, it is necessary to ensure that such a flagellum does not crack after bending.
Advice! If you want your clay plaster to last as long as possible, protect it from moisture with a thin layer of cement (ironizing) or paint.
How to make mortar for plaster
 You can prepare mortar for plaster without any complicated tools. We take an old large container - for example, a trough or bathtub. Even if a large volume is required, you should not soak more than 10-15 buckets - mixing the clay with sand will be difficult.
Clean clay, free of soil and plant roots, must be soaked at least 24 hours and stirred periodically. In this case, it will be easier to work with - it will be easy to knead it with your hands. Drain off excess water. We remove all large lumps that are poorly moistened with water and plant debris. Since we have already determined the quality of the clay and know the required proportions, we prepare the solution by adding the right quantity sand.
Add liquid gradually so as not to overdo it. Continue kneading until the solution reaches the desired consistency.
If you have a mixer or at least an electric drill, the cooking process can be significantly speeded up. Large quantities require a concrete mixer. By the way, to ensure that the clay in it breaks perfectly, throw a couple of stones or pieces of brick into the water. They will help break the clay and mix the solution.
Additives in the clay mixture
 For plastering fireplaces and stoves, asbestos, lime or gypsum is often added to the mortar to increase the strength of the future plaster. Very little of them is required - 1/10 of them. For example, if the ratio of clay and sand is 1:2, then 0.1 part of asbestos and 1 part of lime are added to the mixture.
Advice! Teach that for laying a furnace, cement, which collapses under the influence of very high temperatures, not used. Only clay (preferably fireclay) and sand in a ratio of 1:3. For a small fireplace, you can use a 1:2 ratio.
Fireclay (white fired) clay is often used for kiln plasters. After exposure to high temperatures, it acquires the properties of stone and becomes fireproof. It is crushed and used in solutions in proportions 1:3:1 (clay, sand, cement M400-500).
For oily clay, the amount of sand can be increased. Remember that the amount of cement is calculated based on sand. That is, the more sand, the more cement.
In the event that it was not possible to obtain high-quality clay without chernozem impurities (and in some areas it has to be obtained from great depths), it is better not to take risks and purchase already ready-made mixtures for plastering and especially for laying bricks of stoves and fireplaces. After all, stoves built on an unsuccessful solution may begin to smoke when it cracks.
Clay solution with the addition of sawdust - perfect option for insulation of the building. The lumber in the composition not only improves the heat conservation of the building, but also acts as reinforcement for the plaster layer. However, this mixture is not very elastic, and it is not easy to smooth it out. Therefore, the mud hut is often left without leveling. But after drying, the plaster with sawdust is not afraid of cracks and does not crumble.
Advice! If the solution turns out to be too liquid, leave it alone for a while, and then simply drain off the excess water.
Preparing walls before plastering
Clay mortar due to lack of chemical bonds the surface to be plastered does not adhere well to a smooth base. Therefore, when facing bricks, the joints must be jointed before plastering.
To reinforce wooden surfaces finished with clay plaster, shingles are used. Application plaster mesh in this case it is not very convenient. Since clay is not as flexible as gypsum, it will not bond well to the mesh.
Shingles are narrow boards 3-5 mm thick, which are nailed onto the wall. Are located wooden planks at an angle of 45°. Moreover, the nails should not go into the wall completely, but only halfway. The rest of them are bent and recessed into the wall. In this case, the shingles will hold up better.
Plastering with clay

The principle of working with a clay mixture is essentially no different from working with conventional plaster:
- Beacon profiles are also placed for alignment.
- For getting durable surface without cracking, the thickness of each layer should not be more than 10-15 mm.
- In case of strong slopes and the need to apply a solution of greater thickness, clay-straw or sawdust mixtures are used, which can be applied to shingle-reinforced walls in a large layer.
- If necessary, a new layer is added on top of the first only after the surface has dried.
- After finishing with shingles, the walls are dust-free and moistened with water.
- The surface is moistened abundantly so that it does not take liquid from the solution and weaken the plaster.
- The solution is applied with force to ensure better adhesion.
- To reduce the formation of cracks, it is advisable to add fiber additives to the solution.
The video below shows how to plaster a wall made of clay or wood.
Decorative clay finish

Lately clay colored plaster is becoming one of the most popular materials for interior decoration. It is used in many decorating techniques and is suitable for emphasizing the home owners’ commitment to natural, traditional materials.
Often the natural texture of a clay wall is complemented by the application of relief designs or patterns. To do this, the clay is puttied with a fine-grained compound without impurities. Then they roll over a layer of putty 3-5 mm thick with rollers, stamps, or form a pattern with their own hands.
The finishing layer can be coated with a vapor-permeable casein primer or paint in various colors.
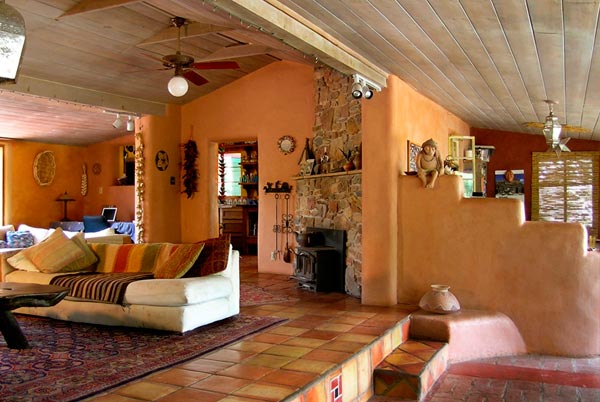
Here are a few photos of clay in the interior.


A “muzanka” or a house that is coated with clay is a very comfortable and environmentally friendly housing. IN summer period It is quite cool in it, and warm in cold weather, while the organized microclimate has a beneficial effect on human health. Coating a house with clay is a somewhat labor-intensive job, for this reason it has recently lost a little popularity, giving way to more simple varieties works If you are not afraid of difficulties, and you are in full readiness to revive old method, try to build a “mud” on your own.
Well, if you are interested in planning and creating interiors of public buildings, visit the website studio-practica.ru. Only there they will help you create a suitable and comfortable interior quickly and without problems.
Build the frame and foundation of the mud hut house. You can just drive stakes into the ground and carefully intertwine them with twigs; this will be a fairly simple structure for storing things and relaxing in the summer. To build more solid housing, you should build a concrete foundation - install it on it vertical bars, fill them with bars, upholster the structure with a board or slab.
The surface of all walls should be covered with willow rod or shingles to ensure excellent adhesion of the wall to the clay. The rods should be stuffed at an angle of 45°, while using an ax to split thick branches into 2 halves. If possible, immediately build a roof for the structure.
Then start preparing the clay. To do this, take a container; it is recommended to dig a round hole in the ground large sizes. Place sand and clay in the hole in layers, pour water into the center.
Mix the clay - it is recommended to do this using your feet. If the container is small, use a drill with a regular curved pin or a special attachment. Gradually add straw to the clay - the thicker the stem, the better.
Knead the clay, moving towards the edge starting from the center. If necessary, add straw or water. You should not throw a large amount of straw at once, otherwise it will not be easy to mix. Clay should be thrown from the edges into the center of the hole. As a result of the above steps, you will get a fairly thick, homogeneous mass.
The wooden surface of the wall must be slightly moistened with water using a broom. Bring the clay closer to the building, you can load it into the cart. It is recommended to work with clay using a fork rather than a shovel.
Take the clay mat with your hands and throw it forcefully at the wall. The clay should stick well and turn into a pancake. When covering shingles or rods, spread them a little.
If the clay does not stay on the wall overnight, you should tear it off and let the surface of the wall dry. Sometimes you need to wet your hands with water.
Photo: avillageinafrica.wordpress.com

European maple (Acer campestre) Family: Sapindaceae Commercial names: field maple (UK); Ahorn (Germany); Norwegian maple, European maple, Bosnian maple (UK) Distribution: throughout Europe, including Great Britain, Asia Minor and Russia European maple - wood description The color of the wood is creamy white with a natural shine. The older the tree, the darker the wood. Over the years it becomes light brown. Grain is like...

Mansonia (Mansonia altissima) Family: Triplochitonaceae Other names: aprono (Ghana); ofun (Nigeria); beta (Shore Ivory, Cameroon) Distribution: West Africa Description of Mansonia wood The color of the wood is gray-brown or light purple, often purple with lighter or darker spots. Wide range of colors. The grain is straight. The texture is fine and smooth. Weight about 590 kg/m3. Mechanical properties Mansonia is a wood that…

Litsea (Litsea calicaris) Family: Laurels Other name: tangeao Distribution: New Zealand Description of Litsea wood The color of the core is creamy light brown with a dull sheen. The wood is straight grained, with a fine and even texture. Weight from 608-768 kg/m3. Mechanical properties Litsea has medium bending and crushing strength, low rigidity and high resistance to impact loads. The wood dries well. Working properties...
Until recently, mud houses were considered housing for the poor. This was due to minimal costs for its construction.
Roofing a house made of clay
Clay like construction material has been used in residential construction for a long time. Today, history can confirm that not only houses for poor people were built from clay. Almost all over the world there are examples of how clay perfectly coped with the functions assigned to it, not only in the economical construction of housing, but also in the construction of monumental buildings.
Houses were rarely built purely from clay, this was due to the fact that it had a rather fragile structure after complete drying. Therefore, we had to look for reinforcing materials. This turned out to be the easiest. Natural materials, such as:
- Straw;
- Small tree twigs;
- Reed;
- Bamboo;
- And materials similar to them.
They coped with this task best. In European territory, which includes Russia, straw was mainly used as the most economical additive to clay in housing construction.
In addition, at all times straw was considered waste material, which was not suitable for livestock feed, but showed itself perfectly in construction, where it was used to cover roofs and erect walls. Until recently, houses made of clay and straw were the main housing of the inhabitants of the steppe and desert zones.
This type of house has many advantages, especially its environmental friendliness. If you make the walls of a certain thickness, and this is usually done, then a unique microclimate is created inside the premises, which has a beneficial effect on human health. In such a house it is always cool in the summer, and constantly warm in the cold season.

Construction of a roof for a house made of clay
The most difficult thing in building a clay house is finishing its walls. It is impossible to stick wallpaper to them; the paint comes off after a short time. The main finishing is whitewash. IN modern conditions This is the cheapest and most unsightly option.
But with the advent of modern finishing materials Solving problems with finishing the walls of a clay house has become easier. Eg, interior decoration can be done using drywall.
The wall will become smooth, and you can continue to fantasize about the interior. The façade can be finished using materials such as siding, various panels, facing brick and so on. The main thing in this situation is to strengthen the foundation.
Methods for building a house from clay
Build clay house possible in three ways. The first is to make bricks from clay and straw. This type of brick is called adobe brick. In different regions, the size of adobe brick varies greatly from each other, from standard sizes ordinary brick to the size of a cinder block.
To make adobe bricks, you need to make a mold from boards tailored to the size you choose. Clay mixed with straw is hammered into a mold and laid out on a drying area. The main condition for making adobe bricks is the presence of a level area sufficient to accommodate a large number of bricks.
The second way is as follows. Formwork is installed into which the finished clay-straw mixture is hammered. This method seems simpler, there is no need to bother with making blocks.
But this also has its drawbacks. Firstly, a lot of time is spent on assembling and disassembling the formwork. Secondly, you will have to purchase boards for formwork. Although you can use boards for these purposes, which will later be used for laying floors.
The process of this technology is that the formwork is first installed at a certain height. They fill it all with clay and wait for it to dry.

House covered with clay
Then the formwork is removed and installed on the next level, and everything happens until finished walls will not reach a certain size, that is, ceiling level. The most interesting thing about this method is that you can know exactly how much material is needed to complete the job.
The third method can be attributed to the most rapid construction Houses. Here you will need strong twigs that can be cut from trees or trimmed young growth. The rods in in this case will act as reinforcement. The first step is to install thick rods in the form of columns. Smaller ones are woven between them. It turns out to be a kind of frame, which must be coated on both sides with ready-made clay. In this case, clay is used without straw. Now clay based on straw is mixed, and with this solution we throw the frame again on both sides. It turns out to be a fairly strong wall.
It takes some time for it to dry. The next operation is leveling the wall surface. To do this, you need a solution based on sand and clay and a plaster float. If further finishing takes into account the installation of drywall, then it is not necessary to level the walls.
Previously, coating the walls of a clay house was considered one of the main operations. There were special craftsmen who knew exactly how to properly coat the walls of a house with clay. Today this is all in the past. With the advent of new finishing materials, this operation may not be carried out at all.
Despite the huge product range building mixtures, time-tested materials are always in demand. Clay plaster has a thousand-year history, and has proven itself only with the best side. There is a rich recipe for solutions mixed with clay; the choice of components depends on the operating conditions of the finish.
In the article we will talk about the types of mixtures, how to make a solution with clay for plaster, and give several useful tips masters, .


Clay plaster - composition and recipe
There are many clay plaster compositions, but there is no universal recipe; the quality of the composition depends on the components. And the main one is clay for plastering walls, it is divided into 2 types: light and oily, the latter is the most suitable.
To check the quality, you should roll a ball of small diameter out of clay, place it on a flat surface and flatten it. If the edges remain intact, then the material is suitable for plaster; if cracks appear, the composition is of little use. Another test is to roll up a flagellum 200-300 mm long, with a cross-section of 10-20 mm and gently bend it, quality material the edges do not crack.

Ways to check the quality of the material
Recipe table, proportions in parts:
| Clay | Gypsum | Sand | Cement | Sawdust, fiber | Lime | Asbestos |
| 3 | 1 | 1 | 2 | 1/5 | ||
| 4 | 2 | 1 | 1 | 1/25 | ||
| 1 | 2 | 1 | 1/10 | |||
| 1 | 3 | |||||
| 1 | 3 | 0,5-1 |
How to avoid cracks when plastering with clay mortar
Before work, wet the surfaces well. The basic rule is to choose clay good quality, prepare the solution correctly. Strengthen the surfaces or shingles (thin slats packed diagonally crosswise), for thin layers– jute or linen burlap. It is better to apply clay plaster in 2 layers: the first thick - clay-sand-straw, the second - finishing, clay-cement-sand-lime, to achieve a smooth surface.

The shingles perform two functions - lathing for insulation and reinforcing mesh for finishing
Plastering a wooden house inside with clay - the secrets of the masters
Inside the house with clay, it begins with carefully sealing the joints with tow; this will create an additional thermal insulation layer and help reduce the consumption of the mixture. Wooden walls should be treated with an antiseptic, then waterproofed - roofing felt is placed on the walls, the joints overlap 100 mm. After which the lathing is made and plaster is applied wooden house clay.
Important: For wooden houses It is not recommended to use metal reinforcing mesh. Wood and clay are microphobic materials, and humidity will lead to corrosion of the metal and damage to the finish.It is eco-friendly, practical and inexpensive way finishing, but despite the obvious advantages and disadvantages of clay plaster timber house also exist: wood works under the influence of delta temperature and humidity, and over time, small cracks are inevitable on the surface. But they can also be turned into advantages, turning them into trendy craquelure.


