Each time dictates its own styles, including in furniture design. However, in addition to beauty, many interior items should also have additional functionality: have drawers, drawers and shelves. And in some cases - hiding places, small safes disguised as ordinary bedside tables, chests of drawers or other pieces of furniture, as well as built into bookcases and wardrobes.
Secretary with curved legs, decorated with carvings
Their presence always had its own meaning: here it was possible to hide something that was not necessary for others to see. And, starting from the 18th century, in any rich house one could find a secretary, or in the Russian version, a desk where the owner kept especially valuable documents: bills, money, jewelry.

Various hiding places and secret drawers are often discovered inside antique furniture that has survived to this day.

Furniture with secrets - table and cabinet with additional drawers
In past centuries, in the homes of wealthy people, a mandatory part of the office was a table or a cabinet with secret drawers, which were used to store especially important documents, money, and jewelry, which made it possible to protect them from thieves. Later in France, a special table-cabinet was invented, called the secretaire, because in it it was really possible to store various secret documents and small valuables.

The drawers were often equipped with secret locks and secret locking mechanisms
The popularity of secretaries and other furniture “delicacies” equipped with various secret spaces was not accidental. Their design has its advantages that ordinary tables and cabinets do not have, and features that are unique only to such products.
They are no less relevant today: valuable papers, expensive jewelry, important correspondence and documentation are stored in stylized safes and hiding places. Among the obvious advantages of such furniture are:
- storage of valuables without access to them by strangers;
- their arrangement in different furniture elements;
- the possibility of making secret storage facilities with your own hands.
Among the factors characteristic of furniture with a secret, the design features of such products are highlighted, making it possible to prepare places for storing a specific type of valuables. As a rule, if hiding places are specially equipped, they are equipped with secret locks, and today - with an electronic security system.
Today, the furniture market offers products not only for personal use, but also for enterprises and organizations. In addition, it can be made to order according to individual drawings.

To open this table you need to place a special magnet in Right place, no more knobs and levers
Hiding places in ordinary furniture
![]()
Hiding places are often installed under furniture - in the empty space between the legs
Antique furniture is a storehouse of secrets and mysteries. Old cabinetmakers turned furniture elements into real works of art. Today's craftsmen make modern furniture in the old style, helping to create a special interior and complement it with hidden elements.

Hiding places in antique furniture
Purchasing special tables, cabinets and bedside tables with hiding places is quite expensive. But that doesn't mean it's especially important documents and the jewelry will remain on the shelf in the closet.

Option for a hiding place in the house on a bookshelf
Ready-made furniture with hidden niches

Wall mirrors and specially designed paintings can also make great hiding places.
Available today different kinds ordinary furniture equipped with secret spaces. Secret places can be located in any part of it, and they can be equipped either by the owners themselves, or by ordering their production by craftsmen, secret places can be located:


A secret drawer or safe disguised as an outlet
Do-it-yourself or custom-made caches

Custom-made desk stash
There is not always a need to buy expensive exclusive furniture equipped with secret places. Can be used a budget option by ordering the desired element of the furniture interior to specialists based on your own drawings. Can i home handyman try to create and arrange it with your own hands.
These can be equipped secret places under or inside countertops, in the doors of cabinets and bedside tables, as well as shelves and drawers on which locks can be installed.
Interesting equipped in the depths of the drawers desk small turnkey niches with a secret.

An interesting option for hiding in a chest of drawers
Hollow furniture legs and uprights

A simple hiding place in furniture - in the hollow legs of a chair
A hiding place arranged in these pieces of furniture is considered a classic. Making it is quite simple: you need to drill a hole of the selected size inside the furniture element. It is assumed that only one person will know about such a “secret” - the one who made it.
It is clear that the place for storing valuables equipped here does not imply a large number of them, which must be remembered to be disguised in a convenient way.
Advice. You need to make holes very carefully and not overdo it with their diameter, so as not to weaken the structure and lead to its breakage.

Stash inside the chair seat
Hides in boxes

The double bottom drawer is a true classic that still works today
Traditionally, hiding places are located in drawers of a desk or chest of drawers, where a “second bottom” can be made. For its equipment, take the same material from which the furniture itself is made, of the same size, secure it:
- Velcro;
- magnetic strips in a plastic frame;
- other convenient ways.

Small hiding place idea - a box within a box
You can put flat objects there:
- documentation;
- cash;
- photos;
- securities.
Hidden “treasures” must also be secured on the “second day”.

Drawers with secrets for regular cabinets
Hides in closets

Secret drawers, securely hidden in the most ordinary-looking bookshelves
Cabinets provide a wide field of activity for equipping secret places from thieves. Their large internal and external space allows you to hide a large number of items of various configurations.

Hiding places built into a regular closet
| Cache location | What can you hide? | How to secure |
| Under the bottom of the cabinet, in the far corner | Jewelry, small valuable items | ·Fold into a box of suitable size and place on the floor; ·pack in a bag and attach with Velcro to the bottom of the cabinet |
| Behind the back wall | Documents, securities. Jewelry, art paintings |
Secure in bags and attach with tape or glue |
| Behind inner surface mirrors | Only flat objects | Use tape |
| At the bottom of the cabinet - the formation of a second bottom | Any objects corresponding to the height of the second bottom | Fold into a niche, cover with the second bottom |
| In the far corner inside the closet, disguised as a shoe box | Items that fit the box | Place a drawer with a lid that locks with a key in a shoe box secured with screws to the floor of the closet, put a pair of shoes on top that no one uses, cover with a shoe box lid |

Pull-out panel in the closet, hidden from prying eyes
Attention! Before hiding a thing, you need to decide who may know about the existence of the cache and have access to it, so that if it is discovered by household members, you will not end up in a stupid position.
Video: how to make - The simplest cache
Secretary, cabinet and other wooden furniture are most often presented in wood color (walnut, cherry, beech, wenge...). But this doesn’t always happen. When is the furniture in progress? finishing acquires a color that hides the wood pattern, then many people have the question: “Why hide the wood under paint?” Probably a fair question. By the way, this same question can often be heard from master craftsmen.
What's the point, really?
Look at this photo report on the construction of a secretary and a cabinet made of wood. These items were planned for the living space of one of the country houses Moscow region. Try to get into the content of the project and most likely you will find some interesting points for yourself, and maybe an answer to the question posed.
Work in the workshops began, as usual, with the preparation of workpieces. First, we prepared the blanks for the cabinet. We sawed plywood and maple boards. At the stage of preparation of blanks, it is extremely important to maintain correct geometry and dimensions of future parts. All corners of the workpieces must be maintained at an angle of 90 degrees, and the error in linear dimensions must be no more than one third of a millimeter. And only with this approach will the product be assembled in the end.
The decision on a convenient, competent arrangement of things is the main part of putting things in order in an apartment or house. It’s always pleasant to be in a clean, uncluttered room where you can breathe easily and there is nothing unnecessary lying around.
Beautiful dressing room.
The table is not littered with newspapers and books, things do not fall out of the cabinets on your head. The shelves are not cluttered with unnecessary little things. For constant order in the house and ease of cleaning, follow the basic storage rules:
- Go through the entire wardrobe of all family members, throw away things that you have not used for a long time. Excessive clutter creates a mess, even in a large room.
If you get something you haven’t worn for a year or more, get rid of it immediately, you definitely won’t wear it!
Dressing room in a separate space of the room.

- When you deal with the extra ones, unnecessary things, determine their purpose and distribute them among the rooms.
- Now determine how often you use the item, its place in the closet or wardrobe will depend on this.
Is there a need for a dressing room?

Dressing room in the bedroom.
Built-in wardrobes have gained popularity. And if you think about it, this is a justified idea. Things are distributed in places, everything is at hand, conveniently folded. With this organization, clothes last longer and serve longer, do not wrinkle, all items are visible in their drawers and compartments. Large furniture does not take up valuable square meters, the room is freer and more spacious. True for rational planning the dressing room will require competent filling with the necessary functional equipment and modules for convenience. In addition to placing clothes, there is room for sports equipment and household items.

Project of a dressing room in a separate room.
Choosing a location for a dressing room
We determine the location for the future locker room: in newly built houses and apartments such a location is provided in advance; all that remains is to choose the configuration and filling of the room.

Convenient dressing room arrangement.
But what to do if such a room is not provided, then what to do, how to equip a dressing room? Then you need to use the services of a master, a furniture designer, who will help you choose the “right” filling for a small room and use every piece of space to your advantage.
Make sure there are outlets in the dressing room!
Block off the space and put sliding door, provide for filling and lighting, this option will work if you can allocate at least 1 meter of depth for the dressing room.

Built-in dressing room in the bedroom.
The location of the dressing room in the corner of the room is another layout option; the door is located diagonally and the room does not visually look smaller.
Options for locating a dressing room under the stairs and in the attic can be successful and interesting.

Large dressing room, convenient location.
Choosing a project for a dressing room
Based on the area and shape of the room, we plan the future “smart” closet. The layout can be L-shaped, U-shaped, linear, trapezoidal and pentagonal. The area of the resulting space is from 2 square meters. and more. If this is a dedicated room, its dimensions are 20-30 square meters.

Large dressing room.
Dressing room along the wall
The system is simple to construct - linear, located along the wall. A utility room is installed using a plasterboard partition.

Arrangement of a linear type dressing room.
The main requirement is that it should not be too long to avoid a lengthy search for the right thing. Although if you design such a utility room taking into account all the nuances, you can get convenient shelves for sports equipment and household items (vacuum cleaner, buckets, cans, travel suitcases, etc.)
The upper shelves contain those items that are not required daily. It doesn't hurt to think about having a ladder for the upper shelves.
Corner wardrobe device
In an apartment with a small area convenient layout will become corner. The area is 3-4 square meters, which will solve the issue of rational storage of things.
The corner dressing room in the room can be triangular - two walls are used and a partition and a door are used diagonally.

Corner dressing room project.
The trapezoidal shape is located along the wall, and the missing ones are completed from plasterboard; we install a door in one of the walls.

Trapezoidal dressing room in the bedroom.
When arranging a dressing room, think over the lighting scenario; it is convenient when the lamps rotate and it is possible to direct the lighting to the shelves.
The L-shaped cabinet filling is located along two walls and meets in the corner. The most common design. The mirror is placed on back side doors, facing the dressing room.

L-shaped dressing room layout.
Five-walled - the most spacious layout. Due to the extended walls towards the room, the area inside is significantly expanded. Modules, shelves, drawers are placed along four walls, and a mirror is usually attached to the door, since a full-fledged mirror for the fitting room will not fit there. This layout is recommended for medium and large bedrooms.

Project of a five-wall corner dressing room.
Dressing room in utility room
In some apartments old building, and in new buildings there are storage rooms. Does your apartment have a storage room? Consider yourself lucky if you have! Read the recommendations on how to organize a dressing room from a closet.
Do-it-yourself dressing room from the pantry - it’s not difficult to get a convenient dressing room for storing things. Storerooms are usually filled with unnecessary things and are used irrationally.
![]()
Dressing room from the utility room.
How to arrange everything correctly and rationally fill the furniture for the dressing room. We will fill the existing racks with things taking into account the frequency of their use. Below we have shelves for shoes. Provide hangers or a row of hooks on top for bags, hats, and belts. In case of missing shelves, we measure the dimensions and can order their production in a specialized store. There you can also purchase the missing modules, drawers, rods, and fittings.
Dressing room under the stairs
A staircase is an uncommon occurrence in an apartment, but in a private house, if there is an attic or second floor, it is doable.
It’s not difficult to use this space for a wardrobe; just think about which design option suits you. Eat open system storage

Dressing room under the stairs with swing doors.
Block-retractable and system with hinged doors or sliding doors. In the area of the highest height, under the stairs, rods are installed for winter clothes and long ones, which hang, and so, in descending height, we think about filling the closet, to the lowest for shoe racks and all sorts of small things.

Dressing room under the stairs open type.
Dressing room behind the partition
You can equip a wardrobe behind a partition yourself, without involving specialists. The partition can be improvised or stationary.

Improvised partition for a dressing room.
Improvised is the use of thick curtains to divide a room. The curtain is attached to ceiling cornice or on a barbell. The screen is suitable for a bedroom; behind it you can not only arrange a dressing room, but also store bedding, and in good lighting, create a boudoir with a mirror. But a model with a curtain will hardly look appropriate in the living room.
The second option is zoning with a plasterboard wall, this model is a little more complicated and more expensive, but there are no problems with the location, it can be installed in any room. No permits are required for such a construction. This structure can be dismantled at any time.

Dressing room behind a partition.
Wardrobe in a separate room
The advantage of an individual room designed for a wardrobe is undeniable. Free layout, arrangement of an area for each family member, equipping this room with the necessary accessories, comfortable furniture, folding chair And large mirror for the fitting area. Gives you the opportunity to apply any content, depending only on your wishes.


Beautiful dressing room in a separate room.
Systems for distributing items in a dressing room
Compact placement of clothes, shoes, bedding for the most part depends on the design and layout of the room intended for the wardrobe. For convenient organization and functionality, it will be necessary to fill it with systems for convenient storage things, they have a lot of model options, each of them has positive and negative sides.

Convenient dressing room in the bedroom.
Main system devices:
- Modular system;
- Mesh;
- Frame;
- Panel;
What does the modular system and assembly principle look like? The system is developed according to your order and dimensions. Mounted along a wall or several walls. It consists of segments that have walls on the sides, top and bottom. All these sections are pulled together. The advantages of this concept are that it is inexpensive, easy to install from chipboard, and looks beautiful.

The mesh system is one of the most stable and can withstand heavy loads. A metal rail is mounted to one of the walls, supporting parts are attached to it, into which brackets are placed for arranging the contents in the form of racks, shoe racks, trouser racks, etc.

Mesh arrangement system in the dressing room.
The frame system is simple to install, it is easy to move the segments, and when using this configuration, natural air circulation is created. The frame consists of metal pillars fastened between the floor and the ceiling or between two walls; the filling is attached to the main frame at the required height.

Frame system in a dressing room project.
Racks that consist of a main panel rigidly attached to one of the walls, and on it are located accessories for organizing the storage of clothes and shoes, are called panel racks. This system has no partitions or side restraints. Installation allows you to hide uneven walls and other flaws, but it is not a cheap pleasure and requires the use of original components for wardrobe modules; they are sold together with a decorative wall.

Installation of a dressing room with a panel system.
Clothing storage systems

Clothes storage systems in the dressing room.
The correct layout of a smart closet determines the number of things that can be placed in it, the convenience of their placement and the quick search for what you need.

Layout of the dressing room.
Long, winter clothes - provide a sufficient number of rods for hangers; the height for this compartment should be at least 150 cm.
For short clothes, shirts, blouses, jackets, etc., an area with a height of 90 cm, with a hanger bar.
For skirts and trousers, it is convenient to use hangers with several tiers or a trouser system.

Trousers for organizing a dressing room.
Underwear is stored in drawers or in organizers on shelves.

Organizer for underwear in the dressing room.
You can make maximum use of the wall space of the dressing room in height using a pantograph-elevator for things hanging in the upper tier of the closet. This device will allow you to zone the room according to the current season.

Pantograph for the dressing room.
Shoe storage systems
Convenient storage of shoes using a shoe rack or inclined racks, choose the one that is suitable for you in a particular case.

Shoe shelves in the dressing room.
Open shelves with compartments similar to mailboxes, racks without partitions - suitable for a narrow dressing room, a shelf width of 35-45 cm is sufficient, drawers, inclined racks, special baskets, open shelves on special holders for adjusting the height of the shelves.

Special shelves for shoes in the dressing room.
If the shelves are open, they are placed under the compartments for winter clothes. Adjust the width depending on the number of shoes; the height for summer shoes is about 30-35 cm, for winter shoes 40-45 cm.

Shoes on open shelves in the dressing room.
Description of designs
There are two types of structures - the classic one made of chipboard and the metal-frame one, consisting of modules. It is based on metal slats to which the necessary sections are attached. Sections are produced in specific sizes, so they complicate planning, for example, in an individual small or non-standard-sized room, but you can’t do without advantages here. The modular system has high strength and stability, durability and reliability.

Arranging wardrobes with a modular system.
The classic design is widely applicable, inexpensive in execution, allows you to arrange it according to the size of your utility room, it is possible to use third-party accessories for filling: rods, trousers, laundry baskets, transformable ironing boards, etc.

Self-installation
Making a dressing room with your own hands is a completely doable task. We have chosen a location, measure all the exact dimensions, and choose a layout. Before carrying out work, it is advisable to make a drawing diagram on which to draw the structure.

Do-it-yourself wardrobe drawing diagram.
With the help of such a drawing it will be easier to calculate the quantity required material, components. The next step is the purchase and preparation of building materials. Choose a door design: coupe, hinged or accordion door.

Profile frame for building a dressing room.
You will need a metal profile for the frame or wooden beam. For walls and cladding OSB plywood or plasterboard. It’s worth mentioning right away that both materials are easy to install, but in terms of environmental friendliness it’s worth thinking about. If the dressing room is supposed to be in the bedroom, it is better to choose plasterboard, this material breathes and absorbs excess moisture, things will not have an unpleasant odor.

We cover the walls of the dressing room with plasterboard.
Let's start installation; for shelves it is better to use a special perforated profile, into the holes of which ready-made shelves and other necessary structures are inserted; it looks like shelves in stores. The profile itself (the main guides are attached to the wall. This type design will allow you to easily vary the height of shelves and racks.
Another system for making a dressing room is the use of special pipes, connectors and various fasteners, all of which are now available for sale, this design installs quite quickly and does not require high level skill.

Shelves in the dressing room are made of plasterboard sheets.
Shelves for the dressing room are made of sheets of thick plywood or chipboard; shelves made of chipboard will require a solid frame.
We decided to make a dressing room with our own hands without incurring additional costs, use available materials, old furniture or parts of it. If everything turns out to be different, to make it look beautiful, carefully paint everything the same color.
Whatever your city apartment- prestigious or ordinary, large or small, comfortable or inconvenient, it is extremely difficult to allocate space for a home workshop. However, with a great desire and sufficient carpentry skills, a do-it-yourselfer can equip for himself a quite convenient workplace, which can easily be transformed into a flat cabinet with a floor area of only 0.36 m2.
It is better to make such a cabinet from the ceiling to the floor and fix it between them using four screw jacks; there is no need to drill concrete walls, drive dowels into them and secure the structure to the wall with screws. In addition, a tall cabinet with the same space it occupies has the maximum usable volume.
The design of the transforming workshop resembles an ordinary secretary with a folding table top. In order to make it, you will need particle boards with a thickness of 16-20 mm (all dimensions in the drawings are in relation to chipboard with a thickness of 20 mm), some plywood and hardboard.
The production of a workshop secretary begins with the side panels (their width is about 300 mm, and the length should be 15 mm less than the distance from the floor to the ceiling), shelves and crossbars made of chipboard.
When processing workpieces, the most important thing is to strictly maintain their dimensions and the perpendicularity of the sides. Even small deviations from the drawing can cause irreparable distortions when assembling the secretary.
To connect parts, it is best to use a very durable and technologically advanced docking unit, consisting
only from an M6 bolt with a spherical head and a nut. In this case, a hole for the nut is drilled in the shelf or crossbar, the diameter of which is slightly smaller than its “turnkey” size, which allows the nut to be pressed into it with some interference. In the sidewalls, crossbars and shelves, corresponding holes with a diameter of 6 mm are drilled for connecting bolts. In order for the connection of the secretary parts to be neat, it is necessary to strictly follow a certain sequence of operations.

1 - cross member; 2 - screws; 3 - loop; 4 - countertop door; 5 - dowels

1 - tabletop; 2 - bushing (metal or plastic); 3 - retaining pin (steel); 4 - door of the lower compartment of the secretary

1 - upper compartment door (chipboard 820, 880×600, 2 pcs); 2 - handle (6 pcs.); 3 - tabletop door (chipboard 820.1200×900); 4 - overlay (s6 plywood, 1150×850); 5 - back wall(hardboard s5, 2660×1190); 6 - upper cross member (chipboard 820, 1160×300); 7 - side panel(chipboard s20, 2685×300); 8 - side-reinforcement (wooden slats 35×25); 9 - shelves in the upper compartment of the secretary (chipboard s20, 1160×250); 10.12 - middle crossbars (chipboard s20, 1160xx300); 11 - shelf in the middle compartment of the secretary (chipboard s20, 1160×200); 13 - reinforcement of the cross member (wooden slats 35×25); 14 - shelves in the lower compartment of the secretary (chipboard s20, 1160×250); 15 - lower crossbar (chipboard s20, 1160×300): 16 - lower compartment door (chipboard s20, 860×600, 2 pcs.)


1 - swivel leg (birch or beech, block 50×30); 2 - M6 bolt; 3 - door of the lower compartment of the secretary; 4 - wing nut M6; 5 - washer; 6 - gasket (rubber sЗ)

1 - gasket (rubber s3); 2 - bolt M8 or M10; 3 - ceiling; 4 - nut; 5 - side panel

1 - M6 bolt; 2 - side panel; 3 - M6 nut; 4 - shelf or crossbar


To begin with, one side panel is marked - on it the axes of all holes are depicted for the connecting bolts. It is desirable that the distance between the holes be the same: in this case, you can use a simple jig that will allow you to easily align the axes of the corresponding holes on the sidewalls, shelves and crossbars.
The conductor itself is assembled from two slats in the form of a kind of crossbar. A mark is applied along the axis of the holes, which, when installing the jig on the panel, is aligned with the mark on the panel. The jig is fixed to the parts with a pair of small nails.
It is also advisable to drill holes for the M6 nut in the crossbars and shelves along the jig. The latter is bent from a steel strip with a cross-section of 20×2 mm, after which two holes are made in the resulting corner: in the smaller shelf - with a diameter of 6 mm (the guide screw is fixed in it), and in the larger one - with a diameter 0.5 mm smaller than the size "under wrench" for the nuts used with M6 thread. As a rule, such nuts have a turnkey size of 10 mm, respectively, the diameter of the hole for the nut is 9.5 mm.
Assembling the secretary is, in essence, connecting the side panels with shelves and crossbars with M6 bolts. The nuts are first pressed into the latter and centered relative to the holes with a diameter of 6 mm in the ends of the shelves and crossbars using a rod with a pointed end. After completing the assembly, the “geometry” of the structure is carefully checked using a tape measure; for this, the secretary is laid face down on the floor and its diagonals are measured. If their sizes are equal, then to the back of the cabinet (to the side panels, shelves and crossbars) with small screws and glue (casein, PVA or " liquid nails") a sheet of hardboard 5 mm thick is attached.
The width of the secretary-workshop is quite large - 1.2 m, so chipboard shelves can sag over time. To prevent this from happening, it makes sense to reinforce them with wooden slats with a cross-section of 35x25 mm. These slats, moreover, will prevent tools and materials from falling off the shelves.
The next stage is hanging the doors and countertops. The first ones are installed using standard furniture hinges, ensuring the doors are secured both open and closed. closed position. Well, the tabletop is connected to the crossbar with reinforced hinges, since these hinge units will have to experience increased loads. It is best to use three or four window hinges with card dimensions of 60x40 mm. You can, of course, attach them to the tabletop and crossbar with ordinary screws, but it is better to purchase plastic dowels with a diameter of 5 mm, press them into the holes drilled in the parts, and only then drive the screws into the dowels. The fact is that the screws do not hold well in the chipboard and fly out of their sockets at the slightest axial load.
As can be seen from the pictures, the doors of the lower compartment of the secretary-workshop are the supports of the tabletop when it occupies a horizontal position. So that the load from it and the heavy tool located on it is not perceived as flimsy furniture hinges, and transferred to the floor, the doors are equipped with swivel legs made of wooden blocks, which are fixed in both the working and retracted positions with a bolt with a spherical head and a wing nut. And to prevent open doors from accidentally slamming shut, metal pins with a diameter of 6 mm are attached to them, and holes are drilled in the tabletop, which are reinforced with metal or plastic bushings with an internal diameter of 6.5 mm.
It remains to equip the secretary with four screw jacks- and the work of assembling it will be completed. As can be seen from the figure, the jack is designed in almost the same way as the docking unit connecting the crossbar shelves to the side panels. The only difference is in the diameter of the bolt and nut - for jacks you will need fasteners with M8 or M10 threads. When installing the secretary, a sheet of rubber 2-3 mm thick is placed under the bolt heads.
How to make a dressing room so that things are stored in one place and you don’t have to look for them different rooms and cabinets. It is not required for installation large area, even in small apartments ah, if you want, there will be a suitable place.
The advantage of a dressing room made by yourself is that it will be made in a way that is convenient for you to use, it will cost much less, because the work will be done using the material found in the house. Another one positive side- its presence will eliminate unnecessary furniture in the apartment.
Where to start making
There are many ideas for equipping a dressing room. There are all kinds of systems and devices for storing things. When getting started, you should think about and plan the progress of the work in advance.
Layout and drawing
You should start by determining the location, dimensions of the dressing room and a drawing of the plan, indicating the dimensions. A drawing is drawn on a reduced scale, the planned systems, fixtures, and drawers are inserted. Systems should be distributed ergonomically without overloading the space.
When planning, it is necessary to take into account the distance between the shelves:
- for storing things - at least 30 cm;
- for shoes (without heels) - 20 cm;
- for shirts, jackets, jackets - 120 cm;
- trousers - from 100 – 140 cm;
- dresses - 150 – 180 cm;
- coat - 180 cm.
On top, it is more practical to make shelves for things that are not used often. And below, a place for a vacuum cleaner is recommended.
The dressing room is not located in a walk-through room; it is better to place it between the bedroom and the bathroom.

Filling
At limited area, it is not recommended to make furniture from wood, MDF, chipboard in the dressing room. This material will reduce small area. Today, storage systems made of metal are popular; they are lightweight and modular. They are installed on special racks that are mounted on the wall, floor, or ceiling. The racks are equipped with many notches, with the help of which the height of the shelves can be quickly adjusted. Material for making shelves - wood, metal, plastic. The shelves are of the pull-out type.
These storage systems are sold, but are expensive. It’s more economical to make it yourself, from chrome-plated furniture pipe.

There are many options for arranging dressing rooms: rods for trousers, skirts, all kinds of shoe stands, drawers for small items. They are retractable - convenient and functional
Material selection
Suitable for production:
- Wood (chipboard) is a common material, able to withstand the load of things, absorbs moisture, and is economical.
- Plastic - used plastic panels different sizes.
- Metal - aluminum is most often used, it is light and durable. The structure is well ventilated. The cost is more expensive than chipboard.
- Glass - promotes visual expansion space. Suitable for high-tech, modern style.
The finishing is made from any material: wallpaper, glass wallpaper, ceramic tiles.

When finishing, you should take into account the location of additional lamps for the shelves, making holes in advance. The built-in mirror in the door looks original
How to make a dressing room: open and closed type
When choosing a type, you should take into account all the nuances: location and rational use of space.
Open view
An open dressing room is a structure for storing things, not separated from the living space by a partition. It must correspond to the general style of the room. Recommended for use in case of deficiency free space in small apartments.

Plus open design- everything is at hand. Minus - clothes gather dust, they should be placed carefully so as not to spoil them appearance rooms
Closed view
A closed dressing room is separated from the room by a wall and has doors. It ensures order in the room, since the contents of the cabinet are hidden.
The closed dressing room has a large area and has a well-thought-out organization of the storage system.

A closed wardrobe is convenient and allows you to try on and care for clothes right in the dressing room. The arrangement requires a large space, which ordinary apartments impossible
DIY dressing room example
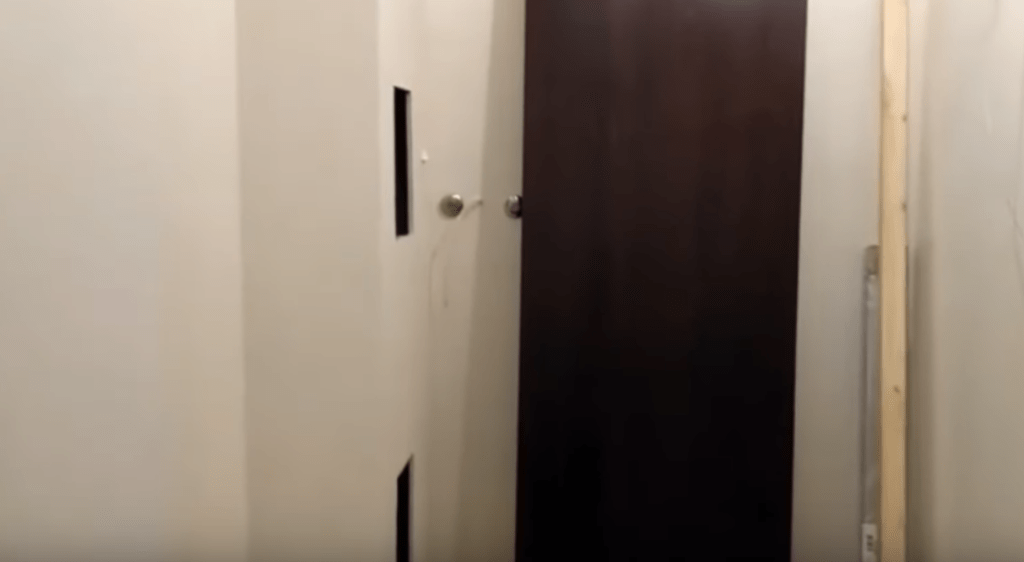
The first step is to note the height and width of the shelves and sliding doors in the niche of the future wardrobe. In our case, the depth of the niche is 1.4 m, taking into account the protruding box

The box is necessary to hide the pipes and install the water meter. Let's not forget to leave space between the shelves, because... titanium will be present in the dressing room. We also provided space for an outlet between the shelves.
- We purchased a 5x5 block to solve the problem of placing the rolling door. Reason: The ceiling height is 275 cm, but suspended ceiling takes another 10 cm;
- We will install aluminum rails at the top and bottom for door mobility;

- In the Leroy Merlin hypermarket, where we shopped, there is a service for cutting shelves using a large machine. Having previously measured the length and width, and estimated everything on paper, we ordered shelves with a width of 30 cm and 60 cm. The service is very convenient, because shelves ready for installation will be delivered to your home. You will only have to use a hacksaw if the corners are uneven;

- Don’t forget about the addition for finishing the cabinet on top, which we buy in wenge color. The width of the extension is 10 cm. To attach the hangers, we purchase two round metal holder. We check again: the distance between the shelves is 40 cm, we fix the small corners 5 cm from the edge of the board. We place large corners immediately below them, so that later we can attach the end guide to the floor and wall (it will have to withstand a large load);
- We fix two large corners in width, and 4 in height. For this stage of work, we will take care of purchasing a level;
- We recommend using a long level. To install the end guide without any problems, you need to tighten the corners on the floor in advance. Don’t forget to measure the distance on the wall with a level. Then we proceed to installation;
- We initially planned to create a dressing room, although the box is made of plasterboard. Previously, aluminum guides were passed inside, which are attached using corners;
- We adjust the length of the aluminum guide using a hacksaw. WITH right side The wardrobe has a rolling door that can slide to the side, and on the left there is a large shelf 60-2.70. Internal shelves are attached to the latter;
- Let us repeat that the top is trimmed with an additional 10 cm of wenge color;
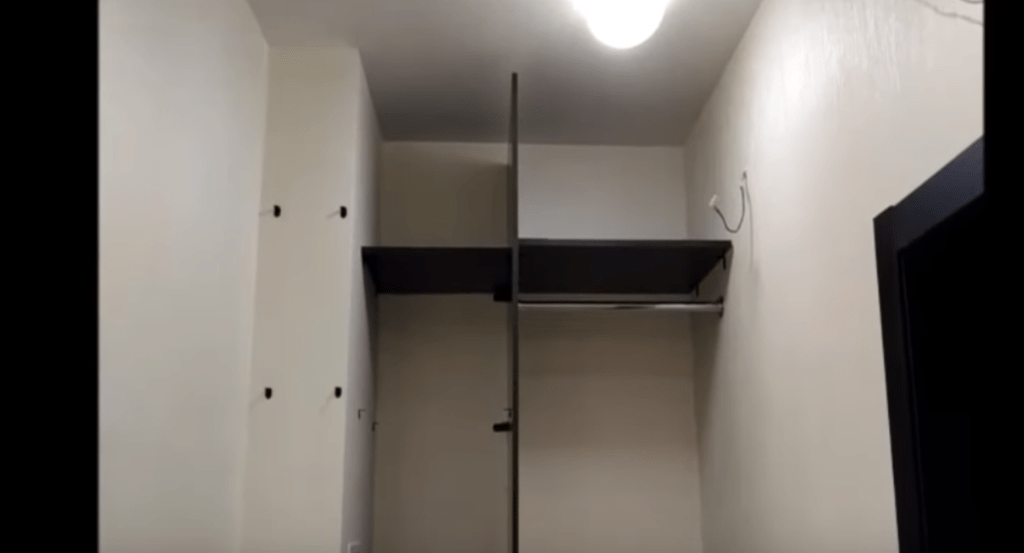


- Inside the wardrobe, but on the left side, there is space at the bottom for boots and other shoes. There are also a lot of shelves installed here and a power outlet. We left room for titanium. Even further to the left is a niche with a depth of 25.5 cm. During installation, we used shelves 30 cm long so that more boxes could fit here;

Wardrobe type
Arranging a dressing room - important point, it is worth considering the installation location, and based on this, choose the type of model.
Angular
An excellent option if you have a free corner in the room. A corner cabinet is more practical than a straight one. It can accommodate: shelves, drawers, rods.

Zoning corner cabinet carried out different ways. Finish the corner with plasterboard and make doors, hinged or sliding. It is possible to fence off a corner with doors, like a coupe
Linear
Linear - similar to a large wardrobe. Mounted along a wall that does not have windows or doorways. It is fenced off from the room in several ways:
- plasterboard wall with sliding doors;
- sliding doors on the entire wall;
- cornice on the ceiling with a curtain.

Linear model with open shelving, looks great in a loft style room. The main thing is to choose the right one for general interior material and color scheme cabinet
U-shaped
U-shaped - ideal for long room. On one side there is a bed, on the other there is a dressing room. It can be in the form of closets or as a full room.

Having fenced off the space, you should think about the lighting, divide it into 4 zones: for outerwear, shoes, short items and for trying on
Parallel
Designers advise using this type in wide, long corridors. Consists of two cabinets facing each other.

A parallel dressing room can be closed, in the form of cabinets, or open, with racks and shelves
Wardrobe dimensions
The dimensions of the dressing room are determined taking into account its location and use. Ideally, it should have space for storing clothes and an area for changing clothes.
The optimal size is calculated individually, it is necessary to take into account:
- size, location, shape of the room;
- presence of a niche;
- location of windows and doors.
Measurements must be taken accurately so that no difficulties arise during the installation process.
The width varies and is calculated as follows:
- if the cabinet is on one wall, the width is its depth, plus the width of the doors;
- in the absence of doors, but there are drawers, width - two depths;
- when two cabinets are located opposite each other, the width is two cabinet depths, plus two door widths and a passage.

A prerequisite for size is that the doors must open freely and not interfere with unhindered entry into the room. If the dressing room is narrow, you should not make large cabinets
Ventilation and lighting for the dressing room
In the dressing room, ventilation is required, since closed space smells will appear. It should be planned in advance. There are two types:
- Natural - air comes in from below and comes out from above. To arrange ventilation, it is necessary to make holes in the closet, at the bottom and at the top, for air movement. This method does not always give full results.
- Forced - means installing a fan in the hole. It is better to install a forced hood - it will provide a suitable atmosphere for storing things.

The exhaust hole is made on the opposite side from the inlet. It’s great if the exhaust vent goes into the ventilation
The dimensions of the holes must be determined in accordance with the area of the dressing room.
A wardrobe is not a closet, but a room with shelves and drawers. To quickly find the right thing, good lighting is necessary. Better, multi-zone:
- on the ceiling - general lighting;
- for illumination of shelves - additional rotating lamps.

The ideal solution is to install a motion detector to turn on the lighting. It's economical and convenient. And the lighting of the shelves looks beautiful and stylish
Doors for dressing room
When making a wardrobe with your own hands, it is important to choose the right doors. The comfort and ease of use of the room depends on a well-chosen model. Common types are:
- Swing doors are practical, but require space. Protect from getting in sun rays, dust, with a high degree of sound insulation. They are the most affordable in terms of cost.
- Accordion doors are compact and fold like a screen. The structure is fragile and consists of many slats.
- Compartments are popular, the movement of the doors is carried out along the cabinet, no additional space is required.
- Roto door - non-standard solution. Suitable for loft and hi-tech style. The door is installed on a special mechanism, which allows it to rotate around its axis and open in any direction. Free space is required for installation.
- Pencil case - the doors are hidden in the wall, no extra space is required. Convenient for small apartments. But the installation of such a structure is complex; without experience, it is difficult to do it yourself.

Accordion doors look beautiful. They transform the room, adding some zest to the interior
The material for making doors is different:
- Wood - looks aesthetically pleasing and is environmentally friendly pure material. But wooden door heavy and expensive.
- Glass or mirror are popular today. Doors decorated with stained glass will decorate the room and make it larger.
- Plastic is light and cheap. Plastic doors less durable and not as beautiful.
To make the door to the dressing room look stylish, it should be decorated with inserts of mirrors with a sandblasted pattern or elements of relief glass.

The door looks original and unusual, giving the apartment a modern, fashionable look. But for classic style doesn't fit
Arrangement: filling and storage systems
For practical use dressing room, you should properly equip it, select acceptable options for storage systems. You should not come up with complex, intricate designs.
Clothes placement system
Exist different designs for storing things, the main ones include.
| Storage systems | Hull | Modular design, consists of sections with walls: side, bottom, top. It is located close to the wall and fixed into a single complex. Made from chipboard. |
| Frame | A model made of metal racks attached to walls, floors and ceilings. The following are installed on it: rods, hooks, holders. Installation is simple, it is possible to move elements and good ventilation of things. | |
| Panel complex | This decorative panels fixed to the wall, modular storage elements are attached to them. The system has no divisions on the sides; there is no floor or ceiling. The cost of the complex is not cheap. | |
| Mesh | The model is universal. A horizontal rail screwed to the wall onto which the slats are mounted. Brackets, shelves, and hangers are installed on them. |
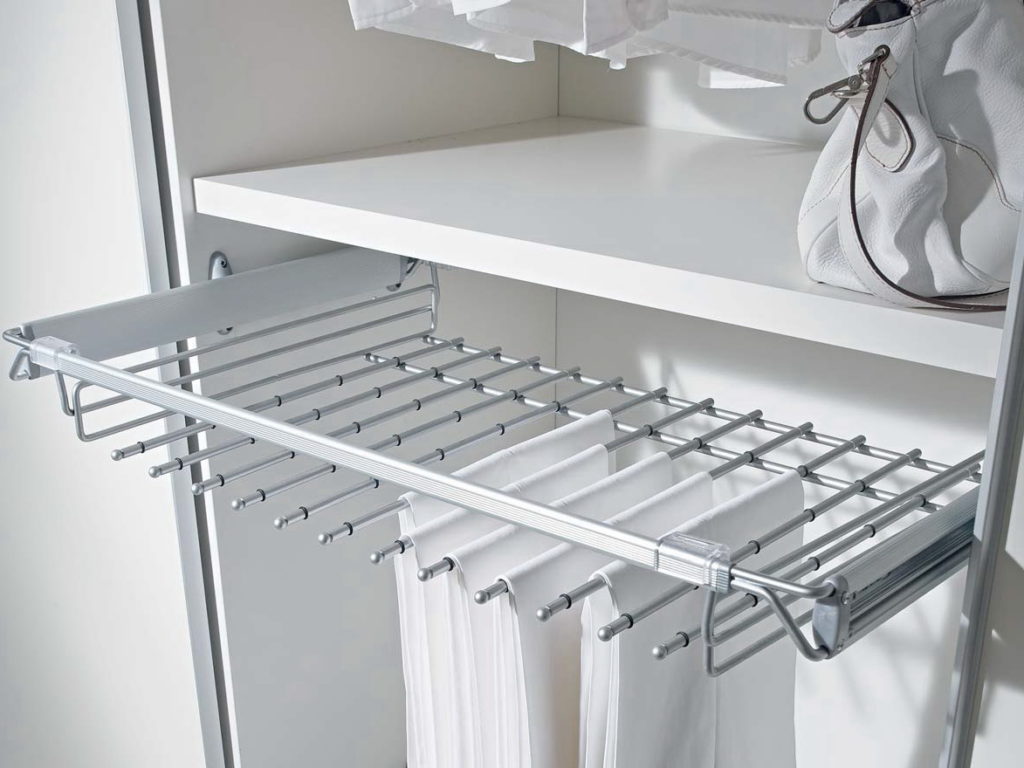
There are attachments for skirts, trousers and tie hangers, and clips on them allow you to secure the item. Very convenient if the hanger extends
Shoe storage system
There is always a lot of shoes in the house, it is important to organize a system for storing them, compact and convenient. The ideal solution is to place shoes on shelves or in special cabinets. It’s good if there is a compartment of the appropriate size for each type of shoe. And when using pull-out shelves, space is saved.
If space allows, it is worth equipping a full-fledged built-in shoe storage system. It has special shoe sections - convenient to use, shoes do not gather dust. Shoe racks are produced different sizes and have various ways installation, so it’s easy to match any dressing room.

An original design for shoes - it looks like pins with modules on a retractable frame. Compact and convenient system
Shelving
Rack - a structure consisting of racks and attached open shelves. Usually it is metal. Access to things stored on racks is free. Their main advantage is modularity. They vary in size and number of shelves.
Where to make a dressing room
Not every apartment has room for a full-fledged dressing room; you have to arrange it in the most suitable premises.
Dressing room in the hallway
It’s convenient to make a dressing room in the hallway, you don’t have to clutter up the room large wardrobes for clothes. A dressing room in the hallway involves storing outerwear, but if the space allows, you can arrange storage for all things. A good option- built-in wardrobe, finished to match the walls of the hallway itself. A mirror is a must-have detail; you can’t do without it in the hallway.
You can do:
- Closed - a large wardrobe, often with compartment-type doors.
- Open - racks, shelves, hooks for clothes. The option requires maintaining order, since all things are in sight, but takes up less space.
- Combined - consists of closed cabinets and open shelves. Convenient, things that are not used often are put away in a closed part.

The dressing room in the hallway should be installed along big wall. If the area is small, ideally - corner, from floor to ceiling
Arrangement of a dressing room in the bedroom
The bedroom is the room most suitable for a wardrobe. The models are different - with a large area, it is possible to make a whole dressing room. If the bedroom does not allow it, then it is better to use:
- open shelves and mobile hangers, decorated with decorative drawers;
- small built-in wardrobe made of plasterboard;
- partitions made of mirror or glass, which will visually enlarge the room.

A dressing room in the bedroom separated by a screen or curtain on a curtain looks good. This storage system is convenient in a small room
Design of a dressing room from a pantry
Making a dressing room in a pantry - good decision, especially for small apartments. It’s simple to do - you need to remove everything unnecessary, decorate it in a light color scheme (this will increase the space), replace the doors (preferably a compartment type) and fill it with: racks, racks, shelves.
Since the closets are small, you should equip them with mirrors, thereby making more space.
Dressing room in Khrushchev instead of a storage room
Khrushchevka small apartment with a standard layout. The only advantage is the presence of a storage room; it can be easily converted into a dressing room yourself. Depending on the size, you can make it into:
- built-in wardrobe - the niche already exists, all that remains is to install doors and install shelves and hangers;
- equip it with a full-fledged system for storing things - dividing it into zones and filling it with functional systems.

It is important to think about the arrangement of furniture and shelving. For rational use, space should be used from ceiling to floor
In the attic
The advantage of an attic dressing room is saving living space, the ability to collect things in one room, making them easy to find. In such a room there is room for all types of clothes and a fitting room.
The layout should be done based on the shape of the attic. If the attic is on a slope, then the dressing room should be located along the lowest or highest wall. Rational use the attic is obtained with a corner dressing room.

Attic dressing room - the ideal solution, trying on in front of the mirror, choosing the right set of clothes in comfortable conditions
It is possible to organize convenient storage for things almost anywhere. It’s not difficult to make your own dressing room by separating part of the room with doors, chipboard leaves, and drywall. But this method, is not acceptable in standard apartments, but in them there are often niches - an almost ready-made dressing room, the main thing is to arrange it correctly.
It’s easier for the owner of private houses, if space allows, you can give a whole room for a dressing room, especially suitable attic room. Experts recommend zoning the space.
The advantage of a do-it-yourself dressing room is the opportunity to design it for yourself, providing for the zones and elements that will be needed. In addition, the opportunity to show your design skills and create a one-of-a-kind dressing room.


Video


