Knowing the direction of the wind can be useful, because it is not for nothing that wind indicators - weather vanes - have been installed on almost all roofs for a long time. There are very simple models - just an arrow that shows where the air flow is directed. There are entire works of art - three-dimensional models. We will talk further about how and what to make a weather vane with your own hands.
What to make a weather vane from
Wind direction indicators are made from the most different materials. The main thing is that these materials are durable and can withstand weather conditions well. These conditions are met following materials:
The most durable, naturally, are metal weather vanes. But cutting sheet metal- difficult task. Thinner sheets - 2-3 mm, you can also try to cut them with a jigsaw with files good quality. And then you will have to stock up on them in large quantities. All other materials are cut with a bang by this tool.
Where to get it or how to make a sketch
Sketches for a weather vane can be found with dimensions, or you can create them from a suitable picture. To do this, any picture you like must be loaded into one of the photo editors, enlarged to the desired size and printed. This trick can be done with COREL.
Another option is to open the drawing in AutoCAD, outline the contours with half lines. You will get the desired outline. It can be increased to the desired size.

If with computer programs You are not very friendly, you will have to work with your hands - draw out the drawing into small squares, then transfer it to paper on a large scale.
How to make a weather vane
Glue the finished sketch of a weather vane in natural size, printed on paper, onto a piece of material of the required size. Any in an accessible way transfer the contours to the material. You can do this:

Using the marks, we restore the contour. On some materials this can be done with a pencil or marker, for metal - only with the same punch.

Next, you need to cut out the body of the weather vane along the resulting contour. You should choose a tool for cutting a weather vane depending on the type of material. In most cases, a jigsaw is suitable. For softer materials, you can also use a hand saw. For metal 2-3 mm thick, you can also try to cut a weather vane using hand saw or jigsaw. True, it will take a lot of time. The metal is thicker, even the most powerful jigsaw will not take it. For such a case, you can use a welding machine and a large chisel. Straight and not very rounded areas, you can try to cut them with a grinder.
After the “body” of the weather vane is cut out, the edges are processed until smooth. To do this, use needle files, files, and sandpaper. If you have a grinder, the process can be speeded up by installing sanding discs of different grain sizes.
How to make a turning mechanism
In order for the weather vane to perform its actions, it must be movably fixed. And so that at the slightest wind it turns. To do this, the “body” of the weather vane itself is attached to a rod, and the lower part to the roof or chimney (if a weather vane is made, a chimney cap with a weather vane). These two parts are connected movably - using bearings or other similar connections.
Using a ball
You can find any bearing and weld two parts of the “holder” to it. You can make a turning mechanism without a bearing, but with a ball of a suitable size or cone.

To make a rotary vane mechanism, you will need two metal pipes different diameters or a pin of a smaller diameter and a pipe of a larger diameter. Moreover, they must be selected so that one fits into the other with a minimum gap (2-3 mm).
The weather vane body is attached/welded to the wider pipe. Moreover, it is necessary to make sure that the upper part of the pipe is sealed. The lower tube or pin is used to attach the cardinal direction indicator. This is what is attached to the roof. Its upper part should also be welded or sealed.

If welding machine If you don’t have them in your arsenal, you can use wooden plugs - they are driven tightly into the pipe. For reliability, you can lubricate the walls with universal glue. But this option - with wooden plugs - cannot last too long. Frequent turns will wear away the wood, so after a while the rotating mechanism of the weather vane will have to be restored.

When assembling the weather vane, a ball from the bearing is placed on the installed pin, and the weather vane body with a welded pipe is placed on top. For smoother rotation, you can add oil to the mechanism. After this, you can consider that you have already made a weather vane with your own hands. True, you still need to secure it, and this is far from easy to do - working at heights with a heavy and bulky product in your hands is quite a challenge.
With a machined cone
If you can’t find a ball of the right size, but you know a lathe or you can work with metal, you can grind a cone that will replace the ball.

The weather vane assembly scheme itself remains the same: we attach the body to the upper pipe, and fix the lower one on a pole, roof ridge, etc.
Final revision
In order for a metal weather vane to serve for a long time and at the same time have a presentable appearance, it must be carefully painted, having first prepared the surface well. To begin with, using sandpaper remove rust completely to bare metal. Then we coat it with automotive primer (you can also use a rust converter). After the primer has dried, you can paint it.

Winged horse - why not decorate your home
We take paints for exterior work. All automobile ones are perfect, but oil-based ones, such as hammer ones, are also suitable. They give an interesting effect. You can also try painting with powder paints, but they require special conditions - heat. Otherwise, the coating will quickly fall off.
After applying the paint, leave the product to dry for two days without touching it with your hands. Such paints take a long time to dry (with the exception of powder paints), and after “testing” stains remain. If you are satisfied with the quality of the painting, you can install the weather vane in place.
Homemade weather vanes of varying complexity: photo reports
When making a wind direction indicator with your own hands, many questions arise. The design is simple, but there are many options. For example, the swivel assembly can be made in different ways, not to mention the shape and size of the housing. Everyone chooses what they like best. In order to form at least a general idea of how you can do this useful for a country house or garden plot device, we will give several examples of homemade weather vanes with step-by-step photos.
Based on a bearing from a VAZ pump
The bearing was taken from an old VAZ. Based on the size of the bearing, pipes were found - one of which this bearing fits into. We install a stopper in this pipe so that the bearing does not fall inside; after installing it, we weld it. From pipes of smaller diameter we make a cross, to which we will then attach letters indicating the direction of the cardinal points.

We weld another piece of thin pipe to the top of the bearing. This will be the rotating part, to which the body of the weather vane will then be attached. We weld two short sections of pipe perpendicular to this pin - we will weld the cut weather vane to them. To protect the bearing from moisture and dust, we use a boot from the steering rod, pulling it before we started welding the rotating part.

From aluminum sheet The cat is cut out 2 mm thick, the letters are made of galvanized steel. We'll spray paint them with bright red auto enamel, and the cat with black.

All that remains is to weld/attach all the parts to assemble the weather vane.

A homemade metal weather vane on a bearing is ready. Can be installed on the roof.
The simplest weather vane in 5 minutes from scrap materials
When hunting, fishing or dacha, you may need a wind direction indicator. Do very simple model you can literally out of nothing. You will need:
- plastic or paper glass (preferably large capacity);
- thick wire (you can use aluminum or steel);
- plastic screed;
- a washer with an internal diameter not less than the diameter of the wire.

The manufacturing process is very simple. First of all, carefully, without damaging the walls, remove the bottom. You can remove it from a paper cup, but you will have to cut it off from a plastic cup. Next, stepping back from the wider edge about a centimeter, we make two holes in the walls, located one opposite the other, and thread the wire. We bend one edge of the wire so that the wind indicator does not fall off.

We make a weather vane with our own hands from scrap materials
From the opposite side - from below - we put a washer on the wire, raise it to the level of the glass, leaving a very small gap (a few millimeters). We take the tie, tighten it, fixing the washer at the desired level.

That's all, we made a simple weather vane with our own hands. Of course, it is very short-lived, but long-term service is not always necessary. And it will correctly indicate where the wind is blowing.
Video on the topic
Photos of weather vanes and ideas for sketches
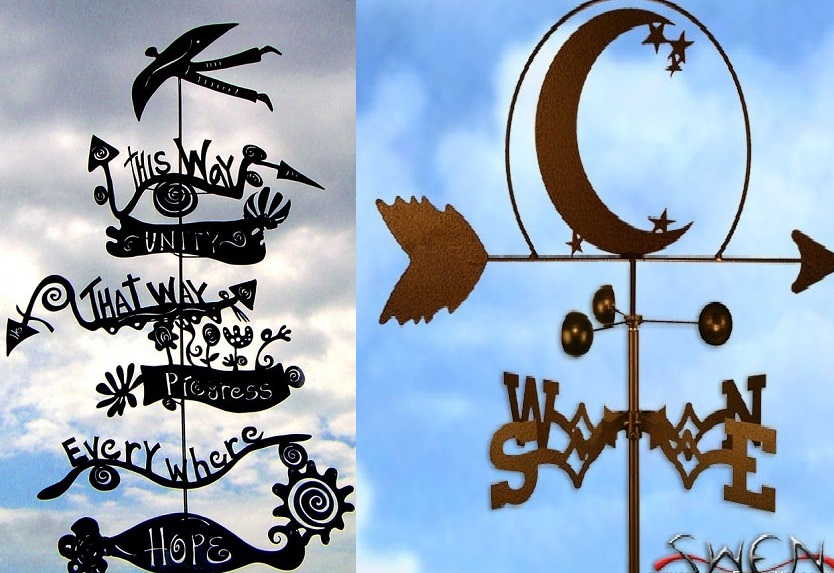
The most common themes for making a weather vane are a cat, a rooster, an eagle, and a ship. They are the most common. There are many options and variations. But there is very non-standard ideas. Perhaps, looking at them, you want something original.


You can attach a weather vane not only to a ridge or a pole - you can install it on a pipe


Stork - to happiness and wealth

Favorite hobby: fisherman can be seen from afar


Wooden weather vane - you can also make it yourself


A weather vane not only has practical value in a summer cottage, but also performs decorative function. Usually it represents a metal figure of a rooster or other forged composition on a vertical axis, which rotates with the help of the wind and shows its direction and strength. At first, weather vanes were exclusively made of steel due to the high strength and durability of such material. And now, in addition to this, a special anti-corrosion coating is applied to them, which protects the metal from negative influences. external influences.

Varieties
Weather vanes differ from each other in their purpose; the following varieties are distinguished:
- decorative options (serve as decoration);
- meteorological weather vanes (determine wind direction);


- chimney models (protect pipes from wind blowing and smoke entering the room);
- schlagen weather vanes (protect the chimney from the penetration of harmful animals or birds due to the action of special rattles or fans that create vibrations).
Moreover, some designs can combine several functions at once.


Material
The metal version of the weather vane is the most common, practical and affordable. Weather vanes can be from of stainless steel or copper. Moreover, the second option, although more expensive, is the most durable. In addition, this design effectively shines in the sun, is resistant to corrosion and is very easy to maintain. In addition, copper soft material, which is pleasant and easy to work with when forging.


As exclusive weather vane models you can use wooden structures, but they are less durable. And plastic is a budget option"not for everyone." Some craftsmen are even able to make a weather vane at their dacha from scrap materials (for example, plastic bottles). But it is unlikely to serve its owner for a long time, and it will not evoke any sense of aesthetic pleasure.
So, a wooden weather vane, subject to processing protective compounds will last 5 years. A steel structure will last for ten years if it is tinted every year, but a copper structure is almost eternal.


Design
A classic weather vane is usually made of metal up to 50 cm high in the form of an image of an animal. It can be a rooster, a cat, or even any fairy-tale or cartoon characters, which will especially appeal to children. If you wish, you can also make a wooden plane with your own hands. If you want the weather vane to serve a decorative function, make sure that its design fits seamlessly into the architecture of the building and the overall style.
For example, for wooden country houses Figures with a rustic theme are more suitable, and for an elegant roof with a spire - Gothic motifs.


When choosing the type of figure for a weather vane, keep in mind that each has a specific meaning. For example, a rooster symbolizes vigilance and, according to old folk beliefs, scares away evil spirits. The cat symbolizes comfort and coziness in the house, and is also considered a guardian of the house and a protector from evil spirits. The owl means wisdom, and the lion means strength and power. A weather vane in the shape of a horse is suitable for purposeful and noble people.
In Asian countries, weather vanes with the image of a dragon are common as a symbol of wisdom and spiritual strength. The image of a chimney sweep, according to popular belief, will bring good luck to your home. St. George the Victorious, killing a snake with a spear, is the protector of the house from negativity.


The griffin speaks of the strength and vigilance of the owner, and also protects the house from the influence of evil forces. It is interesting that even such a seemingly negative image as Baba Yaga is great solution: it will not only attract the attention of others with its unusualness, but will also protect against evil forces.


The eagle protects the home from enemies and, being a symbol of Heaven and the Sun, embodies strength, power and greatness. Such a weather vane will emphasize the independence of the owner and show his social status. And the stork patronizes families and is a symbol of mutual understanding. A very romantic image is a ship flying across the sky. Old Russian themes are also popular: for example, a weather vane in the shape of a rook or a hero.
Therefore, choose a weather vane design not only based on the aesthetic appearance of the structure, but also on the message that the figure conveys.


How to do it yourself?
Before starting work, you need to make a sketch and drawing of the weather vane in order to know exactly what size and shape the structure will be. A standard blank in the image of a rooster can be found on the Internet and the contours of the drawing can be transferred to paper. For the drawing you will need special paper with millimeter markings. Subsequently, this stencil is applied to the metal or other material that you will use. You can cut the figure with a jigsaw or special metal scissors, and file the edges.


To make a weather vane you will need: metal scissors; bolts; compass; bearing; drill with drills; wire; welding machine; kernel; wrench; cover with internal thread; a tube; file.
The base of the weather vane will be a metal tube. At its end a thread is cut into which the lid is inserted. Where there is no thread, a bearing is inserted. We will mark the cardinal directions on the weather vane with wire using a welding machine. Can be fixed on each side symbols cardinal directions, which are adjusted using a conventional compass.


We fix the completed structure on the lid, while fixing a metal rod into the support. A metal figurine and an arrow indicating the direction of the wind are welded to it. And don't forget to balance the figure's weight and counterweight to get accurate readings. And, of course, take care of safety precautions when carrying out installation work.


Fastening
The most common and practical option– fastening the weather vane to the chimney pipe. If the chimney is made of brick, then the strength of the fastening is not satisfactory. In this case, the weather vane structure is fixed in a vertical position with screws at the corners. And if you have a ventilation deflector, you can weld the structure to it.

You can attach the structure on special supporting elements to the horizontal edge of the roof slope. The only drawback is a wooden ridge that can crack over time under the influence of rain, snow, bright sun and other external influences. The figurine must be fixed strictly vertically in the very high point shelter


Another interesting and very non-standard option weather vane - cat figurine as if playing with a ball or catching a mouse. Cat figurine in in this case is a flag, and the counterweight will be a ball or a mouse. A similar design is supported by a rotating axial tube enclosed in a thicker copper pipe. Rotation occurs due to the presence of a bearing in the main body.


By following the advice of professionals, you can not only easily build a weather vane with your own hands, but also ensure its accuracy and durability.
- For greater accuracy of the weather vane, pay attention to the fact that there is no nearby tall buildings or trees, which can significantly distort wind direction indicators;
- the design of the weather vane should not be too weighty, and the figure on the arrow should be balanced with a counterweight - only then will the weather vane rotate freely;
- to connect the axle to the base, use a special bearing with protection from moisture so that rotation occurs freely;

Since ancient times, humanity has used a weather vane to determine the direction and speed of the wind. This can be a simple device in the form of a flag attached to a high pole, or a more complex device with a rotating tube and an arrow that determines the force of moving air masses. The rotation of the weather vane occurs due to air pressure on the flag, which tends to take the optimal position. At this time, the counterweight points in the direction from which the wind blew. The device is often equipped with bearings indicating the cardinal directions, which are used to navigate during observations.
How to make a weather vane with your own hands. Photo
You can make your own weather vane from wood and metal, plastic and tin, and its appearance can be a real work of art. The city halls of many European cities are decorated with beautiful, unique weather vanes in the form of birds and animals, buildings and ships, fairy tale characters etc. Thanks to the original appearance and simple, functional design, the devices have gained immense popularity among owners country houses, where they are, for the most part, just decoration.
The main stages of making a weather vane
To make a weather vane with your own hands, first of all, prepare a reduced version of it sketch on graph paper or other marked paper, or a life-size template of your favorite figure. In addition, you will need the following materials and tools:
- metal sheet 1.5 - 2 mm thick;
- wire with a diameter of 3 mm;
- steel pipes with a diameter of 15 mm, 22.5 mm, 25 mm;
- copper tube Ø18 mm;
- 50 mm piece of pipe Ø 60 mm;
- square rolled metal 15x15 mm;
- steel ball Ø 80 mm;
- ball from a ball bearing Ø 15 mm;
- round metal Ø 12 mm;
- metal plate 60x60 mm, thickness 12 mm;
- angle grinder (angle grinder, grinder);
- jigsaw;
- hammer;
- chisel;
- set of files;
- electric drill and set of metal drills;
- welding machine.
Below we will talk about how to make a weather vane with your own hands. Using our instructions and drawings, all the work can be done in one day. Photographs of individual stages, as well as videos, will help you correctly interpret our recommendations.
The process of making a weather vane with your own hands can be divided into several stages:
- preparatory activities;
- cutting out figures;
- arrow preparation;
- manufacturing of the rotation mechanism.
When working with metal, it is important not to forget about safety precautions. Welding work must be carried out in a ventilated area, away from fuels and lubricants. In this case, it is important to use special gloves and a protective shield, and choose clothes from natural fabric of sufficient thickness.
Weathervane drawings
As an example, we suggest using sketches and drawings of a weather vane in the form of very popular figures in our country. rooster or cat. The dimensional grid allows you to transfer the image to a metal sheet, increasing it to the required size.


Weather vane stencils. Photo
The drawing shows the dimensions of the rotating unit of the weather vane and the arrow by which the wind direction will be determined.

Weather vane drawings. Photo
Step-by-step instructions for making a weather vane
At the first stage, a cat figure is cut out of a metal sheet with a pre-applied outline. Steel billet must be secured to prevent it from moving. It's best to take advantage metalwork clamps, with which the metal sheet is attached to the workbench.

Making a weather vane with your own hands. Photo
You can remove burrs along the edge of a part using a grinder with an installed grinding all around.

IN hard to reach places processing is carried out using a wide, thin file.

Having firmly secured the metal figure on the workbench, use a drill with a drill bit Ø 12-15 mm make holes for the nose, mustache and eyes.

Making a weather vane with your own hands. Photo instructions
The characteristic oval shape of cat eyes is obtained by expanding the drilled holes into a semicircular file m and needle file.

3mm steel wire cut into pieces measuring about 100 - 120 mm, after which 10 - 20 mm are retreated from the edge of each part and an L-shaped bend is made. In this way, blanks for the mustache are obtained.

A cat's nose can be made from round rolled metal diameter up to 20 mm. The edge of the rod is rounded using the same angle grinder.

To imitate the shape and structural features of a cat's nose, chisel characteristic dents are made on the workpiece.

A prepared fragment about 5 mm thick is cut from the workpiece, obtaining a part of the required size.

The nose is installed using welding machine. After this, the mustache is inserted into the prepared holes from the front side and welded from the back.

After welding work be sure to treat the seams grinder until a flat, smooth surface is obtained.

DIY weather vane. Photo instructions
The same instructions will be useful for those who decide to make a weather vane in the shape of a rooster with their own hands.

As the base of the boom, two pieces of a square rod with a cross section of 15x15 mm are used. In this case, the plumage is welded to one fragment, and a tip-shaped part is welded to the other. Welding joints are carefully cleaned.


To make swivel unit, drill holes with a Ø 13 mm drill in its cover and steel ball.

The cover is welded to a 50 mm piece of pipe with a diameter of 60 mm.

On two opposite sides of the steel sphere they make the so-called flats- recesses for a clear fit of the ends of the arrow. A rod with a spherical element is welded to the base of the turning unit.


After both parts of the arrow are attached to the ball, proceed to fastening weather vane. To join the figurine with a spherical element, a semicircular fragment is cut out at its base, after which the parts are connected by welding. To avoid splashes of molten metal on the figurine, it is covered with a sheet of tin. It is very important to correctly orient the parts - the angle between the arrow and rotating mechanism should be exactly 90°.


Sustainability The shape of the cat is determined by the attachment points - its front paws are welded to a steel sphere, and its hind paws touch the base of the pointer.

To ensure that the structure can rotate freely, these parts are used. A piece of round rod was selected as a supporting element.

Support rod must fit tightly into the pipe, after which the edges of the parts are scalded.

Ball, which is needed for easy rotation of the structure, is lubricated with any grease and inserted into a wide pipe, after which a copper or brass tube is installed into it.

After assembling the weather vane turntable with your own hands, the design paint And install on the roof.
Video of making a weather vane with your own hands
The videos presented below will give the most complete picture of all the stages of making a weather vane with your own hands. You can use the video instructions for assembling a simple structure, or start building a windsock with a generator and lighting. In any case, a product made carefully and with soul will delight the owner and his family members for many years, pointing in the direction of the wind.
Types of weather vanes
The popular belief that if you meet a chimney sweep on the street, you will have good luck all day long, is reflected in weather vanes with the outlines of this character. Today such a meeting is almost impossible, so attract good luck you can bring it into your home by installing a chimney sweep figurine with a windsock on the roof.

A cottage with numerous turrets and passages can be decorated a series of weather vanes, which are easy to do with your own hands. Stylized images of figures from the Russian ethnic group will perfectly complement the roofs of buildings made according to folk motifs.

Cat has long been considered a guardian of the house and its protector from dark forces. By placing a weather vane in the shape of a mustachioed purr on the roof, you can create an aura of kindness and tranquility around your home.

Being a symbol of Heaven and Sun, eagle embodies strength and power, speed and greatness. A weather vane installed above the house in the form of this proud bird can indicate the independence of the owner, show his social status and high social position.

Weather vane in shape horse Suitable for purposeful people with an active lifestyle. Those who are guided by prudence and nobility in their lives will be able to express this to others by using this simple and elegant solution.

Griffin, installed on the roof, may indicate the internal struggle of its owner with light and shadow, about fluctuations between good and evil. In addition, a half-lion-half-eagle figurine can speak of the strength, warlikeness and vigilance of the owner, as well as protect the house from evil forces.

Weather vane in shape Old Russian rook will be in harmony with big house with many windows, doors and stairs. By installing such a figure, the owner of the household will be able to announce to others about the remarkable mental abilities and the desire for new knowledge.

Traditionally owl is a symbol of wisdom and patience, so a person who decides to install such a weather vane should think about how much his self-awareness corresponds to the chosen image. And even if everything turns out to be very difficult in this regard, a personal owl on the roof can give an impetus to self-improvement.

Religious motifs are not found on weather vanes very often, therefore, when deciding to make a weather vane based on the Bible or the Koran with your own hands, think about what you want to convey to others with such a decision. As a last resort, choose some heroic figure, for example, St. George the Victorious slaying the serpent.

Ship flying across the sky in full sail - what could be more beautiful and romantic? Having decided to make such a weather vane with your own hands, you must remember the complexity of such work and the need for accurate calculations.

Remembering old fairy tales, you can find that, despite the negative image, Baba Yaga has always been a positive character. Note that this fabulous figure is an excellent solution not only from an aesthetic standpoint, but also from a constructive point of view. The broom with which the witch is depicted is an ideal windsock.

Often a weather vane with Baba Yaga is also decorated with a figurine Black Cat- her indispensable companion and adviser. The beauty and originality of such a composition will attract admiring glances not only from children, but also from adults.

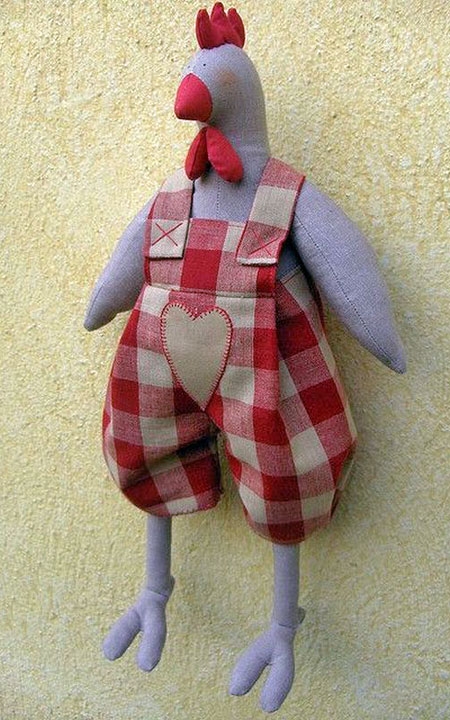
New Year 2017 is the year of the Red (Fire) Rooster, and the most popular gift will be its figurine or image. The Krestik needlewomen have a good tradition: to New Year's holiday prepare thoroughly. And this year will be no exception. Many of us will make or are already making a rooster with our own hands, or even not one, but several at once! After all, you must definitely please your family and friends with a handmade symbol of the year, and yourself with the fascinating process of creating this very symbol in various techniques handmade.
Creating a kind of GUIDE TO MASTER CLASSES from the Internet is also a tradition of our handicraft site, which was born a year ago. For you, dear craftswomen, we have selected only the best master classes online. Admire, look closely, discuss and choose the most colorful rooster! And then sew/knit/draw/blind/weave it. So, what technology can you use on the eve of the New Year holiday?
If you don’t have time to work, it doesn’t matter. The article contains links to craftswomen who sell finished works.
Cockerels made of paper and on paper
Making cards with the kids
If you are not a professional cardmaker, then before you start creating cards, be sure to read our article “Learning to make New Year cards with your own hands using the Scrapbooking technique.” In it you will not only find many ideas, but also get acquainted with the basic rules for creating postcards.
Any cockerel drawn by your child can be placed on a postcard. If it’s difficult for your child to figure out how to draw a rooster with his own hands, then show him this step-by-step instructions:

And then, it’s a matter of technology. Cut out the cockerel and make it the centerpiece of the composition. For example, your card can be this simple but cute. In your work, use New Year's paper and a bright red ribbon, add snowflakes, twigs and other holiday paraphernalia. Once you have a basic idea, the process of creating a card becomes much easier!

Photo from the site http://itsapatchworklife.blogspot.ru
If your child likes to color black and white pictures, give him this opportunity. Print the card template with a cockerel on thick cardboard and let your child get to work. Next, by cutting out a ball blank, you can complement the card with voluminous snowflakes and adhesive half-beads that imitate christmas balls etc. etc. Give free rein to your imagination with your baby))

YOU WILL NEED IT
8 more templates for coloring, as well as 2 step by step instructions for drawing more realistic roosters you will find in the archive, which you can download quickly and for free!
Take note of the idea with a cockerel on a stick, like on Elena Yurchenko’s postcard. Her cockerels are cut out of felt, or you can cut them out of paper.

Roosters made of colored paper
An applique made of colored paper can also be placed on a greeting card. But such an application can itself act as a postcard. To draw and carefully cut out all the details, children will need the help of their parents, but they can glue them themselves.

Olga-15 suggests making funny cockerels out of paper in her master class.

The Rooster blank is a rectangular sheet of flexible paper or thin cardboard, folded in half lengthwise. Its size is 13.5x10 cm. We make 7-10 inclined slits along the fold line (approximately every 1 cm). Their angle of inclination is 50-70 degrees, and their depth is ¾ of the height of the folded sheet.
Ekaterina Ivanova in her video tutorial shows how to make a red rooster using the Origami technique:
Roosters using Quilling technique
A very interesting idea is to lay out only a luxurious rooster tail from quilling paper. It's not as hassle as laying out a whole rooster, and it can turn out very impressive! Here is a rooster without a tail as a basis (see the photo below for how it looked in the original).

Print it on a color printer, and then fantasize about the tail. As an example, here is one such work (although the tail here is modest, but you will try, right?))

And if you are not afraid to make a whole rooster using the Quilling technique, then you can use this ready-made postcard as a basis:

Or this template:

A cheat sheet on the basic elements of Quilling to help you:

Button applique
And here are absolutely stunning handsome roosters, made of multi-colored buttons, half-beads, rhinestones and beads! You can take the contours of the cockerels from our archive as a basis (link just above).


Crochet cockerels
Many needlewomen are familiar with the crochet hook and will be happy to knit a cockerel from multi-colored threads. And Krestik will help you decide on a model and offer several master classes on this type of needlework.

You can also buy knitted cockerels from Svetlana.


Felt roosters
The fastest and not complex options creation of the symbol of 2017 - felt roosters. The material is easy to process, holds the shape of the toy well, and does not require processing of seams. On the contrary, hand stitches along the face of the product give it a special flavor and charm.


Photo from the site https://madeheart.com


Photo from the site http://ktototam.ru/
A rooster figurine carefully cut out of thick felt will be both a Christmas tree decoration and a pendant.

Photo from the site http://ktototam.ru
And if you decorate felt cockerels with embroidery, flowers and other decorative elements, it will turn out incredibly beautiful!

Photo from the site http://mmmcrafts.blogspot.ru

Roosters in Tilda style
Well, how can we manage now in our lives without the tilde-Rooster? On the ToySew website there is a master class on sewing this popular toy.

Master Vetic on her blog posted patterns for the Rooster and Chicken Peas based on the tilde pattern. An interesting couple will turn out if you put in the effort and patience!

And for inspiration:

Cockerel Yurik from Orange Toys
Maria Fedorova made a funny video about her tilda roosters (the link to the patterns is in the description of the video!):
Coffee cock toys
Aromatic, or coffee, toys compete with tildes in popularity. There are roosters using this technique.

A coffee cockerel can be like this:

Photo from the site http://zabavochka.com
You can easily sew it yourself using one of the patterns suggested above. “Cross” talked about all the intricacies of creating coffee toys in this master class.
If you think that you cannot cope with such work yourself, contact a specialist. Yulia Charikova made enough branded toys with the smell of coffee and put them up for sale at this address.

Fur interior toys
Oksana Svyatkovskaya will show her vision of a rooster and show how to sew it correctly using ready-made patterns. Her Rooster is made from faux fur, but who’s to say that this doesn’t happen or that he’s not good?)


In the workshop Everything for creativity (dljatvorchestva) there are a lot of blanks for painting and decoupage. Choose and create!

This is the beauty you can get:


If you don’t want to make a souvenir in the shape of a rooster, then you can decorate any wooden surface image of a rooster. The scope for creativity here is simply limitless!!! Here are just a few examples for inspiration:


Roosters felted from wool
Some craftswomen make wool toys that look like real ones! Let's admire and be inspired! And if you really want to buy one of these beauties, then look for them at the Masters Fair (the link is on each photo).


Elenia collected in one place many different Roosters felted from wool and suggested to MK how to create one of them. It turns out very cute!
Roosters embroidered with cross stitch, beads and ribbons
Perhaps you love embroidery more than other types of needlework. Then you can place the symbol of the year on a pillowcase, decorate it in the form of a panel, a picture in a frame or a brooch. The main thing is that the image of the Rooster warms your soul. And if you give away your work, find out the preferences of the recipient.
You will find more than 50 different patterns for embroidering roosters and cockerels in a special album
weather vane – meteorological instrument, used to determine the direction of the wind, as well as its speed and strength. It is a metal flag with a counterweight at the other end. Rotating around its axis, the device rotates under the influence of wind. The compass rose is installed on the same axis.
Of course, wind parameters nowadays are measured with special electronic devices, so an ordinary weather vane is often used as a decorative detail on the roof of a house.
No one can accurately guess when people began to use weather vanes. The oldest one at the moment can be considered a weather vane, made by a Greek astronomer a little over 2000 years ago. It crowned the Tower of the Winds in ancient Athens and also had a symbolic meaning.
Weathervanes were very popular in the Baltic and Scandinavian countries. In coastal port cities, it was necessary to determine whether the wind would allow a ship to dock. To this day, they decorate the roofs of buildings, striking with their variety of shapes and, at times, being real works of art, but only as decoration.

Types of weather vanes
According to their functional significance, weather vanes are divided into the following types:
- Meteorological instruments. Precisely balanced wind vanes that measure wind direction. This also includes Wild weather vanes, which allow you to determine wind speed. The design of the latter includes a propeller or plate that swings under the influence of air currents. The propeller also serves to scare away birds;
- Chimney weather vanes . Protect chimney from blowing wind, preventing smoke;
- Decorative weather vanes . Artfully crafted weather vanes are commonly used to decorate a home and add personality to a home, adding a unique flair. Mostly they are figurines of animals, mythical creatures or birds, but there are also very original ones, reflecting the tastes of the home owners.
Often all of the above types are contained in one device.

Symbolism of weather vanes
Over the past centuries, the weather vane has become the subject of legends and served not only as a decoration for the building, but also as a kind of amulet. According to the Eastern teachings of Feng Shui, a weather vane helps to establish warm, friendly relations with neighbors.
The most popular are weather vanes with the image of a rooster, especially in Russia. The rooster symbolizes vigilance. In folk legends, he could scare away evil spirits, protect the home from fires and other disasters. In Christianity, the rooster is considered a symbol of St. Apostle Peter.
In Asian countries, weathervanes in the form of dragons are often found. The dragon personifies wisdom, and a weather vane with its image also serves as a talisman.

When choosing a weather vane figurine for your home, it would not be superfluous to ask what this or that image means. For example: a cat serves as a symbol home comfort, the eagle is called upon to protect from enemies, the lion represents strength and power, the ship represents determination, the stork represents the family hearth.
It is not necessary to strictly adhere to any canons. You can choose the figure you like. If you wish, it is not at all difficult to make a weather vane with your own hands.
Materials for making a weather vane
To create a weather vane, it is preferable to use metal: sheet steel or copper. This design will last a very long time without losing its attractiveness or deteriorating from exposure. environment. Forged products look very impressive.
Wood and plywood structures also work, but they suffer from precipitation and temperature changes. To extend their service life, they are coated special composition and varnish.
Quite often lately plastic has been used to make weather vanes. It is lightweight, non-corrosive and impervious to precipitation. But his life is relatively short.
The simplest weather vane can be made from plastic bottles or CDs. Of course, such a device can decorate a modest garden house, a greenhouse or a shed, but not a solid cottage.

Required Tools
The material chosen for the weather vane determines the set of appropriate tools for its processing, including everything necessary to install the weather vane on the roof.
Possible set of tools: ruler, drill, various drills and files, emery, hammer, soldering iron, jigsaw (for working with wooden parts, plywood or plastic). Depending on the complexity of the design, a lathe and anvil may be required.
Main parts of a weather vane
The weather vane design includes:
- bearing axle;
- flag with counterweight;
- frame;
- a cap that protects the housing from water;
- compass rose showing the 4 cardinal directions

Before you make a weather vane with your own hands, you need to select or carefully draw up a drawing of the weather vane. This will help avoid errors and inaccuracies in the design.
The weather vane can be any size; there are no strict rules. But basically they stick to the size 70 x 40 cm (for a cottage).
Making a weather vane from metal
- To construct the body, a segment is taken metal pipe, about 130 mm long and 13 mm in diameter, in the upper part of which a thread is cut. A bearing with an internal diameter of 9 mm is installed inside the lower part of the pipe. It is advisable to use a bearing with a closed housing that is not susceptible to moisture;
- A rod made of smooth reinforcement, 450 mm long and 10 mm in diameter, is used as the axis of the weather vane. The rod is sharpened to a diameter of 9 mm at lathe or using sandpaper. Adjustable to bearing size;
- To make a wind rose, metal rods (preferably steel) of small diameter are taken. They are welded at right angles to the housing cover and end with letters indicating the 4 cardinal directions;

- On inside the lid is carved, then the lid with the compass rose is installed on the weather vane body;
- The rod of the structure is fixed in the hole in the cover and fixed in the bearing. Then the ease of rotation of the structure around its axis is checked;
- To prevent atmospheric moisture from penetrating inside the case, a special cap is fixed above the lid;
- The axle is adjusted to right size and a decorative flag is attached to it - the main decoration of the product. This is done by welding, but you can use bolts or rivets.
Figurine for a weather vane
The most interesting creative moment is to make a weather vane flag figurine.
The size is selected individually, taking into account the dimensions of the entire structure as a whole. For windage, the figure should be somewhat stretched along the horizontal plane.
The design you like is cut out of paper and glued to the material from which the figure will be made (metal, plastic or plywood). Then it is cut out with an appropriate tool (for example, metal scissors).

The edges of the product are carefully processed with a file. Metal flags are often embossed.
How to properly install a weather vane on a roof
Immediately before installation, the product body should be filled with lubricant (for example, grease).
The height at which the weather vane is mounted must be at least 10 m from the ground, at the highest point of the building. The weather vane is attached to the ridge of the roof or to the cap of the stove (or ventilation) pipe. Since the structure is constantly subject to loads under the influence of wind, it is advisable to carry out installation and strength testing with special care.
An important point is the orientation of the weather vane to the cardinal points. A compass is used to determine them.
Attaching the weather vane to the pipe cap
Stove hood or ventilation pipe– the most convenient place for fixing the weather vane. In this case, the thickness of the metal of the cap itself must be 1.5 mm or more!

A bracket is installed in the cap. For this, a strip of steel 2 mm thick is used, bent at both ends by 30–50 mm. The bracket is secured with rivets.
In advance drilled hole cap, insert the threaded vane axis at the very bottom, and attach it to the bracket using a washer and nut.
Attaching a weather vane to a roof ridge
In order to secure the weather vane to the roof ridge, you will need 2 strong, bent at an angle, metal plates.
When installing, you must act carefully so as not to damage the roof or break its tightness.
Simple DIY weather vane
Not everyone can afford luxurious cottages decorated with exquisite wrought iron weather vanes. For a modest country house you can build a weather vane from inexpensive materials, showing your own imagination with minimal material costs.
For decoration summer cottage you can make a figurine of an animal driven in the wind using a propeller.

To make such a device, you can take plywood, if possible, moisture-resistant. The propeller wheel is made of tin, the edges are bent to form the blades. The parts of the device should not fit tightly together to ensure easy rotation of the weather vane. The resulting product can be painted.
How to make a weather vane with your own hands from plastic bottles
The most “budget” option is to make a weather vane using two plastic bottles.
One bottle is cut and a propeller is made, the second is used to make a weather vane. Next, the parts are strung on a metal rod and installed in the right place.
Regardless of the complexity of the weather vane design, its creation and installation must be approached responsibly, then the device will function correctly and not only bring aesthetic pleasure to your appearance, but also be useful as a meteorological instrument.