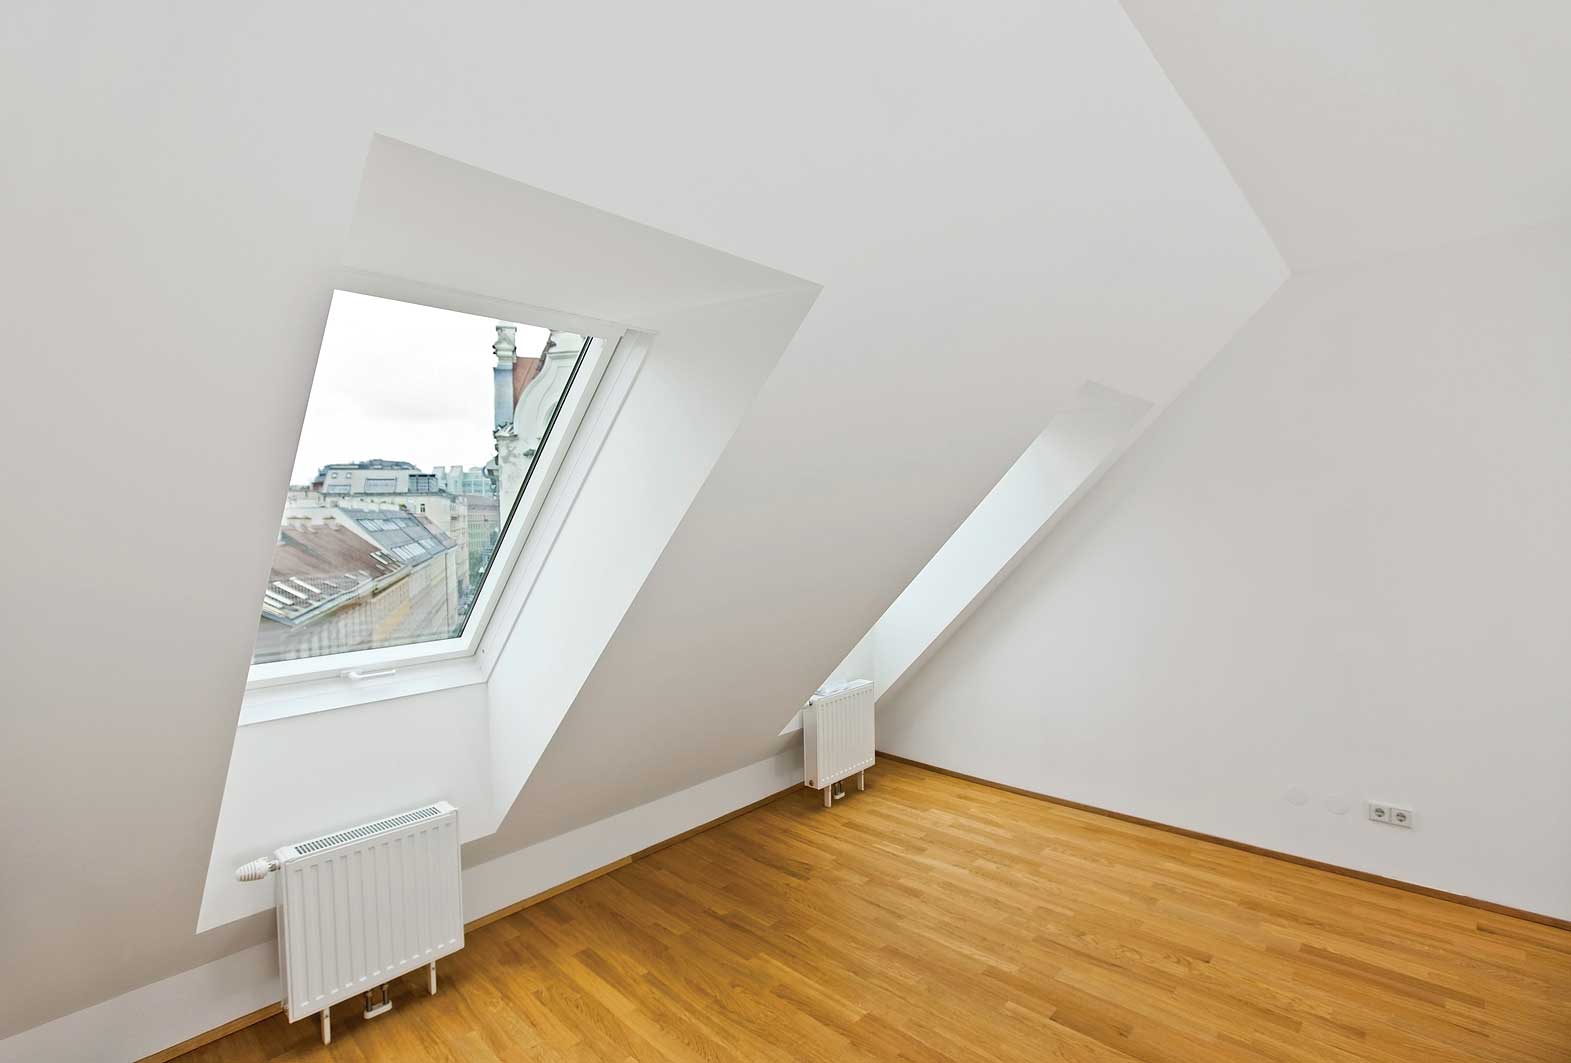
The electrical wiring in the attic has a number of additional requirements, which should be taken into account at the design stage.
In many ways, these requirements depend on how the attic is used, but important factor are the materials from which it is made. Therefore, in order to provide for everything possible nuances, we will consider all options.
Choosing a method for installing electrical wiring in attic spaces can be performed open and in a closed way. But if for other rooms the choice of installation method depends largely on your wishes, then for attics this choice is very limited.
Open wiring
Attic wiring in a private house, which is made of flammable materials, should almost always be open.
For houses made of combustible materials this is generally optimal choice. After all, it allows not only to significantly save on materials, but also to carry out repairs quite simply (see).

So:
- In attics, exposed wiring can be done in several ways. If an unprotected wire is used, then, according to clause 2.1.69 of the PUE, it can be laid on rollers. In this case, the height of the laying must be at least 2.5 meters.
- If you cannot lay the wiring higher than 2.5 meters from the attic floor, then you will need special protection from mechanical damage. Typically, metal or PVC corrugation is used for this.
Note! According to clause 2.1.70, with this installation method, only copper wire can be used.
- But this method is far from always optimal. Much more often for installation open wiring apply steel pipes or metal corrugation. With this installation method, the height of the gasket is not important.
- But the pipes must exclude the possibility of moisture accumulation and ingress into them. Pipes or corrugations must be connected to each other. Although for attics residential buildings the tightness of such joints is not mandatory.
Hidden wiring
Hidden email Wiring in a private house for the attic can only be used if it is made of fireproof materials. At the same time, this premises is subject to other requirements for this method installation
- Hidden wiring can be done both in the ceilings and in the walls of the attic. In this case, the height of the wiring does not play any role.
- When installing hidden wiring, you can use aluminum wire.
- Hidden wiring should not pass through ventilation ducts and come into contact with surfaces exposed to heat.
- When passing through wall openings hidden wiring must be performed through a sleeve and have a supply of wire. In this case, the sleeves must have a fire-resistant seal.

Requirements for installing a lighting network in the attic
When designing, some nuances of the attic space must be taken into account. After all, according to clause 15.1 of VSN 59 - 88, attics are classified as high-risk premises. In connection with this, increased demands are placed on them.
Note! According to paragraph 2.43 of VSN 59 - 88, for private houses with a height of less than three floors, as well as for country houses An attic lighting network is optional. If you still decide to mount it, then it must meet all other standards.
So:
- First of all, the attic lighting network, according to Table 1 VSN 59 - 88, must provide illumination of at least 10 lux. For comparison, the kitchen illumination should be at least 50 lux.
- In this case, for attics it is enough to illuminate the main passages. Installation of full lighting is not necessary.
- According to clause 2.27 of VSN 59 - 88, for attics, modern wiring in the house should be done exclusively with incandescent lamps. Fluorescent lamps are not recommended. But at the time the standard was written, diode lamps probably did not yet exist. But this point is advisory in nature and I don’t recommend focusing too much on it.
- There are also restrictions on the maximum number of lamps per lighting group. For attic spaces it is increased to 60 lamps. At the same time, according to clause 7.1.27 of the PUE, the power of these lamps should not exceed 65W.

- It is quite important that all attic control equipment should be located outside the attic. Therefore, switches are usually installed at the entrance. Although, if you are not going to visit the attic space too often, then the price of the issue will be significantly reduced, provided that turning on the lighting will be done simply circuit breaker, feeding this group in the distribution panel.
Conclusion
Now you know the main differences in designing wiring in attic spaces. Based on this, you can choose in more detail how wiring diagram, and the method of laying the wire.
You can learn more about the methods of installing wiring in attics in the video on the pages of our website.
High quality interior decoration attic will turn it into extra room, not devoid of warmth and comfort
In our previous articles, we described the possibility of converting an attic into an attic and promised to tell you about the next stage - finishing works Oh. Finishing the attic with your own hands is a completely doable task, especially after you have dealt with the installation of the rafter frame and production roofing works. Expensive finishing material in current realities it is no secret to anyone. But by using little construction tricks and doing everything ourselves, we, of course, can save a fair amount. Therefore, armed with a set of necessary electrical and hand tools, we can get to work. But first, it would be nice to think through the whole process, draw up a work plan for yourself and calculate required amount consumables.
Floor, walls, ceiling
Let's start with the floor. Having previously taken care of the thermal insulation of the interfloor space mineral wool, let's start installation. We have ready-made logs on which the slabs are laid. You can use a DSP board ( cement bonded particle board) or OSB (oriented strand board). This type of coverage will allow us to further improvise with the main (final) floor covering: from standard, boring linoleum to everyone, to decorative laminate with a wide choice of colors and textures. You can, of course, follow in your grandfather’s footsteps and close the floor edged board 25-40 mm. It will also be nice, especially if it is pre-treated and then covered with stain and varnish.

 Finishing OSB boards considered a universal option
 To decorate the walls, as well as the under-roof space (), all the above materials are used, but you can also add plasterboard to them - a material that has proven itself with the most the best side ease of processing and installation. This entire motley row of slabs and sheets is attached without any problems with ordinary self-tapping screws. The slabs are cut to size with a jigsaw, and the GC sheets construction knife. Therefore, there will be no problems with installation, despite the squaring of the lining, which can initially be intimidating. It is recommended to pay special attention to the slopes of dormer windows, if any. Is not flat plane, so you need to be extremely precise when marking. It doesn’t matter at all which of the listed materials you use when covering the inside of the attic. The main thing is that everything fits correctly, without large gaps or protruding irregularities. All this can subsequently lead to overspending building mixtures.
Advice!
If suddenly, as a result of an uneven cut when cutting DSP or OSB boards, a gap has formed at the joints (which happens when professional use jigsaw), and it is not possible to use a new sheet, this technical flaw can be filled with a mixture of putty and sawdust during the puttying process.
 The best way finishing the attic slopes - lining with plasterboard slabs
 Installing windows
The next step, of course, will be the installation of translucent structures. In each attic, their number and configuration naturally differ. Some even completely glass the gables, some limit themselves to only windows, and in some places they install glass door blocks to exit to the balcony. We will not raise the topic of dormer windows now. You can learn about this from other articles on our website. We will try to describe, in as much detail as possible, the sequence of installation of vertical translucent structures using the example of installing a banal PVC window. First you need to know what the window actually consists of. Its components (standard for all window, door and stained glass translucent structures):
- PVC frame made of extruded profile with galvanized metal reinforcement inside;
- double-glazed window (two or three glasses connected into a monolithic, sealed block. Glasses can be of different thicknesses and carry different functional loads);
- plastic beads with rubber seals;
- inserts for double glazed windows;
- accessories, where provided.

 Dormer windows are an excellent source of daylight
 For self-installation translucent structure, in our case a window, we will need the following tools:
- hammer;
- Phillips screwdriver (or screwdriver);
- level.
Having placed the window against the wall, remove the glazing beads by prying them up with the sharp end of a knife blade and using it as a lever. Carefully remove the glass and plastic inserts. We insert the light frame into the opening, and using a level we align it horizontally and vertically, making the appropriate marks with a pencil. Make sure that the gaps between the frame and the wall around the perimeter are approximately the same. Using a metal drill (8 mm), we drill the PVC profile (and with it the reinforcement profile) halfway. If our base is wooden, and self-tapping screws are used as fastening elements, then use a 6 mm drill for the second half. Using a screwdriver or screwdriver, screw the self-tapping screw into the hole until it stops. Make sure that when tightening the screw, the frame does not deform. To do this, use wood scraps as substrates.

 Installation of roof windows should be carried out only according to the instructions and with constant checking of the quality of installation
 Advice!
For fastening into brick, foam concrete or concrete wall It is best to use anchor bolts. In this case, the holes are drilled through, taking into account the length and diameter of the anchor.
You can also use mounting plates inserted into the grooves at the ends PVC profile. IN in this case the profile is not drilled. The plates are attached to the slopes and subsequently closed decorative inserts with mandatory insulation. We check the level for any distortions in the frame and you can install a double-glazed window. We put the plastic inserts back, put the glass on them and secure it with glazing beads. If you do not have a special rubber hammer for such manipulations, you can use a block of soft wood and a regular hammer. If the glazing bead fits very tightly, bend it and insert the ends first and, moving towards the middle, carefully seat it in place. After the double-glazed window has taken its place, we can begin foaming the perimeter. There is no rush in this matter. The foam should fill the gap evenly. After standing (at least a day), the excess can be cut off without any problems with a construction knife. All that remains is to adjust the fittings (where they are provided). Our translucent structure is installed, and you can start working on the slopes.
 Correct installation dormer window will ensure its reliability and durability
 A few words about wiring
We should probably go back a little and say a few words separately about electrical wiring. The wiring is done immediately before sewing.
Important!
The wires are corrugated to provide additional safety and only the ends are brought out.
The holes are cut using a special drill attachment. The wires brought out are twisted into a knot. It is worth noting that any electrical installation work begins with drawing up a wiring diagram. Only careful planning of locations lighting fixtures and power supply points, will protect your walls from unnecessary, unnecessary holes.
 Electrical wiring in the attic is a factor of increased danger, because the roof structure mainly consists of wooden and, therefore, fire hazardous elements
 Well, let's assume that you did an excellent job with the attic cladding, and wires are already peeking out of the neat holes, waiting in the wings. And translucent structures pleasantly please the eye, simultaneously protecting from drafts. Time to move on directly to the finishing work. For this we don't need much:
- electric drill with a nozzle for kneading mixtures;
- roller;
- spatulas (from small to wide, usually 3-4 of different sizes are used);
- aluminum corners (for external corners);
- primer;
- putty.
 Sealing joints and seams of drywall on walls and ceilings
 On smooth walls can be used immediately finishing putty, having previously carefully primed the entire surface. Should be paid Special attention for mixing construction mixtures. The putty should be brought to the consistency of thick sour cream. To do this, after kneading it with a mixer once, we leave the mixture for about five minutes and only when it is properly soaked do we knead it completely. Add water in small doses so that the putty does not turn out too liquid and “float”. When the mixture is ready, taking a wide spatula (40-50 cm) in one hand and a narrower spatula in the other, apply the mixture over the entire width of the wide spatula, as if using strokes. Now take a wide spatula working hand and carefully apply a layer of putty to the wall. You should succeed even layer 1-2 mm thick. After repeating this manipulation several times, and eventually obtaining about a square meter of “closed” area, we moisten the spatula with water and smooth out the resulting irregularities. We strengthen the joints of any material with tape putty mesh. Don't worry if you don't succeed the first time. You need, as they say, to “get your teeth into it.”

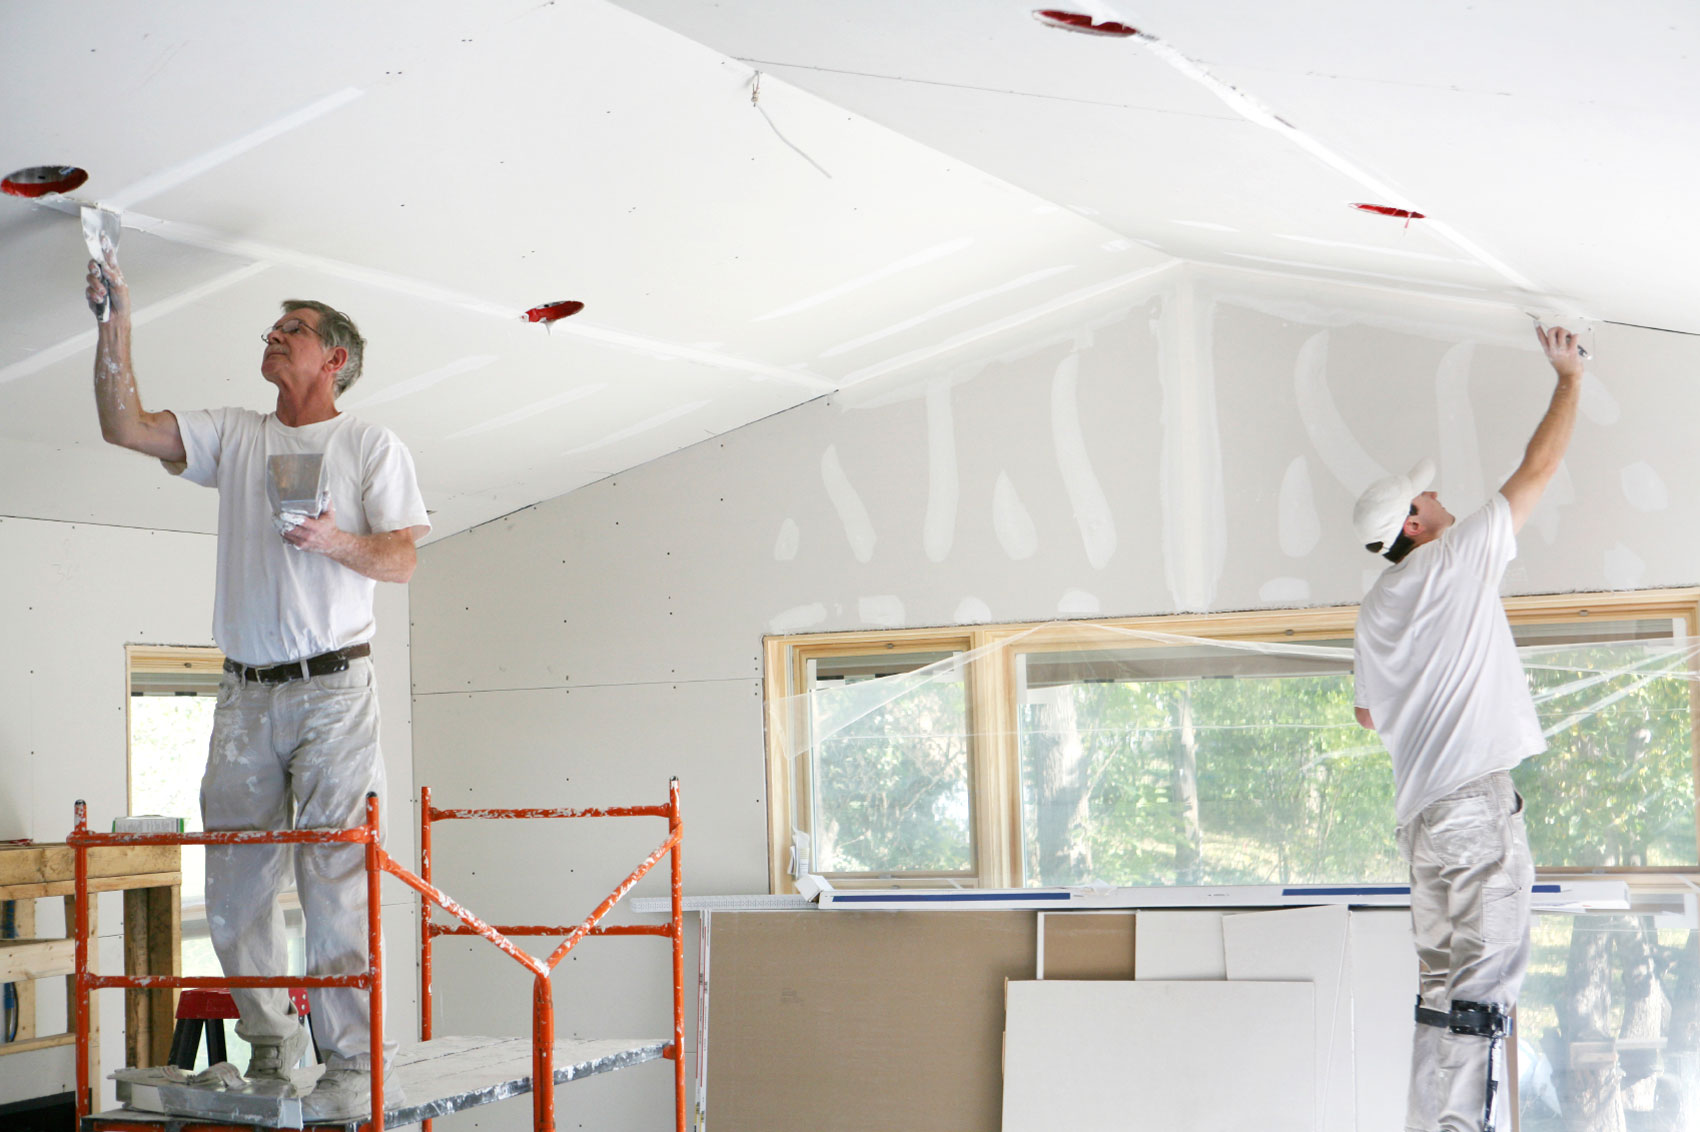 The service life depends on the quality of the putty. attic room
 Important!
An important nuance is that the spatulas are always clean and that there is no dried putty left in the bucket (or any other vessel) where you prepare the mixture.
This will lead to the formation of stripes, scratches and other unpleasant “surprises”. Therefore, do not be lazy to thoroughly wash the container and spatulas after each batch. If you do develop such defects, do not rush to correct them “raw”. Let the putty dry. Afterwards, sand the desired area with a sanding mesh, and then carefully apply the putty with a small spatula. After it dries, you will see that there is no trace left of the grooves. All that remains is to go over this place again with the sanding mesh. Smooth and smooth surface you are guaranteed. On such a surface you can apply paint, glue wallpaper, ceramic tiles yes, basically, anything. Decorating a room in the attic or in any other room includes many works, each of which is very important to achieve the final, desired result, and one of them should not be neglected.

 For finishing surfaces, it is recommended to use light colors that diffuse light well in all directions
 Another option is wood finishing. By by and large, here you can do without stitching DSP sheets, OSB and GC. You just need to secure it cross beam between the elements of the rafter frame. A size of 50x50 mm is quite enough. You can attach it using metal corners with holes for self-tapping screws. Having prepared such a frame, you can safely begin sheathing. Usually clapboard finishing is practiced, but you can find others, more interesting options, for example, imitation of a log house. The tree is selected completely differently than for load-bearing structures. Here, the more knots, the better.
Important!
At self-training The required stages of wood are sanding and treatment with an antiseptic.

 If you want to organize a design in an eco-style, then finishing the attic with wood will suit you
 Coating with stains and varnishes, as they say, is a matter of taste. Natural wood was and remains one of the most popular materials for finishing work, especially in country houses. Its natural structure will not leave anyone indifferent, the main thing is to present it correctly.
Has your attic already acquired a residential look? Well, almost residential. Now is the time to do the lighting. We install sockets, switches and lamps in the holes prepared in advance. When the lighting is turned on, the interior decoration of the attic walls will take on a residential and finished look. And, in general, trust your imagination and do everything according to technology. The results will pleasantly surprise you.
Every day, attic spaces are used more and more often for arranging communications, especially for electrical wiring. Basically, the purpose of equipping the attic with wiring is to save on materials, since there is no need to purchase additional decorative materials to hide cables. But to install such a communication system, you need to know how to make wiring in the attic, what material to use and what to consider when working.
Is this wiring necessary?
For the most part, attic spaces are made of flammable materials, the main one of which is wood, since they are used. This popularity is due to its low cost, light weight and ease of installation. Even taking into account the mass protective compounds, wood will never stop being flammable.
In addition, attics usually contain a lot of dust, which can easily cause a fire if the wiring is not installed correctly.
And of course, don’t forget about various insects and rodents that love to chew on wire insulation. And as you know, broken insulation main reason short circuits and fires. And at the same time, there are a lot of things in the attic that are easily flammable.
Ultimately, given the many negative aspects of the attic, it is better not to do wiring in it, since there is a high risk of fire. But despite this, many still do it, since this step allows you to significantly save on decorative finishing, eliminates unnecessary installation work, gating of ceilings, walls and floors.
In addition, wiring in the attic of a house is often carried out to supply electricity from air lines power transmission to . There is no way to do this without using the attic.
In general, the arrangement of wiring in the attic is not very good good decision, but if you can’t do without it, all the work must be done correctly, taking into account all the features and precautions, and for this you need to study the arrangement methods and its basic rules.
Types of electrical wiring
When equipping an attic space, it is possible to use two types of wiring:
- Open, must consist of copper wires.
- Closed, made of aluminum wires with insulation and installed in fireproof materials
Open electrical wiring is laid through steel pipes or on insulating rollers.
One more good option there will be tension wiring on strings, but it can only be installed if the attic height is more than 2.5 meters, and such are extremely rare, if they still exist.
Open wiring includes wires with a non-flammable sheath. This type of wiring can be stretched anywhere.
Hidden electrical wiring can be made in walls and ceilings made of fireproof materials at any height. But its arrangement is not recommended, with the only exception being attics made of fireproof materials. 
What materials to use for work
Now it’s worth figuring out which specific wires need to be used.
- Given the high fire safety of the attic, aluminum wiring should not be used. The only exception is the input cable (provided its length is no more than 5 meters).
- Accordingly, only copper wire can be used.
Such requirements are specified in the PUE (electrical installation rules). We recommend using this set of rules for any work with electricity.
At the same time, we note that copper the wire will do Not just anyone; you need to approach your choice as responsibly as possible. Only wires with non-flammable and low-smoke insulation can be used. To simplify the task, markings are as follows:
- NG-LS
It would also be a good option the new kind cable that has rodent-proof insulation. It contains toxic substances that repel them. But it is worth noting that such insulation is also harmful to humans, therefore they cannot be used in residential premises.
And now it’s worth figuring out how to do the electrical wiring in the attic yourself.
Electrical installation
As already mentioned, installation can be carried out in several ways, namely:
- Through the pipes.
- On insulating rollers.
- String way
Let's look at the features of each of the presented ones.
Wiring in the attic in pipes
This is the most safe look arrangement of electricity in the attic. Considering state standards RF, to set up a network it is necessary to use metal pipes at least a few millimeters thick. European standards allow the use of plastic non-flammable pipes.
Let's look at some features of the system:

Wiring on casters
In this case, open installation is used with the wire secured to prepared rollers. For this type of device, it is advisable to use rodent-resistant cables. Among the main installation features:

Also one of the varieties of roller arrangement is string wiring, among its features:
- It is a wire device that is not protected by insulation. Fixed at a height of at least 2.5 meters from the floor.
- The fasteners are located at a distance of 5-6 centimeters from each other.
- The distance between the wires is 5 centimeters.
- The rollers themselves are fixed on separately arranged boards fixed to the rafters.
Hidden wiring
Now let's move on to the last type and consider its features:
- As already mentioned, this type is used only in attic spaces made of non-combustible materials.
- In this case, it is necessary to have a layer of plaster of at least a centimeter.
- The cables themselves are laid in pipes (corrugated), which greatly simplifies further wiring repairs.
- All kinds of wiring and connections are made strictly in sealed junction boxes.
At the same time, we note that connecting cables with twists is strictly prohibited. All connections must be made only with clamps, clips or other connectors intended for this purpose. We also recommend reading how to install hidden electrical wiring under the plaster. 
In some cases, a lighting device may be needed; in such a situation, the following rules should be observed:
- All connections and fixtures will only be sealed.
- Safety equipment, as well as all switches, must be located outside the attic.
- If possible, a step-down transformer should be used.
The electricity meter is installed directly outside the house. It can be equipped with either automatic or manual power switch.
If necessary, it can be installed to turn off the light. Such a switch performs the function of protection against unforeseen situations - sudden current leakage, etc.
Conclusion
It is worth noting that even correctly performed wiring does not guarantee safety, but it significantly reduces the risk. In addition, it is necessary to regularly check its integrity. And yet, for your own safety, it is recommended to entrust this kind of work to professionals, and it is better not to use the attic at all for electrical wiring (and if you use it, then as a last resort).
Earlier we already started making partitions, the beginning. Since the time for finishing the house is formed in this way: in the summer we do the exterior finishing and yard work, and in the winter - the interior, then in accordance with these motives, and also with the arrival of funds for it, I began further work. More precisely, he continued installing the electrical wiring...
And I immediately encountered the problem of running the wires inside the corrugation plasterboard walls not entirely simple, not all profiles have special holes for wiring, and their sizes are limited and their locations are inconvenient, so you need to punch holes yourself in the right places, in addition, I, as a reinsurer, was very worried that the corrugation was sliding along torn edges holes in the profiles, in order to avoid accidental damage to the corrugation and cable, each pass in the profile was made through a rubber hose...
To begin with, I pulled all the wires to their future location. distribution panel, With main panel I used a 10 ampere circuit breaker, a wire ran from it to the 2nd floor, for LED lighting more than enough...
At first I made do with 3 6 ampere circuit breakers...
In the future, we will also add an RCD to the bathroom, even a “wet room”; a DIF automatic device will be installed on a group of sockets, one of which also exists in the bathroom; we will also add an RCD to the lighting group.
Bathroom from the inside, ventilation duct, penetrations of ventilation pipes and sewerage are visible, 3 ventilation pipe (corrugation) is still plugged plastic bag. As it should be in “wet” rooms, we sew it up with moisture-resistant gypsum board...


