Have you ever thought that you underestimate the functionality of a window sill? After all, this place can be used not only as a secluded corner behind the curtains, where you can put away unnecessary little things. Many people place flowers on the windowsill, which, of course, is commendable, but quite ordinary. Ask yourself how often have you encountered the problem of lack of space in your apartment. In some situations you need a little extra space, try using a windowsill.
So how can you make the window sill a full-fledged member of your apartment? We have collected several interesting ideas, which you will definitely like.
Window sill as a small place to relax

For residents of apartments with low windows in an original way using the window sill will transform it into a place of relaxation. For such an interior solution, the width of the window sill must be at least 60 centimeters. Also be careful about the height of your window sill - about 50 centimeters, otherwise climbing into the resting place will be quite problematic.

The ideal base, of course, would be wood, which immediately creates a feeling of comfort and coziness. But if you have a typical plastic window sill, do not rush to change it. If you are going to relax, then you will not be very comfortable on a hard window sill (be it made of plastic or wood). You can purchase or even sew a bright colored mattress that matches the size of your window sill. You will rest comfortably on this mattress. One more original solution There will be small pillows that match the style of the rest of the room. You can use the pillows either separately or with the mattress. However, you can change the interior with the help of an ordinary blanket. Lay a blanket on the windowsill and enjoy the view from the window with a mug of hot tea. Now you have a separate place where you can read an interesting book or just daydream.

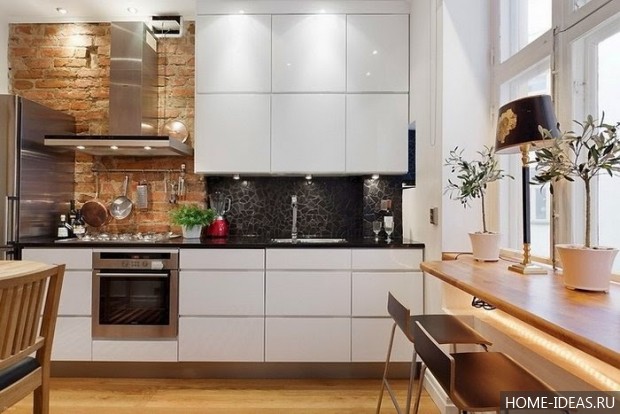
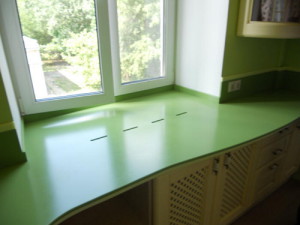
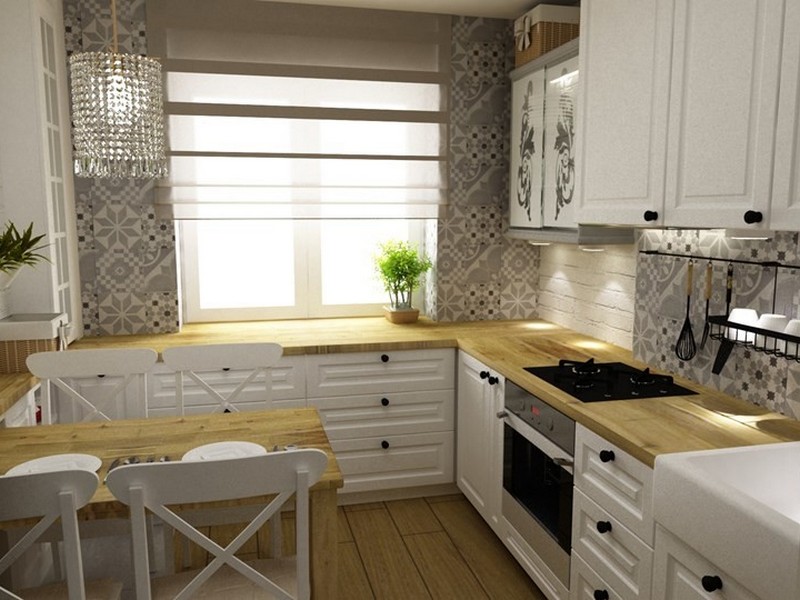
Window sill as a kitchen countertop

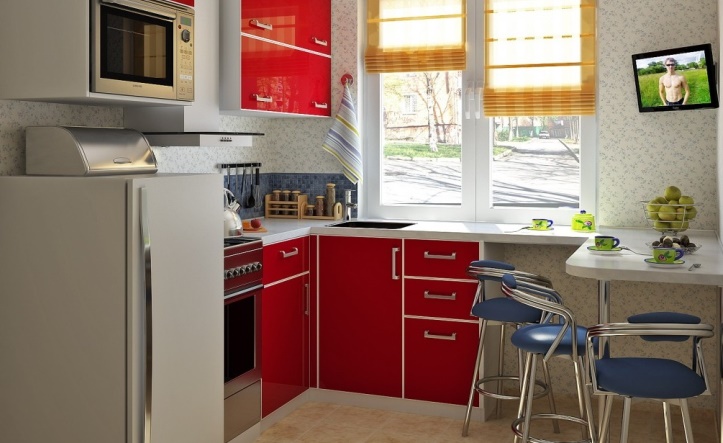
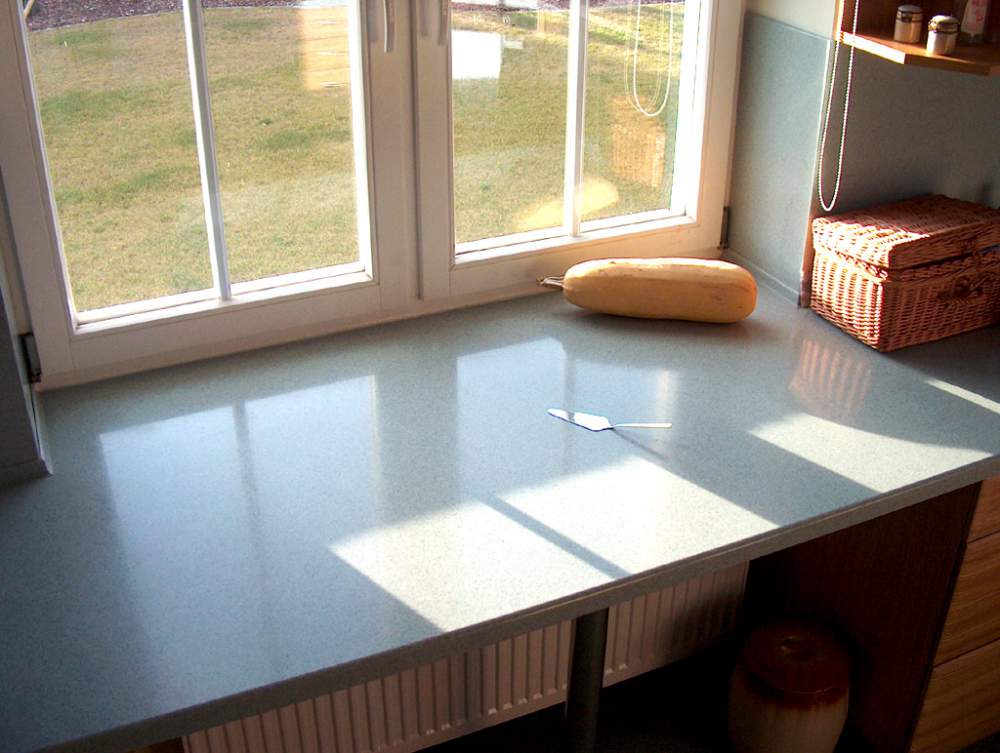
If you live in a normal apartment building, built according to standard project, then the height of your window sill is 90 centimeters from the floor. The same height kitchen countertops, so why not take advantage of this pleasant coincidence to expand your kitchen work area?

You will be able to cook and watch what is happening outside the window at the same time. Another advantage of such organization of the workplace in the kitchen will be daylight. As you know, natural light does not cause eye fatigue. Believe me, you will have a much more enjoyable time in the kitchen.

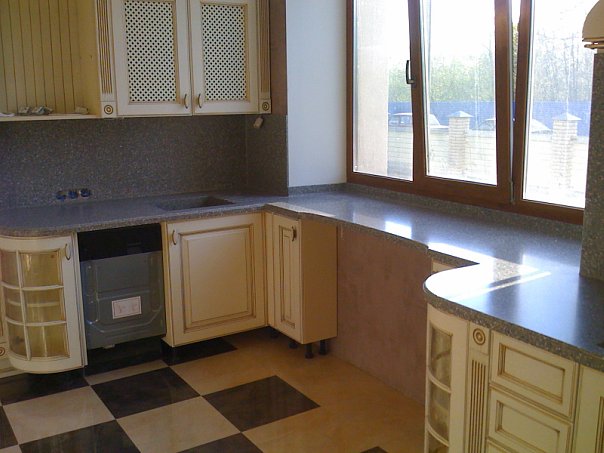
Such a window sill-tabletop will save you space, because under it you can remove, for example, dishwasher. You can also make a cabinet under the countertop to store utensils. However, radiators are often located under window sills, so you will need to either move it to another part of the apartment or ensure sufficient ventilation. If you disrupt the heat exchange process by covering the radiator with dense material without holes, then the apartment will become noticeably colder.
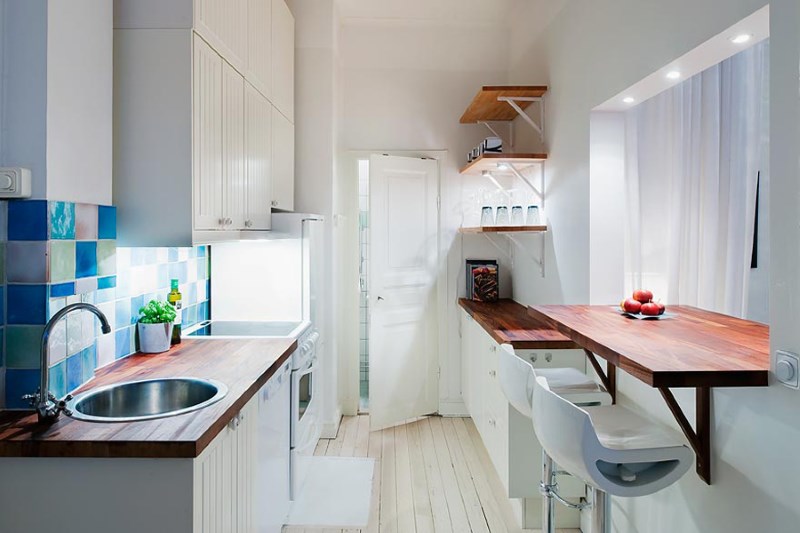
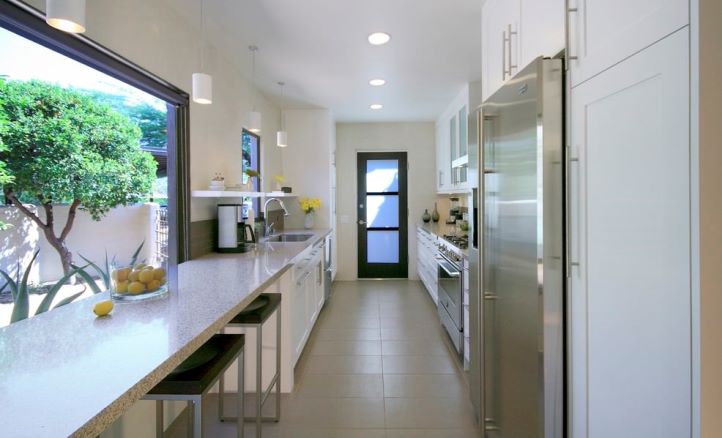
Window sill as a bar counter

Are you used to bar counters being located in the center of the room? Throw aside all standards and turn your windowsill into a bar counter. If you have a beautiful view from your window, then you should watch it as often as possible. At such a bar counter you can drink your morning coffee, have lunch or chat with best friend in the evening over a cup of tea or something stronger (it’s not for nothing that the counter is called a bar!). In this case, it is better to replace the plastic window sill with something more wear-resistant. It could be natural wood or stone countertop. A cheaper option would be acrylic with its endless color palette.
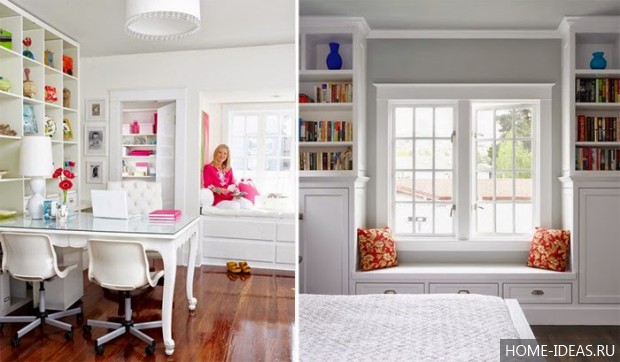
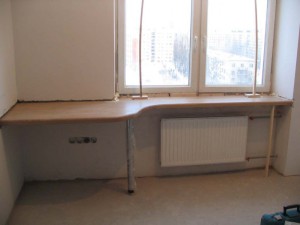
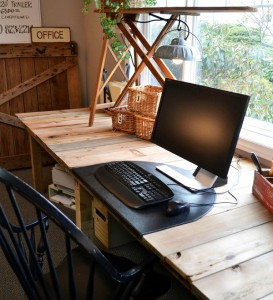
Window sill as a workplace

Owners of small apartments often find it difficult to allocate space for a work area. The window sill will come to the rescue in this situation too. The additional surface will make an excellent work desk. You can definitely place not only a laptop on it, but also table lamp. On the side of the window you can hang several shelves to place work materials, and below you can place a small chest of drawers on wheels.
If you have a large window or windows located nearby, then you can create not one, but two workstations. Combine them using the same materials, furniture and accessories, then your “home office” will be not only practical, but also beautiful.

This workplace Can be done in a nursery too. It will be much more interesting for a child to sit not at an ordinary table, but at such a window-sill table. But be careful, choose a chair based on your child’s height. At such a workplace it will be much easier for him to fantasize, draw and craft, but it is better to do homework at a regular table so that the child is not distracted. It's much harder to concentrate at a young age, so what's design solution may affect your child's performance in school.
Window sill as storage space

All sorts of unnecessary little things are often stored on the windowsill, but you can use this place as a full-fledged storage for important things. You can place books, boxes with handicrafts under it, even hide shoes that are waiting for their season. No, we do not recommend putting everything in this pile under the windowsill.
Order suitable furniture. You need to carefully measure everything, imagine what exactly you want and trust the professionals. The wonderful shelves located under the window will display books and magazines, and things that you don’t want to show off can be hidden in drawers. You can even order a cabinet around your window, just keep in mind that it must be narrow, otherwise you will visually (and actually) reduce the area of the room.

You can do without custom-made furniture, as it is quite expensive. Select several chests of drawers or shelving units that are the right size. If you choose a shelving unit, you can even store things this way, hiding them in beautiful colored boxes or wicker baskets.
You can also combine your storage space with a seating area. Let things be stored below, and a mattress or even a skin from above on the windowsill. faux fur. Complete the seating area with pillows and shelving interesting books, and you won’t want to leave your “most ordinary” windowsill.
Modern apartments are, as a rule, spacious, but in older buildings the living space is often small, and to save space, it won’t hurt you table top-window sill and folding furniture.
1
Today, housing in the city is not a cheap pleasure, and if you are lucky enough to take out a loan from a bank, you can purchase two-room apartment for a family of four, you can consider yourself lucky. Own house It’s also not always possible to make it spacious, because the more square meters at its base, the more materials are required, which are not very cheap. That is why we are considering the option when the owners have a relatively small living space, with small rooms where they really want to create comfortable conditions. To save space, we suggest considering an option such as a tabletop instead of a window sill in the room.
Please note that almost no residential premises can do without such required item furnishings like a table. Desk, computer, coffee, magazine, dining or cooking - there are many options. Accordingly, almost every room has a window, and sometimes even more than one. And this is where space for creativity opens up; you just have to wonder how to make a window sill that turns into a tabletop. In other words, these two planes can be combined into one, creating a spacious work surface.
So, a long one will fit perfectly in a children's room. desk, the lower part of the window opening in the rear will serve as supports, and a pair of cabinets with drawers on the sides. In the living room, the window sill can be extended with the upper surface of a long chest of drawers, and on the loggia you will get an excellent office if you attach it to the window folding table for laptop. In the kitchen, it is not difficult to arrange the space in such a way that falling into the windows Sun rays illuminated the cooking surface, thereby helping to save energy.
2
Any material can be used - solid wood (deck or regular edged board), chipboard, MDF, laminate, plastic, as well as acrylic and natural stone. Of course, only part of the above can be processed by you personally, in particular, artificial and natural stone, and will also have to order. Therefore, let's stop at wooden version or alternatively on particle board. If the design includes cladding, it will suit you regular plywood as a basis.
By the way, tiles are very often used as a covering in the kitchen when making homemade work surfaces combined with window sills. In addition to plywood, the base can be plastic, a metal sheet, a chipboard board or glued from bars, as well as a board made of thin boards. The tabletop will be very reliable, since the layer of glue and the cladding itself will give it rigidity. The support can be a part of the kitchen wall, just two cabinets, the kind that are installed under the sink, or simple wooden supports (from an old dining table) or galvanized metal profiles.

When using radiators as a working surface, do not forget about radiators, which must be closed without compromising the spread of heat throughout the room. In particular, if you completely block access to the heated air above, you will be guaranteed constant fogging of the windows. winter time. Based on this, they will be useful in the tabletop, which can be used to close narrow slots. It’s also a good idea to try to limit yourself to one drawer in the front part, instead of separating the radiator from the room with massive cabinets.
3
If you have an old house or a private new building with good quality window frames, which do not let in either dampness or rainwater drips in stormy weather, will certainly prove to be a model of durability. In this case, you don’t have to break it out, but simply screw a tabletop of appropriate thickness to it on hinges. Yes, the working surface will not be solid, but you will not put a lot of labor into solving the problem. If the window sill has dried out or seems unreliable due to the fact that the apartment was originally designed with plastic surroundings for the windows, dismantling work is inevitable.
Having broken it out unnecessary detail, measure the recess that the window sill occupied, and then cut out a blank from plywood, chipboard or MDF. The first option is the easiest to process, since you can use regular jigsaw. It is better to take waterproof plywood; its thickness should be at least 12 millimeters to prevent deflections. Use chipboard and MDF premium, with high-quality adhesive impregnation and well compressed, this will also serve as a guarantee of resistance to increased level humidity.
Let's say you haven't come up with anything else other than making a table from a window sill in a small kitchen where there isn't enough space even for one. Thus, you free yourself from the need to install a dining set, and the room from excess furniture(although you will still need stools). We have found out the advantages, let’s return to solving the problem at hand. We insert the workpiece into the cavity previously occupied by a standard window sill; if necessary, place it under the plywood wooden blocks or a board to raise the sheet to the desired level.

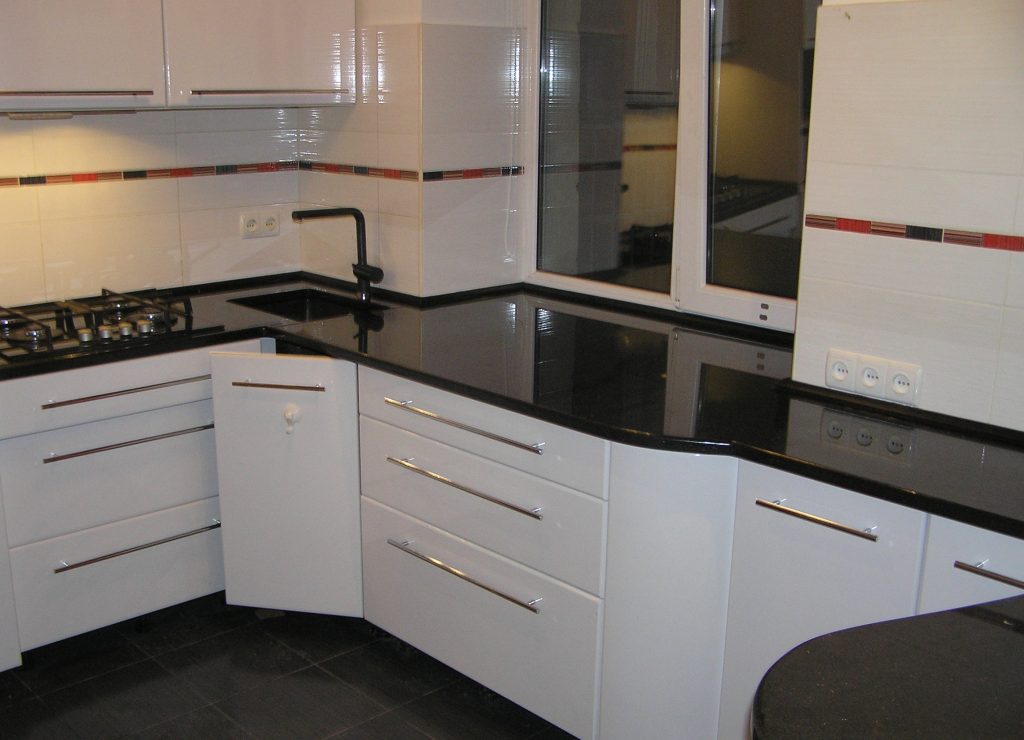
We fix it using cabinets fixed to the wall or steel corner brackets as supports. We screw plywood or chipboard to the window opening with screws. Next we cover the base special glue for ceramics using a notched trowel. We reduce the joints between individual facing elements to a minimum, since we do not need wide seams with grout mixture on the work surface where the cooking process will take place. We glue special ceramic linings to the ends, or use aluminum molding for this purpose.
4
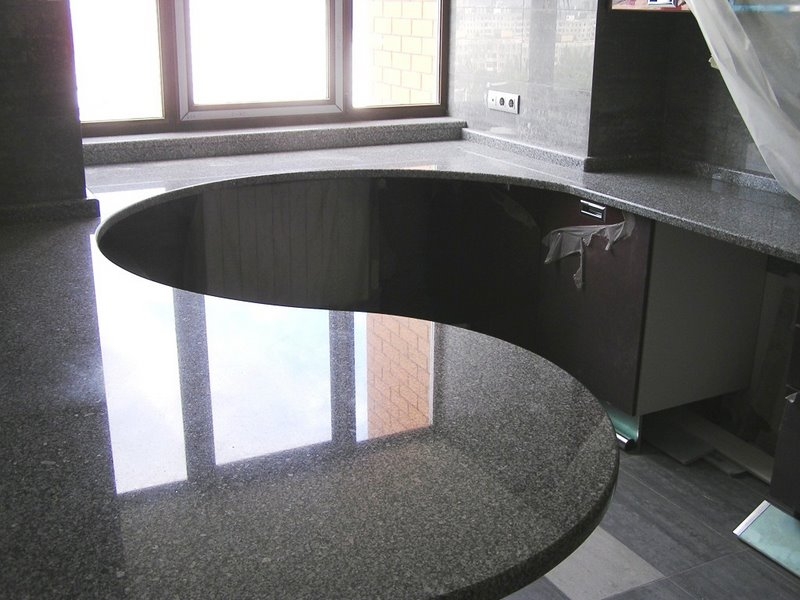
So, we have already talked about the work surface in the kitchen, but you can go further, for example, embedding a sink right in front of the window, which will free up some more space. In a spacious catering unit, using the window sill, you can make a circular cooking area around the entire perimeter of the room, which is very convenient in big family, where at least two housewives perform sacred functions in the kitchen.
In the rest room, from a window sill board, attaching the head of the bed to it, you can make a kind of shelf above the bed. At the same time, the space can be quite spacious, that is, there is enough space for a couple of lamps with lampshades, magazines with books, and, of course, an alarm clock. In the living room by the window there is a perfect cabinet on which you can organize a place to relax by making a soft bed. The result will be something like a high sofa. You can think of many more various options using a window sill, even combining it with a fireplace mantel.
“I lived in a small town where the houses were mostly built in the Victorian era. I designed many kitchens in historical areas, which meant that the exterior of the house could not be changed. Some of these buildings also had low window sills in the cooking area, because they originally housed cabinets and stoves,” is the recollection of one of the designers who had to deal with “old” kitchens.
You recognized the problem in these words own home? Don't be sad! Today, the Kitchen Interior Design resource will tell you how to beat this significant inconvenience so that it becomes the highlight of your home.
Agree that now window sills located at knee level are a real problem. How can you improve your kitchen if almost all the furniture presented in specialized stores is higher than the level of the window sill?
In such a situation, the worst thing you can do is to place cabinets directly under the window, thereby covering the lower part of it. Firstly, you should prepare for the fact that you yourself have now settled in your kitchen black hole, where things left on the countertop and accidentally thrown down will constantly fall. Secondly, of course, it will be almost impossible to wash the windows, and this is not very convenient, you will agree.
Instead, think creatively. For example like this!
Sink installation (Pursley Dixon Architecture)
Sink
Washing by the window is not the worst idea, is it? So install it! This will not only look nice, but will also allow you to still have access to the bottom of the opening.
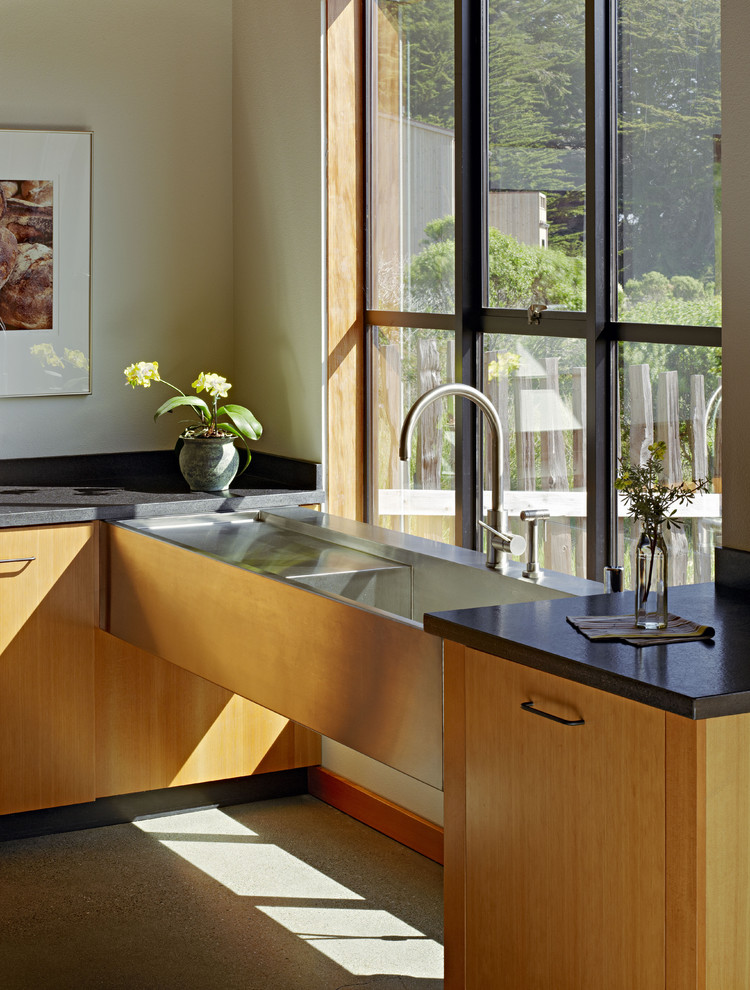
Second sink installation option (Malcolm Davis Architecture)
In this more modern kitchen interior the sink is slightly separated from the window, which makes the room as a whole look lighter and airier.

Tabletop with long legs (Byggmeister Inc)
Use furniture
An even more flexible solution for traditional cuisine– decoration of the window space with a working surface.
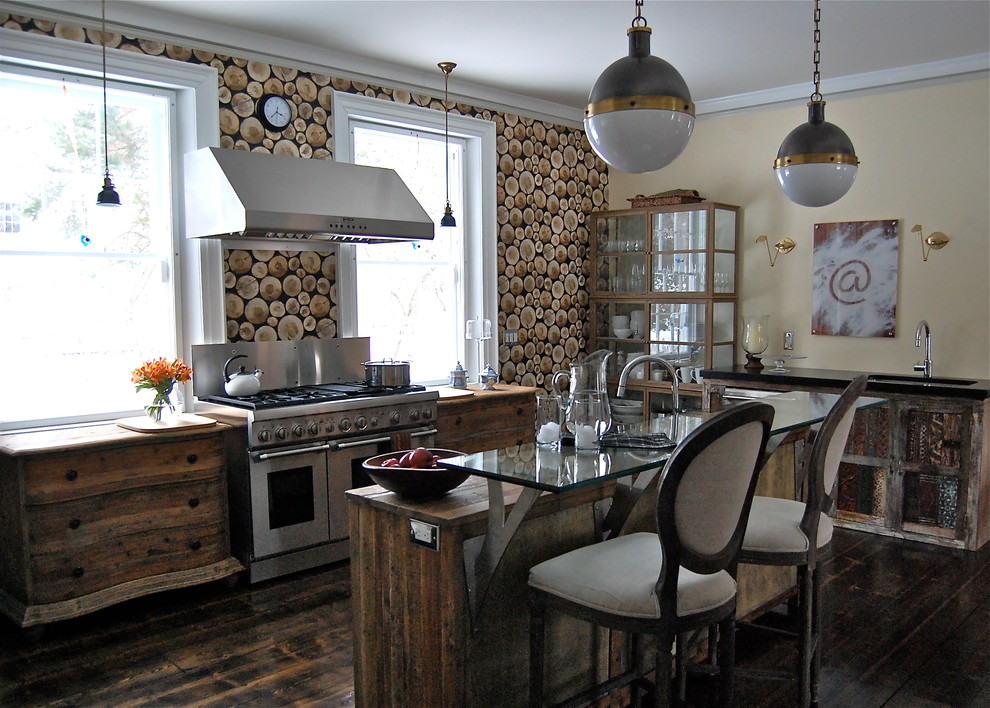
Antique kitchen (Favreau Design)
So, for example, in this kitchen interior (Vermont, USA), the owners abandoned traditional cabinets, giving preference to more practical “chests”, the height of which is lower than the glass level. This solution provided extra bed storage No less successful would be the option of a table or cabinet on wheels.
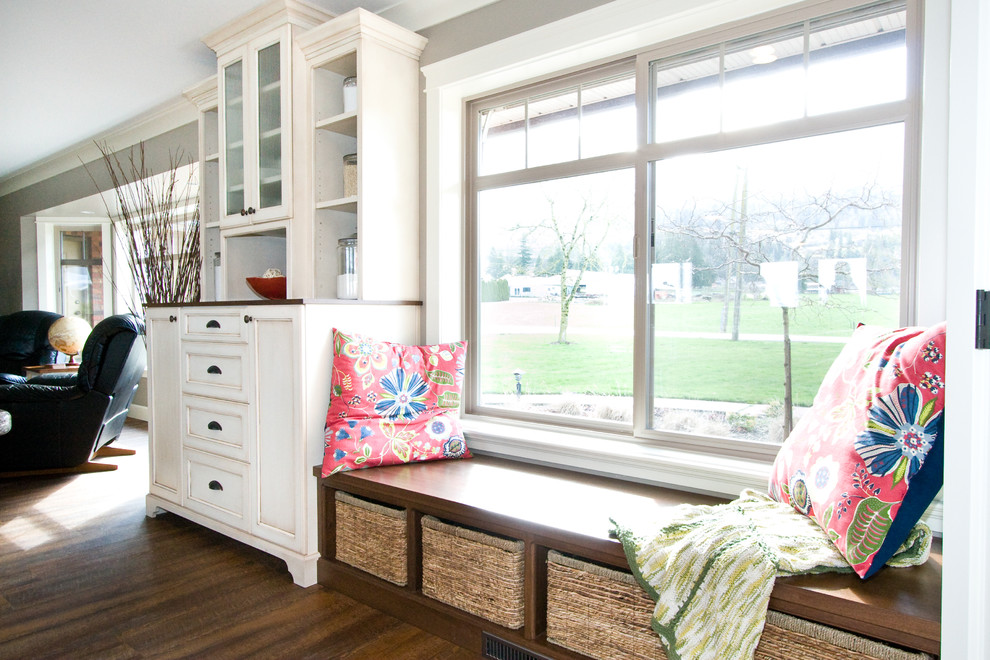
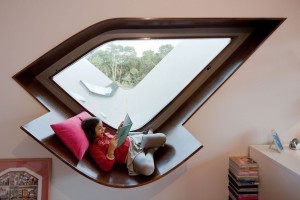
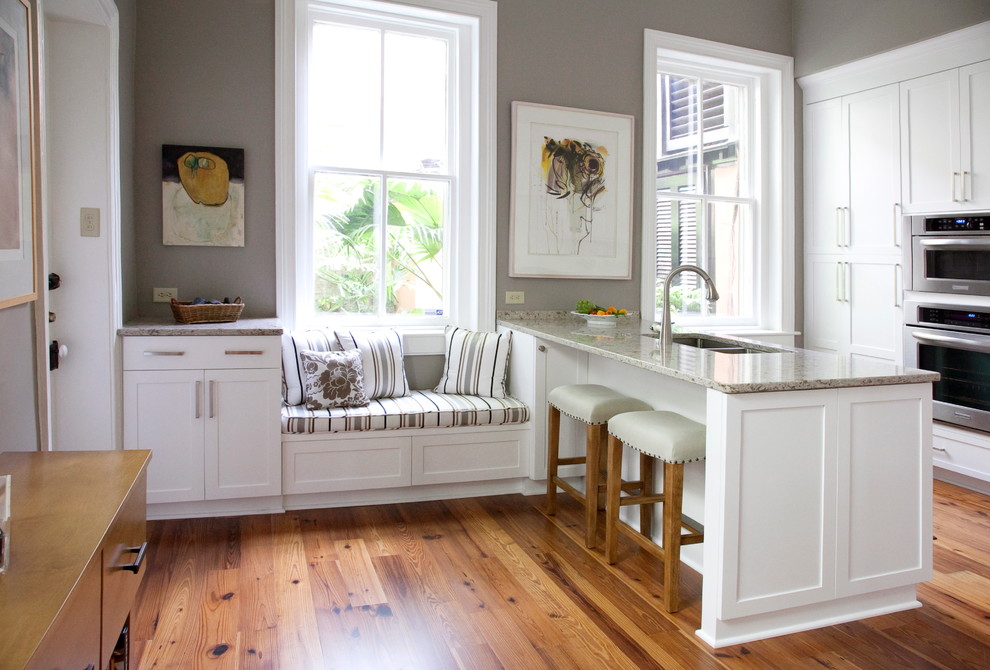
Relaxation area (Starline Cabinets)
Create a window seat
Many kitchens, even those in homes built in the 1960s and later, have a lower window behind the sink. When remodeling, the question arises: what to do with this window? And the answer will be very original. You can create your own “bed” instead of a window sill. Here you can relax, lie down, read a pleasant book or enjoy the scenery outside the window. And under this kind of “bench”, organize an additional storage area.
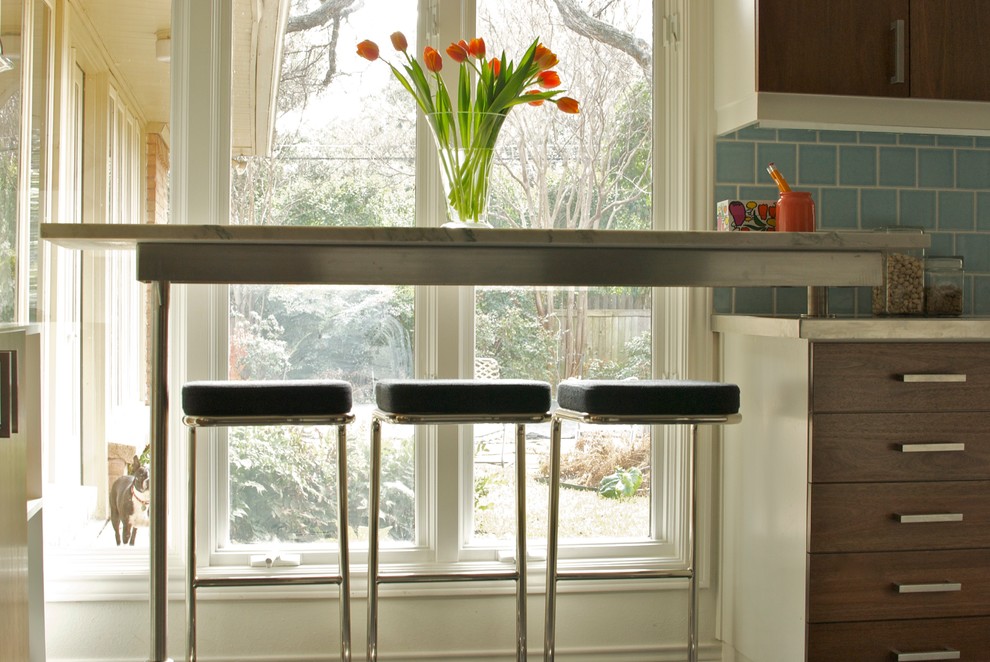
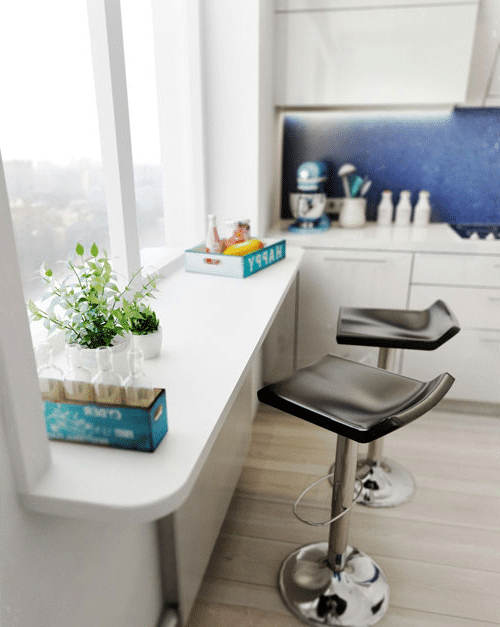
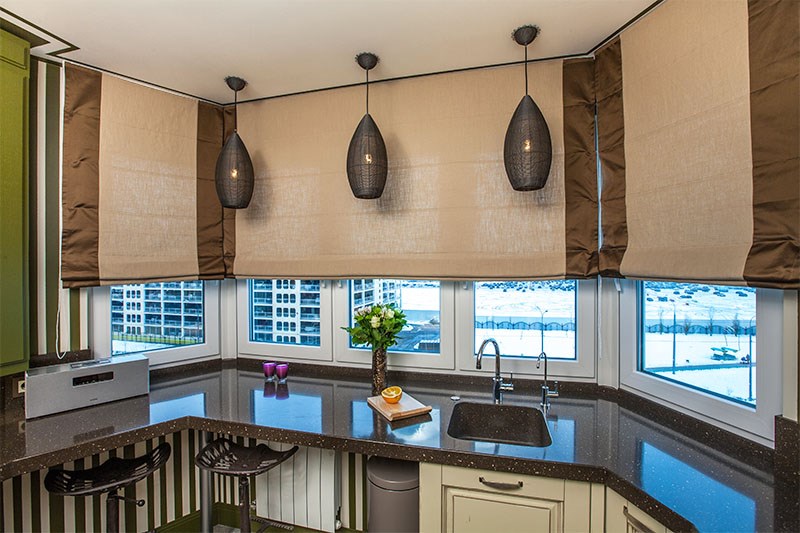
A fashionable bar counter is another way to fill a “problem” space if you have large panoramic windows. At the same time, the counter will serve not only as a dining table, but also as an additional work surface where you can, for example, prepare food before starting to create culinary masterpieces.
Window Space (Veronica Campbell of Deane Inc)
Change the standard layout
In this kitchen, a shallow built-in buffet balances the space between the windows. What initially seemed like a problem became a real highlight here.
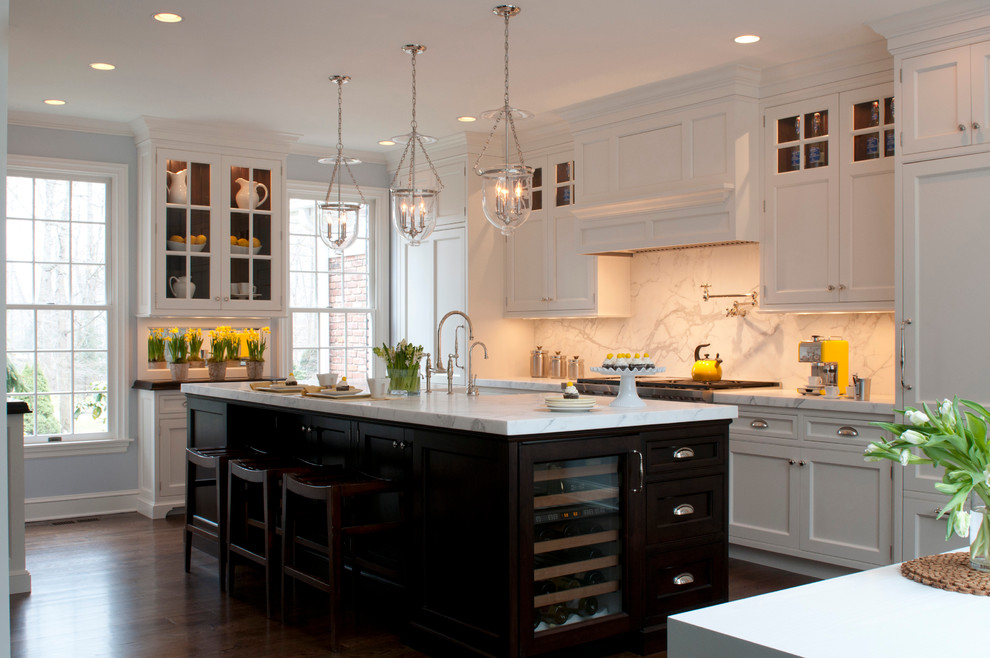
Comfortable sofa (Gaylord Design LLC)
There's a problem in this kitchen low windows nevertheless it was decided. Kitchen island, more precisely, its half, has two shells and dinner table. This helped avoid the need to install high cabinets and low window sills.

Kitchen Island with Dining Table (Historical Concepts)
Although this house is a recent construction, the style of the kitchen interior is vintage; the decoration illustrates another option possible solution the problem we are considering. If you place a large island away from the walls, then a stove with a hood can take up the space between the windows.
Categories:Places: . . . . .
When every meter in an apartment is worth its weight in gold, it is important to properly arrange the interior and make the most of every corner. This is especially true for the kitchen, because this room should be the most functional of all. Typically in the kitchen small size There is not enough work surface.
Increase working space A window sill will help in the kitchen.
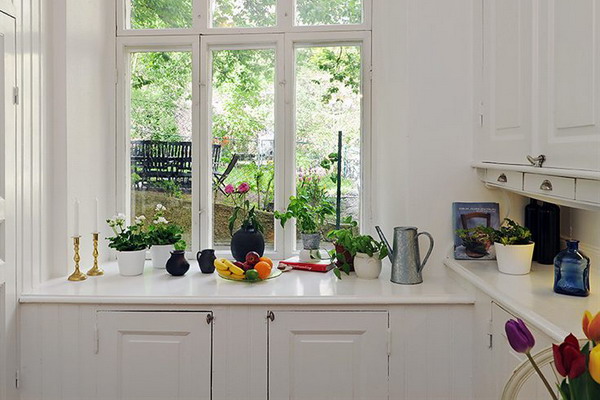
Window sills in the kitchen are usually used as winter garden or a small garden. Indeed, you can grow flowers, onions or dill on it.

A winter garden will decorate the interior of the kitchen and make the indoor air much cleaner.
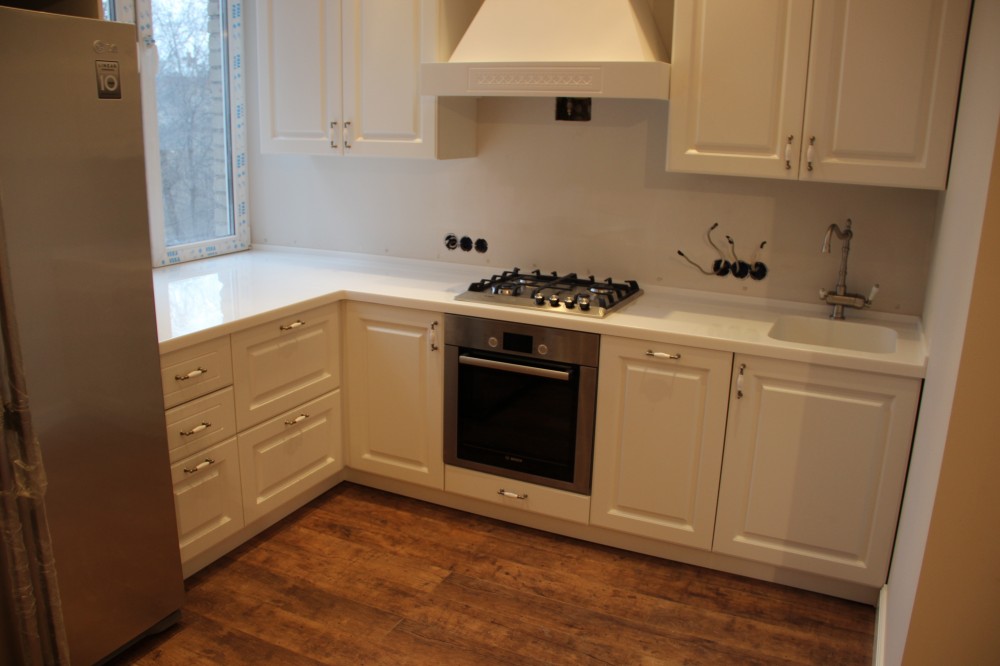
However, when the kitchen is very small, you shouldn’t waste space. An ordinary window sill can be turned into a work surface or bar counter.
A functional window sill countertop in the kitchen can even replace a dining table.
Advantages and disadvantages
Why is a countertop instead of a window sill convenient in the kitchen? Let's consider the main advantages of such an interior solution.
- Space saving.
You can store cereals, equipment or dishes on the windowsill-countertop. In this case, the countertop in the kitchen can replace a full-fledged table, which will significantly save kitchen space.
It is also used in cooking as a surface for cutting vegetables, sausages or fruits.
- Easy to install.
This product is easy to make with your own hands. To do this, you just need to follow the instructions presented in this article.
Installation does not require the use of any complex devices or expensive equipment.
- Aesthetic pleasure.
A large countertop instead of a window sill will allow the housewife to enjoy the cooking process as much as possible.

During it you will be able to observe nice view from the window, and not just an empty wall.
- Saving electricity.
It's no secret that the cost of electricity today is quite high. Therefore, you need to use every opportunity to save. The work surface on the window does not require additional lighting.
IN daytime You can cook on it without turning on the electric light.
- Unlimited design possibilities.
The original solution is very relevant in our time. It makes the kitchen more modern and functional.

The area of use of such a zone is practically unlimited.
- Low cost.
If used during installation available materials, and perform the installation process yourself, then the cost of such a product will be very low.

For casement windows, it is important that the countertop does not interfere with opening the shutters.
Of course, such a design solution for the kitchen also has some disadvantages.
Firstly, it is absolutely not suitable for people who are prone to frequent interior changes.
Installing and dismantling countertop window sills is not an easy task.
Secondly, you will have to spend more time choosing curtains. They should not be easily soiled and water-repellent. If you don’t want to “bother”, then you don’t have to use curtains in the kitchen.

A new window and neat slopes will look good.
Role in the interior
In addition to functionality, the countertop will play a significant role in the interior of the kitchen and windows. In order for it to fit perfectly into the overall design, you need to follow some recommendations:

Types of products
Countertops can be divided according to several criteria:
- F functional purpose;
- Form.
By functional purposecan be a bar counter, work area, table or sink.

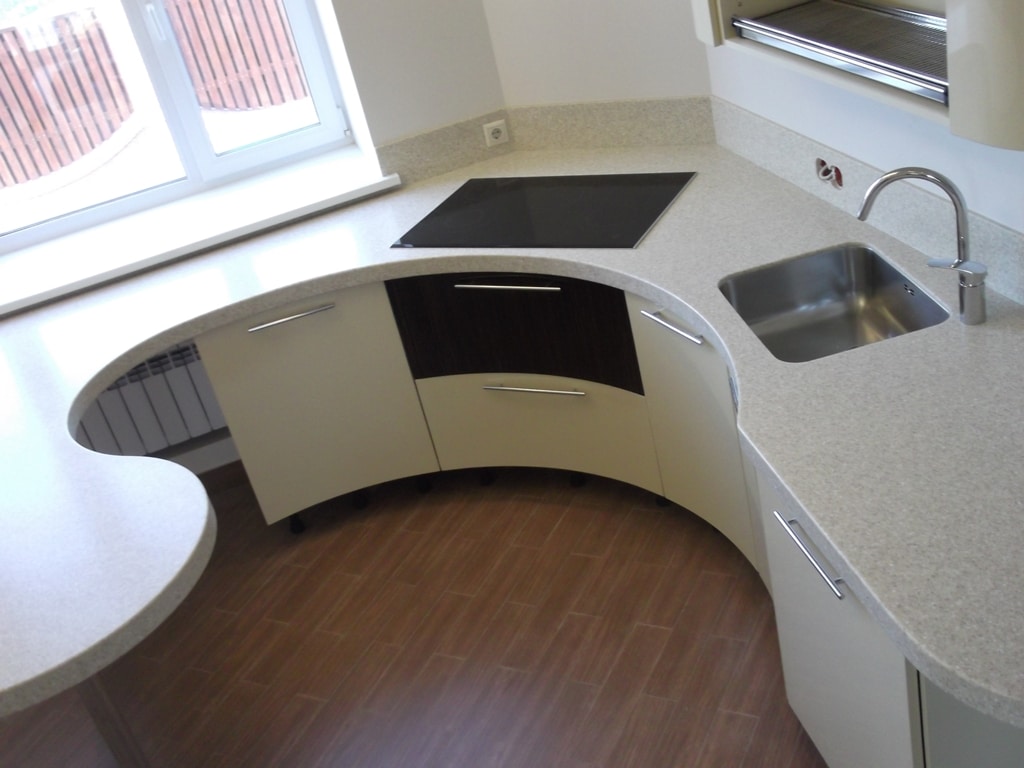
According to its shape, it is divided into: rectangular, round, oval or irregular.
Important! Most functional solution for the kitchen there is a counter combined with a window sill. In this case, it can completely replace the work surface and dining table, and you can install appliances or shelves under the counter itself.

This option will save space.
You should choose the type of product based on your own needs and technical capabilities. For example, if communications are located far from the window, then installing a sink will not work.
To ensure that the window sill fits harmoniously into the kitchen interior, you can think through the design of the set so that the countertop becomes an extension of the work surface.
Choosing material
To make a countertop with your own hands, you first need to choose raw materials. Let's consider their main types and characteristics.
- Marble.
This is an expensive option. However, if financial capabilities allow, then a marble countertop is perfect option. Marble is resistant to any type of damage. He will be able to serve for a long time for long years and will not lose its original external data. Marble in the interior is a sign of the excellent taste of the owners of the house.
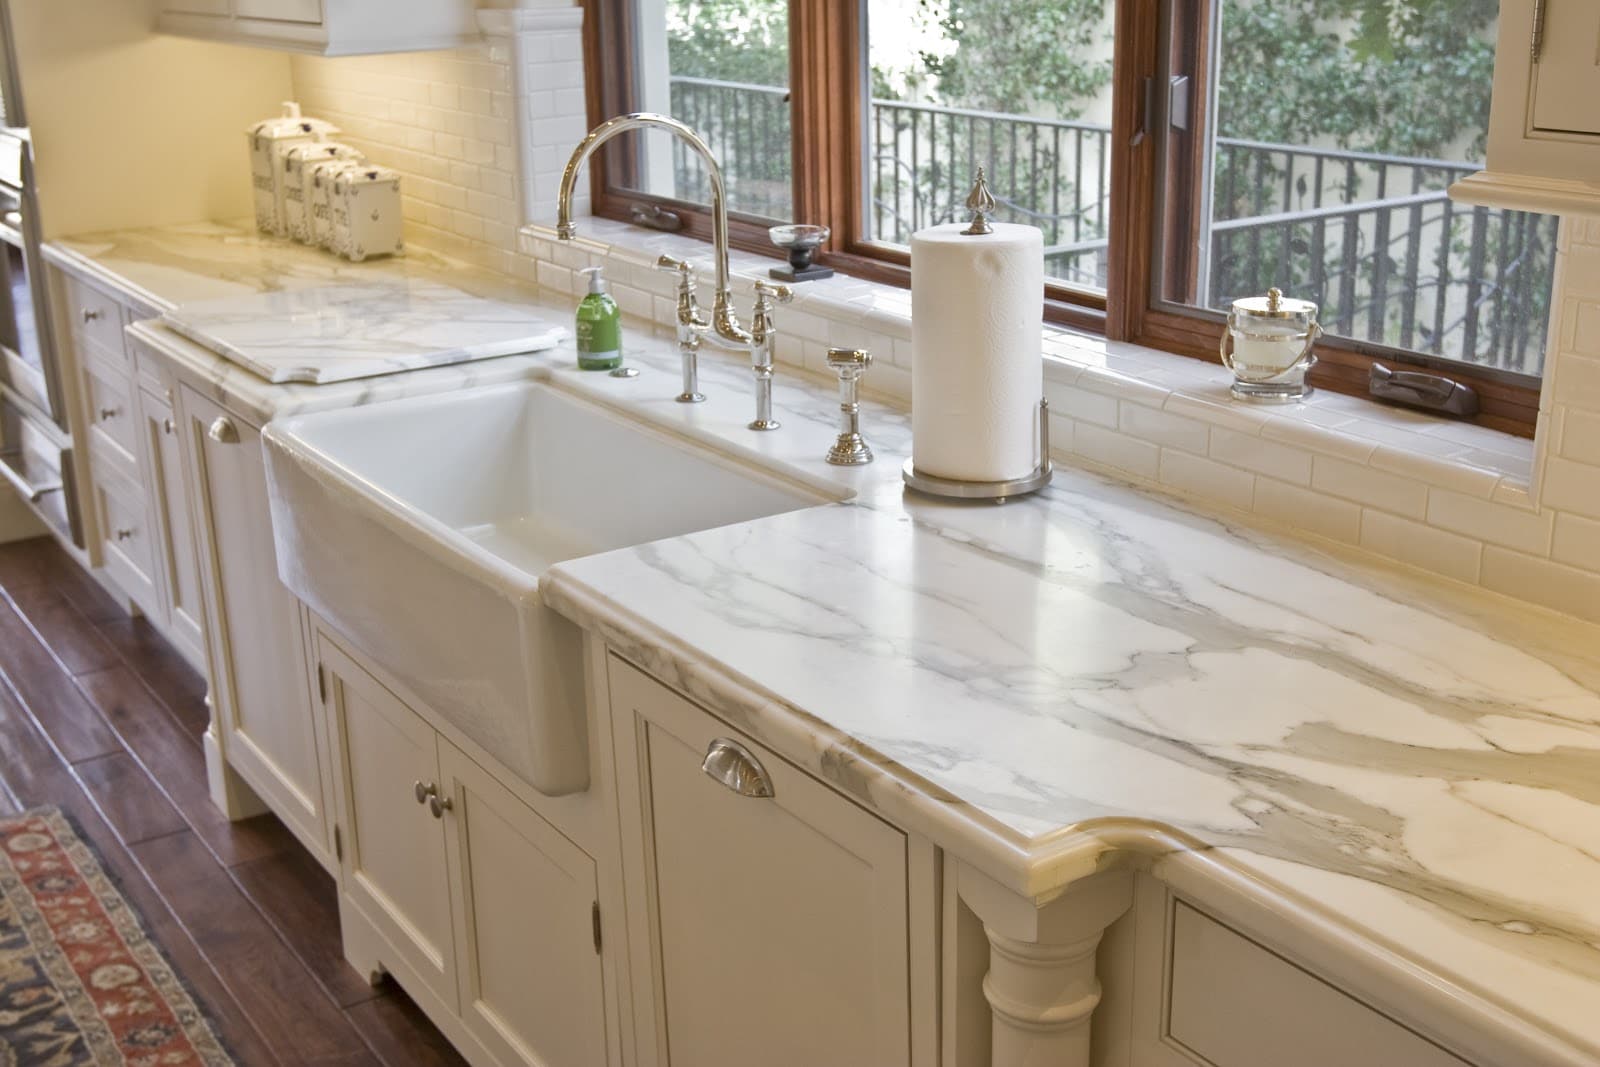
Previously, such stone was used only in the houses of rich and noble people.
- Fake diamond.
It is a cheap alternative to marble. Table top made of artificial stone will withstand any load. It will be resistant to water and high temperatures. However, over time appearance surfaces may be damaged.
Artificial stone is not as resistant to external damage from sharp objects as, for example, marble.
- Ceramic tile.
This raw material is also relatively inexpensive materials. The tile is resistant to high temperatures and water, but it can be damaged by a heavy object.
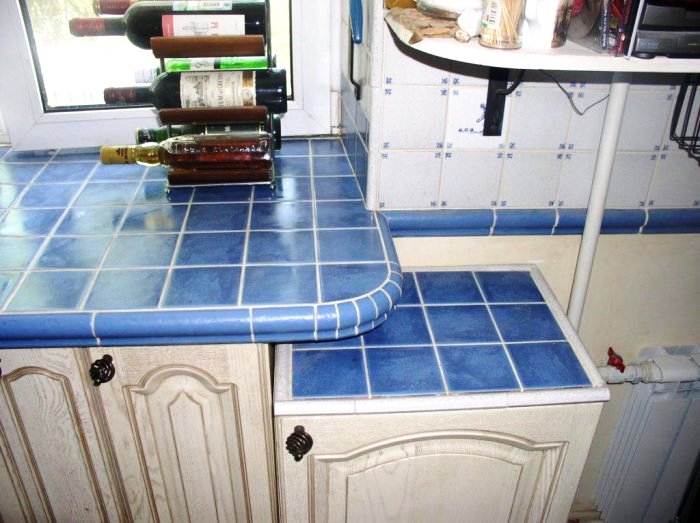
Cracks in tiles cannot be repaired, so they will have to be replaced.
- Glass.
By choosing glass, you can make your kitchen interior original and unique. Glass is not particularly popular, because many people are afraid that it will not withstand daily stress. However, there is nothing to be afraid of! Modern glass for such purposes has a thick and dense structure.

In terms of their characteristics, they can even be compared with artificial stone.
- Natural wood.
If the table will not be used as a work surface, then natural wood is a suitable option.

The tree can serve as a dining table long years if you take proper care of it.
- Chipboard or MDF.
They can be used in the kitchen if the window sill will not be used as a work surface or sink.
You can make a product yourself from this raw material.
To decide which material is right for you, you need to consider some points. If the table will be used as work zone, then it is best to give preference to marble, stone, tile or glass. This raw material can withstand high temperatures and will not lose external properties with daily use.

If you use the window sill as a bar counter or dining table, you can choose any of the options considered.
| Durability | Price | Aesthetic properties | Ease of installation | Resistance to damage | Variety of designs | |
| Marble | + | high | + | — | + | — |
| Fake diamond | + | acceptable | + | + | — | + |
| Ceramic tile | — | acceptable | + | + | — | + |
| Glass | + | high | + | + | + | — |
| Natural wood | — | high | + | + | — | + |
| Chipboard | — | acceptable | — | + | — | — |
Step-by-step instructions for installing countertops made of chipboard and ceramic tiles
- Purchase of material.
For such a window to come out, you need to buy the following equipment: chipboard, ceramic tiles, silicone, tape, ready-made table legs, polyurethane foam.

When all necessary tools and materials, you can begin work.
- Marking.
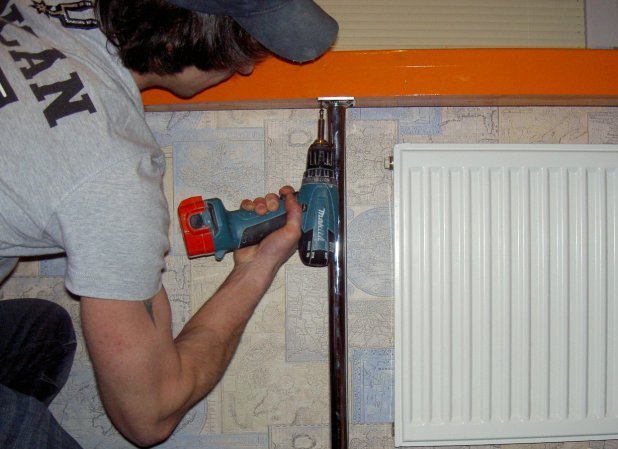
The table should be installed immediately after installing the new window. If the window and window sill have already been installed, you will have to first remove the old products. Dismantling is simple and only requires the use of male physical strength. When the dismantling work is completed, you need to measure the length of the concrete base near the window and determine the width.
If you want a small table that will only hang slightly over the concrete base, then legs will not be needed.
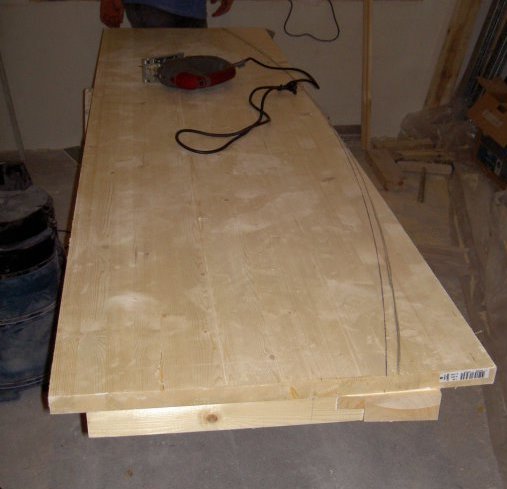
- Preparing the board.
Chipboard must have a thickness of at least 12 mm. The board must be cut exactly to measurements. Accuracy must be maximum, so it is better to make markings first and check everything several times.
Sand the edges and entire surface of the tabletop with a plane and sandpaper(grit no less than 60).
- Surface treatment.
The ends of the board must be treated with silicone in two layers, and the bottom surface must be covered with packing tape.

Be sure to check the plane using a building level.
- Installation.
After installing the slab, all holes need to be sealed. polyurethane foam. When installing, do not forget about the level. The window table top must be level. If it has legs, they need to be screwed in advance.
Wait until the foam sets and foam the seams between the slopes and the window sill.
- Facing.
The countertop can be finished with ceramic tiles. It should be laid with minimal gaps. The gaps can then be painted to match the color of the slabs.
As you can see, installing a countertop with your own hands is quite simple.
In total, the work takes several hours. Installing a product made of marble or stone is even easier, because they come ready-made. They just need to be installed on concrete base at the window and secure it carefully.
In order for the product to serve for a long time, it must be properly cared for.
Firstly, the surface of the new window sill must be cleaned regularly. Especially if it is used daily for cooking.
Wash the product with soapy water and a soft sponge.
Secondly, you need to periodically pay attention to the grout joints. When installing ceramic tiles it is impossible to do without seams. During operation, the seams quickly accumulate dirt, and pathogenic mold often develops in this place.
The seams need to be cleaned special means at least once a week.
Thirdly, you need to pay Special attention any cracks or damage. If the tile is cracked, it should be replaced immediately. Bacteria can form in the crack.
VIDEO: Window sill-countertop in the kitchen.
The kitchen is the central room in the house. This is where the food preparation area is located, a place for shared meals. In addition, this room contains a huge number of household appliances. It is sometimes quite difficult to place everything you need, especially if the apartment is small.
The countertop-window sill in the kitchen is good option to solve the problem with small area. Let's take a closer look at the features of this element.
The advantages of a window sill combined with a tabletop
The kitchen worktop window sill allows optimal use of room space. This plane helps turn unused space into an area that meets the needs of the owners. Here are a number of undeniable advantages of such a tabletop:
- Possibility of installing a sink near the window, in the same place of which you can put any kitchen module.
- Saving energy and preserving vision thanks to daylight falling on the work surface near the window.
- Placing a cabinet under the table top-window sill, which will not only decorate the heating radiator, but also provide additional space for storing groceries, cutlery or dishes.
It is worth noting that it is difficult to find disadvantages of such a window sill. The main thing is to choose the right material, think through the design solution and install the block efficiently.
Design ideas
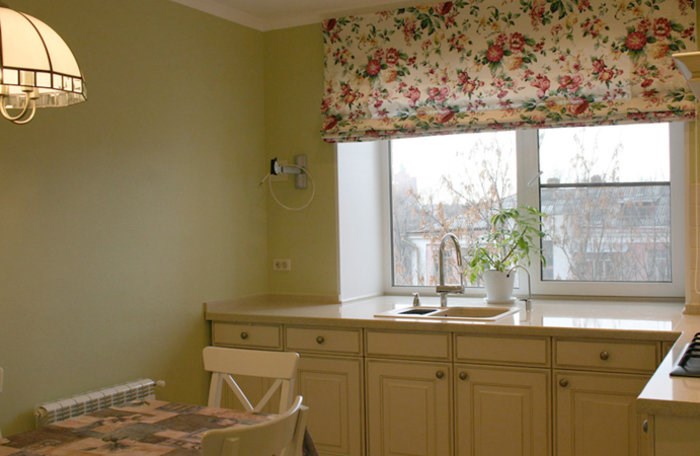
Leaving a window sill in the kitchen for growing flowers is irrational. It is better to create an additional plane from it for preparing dishes or eating. The most aesthetically pleasing look is a window sill combined with a tabletop in the form of a straight table.
Furniture developers offer more practical ideas, making the additional tabletop not only functional, but also beautiful, modifying the lines and shapes. We offer the most fashionable and useful options:
- Countertops with a folding table are great for kitchens in the Khrushchev-era building. When assembled, they free up space and do not interfere with movement; if necessary, they can be transformed into a dining table, at which you can have tea and friendly gatherings.
- Bar counters extending from the countertop will fit beautifully into a spacious kitchen. IN in this case It is important to choose the right set and lighting to create a cozy relaxation area.
- Tabletops-windowsills in the form of a rectangle are ideal for small kitchens; they are easy to install without calling a specialist.
To get inspired useful ideas on kitchen design taking into account the area and general design kitchen, you should look at a number of photographs from stylish solutions tabletop combined with a window sill. This step will facilitate the stage of selecting materials and creating a project.
Materials
After thinking through the design of the countertop, you should decide what it will be made of. Each of them has its own characteristics that affect the overall picture of the room. Let's look at the most common ones.

Plastic
It is made from a piece of chipboard, the surface of which is laminated, or from a single piece of plastic. The quality, price range and level of strength depend on the technology of creation. The advantages of such window sills-tabletops include the following:
- low cost;
- a large number of variations color solutions and textures;
- ease of care.
If the plastic is of low quality, then you should expect that the tabletop will suffer from temperature changes or be easily scratched after mechanical impact. Purchasing a module from a reliable manufacturer will eliminate these disadvantages.

Tree
Suitable if the rest of the furniture in the room is made of wood. Otherwise, the countertop built into the window sill in the kitchen will greatly deviate from the unified style. It has many advantages compared to other materials:
- environmental friendliness and safety;
- availability;
- aesthetics and chic;
- a good selection of raw materials, which allows you to choose exactly what suits the client’s idea.

Despite a number of positive aspects, the tree also has negative responses:
- exposed to moisture and high temperatures;
- ignites quickly in case of fire;
- easily damaged by mechanical stress;
- requires constant care and periodic processing.
Undoubtedly, wood looks very beautiful and has a pleasant aroma, but it is recommended to make a tabletop from it only if it will not be used very actively (for example, for a bar counter). In other cases, it is advisable to choose a material with higher wear resistance.
Metal
Such a window sill-countertop in the kitchen fits perfectly into a design where there are metallized surfaces or newfangled stylistic solutions related to the space theme. Has excellent specifications. The advantages include the following:
- does not suffer from temperature changes;
- does not deteriorate from exposure to moisture;
- does not create difficulties in care;
- looks good.
But also of this material there are disadvantages:
- may get scratched if used carelessly and not properly maintained;
- may corrode after many years of use.
Most often, manufacturers offer tabletops-windowsills in which metal is combined with other materials, which significantly reduces background noise and decorates the product.

Natural and artificial stone
Tabletops are made from natural stone and from combined materials. The most commonly used include granite, marble, onyx or artificial mineral slabs.
The advantages include the possibility of many years of operation and resistance to water, temperature changes, mechanical damage, and the fact that the stone does not burn. The disadvantages of window sills and countertops made of stone include high cost, heavy weight, and difficult installation.
As for granite, your choice should be on a material of the first safety class, since this stone is capable of accumulating radioactive waves. Marble is an eco-friendly favorite, but it will easily stain from coffee or wine stains. Onyx looks very beautiful due to its ability to transmit light.
A structure made of artificial stone (a combination of resin and mineral filler) will delight its owners for a very long time. It is not exposed to high temperatures, retains its color for a long time, and is waterproof. Acrylic stone is not susceptible to mechanical stress.
Suitable size
To determine the size of the future structure, you should remove the necessary parameters:
- width;
- length;
- notch length;
- recess width;
- the gap from the wall near the window to the recess in which the sink or hob will be installed;
- the space from the front edge to the notch.
The measurement should be carried out very carefully, taking into account the presence additional elements(sections below, sink in the countertop, etc.). The slightest deviations in the data can lead to the material quickly becoming unusable. A simplified version in the form of a rectangle requires only two measurements taken along the length and width.

Installation of additional structure
It is possible to attach almost any tabletop without outside help. Such work will not take much time and does not require availability specialized equipment. However, there are certain cases when you should not refuse the installer's servants:
- Installation is included in the total cost of the order.
- The additional plane is made of fragile raw materials.
- If you don’t have the skills to install such structures and are afraid of ruining the countertop.
In the case when a set is ordered without a table top for the window sill, you should wait until the installation process is completed kitchen furniture and only after that proceed to taking dimensions, ordering a design and installing an additional plane near the window.
My own master
Having studied the instructions in detail and the recommendations below, you can begin installing the extension plane yourself. It is practically no different from installing a regular countertop or the window sill itself. You just need to take into account some features. Here are some useful rules:
- Consider the fact that hot air from the radiator under the window must flow freely to the glass so that it does not fog up. Otherwise, excess moisture will lead to mold.
- It is recommended to carry out installation manipulations until completion. finishing works during repairs. Installing a countertop without replacing the window can be a bit of a hassle.
- Taking into account modern standards, the window sill must be located two hundred millimeters lower than the edge of the window opening.
Required materials and tools
Let us give an example of the manufacture and installation of a countertop made of chipboard, on the basis of which it will be easy to understand other options. The following tools should be prepared for work:
- electric jigsaw;
- moisture-resistant plywood with a thickness of more than 12 mm of the required size;
- self-tapping screws;
- screwdriver
Instructions for installing the tabletop to the window sill
Installation work is carried out in the following order:
- Place the cabinets and measure the dimensions required to create the tabletop;
- Draw the future base on the plywood using a construction pencil and a long ruler;
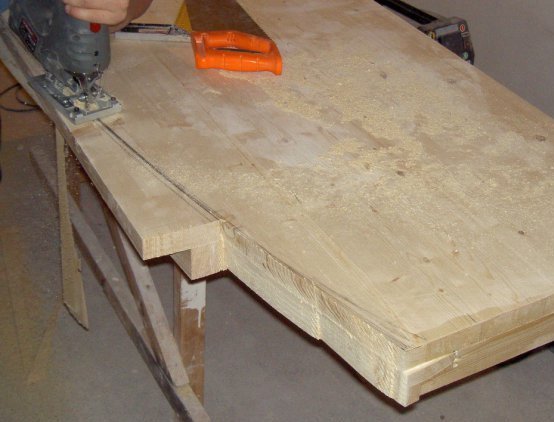
- Form a base for the tabletop by cutting along the marked lines from plywood sheet electric jigsaw the desired design;
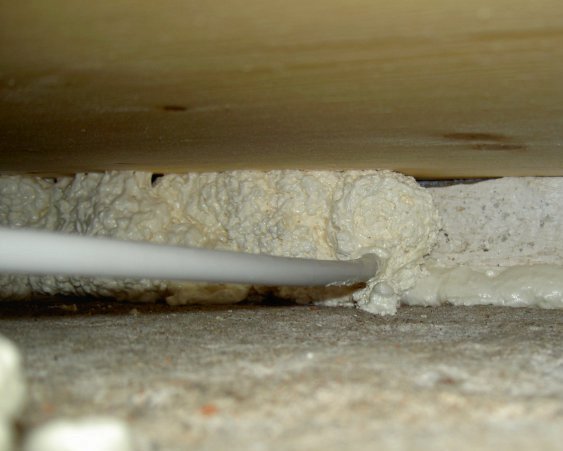
- Cut an oblong hole small size for unhindered circulation warm air on the side that will be attached to the window sill, having thought in advance about decorating it with a lattice;
- Place the workpiece on the cabinet and secure it with wood screws;
- Attach the base of the tabletop using brackets to the window sill itself.
Finishing the finished base
You can choose tiles to finish the countertop. It is important to take into account that small tiles may not be laid perfectly level. Large tiles will visually reduce the space of the room. If the kitchen is tiled, then you should choose the same size tile for the countertop.
To work, you will have to prepare a number of materials and construction tools:
- tiles and glue;
- construction grater;
- construction level;
- grout for ceramic tiles;
- radiator grille;
- molding from your favorite material;
- corners for decorating the ends of the tabletop.
Sequence of finishing work
- Dilute the glue according to the manufacturer's recommendations in the amount required for laying tiles, making it a little thicker than for walls;
- Coat the plywood base, then spread the mixture evenly over the surface, working with a float;
- Lay the tiles, leveling them;
- Lay the subsequent ones using the same method, making minimal gaps. This is due to the fact that the grout deteriorates much faster than the ceramic itself;
- During the cladding process, install a grill for easy access of warm air;
- Remove glue from holes;
- Leave the tabletop until the glue sets;
- Grout all the seams between the tiles;
- Cover the end of the structure with a ceramic corner;
- Decorate the edges of the additional plane with molding.
This creative work will allow you to decide on your own what size and type the countertop should be and significantly save money.
Ways to care for a countertop near a windowsill
The tabletop is made of moisture-resistant material and has long term service, and care for it must be as follows:
- Periodically remove dirt from tiles, stones or other materials. You will have to spend more time and effort on a texture with relief;
- Try not to damage the surface with a knife or sharp objects, and do not hit it with heavy utensils. Do not place hot pots on the countertop;
- Process grout joints if the countertop is tiled, as a lot of dirt collects there.


