To protect their local area, everyone tries to build a strong and reliable fence. It is rightfully considered one of the most reliable types of fence.
When installing a brick fence, everyone has the right to independently choose the thickness, height and even shape of the fence. This material cannot be considered the most affordable on the market, but properly laid brick will make the fence almost impenetrable. The advantages of a brick fence are as follows:
- It is one of the most reliable fences.
- Possibility to choose the height yourself.
- Very durable.
- It looks solid and attractive.
- Allows you to lay out decorative masonry with patterns and different shapes.
- Thanks to the possibility of transformation, it suits any style of site and home.
Beautiful fences
Very often they choose classic version red masonry. But in some cases, to emphasize appearance Decorative masonry is chosen for the house and site. 
For decorative masonry facing bricks are used. It is very convenient to work with him. It does not require additional processing and is available in different types of colors and textures. 
Thanks to the spread of decorative masonry in the modern market, facing brick has gained wide popularity. The masonry can be diluted with various patterns and color solutions. Sometimes to do lightweight design use wooden additions. 
From brick and forging
These types of fences are called combined. in combination with brick adds sophistication to the fence. Each fence differs from the others in its individuality. It is the artistic forging that makes an object memorable. In combination with brick, no matter facing or classic, forging looks interesting and at the same time restrained. 
Thanks to the special properties of brick, you can safely lay out a beautiful figure from it, subsequently filling it with an original decorative design. This creative approach speaks of excellent aristocratic taste. It looks especially harmonious when the house is built from the same type of brick. For large areas, a mono-metal fence with brick pillars. So, a beautiful landscape will be available to the eye. 
Fences made of brick and metal picket fence
This type of site fencing is considered more budget-friendly. But despite this, in combination with durable brick it has advantages over many other types of fences. 
- A metal picket fence will last much longer than wood.
- Fences may not completely block the view of the site, but at the same time they will hide most of it from view.
- The coating can be matched to the color scheme of the brick or house.
- The price of metal picket fences will especially please those who decide to save money.
- It is impossible to scratch the edges of the parts, as they are specially treated.
- No maintenance required.
Simple brick options
By installing a solid classic brick fence, you can be completely calm. With a high fence, you don’t have to worry about weather and many other factors. Despite the fact that the modern market presents a variety of new generation building materials, brick confidently occupies high positions. 
When constructing such a fence, all requirements must be strictly observed. Then it will not only last for a long time, but will also always maintain an aesthetic appearance, despite numerous mechanical influences. 
Not everyone can afford a brick for a fence. However, all costs are more than recouped later. Classic masonry does not need to be painted or constantly restored; facing bricks also do not require special care. But all technologies during its installation must be taken into account and observed. 
From crushed brick
The purpose of crushed brick is rather decorative. Recently, it has been especially often used to build fences. At the same time, the fences are no less strong and durable. 
The style of this building is close to traditional. It must be remembered that the weight of the structure will be reduced due to the fact that the thickness of the bricks is not full, but stability and strength are fully preserved. 
Chip bricks also allow you to create various unusual shapes of fencing. A different shapes and the colors of the bricks give the building an elegant look that harmonizes with the site. 
Made of brick and corrugated board
Fencing made of brick pillars and corrugated sheets especially stands out among others. Such combined view fencing combines both low price and solidity. 
Corrugated sheeting is attractive because, despite low price Convenient to install, easy to operate and durable. The brick pillars between the sheets of corrugated sheets can be different in width, height, and the color range is not limited. All this is usually installed on a solid brick foundation, which color scheme matches with pillars. 
Red brick
Red brick in buildings shows classicism, solidity and high status. This is especially true for fences. High fences made of red brick will conquer anyone with their inaccessibility. 
Many people prefer solid classic masonry, which will protect both from view and from prying hands. Some are decorated with various patterns. Some are trying to give the building a more creative look. But everyone who chooses red brick undoubtedly has good taste and a sense of style. 

From Lego bricks
This type of brick is in many ways reminiscent of details children's construction set lego. The structure of the brick allows you to install the fence much faster. Moreover, this does not require any serious preparation.
All you need to do is connect the parts of the top row with the parts of the bottom, and then glue everything together with a special construction glue. This brick is made from a mixture of limestone and cement. Due to this, it does not require firing at all. 
Lego brick lends itself perfectly to laying, both with your own hands and in the hands of professionals. The speed of laying such material increases significantly, which allows you to complete the work in the shortest possible time. In addition, there is no need for a centimeter layer of mortar between the bricks. All thanks to the ideal geometric shape of the material. 
Due to the fact that this material is hollow inside, its weight is significantly less. This allows you to reduce transportation costs. This brick also has a variety of color textures, which allows you to be creative in the process. 
At the same time, the fence looks quite solid. When installing it, you can save on building materials (such as sand and cement) and labor force. Moreover, this will not affect general view fence 
From facing brick
The use of a facing fence when building a fence can be an excellent solution when creating own garden. This brick looks a little weathered and worn. In appearance it looks more like a stone. Due to this, you can give the fence a rather interesting look. 
A small fence made of facing bricks will add originality to the garden and help separate residential and non-residential premises, increase the attractiveness and functionality of your home. 
To make the fence look even more original, you can diversify the brickwork with various inserts. For example, you can take bricks of different colors or add forged steel elements. 
Yellow brick
Brick comes not only in red, the classic color. A yellow brick fence looks quite harmonious. Firstly, it makes the fence unusual. Secondly, yellow brick goes better with various decorative elements. 
Also, yellow brick will look good if diluted with dark colors. This will give him a slightly aristocratic look.
In addition, if you let various climbing plants, then they will look better on a yellow background than on a red one.
From torn brick
Today, torn brick can be an excellent replacement for classic brick. Its use can open up almost limitless possibilities for the creativity of designers. This material Perfect for both interior and exterior cladding. 
It is incredibly durable and durable material. Torn brick is distinguished by its variety. Usually the colors of the material are selected individually for the house or landscape design the entire area. Although building such a fence is quite expensive, it is worth it. 
A selection of ideas on video
A collection of beautiful brick fences from the VISIT TV channel.
Many people have suburban summer cottages where they can take a break from the bustle of the city and get themselves in order. But rest should be comfortable and, above all, safe. To achieve this result, you need to fence your area with a fence. And most the best option In this situation, it seems like installing a fence with brick pillars.
Idea
Before starting such a large and ambitious project, you should familiarize yourself in more detail with all the proposals that companies for the construction of these structures can offer.

In order to find them, you don’t have to go to every store and check all the details. Using the World Wide Web, you can find information, photos of a brick fence, and any other information related to this product.

The main thing is to correctly analyze the market and choose exactly the product that is most suitable.


The basis
Before starting to lay a brick fence, a person needs to select the material that will be used in the construction of this structure. After all, we can say with confidence that a fence is not only a method of protection. It can also be used as an element of external decor.

Thanks to its presentable appearance, it will be able to form a whole design ensemble together with other items in the summer cottage.

Therefore, there are a large number of different types of bricks for this purpose. Here are some of them:
Facing brick
A very popular material on the market. Thanks to its universal properties, it has the ability to add unique lines and original design solutions during the masonry process. This brick can take the form of any material, and it does not require final processing. Color palette huge and varied.

crushed brick
Brick, the main purpose of which is decoration. Quite an expensive model, so most often it can be found on the buildings of rich people. Has good strength characteristics. Due to its shape, it can give the fence an unusual look.

Ceramic brick
It differs from a regular product by the presence of roughness on the surface. Available in various color tones, which allows you to give the structure a unique and inimitable look.

Sand-lime brick
Classic – sand-lime brick. An economically viable option, in terms of strength and power, not inferior to its richer “brothers”.

Of course, in appearance he does not live up to expensive models, but if you veneer it beautifully, you can get an effect that is in no way inferior to fences from expensive estates.

Clinker brick
Expensive, but at the same time one of the most trendy materials in our time. Most often they attract people with their appearance and great installation capabilities. Clinker bricks are made using special clay and are not inferior in strength to other types.

Thanks to the lack internal voids, can last for decades, but due to the complexity of manufacturing it is quite expensive.

Hyperpressed brick
Well, a completely new trend is a protective structure made of hyper-pressed brick. Main differences – resistant to changes environment, durable, environmentally friendly. The material is made in various colors.

Pros of brick
Before pouring a foundation for a brick fence, you need to understand whether it has any advantages! Or it may be worth holding off and weighing your decision more carefully. But if a person has already decided to build this particular structure, then he will definitely not go wrong with his choice.


A brick fence has a number of important advantages that distinguish it from other analogues. These include:

Reliability. A fence made from such material will serve as excellent protection from “random” guests and the glances of curious neighbors.

Long service life (minimum 10 years). If used correctly, such a fence will last for a long time and will serve not only those who built it, but also their children.

Thanks to the brickwork, such a structure will easily withstand any natural disaster (within natural limits, of course) and will not be affected by changes in the temperature environment.

Attractive view. A fence can be built not only for protection, but also to decorate the area, because a large number of different ideas can be implemented on it. For example, add small arches or weighty columns to the design.

When considering a brick fence as an investment, it is the smartest move a person can make.


DIY fence installation
If a person has a number of specific skills, then he can easily make a brick fence with his own hands. To do this, he will need patience and an auxiliary construction tool:
- trough for preparing the solution;
- shovel for mixing;
- hammer;
- Bulgarian;
- rope;
- cement;
- fittings;
- sand;
- putty knife;
- crushed stone;
- water;
- buckets.

Do-it-yourself fence installation can be divided into several stages:
- stage one - collection of construction tools;
- stage two – selection of material;
- stage three – viewing recommendations related to general design;
- stage four – marking the site;
- this fifth is pouring the foundation;
- stage six - brick laying;
- Stage seven – final cleanup of defects.

Price issue
The price of a brick fence can be very different, because each company sets its own conditions. If we take on average, the price of a fence starts from 500 rubles per m/p. More expensive options start at 5,000 rubles per m/p.

Photo of a brick fence


Fencing personal plot performs several functions: demarcation, protecting the territory from outsiders and creating a unified picture with the house. Therefore, the fence must be not only durable, but also aesthetically attractive. The optimal and relatively budget-friendly construction would be a foundation for a fence with brick pillars, laying the pillars themselves and filling the spans with a material of your choice - boards, corrugated sheets, chain-link mesh or forged decorative elements. The combination of two materials will make the fence attractive and will allow the owner to choose the filling of the spans at his discretion, based on general design and expected budget.
 Source mebelsobe.ru
Calculations and preparation for work
First stage preparatory work– calculation of the number of posts for the future fence. They are usually installed at a distance of 3 meters from each other. But, if the length of the site exceeds 150–200 meters, it is increased to 4. This is due to the high costs of installing brick pillars at such a distance.
For an accurate calculation, first determine the location of the corner posts, entrance gate and gate. After this, the distance between them is divided into spans of the accepted size.
The height of the pillars usually varies from 2 to 2.5 meters. This optimal sizes, suitable for filling spans with mesh or corrugated sheeting. It is not recommended to make the fence higher - this will require deepening and strengthening the foundation so that it can withstand the effects of wind. This is especially true if the spans are made of corrugated sheets, which have a large windage.
Scheme for calculating the deepening of pillars and the distance between them Source ts-zabory.ru
After preliminary calculations of the supports, a rope is stretched around the perimeter and stakes are driven in at the sites of future pillars. Calculation of the amount of materials for pillars and preparation of the foundation will depend on the choice of the type of foundation and the method of laying bricks.
Pouring the foundation
The simplest type of foundation is strip-column. To install it, after marking the territory along its perimeter, a trench 30 cm deep and about 40 cm wide is opened. In the places of the brick pillars, 90 cm recesses are made. The total depth of the pit for support will be 120 cm. For the temperate zone, this depth will protect the foundation from soil freezing. This will prevent its displacement and destruction.
Excavation of a trench can be done manually or using machinery. Experienced craftsmen They recommend the first option - the work will be much more accurate, but the time costs will increase by about 2 times.

Scheme of the foundation for brick pillars Source 1pokirpichu.ru
The trench is reinforced with metal rods with a diameter of 14–18 mm. This will additionally increase the strength of the foundation and compensate for the loads during soil subsidence. Metal profiles or pipes are installed in place of brick pillars. Pouring the foundation begins with recesses under the pillars. Using a building level, the vertical position of the pipe or profile is controlled, after which the rest of the tape is poured.
A fence with brick pillars on a strip foundation is considered the best option - it combines reliability and relatively low time and financial costs.
The construction of a grillage foundation will be more reliable, but more expensive in terms of materials. The grillage is the upper part of the foundation, which sequentially fastens pillars or piles. The grillage is also present in the strip-column foundation, but it is located at ground level.
To install it, formwork is installed - 30 cm from the ground along the perimeter of the dug trench. Reinforcement is carried out as in the case of a strip foundation, after which the formwork is poured with concrete.
After pouring the foundation, it should take 2 or 3 weeks for it to dry completely. Then you can erect brick pillars for the fence.
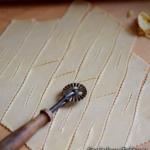
Preparation of the solution - proportions and rules

Proportions for preparing the solution depending on the brand of cement Source www.navesfasad.ru
Sand and cement are the main components of the solution. The mixing proportion is standard: 1 part cement, 5 or 6 parts sand. The latter is better to choose the small fraction. The higher the grade of cement, the better the quality of the solution. It is advisable to choose at least M400. Some craftsmen add detergent or liquid hand soap - this ensures better plasticity of the solution.
To facilitate mixing, sand and cement are first mixed dry and then water is added. The main thing is to choose the optimal ratio - the solution should not spread, but also not be dry.
For decorative purposes, special additives are added to the solution, which are sold in construction stores. For example, it could be simple soot. A small amount of will give the solution an almost black color, which will highlight the light brick.
Which brick to choose

Sand-lime brick of various shades Source bonostroi.ru
On our website you can find contacts of construction companies that offer fence construction and design services. You can communicate directly with representatives by visiting the “Low-Rise Country” exhibition of houses.
One of the main tasks when building a fence will be the choice of the main material - brick. It should not only ensure the reliability and strength of the building, but also have an attractive appearance. Modern market offers the following types of bricks:
silicate;
ceramic;
clinker;
hyper-pressed.
Classic options are silicate and ceramic. The first is made from quartz sand, the second is made from clay. These are universal options, have good strength and moisture resistance. One of the main characteristics of a brick is the number of freezing/defrosting cycles. In this indicator, clay brick is inferior to silicate brick, which can withstand up to 60 cycles without loss of performance characteristics.
Clinker brick is the most durable of the presented types. Produced from refractory clays at high temperature. Withstands up to 150 freezing and thawing cycles. Beautiful specifications combined with a variety of colors and shades. Buildings made from this material, subject to all technologies, retain their strength and aesthetic characteristics for 100 years. The only negative is the price is higher than silicate and ceramic.
Hyper-pressed or Lego brick. Thanks to high pressure processing, the particles of the material are bonded at the molecular level, which provides it with strength on par with clinker.
Any of the listed types can be used to build brick fence posts. The main selection criterion will be the financial issue.
Video description
How to choose quality brick for laying pillars, look at the video:
Brick pillar laying technology
Before starting masonry, roofing material or special waterproofing is laid under the bricks. It will not allow direct contact with water.
Depending on the width of the brick fence post, there are two most popular masonry methods:
one and a half bricks;
two brick masonry.
In the first case, the result is a post 380x380 mm, in the second 510x510 mm. The first option is more economical in terms of solution consumption. The support profile for the pillar is usually 80x80 mm. This will greatly reduce the gaps between it and the masonry and require less mortar to fill them. In the second case, the support will be more durable and massive, but will require filling in the gaps big amount solution.

Laying a pillar with one and a half and two bricks Source pinterest.com
The bricks are laid according to the diagram. Using a building level, the horizontal and vertical planes are controlled. The next layer of brick overlaps the seams of the previous one. The gaps between the iron support and the masonry are filled with mortar and compacted.
To obtain perfectly even seams, round or round metal rods are used. square section diameter up to 10 mm. Such rods are laid along the perimeter of the first row of bricks from the outer edge. The area is filled with solution with some reserve towards the center. The brick is laid on the rod with one side, and the other is leveled to the building level. After filling the vertical seams, the procedure is repeated with the next row. The rods are removed from the previous row. This technology will allow you to control the masonry and make the seams neat and even.
After the brick pillars have been erected to a given height, a decorative cap is installed on the end. Various options can be found in building materials stores. The cap can be metal, ceramic or concrete. It installs on masonry mortar. The cap will protect the pillars from moisture and precipitation.
Video description
Watch the video for the technology of laying brick pillars:
Fence and gate installation
At the stage of laying pillars, it is necessary to decide on the material for the spans. If metal materials are chosen (corrugated sheeting, forged gratings), and also if the choice is wooden fence with brick pillars, then they are welded to the supporting posts of the pillars at the same height metal elements for the installation of horizontal jumpers. For reliable fastening, two jumpers are constructed.
In those places where wickets and gates are located, it is recommended to install three jumpers to securely fasten the doors, since these elements are constantly under load and in use.
Installation diagram of corrugated sheets between brick pillars Source iw.aviarydecor.com
An alternative to the listed materials would be to lay a brick fence between the pillars. It is more labor intensive and long process. Each subsequent row must be aligned horizontally and vertically. The foundation for such a fence must be strong in order to support the mass of bricks.
The advantages of this type of fence are the ability to use different bricks in color and texture, which will give the fence an attractive appearance and individuality.
Photo examples of fences with brick pillars

A column of light and dark bricks combined with simple forging Source mebelsobe.ru

Light brick combined with openwork wrought iron gates looks elegant Source pinterest.it

A fence made of light-colored brick pillars and dark wooden planks Source aquasd.ru

The combination of yellow brick and dark brown corrugated board is one of the most common options Source mebelsobe.ru
Yellow brick and green corrugated sheets are also a popular option. Source tvoj-zabor.ru
A budget option for a fence with brick pillars - using a chain-link mesh Source mebelsobe.ru
Conclusion
Brick fence posts are the most common and affordable option. Variety of species and various possibilities filling the spans will help you choose the most suitable one for a specific site and house design. A properly constructed foundation and high-quality masonry work will make the fence a reliable fence that will last for decades.
Eurogib specialists constantly have to travel to construction sites for measurements and installation. When we go out to order caps for fence posts, we often come across mistakes that even experienced masons make when building brick pillars. Masonry fence posts has its own characteristics and differences from the masonry of walls of houses or stoves. In this article we want to highlight the basic principles of building brick fences.
The foundation for a brick fence is a very important thing. The more massive the fence, the more reliable the foundation under it should be. Special attention it is necessary to pay attention to the foundation for those fence elements on which the gate will be installed.
|
|

When choosing a foundation design, they play a big role load-bearing capacity soil. For example, it could be a strip foundation with bored piles, and each of them contains a metal pipe, but the choice of the type of foundation for brick pillars depends on what material the filling will be made of, as well as on the type of soil. If the fence span is from lightweight material(corrugated sheeting, wood), you can make a pile foundation for each pillar. The depth of the pile depends on the type of soil and the height of the groundwater. If the soils are classified as heaving (clay or loams) with highly located groundwater, the level of the bottom of the foundation should be located 15-20 cm below the freezing depth of the soil. On well-drained soils (sands and sandy loams), it is enough to lay the bottom of the foundation at a depth of up to 80 cm.
Here is one of the options pile foundation under a brick pillar: we drill a hole of the required depth (diameter 25-35 cm), fill the bottom with a bucket or two of crushed stone, compact it with one of possible ways. We install formwork inside the hole (usually roofing felt rolled into two or three layers). We place a pipe inside the formwork, around which we will subsequently lay the pillar. The length of the pipe consists of two quantities: the part that is walled up in concrete and the part that will rise above the level of the top of the foundation. Moreover, the upper section of the pipe is not necessarily in in this case should be to the very top of the post. It can rise only 40-50 cm. An exception is the pillars on which the gate and/or wicket will be hung. Here the internal reinforcement should be almost to the very top.
If the fence is planned to be entirely brick or there are high wind loads in the region, most likely you will need to make a full-fledged strip foundation. Another option is piles connected with shallow tape.

Most often, brick pillars are made 2-3 meters high. But the designs can be different, it all depends on the expected height of the fence itself. Accordingly, the higher the pillar, the stronger the foundation needs to be made.

The technology used to lay bricks for fence posts is exactly the same as for load-bearing structures, however, they will not serve as a support and their ability to withstand large vertical loads is completely unimportant.
The design of the post on which the gate or wicket will be attached may look something like this:

The design of the intermediate pillars to support the spans can be reinforced a little weaker, but the reinforcement of the pillars must be done:

The distance between the pillars of a brick fence can be from 2 to 8 meters. It depends on many circumstances and conditions:
- the volume of financial resources intended for the construction of the fence;
- dimensions of the filler material (span length of corrugated sheet or wooden picket fence) during the construction of a combined fence;
- load forces on the pillars.
You should not erect poles too rarely, as this will significantly affect the quality of the fence and its service life. And besides, it looks less attractive. Most optimal distance between posts 2.5 - 4 m. Measure the distance between the posts of the gate and gate very carefully so that you don’t have to adjust anything later. It is ideal when the dimensions of the gate and wicket are known before the construction of the brick fence. This way you can avoid many problems associated with subsequent fitting.
The span filler is attached to the pillars only after they have stood for some time. This usually takes 2-3 weeks.

Which brick to choose for a fence?
The simplest one is ordinary ceramic brick. May be solid or hollow. In the first case, the advantages include strength, but the disadvantages include heavy weight. With the second option, everything is the other way around.
Another advantage is its low cost, but it also comes with a drawback – its unpresentable appearance. Typically, simple brick is used if the pillar will subsequently have an external finish.
Another option is clinker brick. Beautiful, durable, practically does not crumble. Captivates with the variety of textures, colors and the ability of clinker to harmonize with buildings made in both classical and traditional styles. modern styles. Of course, it will cost more than its simple clay counterpart.
The next option is sand-lime brick - very durable, frost-resistant, has excellent noise-absorbing qualities, environmentally friendly and, of course, not cheap.
Most often, fence posts are made from the same brick as the house itself. But combined options are possible:
Brick size standard red: width – 120, length – 250, height 65 mm. This ratio is considered optimal if you alternate longitudinal and transverse placement of single bricks in the masonry.
One and a half. Construction does not stand still; new brick sizes have appeared, in particular – one-and-a-half bricks. The width of such a brick is 120, length is 250, and height is 88 mm. To lighten the weight of the masonry, a special technique was developed: solid bricks alternated with porous, hollow and perforated ones.
Double. This type of brick is practically never found in solid form; it is made in a perforated form to lighten the weight of the masonry. Brick size: width – 120, length – 250, height – 103 mm.
Euro– 250x85x65 mm, guest reduction 0.7 NF;
Single modular– 288x138x65 mm, guest abbreviation 1.3 NF.
| Type of brick | Standard sizes, mm | Weight, kg |
| Ceramic facing brick |
250*120*65 250*120*65 250*85*65(Euro) |
2.3; 2.6-2.7 (hollow) 3.6-3.7 (hollow) 2.1-2.2 (hollow) |
| Thickened ceramic facing brick |
250*120*88 250*85*88 (Euro) |
3.2; 3.6-3.7 (hollow) 3.0-3.1 (hollow) |
| Clinker facing brick |
250*120*65 250*90*65 250*60*65 |
4.2 (full) 2.2 (hollow) 1.7 (hollow) |
| Clinker facing brick (long) | 528*108*37 | 3,75 |
| Hyper-pressed (non-firing) brick, solid, smooth |
250*120*65 250*90*65 250*60*65 |
4,2 2,0 4,0 |
| Hyper-pressed (non-firing) brick, solid, smooth, thickened | 250*120*88 | 6,0 |
| Ceramic brick self made | 188*88*63 | 1,9 |
Brick pillar laying
In most cases, fence posts are made of 1.5 or 2 bricks, cross-section 380*380 mm and 510*510 mm, respectively, up to 3 meters high.

It is best to do the masonry around a metal pipe, the base of which is concreted into the base of the foundation. Mandatory presence of long metal pipes(full height of the pillar) is for the pillars on which the gate is attached, for the rest you can lay shorter pipes so that the elevation above the top of the foundation is 300-500 mm, and then you can weld several rods with a diameter of 10 mm, but for pillars which support the gate, this option is unacceptable.
At least for the bottom 3 rows you need to use solid brick. For the remaining rows, hollow facing is also suitable, but in this case the solution should not be too liquid, otherwise it will fall into the cracks of the brick.
The masonry is carried out with dressing (displacement) - the seam of the bottom row is overlapped by the “body” of the brick lying on top. The seam is standard - 8-10 mm. Scheme for laying columns in the photo:

Ceramic brick absorbs moisture very quickly, so if you hesitate a little, it will be difficult for you to “put” it in place. To ensure that the solution retains its plasticity longer, the brick is dipped in water for a few seconds before laying. The same maneuver makes it easier to remove excess mortar from the surface of the masonry (it is removed immediately with a dry cloth). This method of laying pillars has long been proven, but for beginners, if they do it themselves, it will be difficult for them to maintain an even seam. The work will be much more convenient and faster if you use masonry under the rod: a metal rod with a side of 8-10 mm, cut into pieces (10-15 cm longer than the size of the post).

Having laid the first row, a rod is laid on it along the edge of the brick. Fill the area with a small amount of solution, with a larger layer being made closer to the pipe. Next, moving the trowel along the rod, remove the excess, clearing the rod of the solution. But at the same time, the slope of the solution is maintained. They place a brick and level it. At the same time, the rod prevents it from settling too much, and we control the position of the other end with a level.

Then take a short piece of rod about 10 cm (for a vertical seam), place it along the end surface, apply the solution with a trowel side part laid brick, also removing excess along the rod. Place and level the next brick. After the brick is set to the required position, the seam is pressed from above with a trowel, and the vertical rod is removed.

Other problems that may arise when laying pillars with your own hands are changes in size or “twisting”. Both defects arise from insufficient control of the vertical position of the bricks being laid.
At self-masonry very often the upper rows of pillars become much wider than the lower ones. This happens gradually, a millimeter or even less is added, but in almost every row. As a result, at a height of 2 m, the width of the column can be 400 mm or more, instead of the planned 380 mm. Avoiding this mistake is to control the size of each row. Controlling the building level alone is not enough. Mostly household tools are used ( yellow color), but it has a fairly large error. And if the level is 60-80 cm long, you simply will not see minor vertical deviations. Therefore, they additionally use a tape measure - checking each row by size, or you can make a template according to size (for example, from even planks) with which to check for possible deviations.

Laying pillars yourself without experience in such work can lead to another mistake: the edges of the pillar can shift, while the pillar “twists” around its axis - try attaching spans to such pillars. Therefore, when laying each row, you must strictly ensure that the corners are located strictly one above the other. You can make the task easier by using two corners screwed to opposite corners. They are temporarily attached to the lower rows (with bolts or self-tapping screws in the seam) and then used as a guide, placing the bricks strictly in the corner.
And finally, another fairly common mistake made by inexperienced craftsmen is the lack of mortgages for attaching gates, gates and fence sections. The result of forgetfulness is a very even and beautiful, but completely smooth pillar to which it is not possible to attach anything. Find out how to avoid such trouble below.

The type of mortgages depends on what the fence sections will be made from in the future. If this happens brickwork, then the role of the mortgages is reduced to connecting the pillars and sections into one whole. Since there will not be any special weight load on them, it is enough to use wire loops 8 mm thick, laid in every fourth row on the side of the post to which the sections will be attached.
If the sections are made of corrugated sheets or wooden beam, that is, they will be attached only to poles; more durable mortgages are needed that can withstand their weight and additional loads that arise. In this case, use metal plates which are welded at a certain height (or mounted in any other way) to a base post or reinforced frame, and a cut is made in the brick using a grinder in the right place.
In the future, purlins will be welded to the mortgages, and corrugated sheets, metal rods or other elements will be mounted on them.
Columns made of facing bricks must be treated with a special impregnation, which will cover it with a film and will serve as protection against the appearance of efflorescence (whitish stains) and subsequent destruction.
All is ready? Don’t rush to fasten the fence sections right away - the posts should stand for about three weeks, otherwise you can easily ruin all the previously done work.
About finials (caps) and fence parapets

Caps for protecting the masonry of brick fence supports
Here it is, your first DIY brick pillar. It is perfectly smooth, with seams of the same width, made according to all the rules - a sight for sore eyes! To keep the pillar that way long years, necessary finishing touch– pommel (cap). The intake hood performs several functions at once:
- Protects the brick from excess moisture, which will destroy it when frozen.
- Protects concrete and metal base pipes located in the middle of the column. If they are not protected, then during rains the concrete will gradually crumble, and water, accumulating in the resulting depressions, will sooner or later reach the metal base.
- And finally, the pommel gives the post a more attractive, finished look, serving as its decoration.
For brick pillars, metal caps are usually used, the size of which is selected so that they protrude several centimeters beyond the boundaries of the pillar. When choosing them, give preference to products without rivets, with well-processed tight joints that can provide reliable protection. In addition, the following requirements apply:
- resistance to precipitation;
- sufficient angle of inclination to prevent moisture accumulation;
- Possibility of reliable and accurate fastening to the pole;
- the presence of ventilation to prevent the formation of condensation.
If the spans between the pillars are also made of brick or concrete, then the top of the wall must be protected with special ones.
All metal elements of a brick fence can be ordered from us - send a request to
Land plot traditionally surrounded by a fence. The fence is made from different materials. One option is a fence with a base of brick pillars with spans of corrugated board, forged elements, wooden picket fence or brickwork. Such a fence looks solid, it reliably protects the territory and is decorative in its decoration.


The brickwork of the pillars is quite simple for self-made, if you become familiar with the technology for constructing such supports. Let's consider the details of this type of construction work.


Peculiarities
A fence with brick pillars provides the necessary level of security against unwanted intrusions into the estate. Spans of corrugated sheeting or brickwork, supported on brick pillars, can add impermeability and reliability to the protective function of the fence.
Forged and wooden spans will add external lightness to the structure, while maintaining the required level of insulation from the external environment.


Brick supports are durable and weather resistant. They are resistant enough to the increased payload for installation massive gate with automatic sliding or mechanical swing device.
To extend the life of the poles, they need to be covered with caps made of metal or concrete. Here it is worth considering that concrete caps have a greater variety of shapes, but they themselves are destroyed by changes in temperature and humidity.


Metal caps better isolate the brickwork from moisture.
A fence on brick pillars, while providing a sufficient level of protection, is more affordable than a completely brick fence. The types of bricks, masonry patterns and span material provide great scope for decorative creativity when designing such a fence. Brick pillars can be safely equipped electric cable to organize lighting for individual supports, which will be convenient for owners and serve as additional decor.


Types of structures
To build a fence with brick supports, you need to decide on the type and height of the structure. The optimal height of the supports is chosen to be about two meters, then the pillar is laid out 1.5 bricks wide, which together with the seams is equal to 38 centimeters.


If necessary, you can increase the height to 3-4 meters, then it is better to lay the bricks in two or more bricks. In this case, the size of the pillar will be about 50 by 50 centimeters. The span width ranges from 2.5 to 6 meters, the dimensions are selected according to the relief or the composition of the fence.
The type of foundation depends on the type of structure: strip or point. For spans made of lighter materials, a point foundation is chosen under brick columns; for heavier ones, a strip foundation is chosen.

Spans made of corrugated sheets are the most common option.
Advantages:
- This fence has a simple appearance and is easy to install.
- You can choose the desired color scheme.
- With such spans, geometric hoods look beautiful.
- It is convenient to install the gate.

A strip foundation is made for this type of fence. You can choose point supports, but wear resistance and decorative qualities will be reduced.
For a fence with forged inserts, you can also use both the first and second options for supports. Of course, forging gives the fence artistic value and emphasizes the well-being of the owners. A strip foundation with several rows of bricks will add solidity to the fence. The airiness of the structure appears when you refuse strip foundation, but the durability features are preserved, reliable protection and decorativeness.


The fence can be made entirely of brick or torn decorative stone, such fences are made on a reinforced foundation; they reliably isolate the territory of land ownership. For decorative effect perform combined fences.


After choosing the type of fence, we begin to select the material.
Selection of materials
The material for the spans is chosen according to the degree of protection required: for better insulation - corrugated sheet or brick, for a decorative effect - metal forging; in rural farmsteads, a wooden or metal picket fence has proven itself well as protection from cold winds and unwanted intrusions.


The fence material should be in harmony with the architecture of the outbuildings and the overall design concept of the site. Classic mansions look harmonious with wrought iron or stone fences. House in ethnic style It is better to fence it with a wooden picket fence. In areas where it is contained Domestic bird or other living creatures, solid fences made of corrugated sheets would be optimal.


In modern minimalist trends, it is better to use a fence with a minimum of decor. Simple and elegant. Such fences are decorated with spans of special glass or plastic.
Bricks for columns are selected based on general design fence For the first two or three rows you will need an ordinary clay brick, then use a hollow one or the same as in the bottom row. To enhance the decorative effect, the columns are laid out clinker bricks or facing bricks of the desired color in various combinations.


Relief brick gives greater expressiveness to the architecture of the fence. Decorative finishing can be applied only on the front side of the fence, and the inside can be left in the form of simple brickwork. This will provide significant savings.
According to the number of pillars, steel pipes are purchased, which will become the vertical axis for reinforcing the brickwork. It should be taken into account that the support reinforcement for gate and wicket posts is purchased with a reinforced profile. Reinforcement will be required to strengthen the foundation; its quantity is calculated based on the need for a strip or point arrangement.


You will need construction fillers: cement, sand, crushed stone or expanded clay. You will need to stock up on boards for making formwork. Since brick absorbs moisture very well, and when it freezes it destroys the structure of the material, then everything brick structures will have to be protected from soil moisture, so waterproofing material will be needed.
Quantity calculation necessary materials produced according to the length of the fence, the pitch of the brick supports and their size.


For a standard column of one and a half bricks, 2 meters high, 110 bricks will be required.
Laying technology
Sequencing:
- The first step is to mark the outline of the fence using twine. Pegs are driven in at the locations of future supports. For a pile foundation, a hole 30-35 centimeters wide and deep for sandy soil 80 centimeters, and for clay – up to the freezing layer plus 20 centimeters.


IN middle lane Russia is best to maintain a depth of 1 meter or 1 meter 20 centimeters. A bucket of crushed stone is poured into this hole and compacted. Formwork is made according to the diameter of the pit; it can be rolled from roofing felt required diameter handset. A steel pipe is inserted into this formwork and filled with cement mixture.
A mixture of cement and sand is made in a ratio of 1: 5 or 1: 6, for plasticity you can add a little liquid soap. The solution should be neither liquid nor dry, so add water gradually. The upper part of the foundation is poured into formwork along the width of the column. For a strip foundation, a trench 50 cm deep and 40 cm wide is dug between the pillars. The bottom layer is strengthened with a cushion of crushed stone, formwork made of boards is installed along the trench and filled with mortar.


- After pouring the foundation, brickwork begins no earlier than 2 weeks later. The surface of the foundation is covered waterproofing material so that the brick does not absorb moisture from the soil. Here you can use roofing felt, but more modern material is a bitumen-based waterproofing agent.
- Embedded corners, ears for gate canopy are welded onto a steel pipe, or transverse pipes are welded to secure the span material - picket fence, corrugated sheet or forging.


- The next stage of work is brickwork. Here you need to pay close attention to the quality of the solution and its thickness. To test, place a little mortar on the brick; it should not spread. Bricks are laid according to the masonry pattern with ligation through a row around steel pipe. The first and second rows are laid with regular full bricks; for the next rows, lightweight hollow bricks can be used.

- A layer of cement mortar 1 centimeter thick is applied to the waterproofing, and bricks begin to be laid on this layer; each brick is tapped with a rubber hammer to compact it. To ensure uniform adhesion to the mortar, the brick is first dipped in water. It is better to measure each row with a tape measure, since a shift of even a few millimeters in each row can lead to a skew of the post or an expansion of several centimeters.
Each side should be regularly checked with a level to avoid deviations from the vertical.

- If desired, you can do decorative finishing seams, usually in cement mortar add dye or textured chips and after finishing the masonry, coat the seams separately. This gives neatness and completeness to the entire building.
- After laying the entire column, the middle part around the pipe is filled with a solution; it can be filled with crushed stone and filled with a more liquid solution. The top is again covered with a waterproofing layer.

- A cap made of metal or concrete is attached to the top of the structure. Manufacturers offer a wide variety of shapes, colors and materials for making such caps. A simple rectangular cap can be made from a sheet of metal yourself using a pattern. The color is selected according to the color of the fence design.

- If the project involves combined masonry, then you need to carefully select the dimensions of the main and finishing bricks. If the brick pillar is finished with natural stone, then after the masonry has dried, a finishing layer is applied.
- The next stage consists of hanging the span material: corrugated sheets, metal lattice, picket fence or laying out the span with decorative bricks.
- The final type of work is the installation of gates and wickets, installation of lighting.

A few tips on doing masonry will help you do it well even for a novice master:
- To ensure that the seams between the rows of bricks are of the same thickness, a metal rod of the required diameter is laid along the edge. The cement mortar is leveled over it, bricks are laid on top, tapped with a rubber hammer, then the rod is removed and laid on the next row.