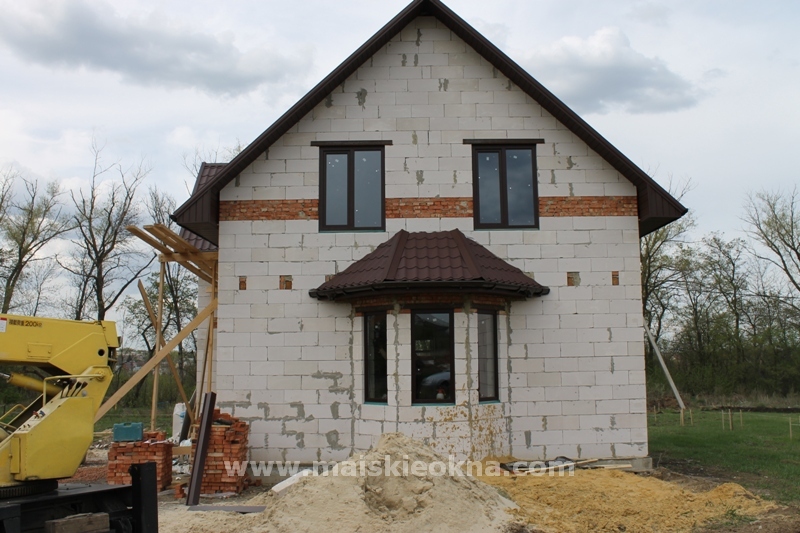
In this article we will tell you how to install it correctly plastic windows V a private house, lined with Aerobel foam block. Everything is built from this popular material more houses in Belgorod.
The peculiarity of this house is that the main wall of the house is made of foam block, exterior finishing Not yet.
Insulation and finishing planned decorative plaster- bark beetle. With this configuration of the house, there are installation features that we will pay attention to.

So, the first step in any order is measurement.
IN in this case we are dealing with bare openings, without a quarter. It is important to measure all openings, without exception, in several places, and provide the same gap on all windows.
After measurement, the order is transferred to production.
The production of windows at the May Windows company with standard configurations and lamination warehouse positions takes a minimum of 5 working days.
In this case, the installation was chosen window system KBE 70, 5 chamber, Mahagoni lamination.
Double-glazed window 36mm, with energy-saving Guardian ClimaGuard N glass. A good option for glazing a private home.
Then window designs are delivered to the installation site using specialized transport.
The installation team receives the windows and immediately checks them for manufacturing defects or damage during delivery. As a rule, such situations are the exception; they practically never happen.
Then, the installation team places the windows according to the measurement sheet to the required openings and begins preparing the installation work.
The first step is to prepare the window openings for installation - remove the film from the openings. Often when performing brickwork, the solution emerges and solidifies in window opening. These deposits must be removed before installing windows.

Then you need to prepare the windows for installation. Before installation, you need to once again check the dimensions of the window and opening and compare them with the measurement sheet.
All laminated windows come from production packed in protective transparent film.

The installation team removes the packaging film and begins preparing the window for installation:
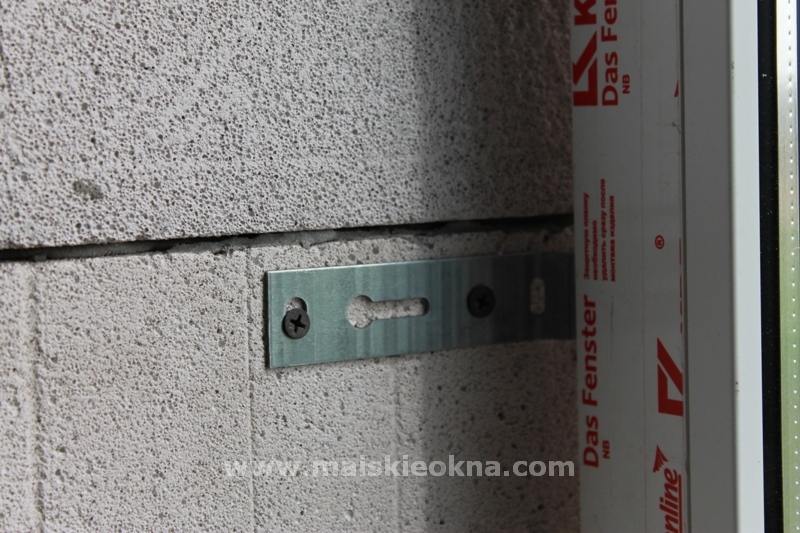
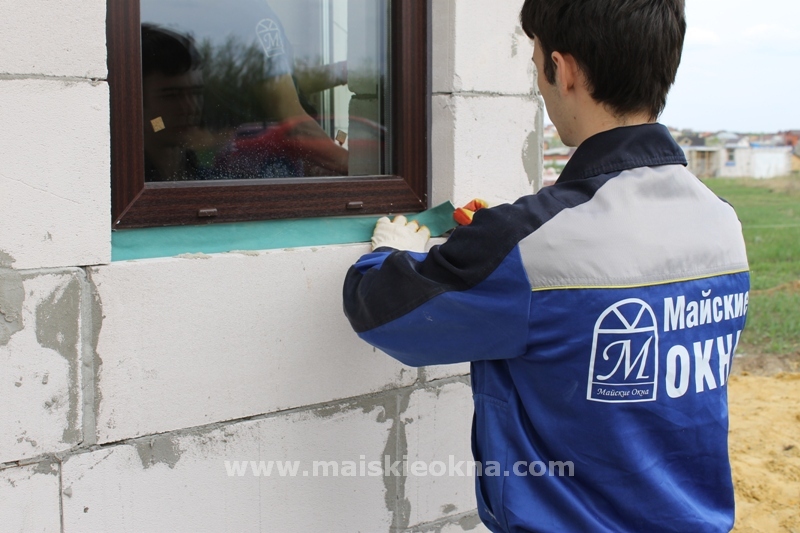
Attaches special window mounting plates to the frame, which must be screwed to the window, into metal reinforcement

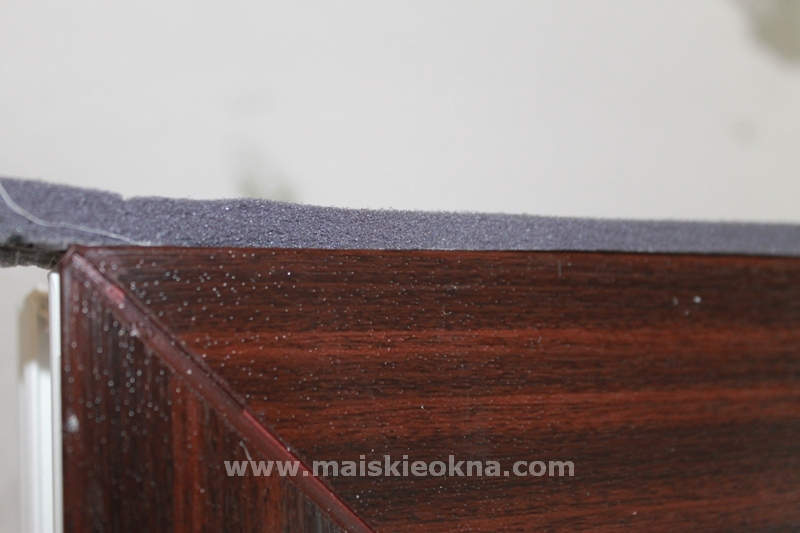
Apply PSUL tape (vapor barrier self-expanding sealing tape) to the frame. In the absence of window openings quarters, PSUL is glued to the end of the frame.

And removes the shipping film from the front of the frame. This film must be removed either immediately before installing the window, or immediately after installation, because under the influence sunlight it can stick very tightly to the window and then be very difficult to remove. This is what the window should look like ready for installation:

If the window standard size, or exceeds it, it will have quite a lot of weight. Therefore, you can remove the sash for easier installation.
Windows in the openings are installed at the same depth, which depends on the type of wall and type of decoration on the outside. For foam blocks, the installation depth with finishing and insulation is at least 7 cm.

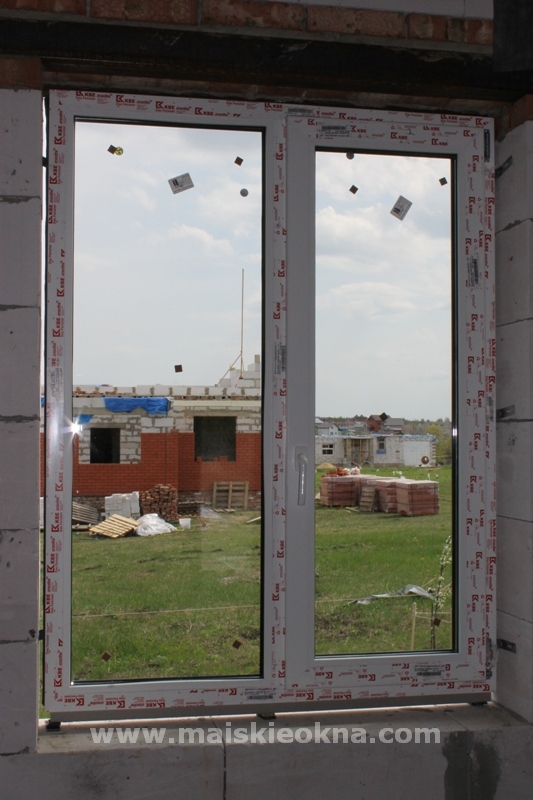
Then the installation crew places the window in the window opening. At the bottom of the window you need to place plastic pads of the required thickness to level the window and provide a foam seam around the perimeter.
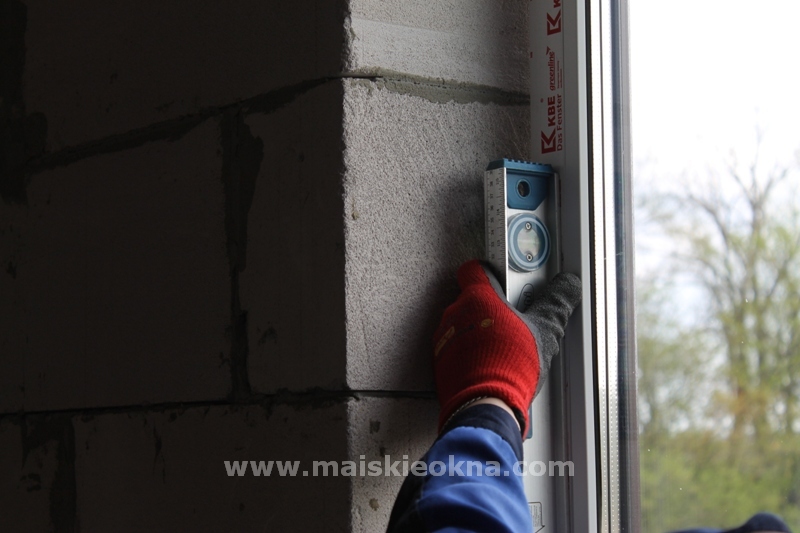
When placing a window in an opening, be sure to check the level of the product several times.

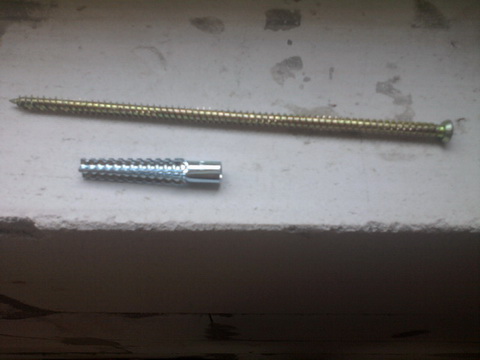
Then you need to secure the window in the opening through the mounting plates. Be sure to use both mounting holes to prevent wind loads. During installation, it is necessary to use suitable installation materials. It is allowed to use self-tapping screws with large threads for dense foam blocks. The length of the screws must be at least 80 mm.
After fixing the window in the opening, the sash is hung on the window and a handle is placed. You need to remove the protective tape from the outside of the sash, as well as from inside in the place where the handle is installed.


The window fixed in the opening is left without foam, and the team installs the next window. While the next window is being installed, the PSUL on the previous window expands and fills the foam gap from the outside.
After securing all the windows in the openings, you need to glue a protective tape on the outside (Gerlenta), which covers the bottom foam seam and protects against blowing under the window.


Now you can start foaming. But first you need to wet the window openings with a spray bottle to get better adhesion of the foam to the wall.
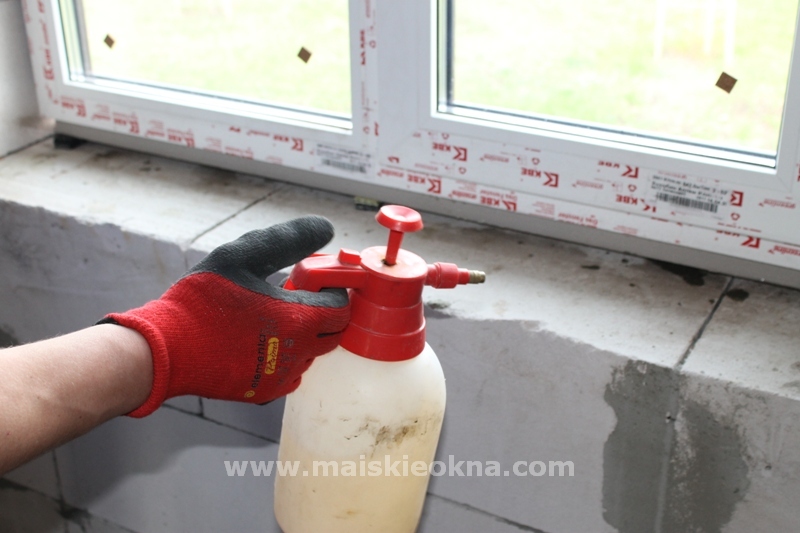

Now you can foam. For foaming it is important to use professional foam, which has a low expansion coefficient.


After finishing the foam, get dressed decorative overlays on fittings, as well as plugs for drainage holes on the outside. The opening of all moving parts of the windows is checked.
The team leader inspects the facility and accepts the work of the installation team.

Customers who order windows from the May Windows company receive not only a factory warranty on the products for 5 years, but also a warranty on installation during this period, as well as free service.
The company "May Windows" is engaged in the professional production and professional installation of windows in private houses in Belgorod and the Belgorod region.
Recently, aerated concrete is often used for the construction of houses, since this material is durable, reliable and easy to construct. The walls of the buildings are resistant to temperature changes and have high heat-insulating properties.
After erecting the “box” of the building, specialists begin installation. Most often today, preference is given to plastic structures.
Technology for installing plastic windows in aerated concrete
Before installation, specialists prepare necessary tools and materials, and also carry out cleaning work surface from dust and debris. Then remove from the frame mounting film and check the windows for possible defects. Then they proceed directly to the installation of the structure.
At the first stage plastic frame fixed in the window opening. To do this, first install one side of the frame, and then the other. In this case, it must be placed in the window opening at a distance of 15 cm from the outer edge. For fixation, special plastic wedges are used, which are driven into gaps of 3-5 mm in size, previously left for this purpose, located on the sides.
Then the structure is leveled vertically using a building level and wedges are also driven into the upper part into the previously left gaps.

After installation of the frame is completed, its joints are filled with polyurethane foam. While the material hardens, proceed to the installation of the window sill. To do this, apply to the surface where it will be installed. silicone sealant and lay the board. Immediately after this, all gaps and cracks are foamed. To ensure strong adhesion of the window sill to the surface of aerated concrete, a load is placed on it.
On final stage craftsmen complete the finishing of the window using available tools and quality materials. After the foam has completely dried, experts hang window sashes and check their performance. Then the excess polyurethane foam is cut off with a knife, the surface is primed and plastered until the grooves are hidden.

Alignment is carried out in one of two ways:
- a platform is formed perpendicular to the window frame, applying the material in an optimal layer to avoid the appearance of cold bridges;
- like a continuation of the wall. In this case, the layer finishing material lead behind the frame, overlapping the fasteners. This method is considered the most optimal, but sometimes it affects the aesthetic appeal of the window.
After applying the base layer of finishing material, it is left to dry for at least 8 hours. Moreover, in the cold season the drying period should be increased. Finishing impose thin layer- 4-5 mm, leveling it with a spatula. Then, after complete drying, the excess material is cut off with it.
By involving specialists in the installation of plastic windows, you can be sure that all stages of the work will be completed consistently and efficiently. That is, your windows will not freeze in winter or let in noise and will retain their functionality for many years.
Cost of installation of metal-plastic windows
Of course, every home owner, before contacting a window installation company, wonders how much this service will cost. To do this, it will be useful to know what the price consists of. The final amount is influenced by:
- the cost of a double-glazed window, which depends on the type of construction and the number of glasses;
- the need for simultaneous installation of several frames;
- cost of delivery, installation and Maintenance, if you ordered a turnkey service;
- design features of the glass unit;
- time of work and labor costs of a specialist;
- number of floors of the building. If it is necessary to install a plastic window on the sixth floor or higher, the cost of the work increases, since the involvement of specialized equipment or industrial climbers is required.
When ordering windows, you should not skimp on fittings and the number of glasses. So for northern regions with cold winters, five- and six-chamber double-glazed windows are recommended. The durability of windows and the stability of their operation depend on the fittings.
Cellular types of concrete in general and aerated concrete in particular are rapidly displacing the familiar brick and cinder block from the market. Aerated concrete has many advantages, but there are also certain disadvantages. Due to the porous structure of the material, the installation instructions for doors and windows are somewhat different from the traditional ones.
The photo shows door installation.
Preparatory activities
Many owners are afraid that aerated concrete blocks, having a cellular structure, are easily destroyed. Because of this, burglars can simply tear out the inserted metal door without bothering to open it. They are partly right, because if you install windows or doors according to traditional technology, then such a danger exists.

The insertion technology will be discussed specifically below, but now let’s focus on the preparation. First of all, it should be noted that both windows and doors need to be ordered with a small gap. That is, the size of the structure should be 20 - 60 mm smaller than the window or door opening.
![]()
Before installation, the surface of the blocks must be prepared. Many craftsmen advise simply gluing outside waterproofing, self-adhesive tape. But we think differently.
Aerated concrete is a hygroscopic material and there is a high probability of moisture getting into the joint. Therefore, it is more advisable to impregnate the blocks with waterproofing, strengthening soil deep penetration. Thus, you will not only provide reliable waterproofing, but also strengthen the surface of the block to a depth of up to 50 mm.

Installation technology
Do not be afraid to install such structures with your own hands. The installation technology, of course, involves additional costs for strengthening, but the price of these materials is disproportionately less than the payment for the work of professionals.
Metal door installation
As you know, metal is a heavy material and installing a metal door in aerated concrete is quite a responsible job.
Especially if you prefer reliable domestic doors made of thick metal with good protection.

- As mentioned earlier, the dowels that come with the door will not hold securely, so here you can do two things. We recommend an easier method. For this you will need to purchase additional metal corner and take care of welding machine.
- For a standard metal entrance door, a 35 mm corner is sufficient. If you need to install a larger double door or Garage Doors, then we recommend taking a corner of at least 50 mm.
- The corners are cut to the size of the opening and applied from the inside and outside opening. They need to be welded together using several jumpers.
- It is better to cut jumpers from sheet metal about 50 mm wide. The thickness of the jumpers is selected depending on the power of the structure. For standard door metal with a thickness of 1.5 - 3 mm is sufficient. They need to be placed in places where the loot is attached.

Tip: some owners try to save money by welding only two vertical, opposing structures.
Such a door will certainly hold up, but we recommend making a completely all-welded wraparound structure from a corner.
The price will increase slightly, but the reliability will increase significantly.
- The frame is fixed on the jumpers. In this case, due to the U-shaped grip, the structure will hold well anyway, but to be sure, you can screw 1 self-tapping screw with a length of at least 120 mm into each jumper. Please note that the door will still be attached to the lintels and the fixing screws should not match.
- Next, the door hatch is inserted level and secured with wooden wedges. To fix the door, you can also use powerful metal screws with a length of less than 150 mm. But if you prefer dowels, then the holes are pre-drilled a regular drill, and then special ones are fixed in them.
- After securely fixing the door opening, both in the wall and in the corner frame, you need to coat the outside with sealant and fill all the cracks with foam. For better sealing Experts advise that after hardening and cutting off excess foam, once again coat the seams with sealant from the inside.

Important: shabashniks may suggest hammering several long pieces of reinforcement into the walls and fixing the door on them. This may go away with brick wall, but on aerated concrete such a door will become loose within 1 year and you will have to do everything again.
The video in this article shows how to install doors.
A few words about window installation
Installing windows in aerated concrete is somewhat simpler than installing metal doors, but still requires attention.
Windows are not subject to the same loads as doors, plus the weight of these structures is much less.

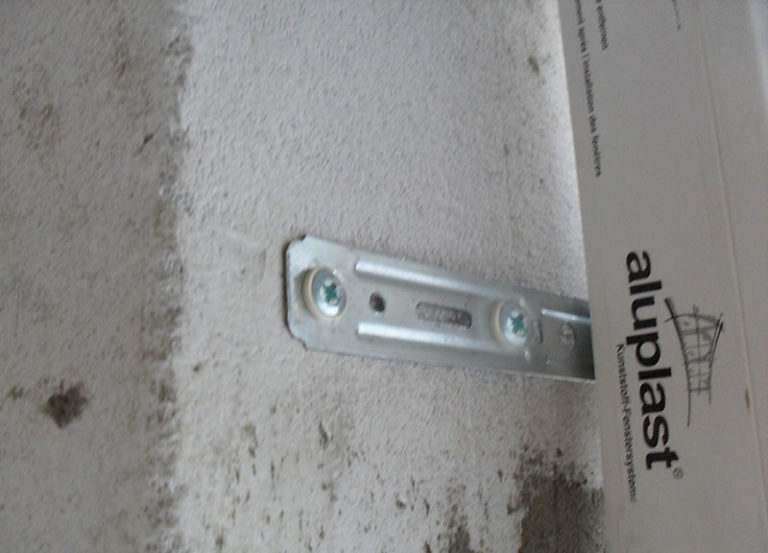
- The window frame is attached to special metal anchor plates. Plates can be purchased at any hardware store or cut it yourself from metal 1.5 mm thick. Initially, the plates need to be secured with self-tapping screws at the ends of the window frame.
- After this, you need to clearly level and plumb window frame into the opening and secure with previously prepared wooden wedges. It is advisable to make the distance from the frame to the wall the same.
- The best option when the window opening is pre-composed of aerated concrete blocks and a quarter. A quarter is an L-shaped protrusion located on the outside into which you insert window unit. If this detail is not provided in advance, then a false quarter is made.

- The anchor plates are bent and tightly joined to the wall. They are fixed in the same way as doors, using long screws 120 - 160 mm. After fixing with the plates, the wooden wedges are pulled out and the gap around the perimeter is filled with fine-pored foam. Just as in the case of doors, the gap on both sides must be coated with sealants.
Important: both the installation of doors and the installation of windows in aerated concrete can be carried out in one more way.
It provides for preparation during construction.
To do this, special U-shaped blocks are installed around the perimeter of the opening.
Subsequently, they can be embedded wooden beam or pour reinforced concrete and mount structures on them.
The video in this article shows the installation of windows in aerated concrete.
Conclusion
We have outlined the basic principles of installation. It should also be noted that interior doors, as well as any metal-plastic or wooden structures installed using window installation technology. The use of a metal welded frame is allowed, but in this case it is not advisable.

I’m finishing the 10th row, today I was in Krasnodar, I bought a corner 65. for the beams above the windows. I painted it, tomorrow I'll try to lay out the jumpers. Yes, it’s time to post some photos - I’ll take them tomorrow. The walls already seem simply huge.
Why not weld a frame from a corner?
Weld the frame and get a cold bridge!
The frame can be covered by covering the house with siding
and when the lintels above the windows are from the corner, are they not bridges of cold?
answer for people like me, about the bridge of cold http://method-estate.com/archives/51
Window manufacturer in Goryachy Klyuch
Throw in the address of the window workshop here. They have production on Yaroslavsky 123, and the representative office is only in Krasnodar. I called, a representative came and, after taking measurements, drew up an agreement with me, the representative’s phone number is 89183014991Buy only windows from a window company
It’s not very good to buy everything at once from one company... they make good money on these secondary items
Prices
According to the contract, the price they charge me is for 5 sills - 596 rubles. For 4 window sills - 876 rubles... I don’t know whether this is a lot or a little...
Window installation
Today I’ll try to install windows. I bought screws, dowels for aerated concrete, polyurethane foam, went to Krasnodar - it turns out the difference in the price of foam with HA is more than 50 rubles per cylinder - it’s noticeable when you take a dozen.I also bought a gas wall-mounted boiler from the Baksi company with a closed chamber - the chimney goes into the wall and onto the street - there will be no problems with gas workers (24 thousand together with the chimney - in the Civil Code it will be 3 thousand more expensive). I bought aluminum heating radiators in Merlin - the price is ridiculous 239 rubles per section - 10 sections in the living room, 6 sections in the rooms.
What remains is the pipe for the warm floor - I’ll look for somewhere cheaper... I looked through the instructions for installing windows, but I can’t figure it out - is it necessary to foam under the frame? Well, it’s not explained anywhere... ...I’ll call the window technicians and find out.
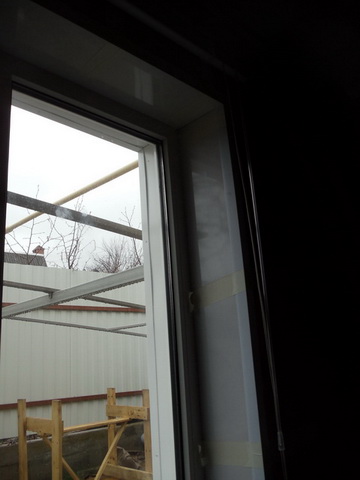
I started installing windows, in general I don’t see any problems, everything is going fine
I put special dowels for aerated concrete on these screws - it turns tightly, but it holds great!
I'll put all the windows out until the evening, and then I'll cover them all at once... I decided to open the frames with blocks just in case, although I install each window with 6 screws.
I’m thinking about the design... ... However, the foam is not weak, macroflex - it’s so swollen, I didn’t expect it!

Are the bags 2 or 3 layers?
Yes, 3 layers... I was puzzled - it turns out that such bags (with spraying) also have a rule for installation - with a sticker inside the room, that is, the package pie is unequal on the sides - there is an outdoor and an indoor...
Without sash and without double-glazed windows - maximum seven kg!
Then we are talking about something different. I'm talking about metal-plastic windows, for example, 2.5X1.1 m on a scale of 150 kg. The windows are taken out of the frames, of course, during installation, but still, two hefty guys with great effort lifted it all up piece by piece.
Glasses come separately
Well, I don’t know... the glass came separately... The frames are not heavy, and I lifted the glass without any problems. Maybe my windows are just small?
How to make lintels over windows and doors
How did you make lintels over windows and doors? Did you use EPS inserts? If you simply pour concrete into the channel, I am afraid that it may freeze and condensation will appear.
I didn’t mess around with the U-shaped blocks, but made it simpler - the jumpers consist of 2 65mm corners. You just need to paint them right away before installation. Everything turned out great - when it was -15 at night in November, there was no freezing.
Doors
It’s more difficult with doors - I didn’t know the exact height of the openings - since I still had to pour the floors, I made it simpler - I nailed pieces of boards under the openings, and laid a board on them along the width of the opening, and then laid blocks on it, then removed all this - blocks they hang by themselves.
Now, when installing doors, I saw upward as much as I need and that’s all.
Entrance door
WITH front door It’s more difficult - there’s a load from the Mauerlat on top. I did the same with the pieces of wood, but on top of the first row above the door I put 2 corners at 65, and on them the last, top row, now these corners take on the entire load, and I also cut the row above the door to the height of the front door.
Putty corners
The corners are obtained from the inside and outside. How will you putty them? The putty won't last long on them. I think, as Itong suggests, only U-blocks should be made from "100" blocks. Tie reinforcement into such a trough and fill it with concrete. But there is a danger of freezing of the wall and the release of condensation. You can insert EPS, but there will be little space left for concrete, then you will have to either make U-blocks or buy them from thin ones (available in merlin).
Yes with different sides. By the way, some GB manufacturer recommends doing just this - everything was puttied normally, I specially tried to peel it off - it holds. You shouldn't mess with U blocks - it's an extra hassle. Well that's my opinion.
Slopes for windows - from the remains of plastic panels
I thought for a long time about how to make slopes for the windows in the house. I came up with this kind of KNOW-HOW. We take an ordinary plastic panel, cut it to size, connect the joints with an internal corner, and insert it into the window. From the boards we make formwork exactly according to internal size plastic blind area and foam everything - the foam presses the plastic to the formwork, in theory it should turn out perfectly even and strong. Tomorrow evening I will remove the formwork and see what happens. If everything goes well, stick plastic corners on the outside, cash out and everything is cheap and cheerful.

Opinion:
why is it so difficult? I glued gypsum board. It turns out smoothly and quickly. (I also pressed it with a board). In the bathhouse I glued the plastic onto the foam (due to humidity), but it didn’t work out smoothly everywhere - the foam squeezed out in some places.
Answer:
And then the gypsum board still needs to be painted, or something else needs to be done with it, and then it’s done. In fact, everything is done quickly.
Hooray! I removed the formwork - great! everything is perfectly even and smooth!
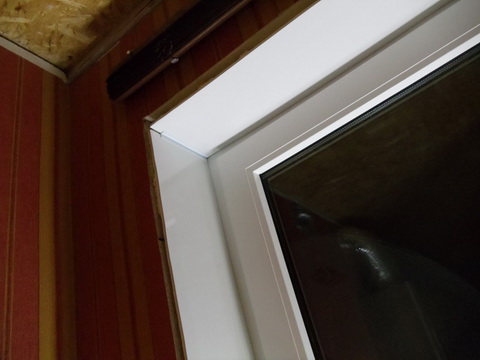

In general, like the first window - first a frame made of wood, cut to size for it PVC panel, after the foam has dried (about 12 hours), remove the frame and glue the corners with DRAGON PVC glue. Fix with masking tape. All small cracks, if there are any, carefully use tile grout. That's all - very beautiful and practical. easy to clean, does not deteriorate, does not age.
Yes - very important! Foam very carefully, keep it to a minimum - otherwise the panels will move away, foam will come out of the joints - once I got burned, I had to pick everything out


Do-it-yourself aerated block house
Foundation
Material for building a house
- Material - Aerated concrete for building a house with your own hands
- Characteristics of aerated concrete for building a house with your own hands
Site preparation
House inside


