Slate roofing is the most common covering, especially for private buildings, be it a house, barn or garage. Slate is quite durable and relatively cheap material. The main damages to which wave slate is susceptible are small cracks, chips, through holes(from hail, something fell or in the wrong place hammered nail). In general, there are many causes of damage, but methods and methods of repair slate roof with your own hands and the conversation will go on.
Method 1
Quite old and widespread previously. The slate roof to be repaired is cleaned of dirt, dust and possible vegetation, then washed and dried. Next, they are primed with drying oil, and then all cracks and through holes are covered with fabric strips soaked in oil paint.
However, it is worth noting that such repairs extend the life of the roof by 2 - 4 years, after which such repairs will have to be repeated, having first removed what was previously stuck on. The duration of the repair is influenced by how well the surface to be repaired is prepared, and it should also be thoroughly dried before painting.
Method 2
Currently, the most common simple and reliable method of repairing an asbestos-cement slate roof, after which the roof does not leak for up to 10 years.
Prepare a homemade repair mixture for applying patches to damaged slate as follows:
Mix 2 parts of cement grade M400 or higher with 3 parts of fluffed asbestos. Pour the resulting composition with a mixture of PVA glue and water (ratio 1:1) and mix thoroughly.
The finished repair mixture should have the consistency of thick sour cream.
PVA glue can be replaced with frost-resistant water-based paints such as E-VS-17 or similar. However, using paint instead of glue may slightly reduce the durability of slate roof repairs. Instead of fluffed asbestos, you can use regular sheet asbestos, passed through a fine grater or crushed with emery.
As with any How to repair a slate roof, the surface must first be thoroughly cleaned, washed - preferably with a hose or Karcher, if this is not possible - then simply with a rag followed by rinsing. Particularly thoroughly clean areas with cracks (using a stiff brush).
After the mixture is ready (and it is better to prepare it in small portions, since it expires maximum efficiency does not exceed two hours) you can begin to repair the slate.
We fill cracks and other damaged areas of the slate roof with the prepared repair mixture at least twice, so that the layer of this composition is at least 2 mm.
It is advisable to carry out repairs in cloudy weather - this way the sealing mixture will dry out longer, which means it will have time to gain greater strength.
Method 3
Ready-made mixtures. Very good results when using non-hardening bitumen mixtures. In this case, cracks do not appear when the slate expands under various temperature changes, which is the main reason for the fragility of other, “hard” repair methods. This is the best way to isolate chimneys. The main disadvantage is the high cost and aesthetics. This mastic is always black. But you can paint it on top, although the paint will crack, but general form will still improve.
When repairing a slate roof, instructions for using various mastics and mixtures must be followed completely. After pre-cleaning The areas to be repaired must be degreased with White Spirit or gasoline.

To seal cracks and crevices up to 5 mm, use Emphymastic PU 25. This sealant is applied with a manual or pneumatic gun, or you can do this with a regular spatula. Larger slate surface defects can be eliminated using Hyperdesmo mastic. It must be remembered that before applying it, it must be thoroughly mixed until uniform.
The edges of cracks or holes must first be primed with a small amount of mastic mixed with xylene in a ratio of 9 parts mastic, 1 part xylene. This will ensure good penetration of the mastic into the damaged edges, ensuring good adhesion. Before applying the mastic itself, it is necessary to allow the primed areas to dry for at least 6 hours. For large damages, reinforcing material, such as geotextiles, is used. The mastic is applied with a spatula or brush.
Currently, the industry produces quite a few different roofing sealants based on bitumen mastic both domestic and foreign. For small repairs, it is more advisable to purchase one or two tubes for a gun - it’s more convenient and cheaper. If you need quite a lot of mastic, take bucket packaging - it’s definitely cheaper.
Method 4
Also cracks in slate Can be covered with ordinary bitumen resin or putty made from drying oil and chalk. These methods are still used today as they are among the simplest and cheapest, but none of them are durable. The main disadvantage of this method is the loss of plasticity due to temperature changes, especially at high temperatures. Cracks are sealed with hot bitumen pitch, and its temperature exceeds 150 degrees. You have to work very carefully. It is quite inconvenient on a steep roof - there is a danger of serious scalding. It is most often used to seal cracks in a sloping roof, such as a garage.
Method 5
Partial replacement, when individual sheets are removed and replaced with new ones or the damaged areas are covered with entire pieces of slate. This is necessary in the presence of large chips, holes and large cracks. At the same time, it is also recommended to immediately check the integrity of the remaining elements of the roof structure, since water through holes in the covering could damage the rafters, layers of insulation or insulation.
In this case, the whole slate must be placed under the overlying sheet, having first lifted it. When working with slate sheets, you must be very careful not to break the fragile surface. For these purposes, when removing nails from a sheet, a wooden block is placed under the tool (for example, a nail puller).

When replacing the entire sheet, it is necessary to remove the damaged sheet; to do this, you need to pull out the nails, then slightly lift the top sheet of slate and pull it out cracked slate sheet. In its place, install a whole sheet, having previously cut off the bevel, as in the one being replaced.
If there is no whole sheet of slate, or the crack is not large, you can put a piece of slate of the required length and width on top of the damage, and it should cover the crack or damage with one wave on both sides, and place it under the top sheet, or seal the joint with sealant so that water did not enter the damaged area. To do this, we lift the top sheet of slate in the same way and insert part of the intact slate on top of the damaged one. After replacing the slate sheet, we nail it in the same places with slate nails into the upper wave.
Never nail slate into the bottom wave - there will be no space when the slate deforms due to temperature changes, and as a result, cracks will appear. In addition, there is a high probability of cracks appearing while you are nailing. If you still need to fix it in the lower wave, it is better to use a self-tapping screw, having previously drilled a hole in the slate of a larger diameter (2-3 mm). And do not tighten the screw completely, leave about 2-3 mm for the thermal expansion of the slate.
If the asbestos-cement slate roof covering has lost its integrity, it is necessary to identify damaged areas, assess the condition of the rafter system and carry out partial or major repairs of the slate roof with your own hands.
Basic qualities of the material
Classic asbestos-cement slate continues to be a popular roofing material, despite the ever-expanding choice modern coatings. This is due to the reasonable price-quality ratio of the material; among the positive characteristics we can note:
- resistance to heat and combustion;
- chemical inertness (does not interact with aggressive environments, can be used in industrial areas with high concentrations of chemicals in the air);
- simple installation technology without the use of special equipment;
- service life more than 15 years, subject to compliance with installation technology.

Among the disadvantages, the main ones are the heavy weight and fragility of the material. Lack of elasticity is the main cause of damage roofing from slate. That is why it is important to adhere to the rules of loading and unloading, warehousing and installation.
Preventive measures will help reduce the likelihood of microcracks in slate roofing.
How to prevent microcracks
Repair of a slate roof is necessary if it has been subjected to external mechanical stress that has damaged the integrity of the coating. Most often the reason is:
- negligence when performing roof maintenance work;
- heavy objects falling onto the roof (branches of nearby trees).
In such cases, the causes of the damage are obvious. It is more difficult to identify defective places where slate is destroyed due to the formation and growth of microcracks. Their appearance may be a consequence:
- storing slate in high stacks (the lower sheets experience increased stress and begin to crack);
- damage during transportation and lifting onto the roof (it is important to protect each sheet, especially its edges, from impacts);
- installation errors ( incorrect fastening sheets);
- stagnation of moisture in certain areas (water during periods of frost and thaw gradually destroys the outer layer of slate);
- accumulation of snow (slate cannot withstand high pressure from the snow mass).
Particular attention must be paid to the principles correct installation slate. The main mistake is that the hole for the fastener is made without reserve. During operation roofing system, the wooden rafter structure “breathes” - changes its geometric dimensions under the influence of temperature and humidity. Accordingly, the roofing deck shifts in one direction or another.

If there is insufficient gap between the fastening element with which the sheet is fixed to the sheathing and the edges of the hole in the slate to compensate for the displacement of the flooring, then microcracks appear in these places, which increase over time. In the most difficult cases, an incorrectly installed coating may warp.
Correct installation is carried out as follows:
- at the fastening points, holes are drilled in the slate sheet, the diameter of which is several millimeters larger than the diameter of the fastener;
- the sheet is attached to the sheathing with slate nails.
When laying a slate roof, you only need to use special slate nails with a wide head and a gasket to seal the hole. Otherwise the coating will leak.
Biological influences can cause cracks in slate. The rough surface of the material contributes to the accumulation of organic residues (dust, dust from dry leaves, soil particles, etc.), on which lichens and mosses actively grow. The vital activity of the lichen proceeds with the release of acid-containing substances, with prolonged local exposure to which the slate is gradually destroyed.

Preventative work
Slate roof repairs won't take long if you carefully monitor the condition of the roof. In addition, it is necessary to remove dry branches from trees growing in the immediate vicinity of the house, as well as branches hanging over the roof.
The fight against mosses and lichens involves mechanical or chemical cleaning of the affected areas. In the first case, a brush with metal bristles is used. After stripping, the coating is washed with water and treated with a primer, which will seal the open pores on the surface of the asbestos cement sheets and prevent the reappearance of unwanted vegetation.

The chemical cleaning method involves the use of special products containing alkalis, acids or surfactants. Processing is carried out according to the manufacturer's instructions. Protective equipment is mandatory.
Repair work on a slate roof
How to repair a slate roof? First of all, it is necessary to assess the degree of destruction of the coating. If individual cracks need to be sealed, then you can do without changing the roofing. In this case, you need to clean out the cracks, make sure that the material is dry, and fill them with a repair compound. It could be:
- homemade putty made from chalk powder and drying oil, on top of which a protective layer of oil paint is applied (due to the low elasticity of the mixture, the putty crumbles relatively quickly);
- bitumen resin (working with hot pitch, the temperature of which is 150 ° C, requires certain skills and extreme care);
- bitumen-based sealant (material in tubes is more expensive than in cans, but it is much more convenient to work with).
It is easier to replace the most damaged sheets than to repair numerous cracks. To remove a specific covering element, you do not need to disassemble the entire flooring. It is enough to partially pull out the fasteners of the adjacent sheets, then one person should lift the edges of the adjacent elements so that the second person carefully removes the damaged sheet and replaces it with a new one, sliding it under the raised sheets. The laid element is secured with slate nails.
Slate is considered a fairly durable roofing material, but over time it may require repairs. New roof always associated with costs. If you periodically inspect the old one and clean it of accumulated debris, you can quickly notice small damage - cracks or crevices. In this case, without resorting to radical measures, it will be possible to extend her life by about another ten years.
Known technologies for repairing slate roofing in normal situations come down to the use of special protective equipment, allowing you to seal emerging cracks or apply patches to chipped areas. If severely damaged sheets of roofing material are detected, they are replaced with new blanks installed in accordance with the requirements of building regulations.
note
All of the above actions can be classified as minor or cosmetic roof repairs. If significant damage to the slate covering is detected, its complete replacement is necessary.
When overhauling a slate roof, not only the sheets of protective material, but also the truss structure itself (including the mauerlat and sheathing frame) must be inspected and replaced.
Characteristics and features of slate products
Before repairing burst slate, you need to be absolutely sure that the material used will help eliminate this type of damage and that this will significantly extend the service life of the coating. To do this, you need to become familiar with the main types of existing damage and their causes, and also learn to classify them according to the degree of danger and repairability.
The main reason for possible destruction of slate coverings is: violation of the rules of operation and maintenance of the roof and accidental contact with third-party heavy objects.
In these situations, no special explanation is usually required; It is much more difficult to determine the source of the defect when the damage appears in the form of small cracks or subtle microscopic flaws. They may be caused by the following reasons:
- Violation of slate storage techniques (formation of too large piles);
- Accidental damage during transportation and subsequent lifting to the installation site.
- Deviations from the instructions when laying and fastening sheets. Damage that occurs during the laying of a slate roof, for example, when excessive pressure is applied to the fasteners connecting the sheets of material to the base, cracks can form. The slate may also crack if the hole for the mounting screw has a diameter smaller than the required one - the recommended diameter is 3 mm larger than the value of the screw.
- The formation of damp stagnation, which over time destroys the outer layer of slate;
- Damage caused during the operation of the roof: cracking due to mechanical stress, say, when installing an antenna on the roof or from temperature fluctuations.
- Overgrowing of the surface of a slate roof with moss and lichens, as a result of which the appearance, and the roof begins to gradually collapse.
- An accumulation of large snow masses, under the pressure of which the coating material begins to crack.
Of particular importance during installation is the correct placement of sheets and compliance with the requirements for leaving a small gap at the points (approximately two millimeters on each side of the fixing element). Such a reserve is necessary so that, during operation, access to fresh air is maintained in and around the spaces covered with insulating material (foam).
In addition, under the influence of moisture and temperature changes, sheet blanks can become deformed and change their geometric dimensions. In this case, a correctly maintained gap allows you to protect them from destruction when moving within the limits of temperature expansion.
In order to properly repair a slate roof, you first need to understand what reasons could cause this or that damage.
Slate roof repair
Repair materials and compounds
Before filling holes and cracks, you should familiarize yourself with the list special compounds used for these purposes. For minor repairs that involve eliminating microscopic damage, the following restorative agents are most often used:
- a self-made putty consisting of a mixture of finely crushed chalk and drying oil. After its application, a layer of oil paint is applied over the repair composition, which performs a purely protective function;
- special types of sealants made from bitumen;
- liquid compositions based on bitumen components, the handling of which will require certain skills. When working with such mastic, extreme caution is required in terms of compliance with the fire regime requirements (the melting point of the pitch is approximately 150 ° C);
- built-up coatings;
- tape-type repair products.
The use of some of the above types of repair composition does not require special explanation. As for bitumen-based mixtures, when using them, you should pay attention to the fact that when working with sealant, it is preferable to choose products sold in special tubes.
Although the cost of such containers with repair compounds is somewhat more expensive than the same drugs supplied in jars, they are much more convenient and easier to handle.
When carrying out restoration work with workpieces on which significant cracks are found, experts recommend first sealing them with a special slate repair tape.
Recovery methods using special protective equipment
One of the most common repair materials is a specialized roll coating with a self-adhesive bitumen-polymer layer applied on one side (). In its various versions as protective coating applied to the second side, a thin layer of aluminum or copper foil is used (type “F”). There are also known examples of this construction product, in which polypropylene (type “P”) is taken as the basis of the outer layer.
Some representatives of the repair material may have a self-adhesive layer on both working sides (type "A").
For slate repair certain types of waterproofing material are used (most often, samples marked “P” and “F”). Its main advantage is that this material can be laid without the use of special tools and allows working with it in almost any production environment.
The only limitation concerns the ambient temperature observed at the time of its installation, which is not should be less than +15 degrees.
Repair of a slate roof with Rizolin is carried out in the following sequence:
- First, the material, supplied in the form of a roll of standard size, is laid out.
- Then the film is removed from its working surface, after which a piece of roll prepared to the size of the patch is laid out on the area to be repaired with its adhesive side.
- At the final stage of work, in order to improve the adhesion between the restored surface and the rizolin patch, the latter is rolled with a special roller.
Another fairly common way to restore the roof surface is to repair slate roofing with built-up materials. The category of such repair structures includes roofing felt with a fiberglass base, having a bitumen-polymer coating on both sides.
Restoring a slate surface using this method consists of heating the underside of the material being deposited and then gluing it to the damaged area. The molten bitumen structure provides excellent adhesion to the texture of the restored slate sheet and guarantees a durable patch.
Sealing loose areas where slate sheets are applied
Repair of a slate roof if slate sheets are found to be loosely attached to each other is carried out using various putties and mastics.
You can prepare mastic from refractory bitumen yourself - of course, subject to strict adherence to all safety rules - fire safety and personal.
How to prepare mastic
Finely chopped 47% refractory bitumen is melted in a durable container over low heat at a temperature of about 220⁰C. I first punch holes in a tin can and use it to remove foam and all sorts of impurities. The bitumen continues to melt until foam stops forming and the water has completely evaporated. Then it is carried to a certain distance, about 5 m, and mixed in small portions with a 28% solvent. Mixing thoroughly, 13% fibrous filler is added to the mass, which is preheated to 110°C. During the preparation of mastic, the temperature of the mixture should not fall below 90°C.
How to apply
Hot mastic is applied using a spatula, trowel or plaster spatula. The area of the “patch” is carefully smoothed to prevent water from lingering on the surface, and painted over with oil paint.
Sealing cracks

- Small cracks are covered with bitumen mastic or chalk putty made from a mixture of chalk and drying oil.
- Larger cracks are usually repaired using fabric patches. Although recently, no less effective specially prepared mixtures are being used more and more often for these purposes.
The area under the patch is thoroughly cleaned and primed with drying oil. It itself should be about 10 cm wider than the damaged area. It is glued using thickly grated oil paint, gently smoothed and dried. Then the patch is painted, covering an area 3–5 cm larger than its size.
To prepare the repair mixture, cement is thoroughly mixed with dissolved asbestos (ratio 1:3). At the end, PVA is also added, diluted in equal proportions with water, and the mixture is brought to the consistency of sour cream.
Using water-based paint, there is no need to dilute it with water.
Before repairs begin, the roof is prepared: areas covered with earth are swept, areas covered with lichens are cleaned, etc. Then it is washed with water using a water hose. Areas with cracks require special attention - when washing them, use a stiff brush or metal brush. The roof is dried and primed with PVA glue diluted with water (volume ratio 1:3).
All damage to the roof is covered with this mixture in at least two passes - the thickness of the resulting layer should be at least 2 mm. A wide paint brush is most suitable for painting slate sheets.
For convenience, it can be equipped with a long handle.
Repairs are recommended to be carried out in cloudy weather.
- The holes are covered with putty prepared from equal parts of cement and fine sand. To avoid possible cracks, add another 0.5 parts of glass wool (finely chopped) or wool tow to the mixture. Then the repaired area is carefully smoothed.
Replacing old sheets with new ones

Sometimes slate roof repairs require replacing slate sheets. If there are quite a lot of them, when replacing them they are dismantled in the direction from the ridge to the cornice. Damaged sheets are replaced according to the following scheme.
When replacing slate sheets, you need to pull out the nails that are nailed down from the damaged one, then slightly lift the top slate sheet and pull out the cracked one. A whole sheet of slate is installed in its place.
When removing nails using a nail puller, place a board under it.
If a whole slate sheet is not available, a piece of slate of the required size is laid over the crack. It is necessary that at the same time it covers the crack or damage on both sides with one wave. In this case, water will definitely not get into the damaged area.
To do this, lift the top sheet in the same way and insert part of the whole sheet over the damaged slate. The replacement slate sheet is nailed in the same places using slate nails.
In conclusion, we note that minor repairs to slate on the roof of any house are within the capabilities of a person well prepared for this event. The main thing is to thoroughly study all the materials discussed above and take the upcoming repairs with full responsibility.
In contrast, a complete renewal of the slate covering, as a rule, is organized in the case when the total amount of damage reaches 40% of the area of the entire roof.
Slate has always been considered one of the most popular coatings among all roofing materials. This is easily explained - it is affordable for everyone, simple and easy to install, unpretentious in maintenance, strong and quite durable. Therefore, the vast majority of private houses in Russia, despite the diversity of more modern materials, still has
However, with all positive qualities This material, despite the strength of its constituent asbestos fibers in combination with cement filling, slate sheets cannot “boast” of high resistance to accentuated mechanical loads, and natural influences slowly “age” them. Therefore, over time, cracks or even serious holes may form on the roofing covering, as a result of which the roof will begin to leak. Completely replacing the entire roof covering is an expensive and time-consuming undertaking, which is why many home owners resort to renovation work.
Slate repair: how to repair holes and cracks - this is the question often raised by home owners if there are obvious signs of roof leakage. In order to choose the right, optimally suited method for a particular case, to put the roof in order, it is necessary to consider several of the most popular technological methods. This is what this publication is dedicated to.
The main reasons for the destruction of slate
Slate is attractive because this material has clear advantages over other coatings. For example, such a roof, unlike steel coverings, is not subject to corrosion, is highly resistant to moisture, tolerates temperature changes well, practically without significant linear expansion, and is almost completely indifferent to the influence of ultraviolet rays. However, you still have to periodically resort to repairing it.
 Slate does not last forever - it deteriorates, becomes covered with cracks, and chips may form along the edges
 Before moving on to the description technological methods carrying out repair work, it is necessary to determine for clarity possible reasons occurrence of defects. With this information, it is possible that such damage can be prevented simply by paying attention to prevention and proper maintenance of slate flooring.
So, they may appear on slate for the following reasons:
- Most often, these are some kind of shock loads, for example, large hail or large tree branches falling onto the roof surface. This also includes inaccurate, incorrect movement on the roof surface.

In order not to damage the slate during roofing or repair work, it is necessary to protect it by laying a deck of boards on top, which will increase the supporting area and thereby reduce the pressure on the covering.

To carry out roofing or repair work on slopes of great steepness, over 20÷25°, especially in the area or upper part of a slate roof, it is necessary to have a special mobile ladder, which is fixed at the ridge with a special fastener.
- The second reason is the appearance and development of colonies of simple plants on the surface of the slate, which attach themselves to it and slowly but steadily destroy the structure of the material. Lichens and mosses especially love the rough surface of the roof. Having established themselves in one place, they first grow in size and then reproduce by spores over the entire surface of the roof. Moss grows into the joints of slate sheets and thereby begins to lift them, which is why during rain water can freely get under the covering. If moss has chosen a place at the bottom of the wave, then it can delay the normal flow of water, which also leads to roof leaks.

These phenomena usually occur on the north side of the roof, where there is insufficient exact time there is sun, or on the roof, which has a slight slope, due to which moisture is retained on it, promoting the growth of such plant colonies. In addition to the fact that the coating is destroyed and the roof begins to leak, the entire building as a whole looks sloppy and not aesthetically pleasing.

If there are already mossy colonies on the roof, but there is a desire to try to save the roof without replacing it, then it is necessary to free the slate from this “vegetable garden”. This process can be carried out in three ways:
- mechanically, using an iron brush;
— using water under high pressure;
- chemical, by spraying the roof with special herbicide compounds.

- The reason for the deterioration of slate can be a completely banal reason - a long service life. Unfortunately, not all slate produced today is of the proper quality, since often in its production, in order to reduce production costs, not only GOST standards, but even less “demanding” specifications are not fully observed. As a result, sheets of such slate covering turn out to be fragile, and, unable to withstand even minor impacts, they crack or even split along their entire length. Failure to comply with technological rules can occur at various stages of the slate production process, for example:
— The solution for making slate was made in violation of the recipe - the proportions of the constituent ingredients were not met.
— The roofing material was produced using homemade equipment.
— Not enough high-quality processing slate sheets.
— Reducing the period of complete maturation of the material - it should be at least 28–30 days from the date of manufacture.
Unfortunately, it has been noticed that “old-school” products last for decades, while modern slate often lasts only 12–15 years. Conclusion - when purchasing material, you should pay special attention to the reputation of the manufacturer and the obligations it provides.
- From stagnation of water around chimney and ventilation pipes, as well as skylights, cracking of sheets of material may also occur, especially with a sharp drop in temperature. Therefore such problem areas require enhanced sealing and ensuring free flow of water.
- As mentioned above, slight slope The slope of the roof and the stagnation of water on it can also contribute to cracking of the material. And stagnation of water very often becomes a consequence of a banal accumulation of dirt or fallen leaves, that is, a kind of damming of waves.
- The cause of damage may also be that the installation of slate sheets was carried out in violation installed technology this process, and this may cause the coating to experience excessive internal stress.
- To secure the material to the sheathing, ordinary nails were used or rubber gaskets were not used. In this case, cracks will certainly appear over time.
- The holes drilled for slate nails are too small, which, with temperature changes and expansion of the material, will also lead to damage to the covering sheets. Therefore, when drilling holes, you need to take into account that the slate nails must fit into them freely. But at the same time, the holes should not be too large, otherwise leaks will occur.
- Snow also adds load to the roof, not only with its considerable weight, but also with the formation of ice in the lower part of the slope, near the eaves. On spring days or during the thaw period, the snow begins to melt, and water flows into the lower part of the slope, and in the evening hours the air temperature drops, and ice forms on the edge of the slate, which leads to crumbling of the roofing material in this area.

If the slate in this place is destroyed, then through the cracks formed, water will fall onto the sheathing, insulation, rafters and mauerlat, onto load-bearing walls, which will lead to the formation of fungus and gradual decomposition of the wood. Therefore, prudent homeowners, in order to preserve all materials and elements of the roof, often install cable heating in the lower part of the slope and in drainage channels, which winter period if necessary, it turns on, preventing the formation of ice
Now, having examined the main causes of damage to slate, taking into account what opportunities exist to avoid them, let us dwell on how to identify the damage that has appeared.
Detection of roofing defects
On the rough surface of slate laid on a rafter system, it is almost impossible to see small chips or microscopic cracks, so you should pay special attention to some alarming signs that indicate that the roof requires repair:
- If there is even a small leak, even imperceptible to the eye, then it will soon manifest itself by the appearance of mold spots in the corners or at the joints of the ceiling and walls, the appearance unpleasant odor dampness.
- If it is not secured to the roof from the inside thermal insulation material, then even the smallest crack can be easily detected by going up into the attic after rain. The leak will appear as a darker spot compared to the rest of the interior surface.
Now you need to focus on which areas of the roof most often need to be repaired, since this information will be useful when searching for damage to the roofing.
- First of all, you need to monitor the edges of the slate facing the cornice. It is recommended to examine them every spring. If cracks have formed on the edges, then they will not be difficult to detect - sometimes you don’t even have to climb the stairs to do this, since they can be seen from below.
- Moss may appear on a roof that does not have cracks or chips, but you should not wait for it to grow and occupy the entire surface of the slate. It is on a neglected roof that, after cleaning, a very sad picture with a lot of damage is often discovered. In addition, removing several islands of emerging moss is much easier and cheaper than subsequently cleaning the entire wavy surface.
- Cracks can form at the crest of a wave or at its lowest point. It is more difficult to detect the latter, since they are invisible at first glance. How they can be identified was described above.
- At the crest of a wave, cracks generally form along the line where the slate nails are driven in and are immediately visible to the naked eye. However, if these cracks have already become so pronounced that they are visually noticeable, repairs should be started immediately.
Having examined the roof in all respects, it is necessary to make a decision on how to carry out repairs more efficiently.
- If significant chips are found along the edges of the lower sheets, then it may be necessary to replace one or all sheets of the first row, especially since the roof structure allows this to be done. However, it is necessary to take into account that the nails will have to be removed with great care so as not to damage the bottom edge of the next row, since it is this that overlaps the bottom one.

If it is not possible to replace the sheets, then the integrity of the edge can be achieved by placing a kind of patch on the inside of the sheet, but you cannot leave the coating in a damaged state, since in this case leaks cannot be avoided.
- If the crack runs along the crest of the slate wave, then it must be repaired using patches, applying them from the inside and outside. Usually, a piece of galvanized iron sheet, bent to the shape of a wave, is placed under such a crack from the inside, and a special roofing tape is applied on top of the damage.

- If the crack runs across the slate sheet, then there is no way to do without replacing it. You will have to carefully dismantle it and install a new one.
Methods of repair work for sealing damaged sections of slate
So, knowing all the nuances of the occurrence of defects in this roofing material and the detection of damage on it, it is necessary to move on to considering repair work.
There are several effective ways sealing cracks using traditional and special modern materials. But anyway, that's it renovation work must be done on a roof surface that is well cleaned of dirt, debris, any growths, foreign objects, etc.
Whatever approach is chosen for repair work, one should never forget about careful movement on slate if damage is found not at the edge of the roof, but at a height. To avoid additional damage to the slate on gable roof they use a ladder-gangway, and on a single-slope one - a flooring made of boards, which will help to evenly distribute a person’s weight on the surface.
The first method is using ordinary concrete mortar
Repairing slate using cement and sand can be called the simplest and in an accessible way, if you do not take into account that the process will take place at altitude, this always complicates the work.

The slate repair solution is made from cement and sand in proportions 1:2, and fine washed sand and M-500 cement are used for it. Instead of this solution, it is quite possible to use high-quality tile adhesive for external facade work (you can also find another name - for complex bases), which can withstand high humidity and temperature changes. The glue has a fine consistency and good adhesion to the slate surface, since it is also made on a cement base.
The solution should have the consistency of soft dough and adhere well to the surface. To increase the adhesion of materials, the slate in the repair area should be moistened. If the damage is too large, then under it you should make a lining of galvanized roofing steel by bending a piece of sheet in the shape of a wave and slipping it under the crack or pothole. This device will provide an additional guarantee of good adhesion of the solution to the asbestos concrete surface.
The solution is applied to the surface using a spatula. There should be a not too thick layer of it on the surface, which will not retain water too much if the crack is located at the bottom of the wave. The surface of the applied solution should be smooth - to do this, it is slightly moistened and smoothed with a rubber-gloved hand.
After the patch has completely dried, it should be thoroughly primed and then painted with waterproof slate paint for external use.
The second method is using butyl rubber sealing tape
Butyl rubber waterproof tape is used not only for repair work, but also for sealing joints between sheets, as well as for waterproofing the contact of roofing coverings with ventilation and chimneys.

The surface of the tape is made of nonwoven material, thanks to this, the applied patch can be covered with paint of the desired color. Working with such material is quite simple, and repairs are carried out in the following sequence:
- The area of slate that requires repair must be cleaned and degreased. This can be done using white spirit, acetone or other organic solvents.
- Next, a piece of tape of the required length is cut from the roll (so that the entire crack is closed, plus along its edges the tape extends another 50 mm onto the undamaged area).
- The adhesive layer of the tape is covered with a protective film. The tape is applied to the crack and as it is glued, this protective backing is sequentially and very carefully removed from it. There is no need to rush - you must not allow the tape to crumple, wrinkle, or stick together.
- The tape is carefully pressed against the surface of the sheet, as it should fit as tightly as possible, without the slightest gaps, to the slate.
- To prevent the patches from standing out on the roof, the roof can be completely covered with paint or you can match the shade of the patch to match the slate. But it is imperative to paint the patches on top with high-quality waterproof paint.
It should be noted that what you can find on sale is not rolls, but ready-made butyl rubber patches of various sizes.
In addition, for more reliable repair of wide cracks in slate, in addition to butyl patches, it is recommended to use fiberglass, which acts as a reinforcing layer that gives greater strength to the sealed seam.

If the work is carried out using serpyanka, then for the bottom layer glued to the damage, you should use double-sided tape or a patch, that is, a coating with a protective backing on both sides. In this case, the work is carried out in the following sequence:
- First, butyl tape is glued to the degreased slate, just as shown above - only the bottom backing is carefully removed. The tape is also carefully smoothed over the repaired area.
- Then the top protective coating is removed from it.
- After this, a cut piece of sickle tape is secured on top of the tape.
- Then, a tape with one-sided application of adhesive and a non-woven surface on the front side is attached to the serpyanka.
- The last step is coloring.
The third method is using bitumen mastics

Repair with help can be carried out in two ways - hot and cold.
bitumen mastic
1. If repair work is carried out with hot bitumen, then it must first be prepared - this is done as follows:
- Bitumen is placed in an old bucket.
- A fire is lit and enclosed with bricks so that a bucket of bitumen can be placed on them.

- The contents of the bucket are stirred periodically so that it does not burn to the bottom or ignite. The composition should be heated to 160 degrees.
- If the work will be carried out at sub-zero temperatures outside, it is recommended to add about 10% of the total volume of waste oil to the bitumen. It will give the composition the missing elasticity, which will help avoid cracking of the patch. This is especially important if the edge of the roof is being repaired, as this area is considered the most problematic. In this case, it is best to additionally reinforce the patch with fiberglass mesh.
- You can do without reinforcement if you glue a waterproofing material of the TechnoNIKOL type (Euroruberoid), which is usually used to cover flat roofs, onto hot bitumen.

Due to the elasticity of the material, it will perfectly take the shape of slate waves. If it is not possible to press it tightly to the applied mastic, then it will have to be heated using a burner or a hair dryer.
Bitumen is applied to the degreased damaged area of the roof using a brush or spatula. Then reinforcement is laid on the heated mass. After the first layer of bitumen has set, another bitumen layer is applied on top of the serpyanka mesh.
2. When using ready-made waterproofing bitumen mastic, it does not require heating.

It will be enough to mix the contents well and apply to a previously degreased and primed slate surface.
You can also lay a sickle mesh on the first layer of mastic, which additionally fastens the two edges of the sheet that were separated by a crack.
The number of layers can be any, but the thicker it is, the longer the drying period. Therefore, the best option is considered to be this: two layers of mastic, 1.5 mm thick, between which reinforcing material will be laid.
The fourth method is using cement-asbestos mortar
Repairing slate in a similar way is carried out using a mixture mixed from cement with the addition of asbestos fibers and PVA glue. Bulk asbestos can be made by grinding up a piece of asbestos sheet, cord or strips that are used in laying brick kilns. When grinding this material, it is imperative to protect the respiratory tract with a respirator or at least a medical mask, and protect your eyes with goggles.

To make the mixture, materials are taken in the following proportions: 3 parts asbestos, 2 parts cement, and PVA glue and water are diluted 1:1. All ingredients are mixed until the mixture reaches the consistency of thick sour cream. The composition is prepared immediately before use.
The slate for applying this composition must be well cleaned and dried. After it dries, the damaged area of the sheet is carefully primed with a solution consisting of PVA and water, taken in a ratio of 1:3. This primer is applied in two layers, waiting for each of them to dry.
Then, using a spatula, the asbestos-cement composition is applied to the damaged area of slate treated with a primer. If a crack is sealed in the lower part of the wave, then the layer should be as thin as possible, approximately 1÷1.5 mm. In the case when the defect is located on the ridge, the thickness of the layer is not of fundamental importance. In the latter case, it is very important to fill the resulting crack throughout the entire thickness of the slate. The applied material must be well leveled, since its surface must be smooth.
The fifth method is the use of polyurethane foam and epoxy resin
We can say that this method was invented by home craftsmen, since repairs are carried out using polyurethane foam and epoxy resin. To perform work using these materials, you will need a container of polyurethane foam, sealant and a two-component epoxy adhesive complex, the latter will serve as waterproofing for the foam. This method is called “three-layer”, and the repair itself is carried out in several stages:

- Preparatory stage consists of cleaning and degreasing the area being repaired. If the crack or break in the slate is large enough, the edges of the slate inside the hole should be cleaned and processed, using, for example, a file.
- The next step is to fill the existing gap (hole) polyurethane foam. After this, you should wait about a day for a pause necessary for expansion and polymerization of the foam. It should be noted here that if a very large flaw has formed in the slate, then it is recommended to place a piece of roofing felt or galvanized metal under it, but it must be well pressed from below to the slate, otherwise the foam, expanding, will push it away.
- After the foam dries, its excess is cut off in the shape of a wave.
- On top of the frozen and trimmed foam, thin layer sealant is applied. It is necessary to ensure that it fills all the pores on the surface of the material. After this, the sealant is left until completely dry. The hardening and hardening time of the sealant, which must be maintained before proceeding to further operations, is usually indicated on the packaging of the material.

- The third and final stage is coating the repaired surface with an epoxy compound, which will finally smooth the surface and it will merge into a single whole with the slate. The hardened epoxy will cover the repair patch with a reliable protective layer.
This repair method turns out to be quite complex and expensive. But after the repaired area has completely hardened, it gains high strength and is guaranteed to eliminate the problem of roof leaks.
If you need to repair a slate sheet that is located in the middle of the slope and has split along its entire length, then you can only get by with an epoxy compound that completely fills the entire crack. In this case, first, on the bottom side of the sheet, from the attic side, a mounting waterproof tape is glued to the crack, and only after that the gap is completely, as tightly as possible, filled with epoxy.
Sixth method – chalk + drying oil
This composition for repairing cracks in slate can also be called popular, however, it is absolutely not suitable for sealing large holes, therefore, if one has formed, then such a technique can be immediately rejected.

The repair mixture in this case is made from chalk and drying oil. The mixture should eventually resemble the consistency of thick honey. Therefore, chalk is added to the drying oil, so to speak, “by eye,” in small portions, each of which is thoroughly mixed. The mixing process is carried out until the desired density of the solution is achieved.
The pre-cleaned crack is covered with the prepared mixture and then leveled. After the mixture has dried, the crack is thickly covered with moisture-proof paint. At this point, the work on repairing slate using this method can be considered completed.
The seventh method is to use moisture-resistant nitro-based glue
This method of repairing roofing material uses moisture-resistant nitrocellulose glue, for example, “Emalit”. The defect is repaired as follows:

- Inner side The sheet of slate coming out in the attic is well cleaned with a wire brush and washed with water, then completely dried.
- Dry slate in places of damage is sealed with fabric. To do this, you can use regular thick fabric or fiberglass. The patch must have a size that exceeds the size of the hole or crack by 40÷50 mm on each side.
- The fabric is impregnated with glue and applied to the damaged area, pressed well and smoothed.
- After the materials have adhered and the glue has set, another layer of glue is applied on top of the patch.
- After the internal patch is completely ready, the hole or crack is filled on the outside of the sheet concrete mortar or tile adhesive for facade work. The surface of the filled hole must be well leveled.
- If a crack is being sealed, then one hole is drilled at the beginning and end, which are filled with elastic sealant, and then self-tapping screws are screwed into them. This must be done to prevent the crack from developing further.
The eighth method is using special waterproofing coating compounds
Ready-made cement-polymer-based waterproofing coating compositions, sold in finished form in buckets, or in the form of dry mixtures that require dilution. Instructions for their preparation can always be found on the packaging.

In any case, it is very easy to work with such compounds, since they have a fine-grained composition that fits perfectly onto the material being repaired due to its high adhesive properties. Repair work is carried out in the following order:
- The surface around the damage, cleaned and degreased with one of the solvents, as well as the internal walls of the crack, is thoroughly dried.
- Then, the waterproofing mixture is diluted with water, and the surface to be repaired is primed with it. The primer should also dry well.
- The next step is to apply a thick mixture prepared for repair using a spatula or gun.
- After six hours, the crack should be covered with fiberglass, and another layer of waterproofing compound should be applied on top of this patch and leveled well.
If a certain repair method is chosen, it would be reasonable to inquire about the weather forecast for the coming days for which the work is planned. Roof repairs should be carried out in dry, calm, but preferably not sunny, cloudy weather, since any mixtures should dry at average temperatures. That's why optimal time for repair work it will be the end of summer or the beginning of autumn, when it is quite possible to choose days that are suitable according to forecasts.
In addition, you must remember that even very good and high-quality patches will only provide temporary protection against roof leaks. The problem is that the roofing material and various repair compositions have different coefficients of linear expansion and density. Therefore, repaired flaws can only withstand a few cycles of severe temperature changes, and then leaks will appear again. Such repairs are needed so that homeowners have time to select and purchase a new roofing covering. If it is possible to cover the roof immediately, then if serious damage occurs, you should not resort to repairing it - it is better to immediately resolve the issue radically.
Protecting slate from further damage
If on a roof that has been in use for a long time, cracks have appeared over time, then putting patches or filling the damage with sealant will be completely insufficient, since the destruction will still continue. In this case, in addition to completely replacing the coating with a new one, you can name several more ways to stop the process of rapid aging of a slate roof.

- First of all, the roof surface is well cleaned, washed and dried. If there are no moss growths on the slate, then the coating can simply be thoroughly cleaned with a broom. In any case, no matter what kind of cleaning is carried out, the respiratory tract of the master must be well protected during this operation - asbestos dust is extremely harmful.
- Next, it is recommended to prime the entire roof surface well and dry it.

- Next, the slate roof is completely covered with rubber paint, which creates an elastic waterproofing layer on the surface.
- Another way to save an aging slate roof is to cover it completely with “risolin”.

“Rizolin” is a self-adhesive flexible material with a foil surface, based on fiberglass impregnated with bitumen-polymer compositions with targeted additives that improve the performance of this coating.
This material is specially designed for laying on roofing surfaces of any complexity; it reliably waterproofs the roof. "Rizolin" has excellent adhesion to any surface, and its plasticity allows it to take the shape of slate waves.

The adhesive side is protected by an anti-adhesive backing, which is removed from the material before installation on the roof. After removing the protective layer, the sheets are pressed against the slate surface and adhere securely to it.
This material has another important advantage - due to the fact that the outer layer is foil, “rizolin” prevents overheating of the roof and protects it from direct ultraviolet rays. Thereby old slate as if “preserved”, and in a house with a roof covered with “rizolin” it is never hot.
In conclusion, I would like to recall that in 1999 the European Commission adopted a directive banning the use of asbestos and products made from it from 2005 in the countries of the European Union. This decision was made on the basis of research conducted and the discovery that asbestos can cause serious harm to human health. Therefore, if the time has come to repair a slate roof, perhaps consider this a reason to completely replace the covering with one of the modern roofing materials, and not to seal cracks and holes?
And in conclusion - an interesting video in which the master shares his secret of preparing glue for slate roof repairs
Video: homemade glue for slate repair
About 20–30 years ago, slate was considered the most reliable and was the most common roofing material. Currently, in many countries the use of such roofing is prohibited due to the presence of carcinogenic substances in it. It’s difficult to argue with science, but people have lived and lived in such houses for many decades, without feeling any harm to their health.
Among the main advantages of slate are durability and relatively low cost. The service life of slate, subject to the rules for arranging the rafter system, is at least 50 years.


The weight of an eight-wave sheet 40/150 with an area of 1.6 m2 is 26.1 kg, a seven-wave sheet is 23.2 kg
Causes of slate roof leaks
Like any building material, slate roofs lose their original properties over time. They have to be completely replaced or repaired.
What causes leaks on a slate roof?
| Causes of leakage | Short description |
|---|---|
| Depending on the type, one sheet of slate weighs 23–35 kg; if the roof area is 100 m2, then rafter system should support approximately two tons of weight. In addition to the load from the slate, there are also significant forces snow cover. Especially in spring, when snow absorbs a lot of moisture. If the calculations are made incorrectly or errors were made during construction, but the load-bearing elements bend, the slate cracks. | |
| Most often, slate is damaged by hail, sometimes undermined by hurricane gusts of wind. There are cases when slate cracks during installation of various utilities on the roof - the coating does not support the weight of the installers. | |
| After about 20–30 years, mosses begin to grow on the surface of the slate. Their root system penetrates into the material and gradually destroys it. | |
| If slate nails are driven incorrectly, there is a risk of cracking. Another mistake is that the nails do not fit into the sheathing, the sheets are not fixed according to the rules, and during the wind they rise a little and vibrate. Such movements also cause cracks to form. |
Depending on the cause, the nature and size of the crack changes; when choosing materials and repair technologies, these factors must be taken into account.
The faster leaks are repaired, the less negative consequences will have to be eliminated in the future. In this article we will look at some of the simplest and most effective ways to repair a slate roof.
Important. Roof repairs are done at high altitudes, never violate safety rules, do not work without insurance and special devices.
If you need to repair very old slate, then walking on it in shoes with hard soles is prohibited; the sheets can no longer withstand such loads. You need to prepare a special ladder or platform, otherwise, instead of repairing one leak, you can ruin several sheets. Sometimes they can no longer be repaired and have to be completely replaced. But here a problem arises. The standards of slate sheets have undergone significant changes over the past decades; it is almost impossible to select a new slate with the same linear dimensions and wave parameters.
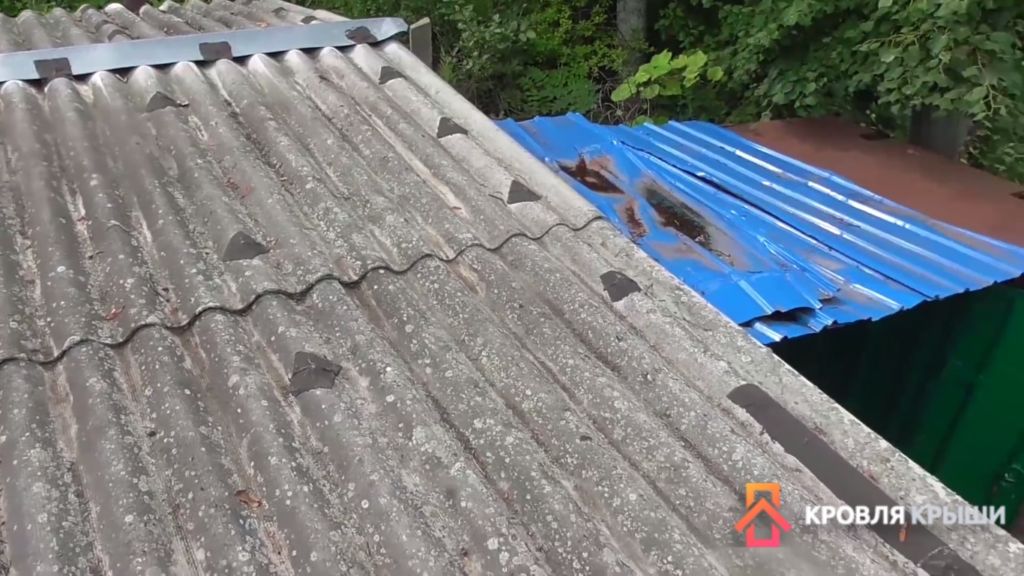
Repairing a slate roof using soft roll roofing
This is one of the simplest and most reliable ways to restore the integrity of a slate roof. Modern roofing roll materials are made on the basis of modified bitumen, which is not only resistant to temperature changes from plus to minus, but is also very resistant to harsh ultraviolet irradiation. Namely, it is the main enemy of bitumen; under the influence of UV rays, it loses its plasticity, cracks and leaks. Modified bitumen does not change its original characteristics for twenty years, this time is quite enough for a repaired slate roof.

To carry out the work, you need to have a piece of soft roofing of the appropriate size, a gas can with a burner and a sharp mounting knife.
Practical advice. Cracks occur in the upper and lower parts of the slate wave. If they are in the upper part, then there is no need to repair them; there are no leaks due to them. On the contrary, during repairs the sheets can be damaged even more.
Step 1. Clean the surface of the slate adjacent to the damage from dust and dirt. It is recommended to use a wire brush; it will remove thin upper layer slate. This thin layer has already begun to lose its strength, it is better to remove it, the patch will hold much stronger.

Step 2. Taking into account the size of the problem area, cut a piece of soft roofing. The specific brand does not matter; currently, domestic manufacturers of roofing materials use imported bitumen, and this guarantees high quality. The size of the patch should be approximately five centimeters larger than the dimensions of the hole.

Patch. Material "Technoelast" from "TechnoNIKOL"
Step 3. Heat the slate around the hole with a torch, this will improve the adhesion of materials and remove moisture.

Step 4. Heat the soft roof. It is necessary to heat until the bitumen becomes liquid over the entire surface. It is important not to overheat it, due to the very high temperature it may boil or ignite.

Step 5. Quickly place the patch in place and press firmly. You can press with your hands, but be sure to wear mittens.

Try it to tear it off; if the adhesion is weak, then lift the edge and re-heat the patch and slate, pressing it when ready.

Important. Pay the most attention to the junction of the upper part of the patch, this is where repeated leaks may appear. Take your time, work very carefully and carefully.
A soft roof must accurately follow the surface relief of the sheets. They have small grooves, the bitumen must fill them to their entire depth. If the heating temperature is correct, then bitumen should be slightly squeezed out around the perimeter of the patch. Such a patch can last for several years; the exact time depends on your professionalism.

Slate roof patch
Prices for various types of gas burners and blowtorches
Gas burners and blowtorches
Repairing a slate roof with mastic
This method does not require heating, which is considered one of the advantages. For repairs you will need rubber-bitumen mastic, a brush and a polymer mesh.


Step 1. Clean the leak area thoroughly, preferably using a wire brush. The slate dust must then be blown off or removed with a clean paint brush.

Step 2. Cut a piece plastic mesh, place it on the crack. Apply the first layer of mastic. Work carefully, carefully rub the mastic into the surface of the slate. Remember that the reliability and durability of the patch largely depends on the degree of adhesion of the first layer.


Step 3. Give time for the mastic to polymerize; depending on the weather and type of material, this will take 3–4 hours.

Step 4. After the first layer has completely dried, you can apply the second layer. The technology of work is no different from that described above.

Important. The dimensions of the mastic along the perimeter of the second layer should be 1–2 cm larger than the dimensions of the first, this will increase the tightness of the upper most problematic joint of the patch and slate. If you apply the third layer, it is recommended to increase its area slightly.
Professionals advise last layer Cover the mastic with a thick cloth to protect the material from ultraviolet rays. This makes it possible to improve the operating conditions of the mastic and, accordingly, increase the service life of the roofing covering.
Prices for bitumen mastic
Bitumen mastic
Cold welding of cracks
This method is only suitable for sealing narrow cracks on the surface of slate sheets. Large holes must be sealed with rolled materials. For sealing, cold welding on a bitumen base is used. This modern innovative material characterized by excellent performance indicators. After hardening, it becomes moderately hard and plastic, which allows it to easily compensate for thermal expansion of cracks and at the same time not lose its tightness.
Cold welding is easy to use, does not require special skills, and has high adhesion rates with all building materials. The seam is not afraid of temperature changes, direct contact with water and ultraviolet radiation. As for the cost, it is available to all consumers. Moreover, the welding consumption is insignificant, and the storage time is long. You can use welding at any time and not only for repairing a slate roof. Professionals strongly recommend that you always have cold welding at home; it will help eliminate many construction errors.

Cold welding "Skol" produced by "Remplast"
How to repair slate by welding? As always, surfaces must be thoroughly cleaned. Only in the case of welding there are some peculiarities. It is necessary to clean not only the surface of the sheets, but also the crack itself. It is highly advisable to remove all the smallest fragments, dust and dirt. The cleaner the cracking plane, the more reliable the leak will be sealed.
Practical advice. Bring a water bottle with you to the roof. The fact is that to prepare welding for use, you need to warm it up and warm it up with your hands. If your palms are not moistened with water, the bitumen will stick to them, which will make the work much more difficult. As soon as your hands dry out a little, immediately moisten them with a little water.

Step 1. Find the crack and clean it of dust. The main attention should be paid to the crack itself, but a clean strip about one centimeter wide should also be prepared around the perimeter.

Step 2. Knead the weld with your hands, it should become soft. Depending on your diligence, kneading will take 3–5 minutes.

Step 3. Roll the weld into a thin sausage. The diameter of the sausage should be slightly larger than the width of the crack. Do not prepare a large amount of material at once; it should not cool down before applying the patch.
Step 4. Press the sausage very firmly into the crack. If you have an assistant, great. Let him hold the weld emerging from the gap on the back side of the roof, this will help fill all the smallest pores with maximum density. The larger the area of contact between the weld and the surface of the crack, the more reliable the sealing.

Step 5. As you fill the crack with mastic, spread the excess in a thin layer along the edges of the crack. At the same time, form a small mound to drain the flow of water. How less water will fall on a crack, the more reliable the roof. You need to work with welding according to the principle of working with plasticine - do not rush and do not forget to periodically heat up the frozen material.

Practical advice. Choose dry and warm weather for repairs. If the slate is warm to the touch, great, the quality of adhesion will increase significantly.
Application for cold welding slate roof repair - the fastest, easiest and reliable method. As practice shows, tightness is maintained for 5–6 years.

Slate repair with foam plastic
Let's say right away that this is not the best way to repair slate covering, but it can be used in cases where for some reason it is impossible or unprofitable to buy industrial materials. The material for sealing cracks is prepared independently from gasoline and foam plastic.

Important. The glue dries very quickly, you need to work at a pace. Before making glue, it is advisable to find leaks and first clean them of dust and dirt. If there are a lot of them, it is recommended to mark problem areas with chalk.
The patch is made in the following way.
Step 1. Using a stick or small spatula, apply glue to the crack and press it as hard as possible into all the recesses.

Step 2. Level the layer of glue, making sure that there are no dry surfaces around the perimeter of the hole.
Step 3. Place a piece of galvanized sheet steel of the appropriate size on the glue and press it into the glue.


It is not necessary to cover the gap with metal patches; other materials can be used. The main thing is that they are not afraid of moisture, do not dissolve in gasoline and are resistant to UV rays. But they must be used. The fact is that polystyrene foam reacts very negatively to ultraviolet rays; without such protection, the patches will crack already. next year, the roof will have to be repaired again. And this is an extra waste of time and nerves.
You can apply another layer of glue to the rigid patch, which will further increase the adhesion strength.

How to quickly repair a slate roof after a hail storm
Situations occur infrequently, but bring many problems. A slate roof doesn't just leak, it leaks like a sieve. It is necessary to take immediate action, otherwise the entire interior will have to be repaired, and this will increase the cost significantly. Another problem is that hail falls in the summer and autumn period, and this is rainy time. It is unrealistic to completely replace the roof during rains.
The repairs we offer allow you to immediately eliminate a large number of holes in the slate and calmly wait for good weather to overhaul roofs of buildings. If this is an inexpensive extension, then after repair it can wait for its turn for several years; patches will ensure tightness all this time. And another advantage of the method is that the first stage of repairs can be done from the attic.
Holes are sealed with silicone putty or sealant and corrugated cardboard. Corrugated cardboard bends well along the lines of the corrugation and holds the bending load across it well. In addition, this material is always at hand and costs almost nothing.
How to save a house after a hail?
Step 1. Go up to the attic to get a rough estimate of the extent of the loss and check the condition of the slate sheets. As we have already mentioned, when damaged by hail, the number of holes is in the dozens. Prepare materials according to volume.

Step 2. Cut out patches from corrugated cardboard. There is no need to waste time trying on each hole; focus on the largest one. Moreover, there is little time for repairs; everything must be completed as soon as possible. At first, you should only seal the holes on the lower waves of the slate. The upper waves have almost no leaks.
Step 3. Use any brush to remove dust from the slate. From the attic side the sheets are much cleaner than from the outside; preparing the area for gluing is much easier and faster. We recommend preparing all the holes at once, this will be much faster than sealing and cleaning each one separately.
Step 4. Squeeze silicone onto the patch, squeeze it out in a zigzag pattern, and then spread it with your finger in an approximately even layer over the entire surface of the corrugated cardboard. Please keep in mind that silicone adheres firmly to the skin; work with disposable medical gloves or use other skin protection.

Squeezing silicone onto the patch
Important. Do not leave gaps, the paper is afraid of moisture, the silicone should reliably protect it.
Step 5. Immediately firmly glue the patch into place, making sure that it lies exactly along the profile of the sheet bend.

Gluing the patch in its place
Step 6. Once again, walk the silicone around the perimeter of the patch, level the silicone with your finger, the fit should be tight.
Step 7 Protect the back of the corrugated cardboard from moisture. Coat it with silicone using the above method.

This completes the first emergency repair work. The roof may remain in this condition for several months and await a complete replacement. If it is impossible to quickly replace the sheets and the roof will remain in this condition for the winter, then you need take measures to strengthen the patches. The work is already being done outside. How exactly?
Step 1. Use a wire brush to clean the area around the hole. Be careful not to damage the patch already installed underneath.

Cleaning slate with a brush and brush
Step 2. Use a soft brush to remove dust, especially from the patch. The cleaner the surface, the more reliable the repair will be.
Step 3. Buy a bottle of solvent (you can use white spirit), put a spray bottle on it and wet the surface of the patch and the surface of the slate around it.

The solvent will not only degrease the slate, but will also destroy all microorganisms growing on it. Due to this, the adhesive strength increases and the reliability of slate repairs increases significantly. When working with solvents, follow safety regulations - the liquid is explosive and the fumes are toxic. Protect your respiratory system with personal protective equipment.
Step 4. Apply sealant over the entire area of the patch, especially around the perimeter of the hole. It is desirable that the thickness of the sealant be slightly greater than the thickness of the slate; due to this technique, water will not stagnate on the patch. But this is an optional condition; make a decision taking into account the approximate period for which you are counting and how much sealant you have.

Important. There must be some amount of sealant on the surface of the slate around the perimeter of the hole. It is recommended to make a small tubercle in the upper part; it will drain water along the sides of the patch.
Step 5. Level the surface of the sealant and check the quality of the putty. To prevent the sealant from sticking to your hands, periodically wet them with soapy water. You can take a little dishwashing detergent and dilute it with water.


If desired, the entire roof can be repaired in 4-5 hours. If everything is done correctly, then you can safely overwinter, and next year you can make a final decision on roof repairs. Old damaged slate, of course, will have to be replaced. And what roofing material to use instead is a matter for each building owner personally.
Prices for polyurethane sealant
Polyurethane sealant
Video – Slate roof repair


