Creating a charming flower is quite simple, if only you had the desire and ribbons the right size and some free time
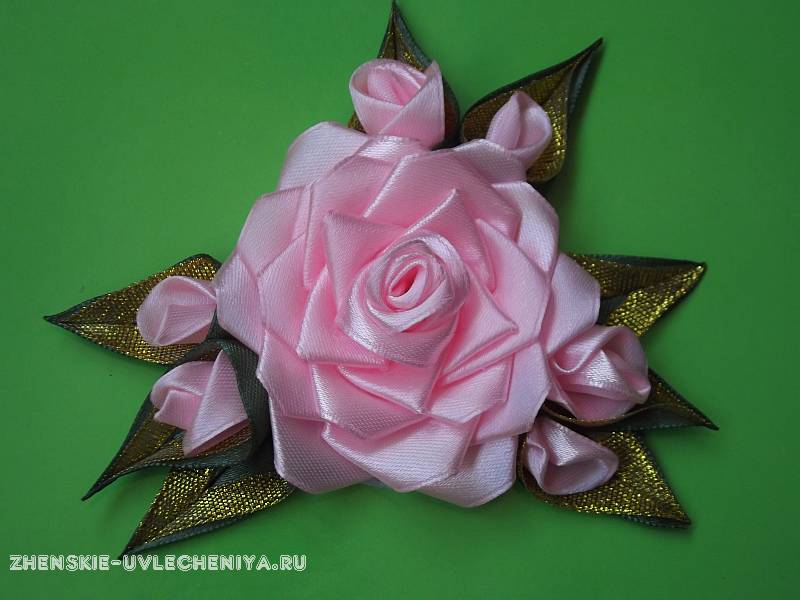
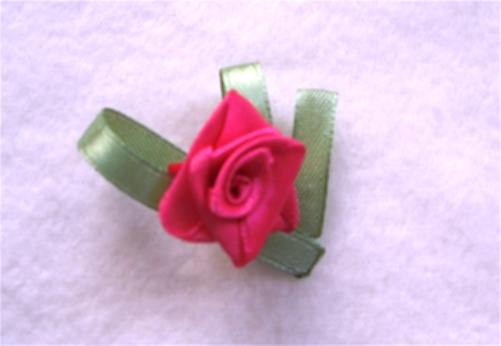
With this master class you will make a charming decoration with your own hands - a rose made of satin ribbons using the kanzashi technique will complement a hairpin, hoop or bracelet. It can also be pinned as a brooch or an elegant boutonniere. Step-by-step instructions with photos will help you assemble the composition correctly, easily and quickly.
Materials and tools for the master class
To make a rose from satin ribbons with your own hands you will need:
- satin or silk ribbons in soft pink and dark olive shades, 2.5 cm wide;
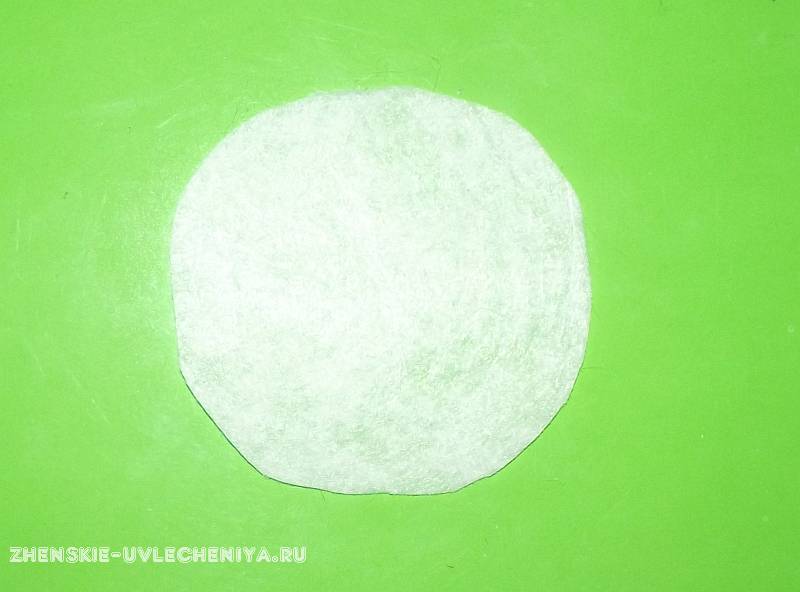
- felt square white size 6x6 cm for the base;
- golden-colored brocade ribbon 0.6 cm wide;
- candle and matches or lighter;
- tweezers with a long sharp nose;
- hot glue gun or universal glue;
- scissors;
- ruler.
If you have never worked in this needlework technique, we recommend it.
Step-by-step instructions for assembling a rose from ribbons
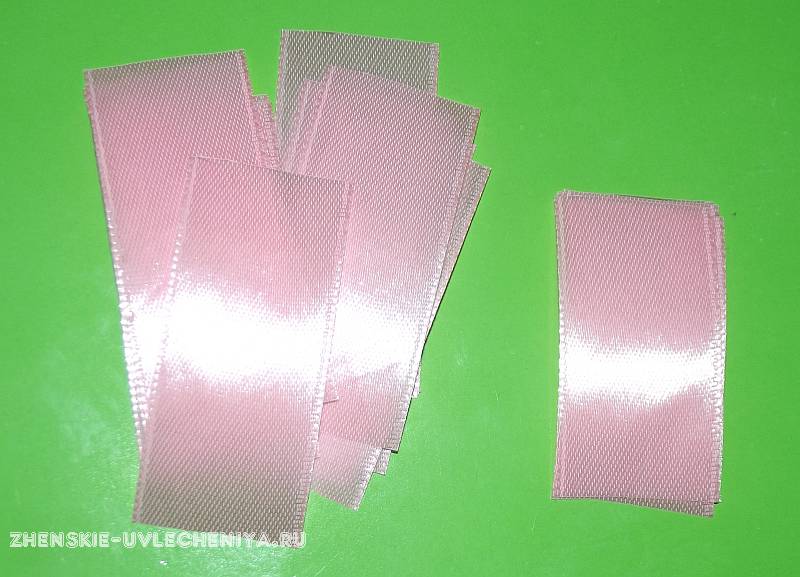
Take a soft pink ribbon 2.5 cm wide. Using scissors, cut it into pieces 6 and 5 cm long. In total, you will need 33 pieces 6 cm long and five 5 cm long.
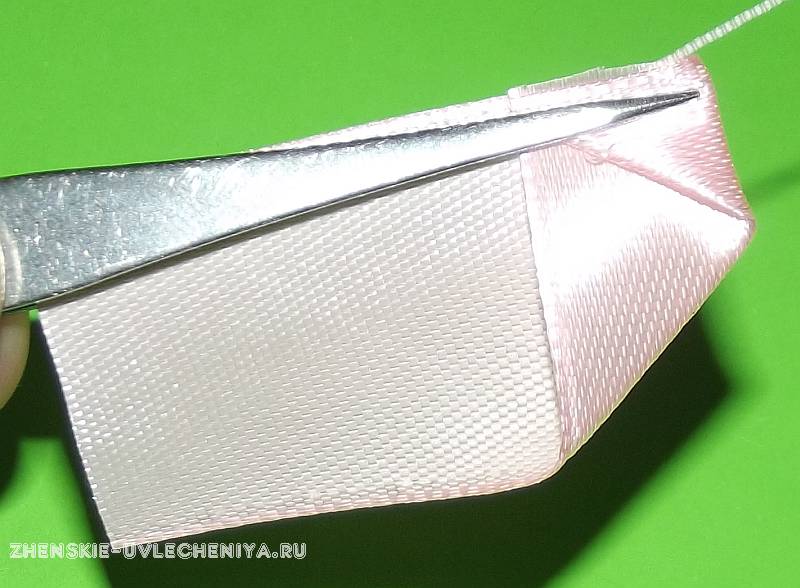
Now you need to prepare the petals for the rose. Take a 6 cm long piece and tweezers. Fold the top right corner of this piece towards the bottom side.

After this, fold the corner formed at the bottom in the opposite direction to the starting line.
Holding the element with tweezers, melt its bottom over the flame of a candle or lighter.
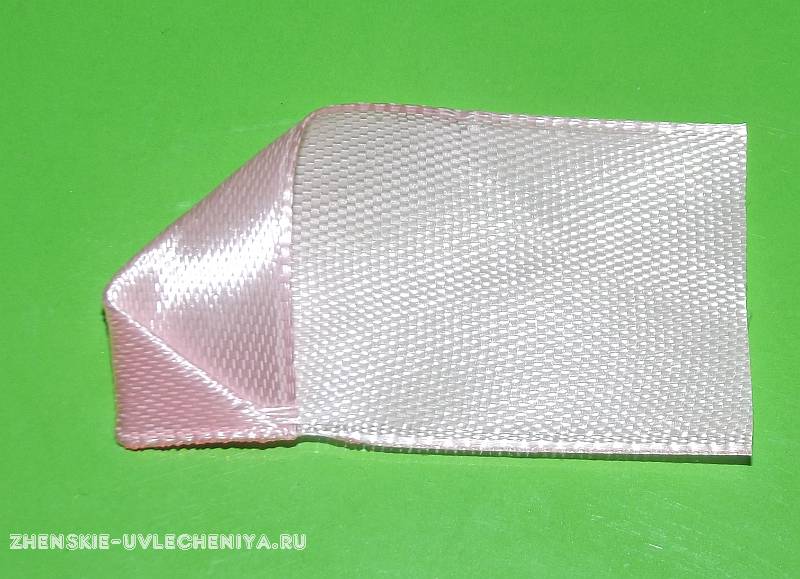
Repeat exactly the same on the other side. One petal is ready!

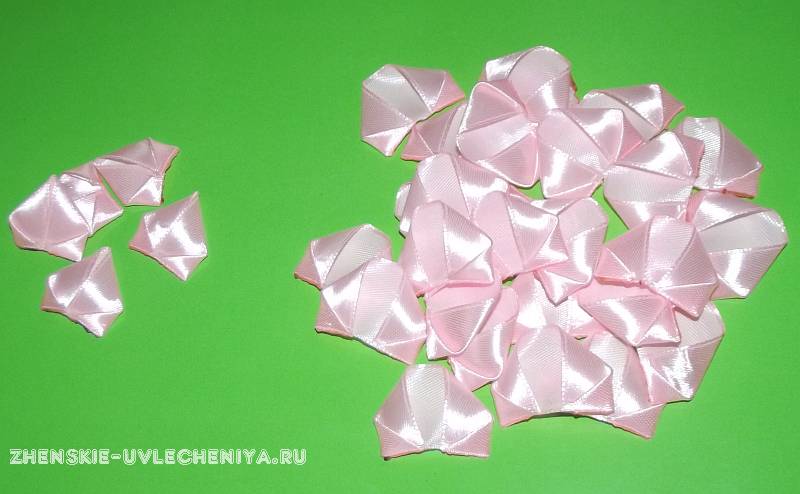
In the same way, make petals from the remaining pieces of 6 and 5 cm. Please note that petals from pieces 5 cm long will turn out sharper, and from pieces 6 cm long - wider.
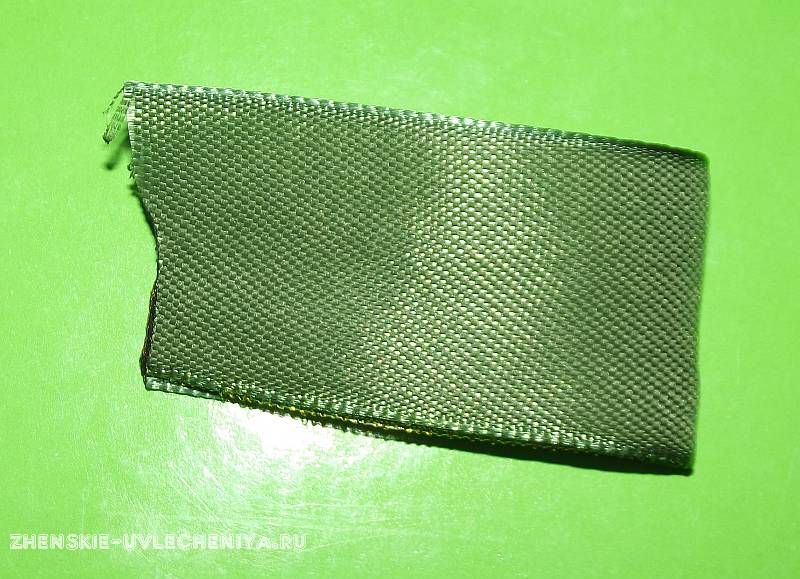
The next step is to form the leaves for the rose. Cut the dark olive-colored ribbon into 10 cm pieces. Also cut the golden-colored brocade strip into 10 cm pieces. A total of eight pieces of each tape are needed.

Place one brocade piece on top of the satin ribbon on the left side.

Fold the olive piece in half lengthwise. Melt and seal the edges on the side where the brocade is.
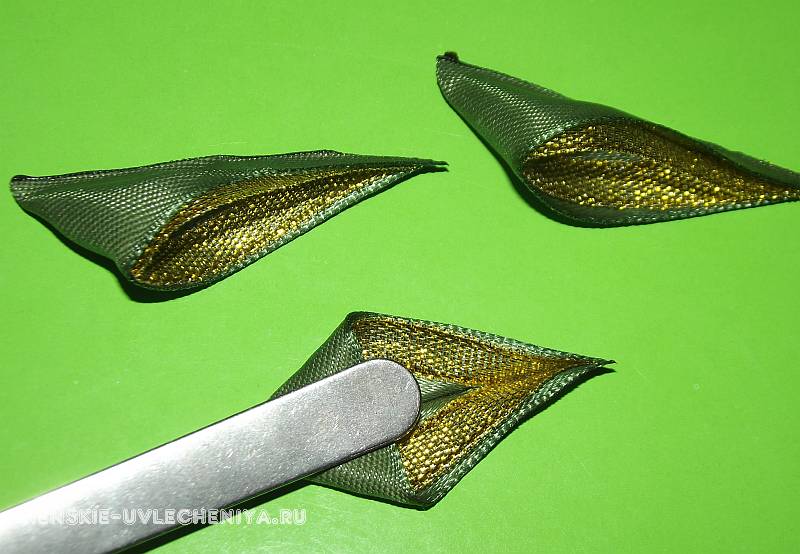
After that, cut this piece in half diagonally, starting from the side you just sealed.

Melt over the fire and seal the entire cut bottom edge with your fingers or tweezers. The first sheet is ready! Make the remaining leaves in the same way.
Now it's time to make rose buds. Cut a neat circle from a 6x6 square piece of felt.
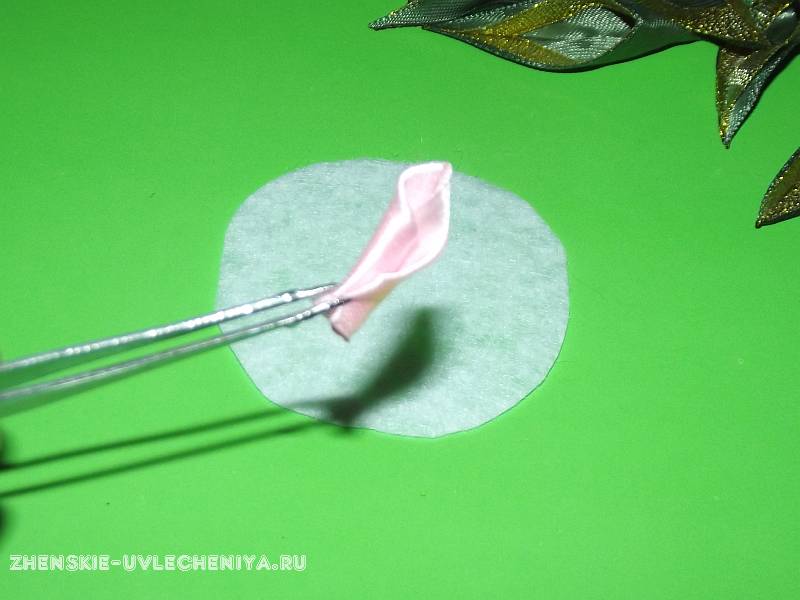
Using tweezers, roll up the petal that you made from the 6 cm piece into a “tube”.
Wrap this petal with another one. Secure with glue on the bottom side. This will be a larger bud.
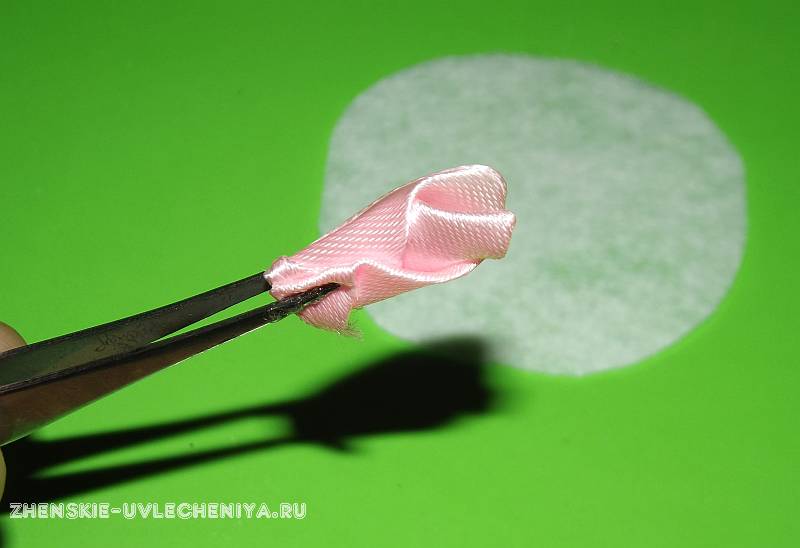
After this, roll another petal into a “tube” and secure it at the bottom with glue. This will be a small bud.

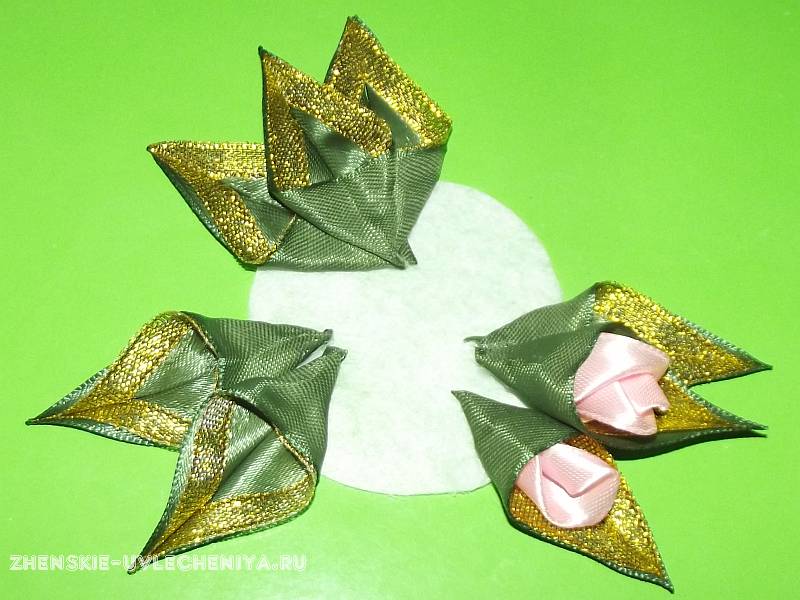
Glue each rose bud inside the leaves.

Glue a simple leaf and two leaves with buds onto the felt base.

After this, attach the remaining leaves to the base.
The final stage is assembling a rose from satin ribbons. Glue six petals made from six-centimeter pieces into the middle of the base.
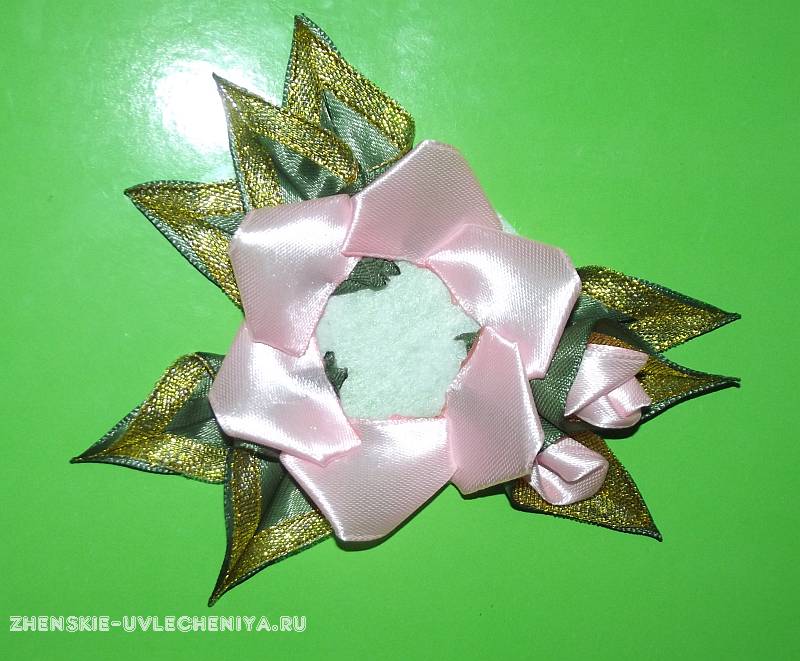
Glue a second tier on top of the first, also consisting of six petals.
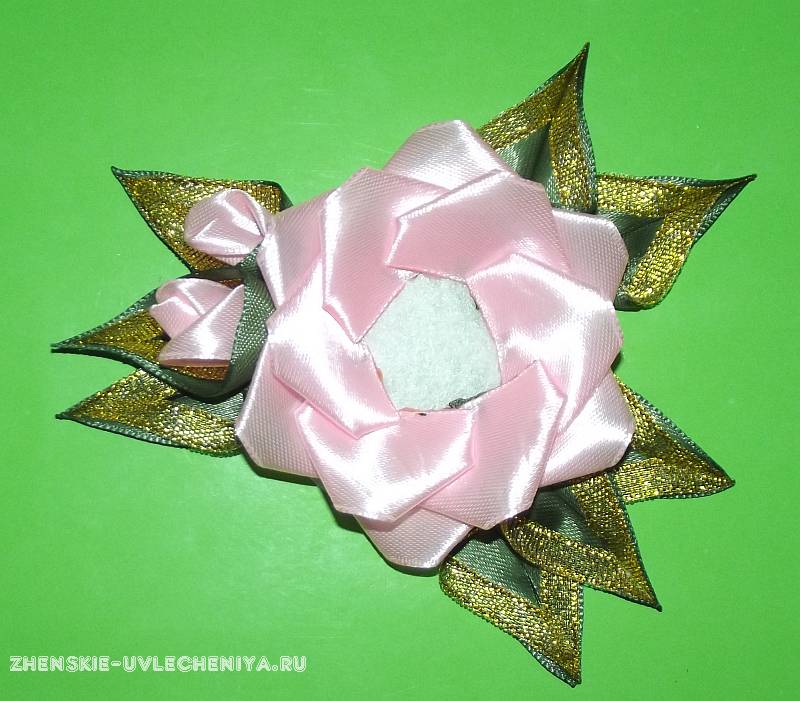
Add the third tier in the same way.
From six petals made from 6 cm pieces, make four buds. Make two from one petal, and two from two petals. This step is optional, and if you prefer, leave it as is.

Glue these buds into the leaves around the perimeter of the flower.

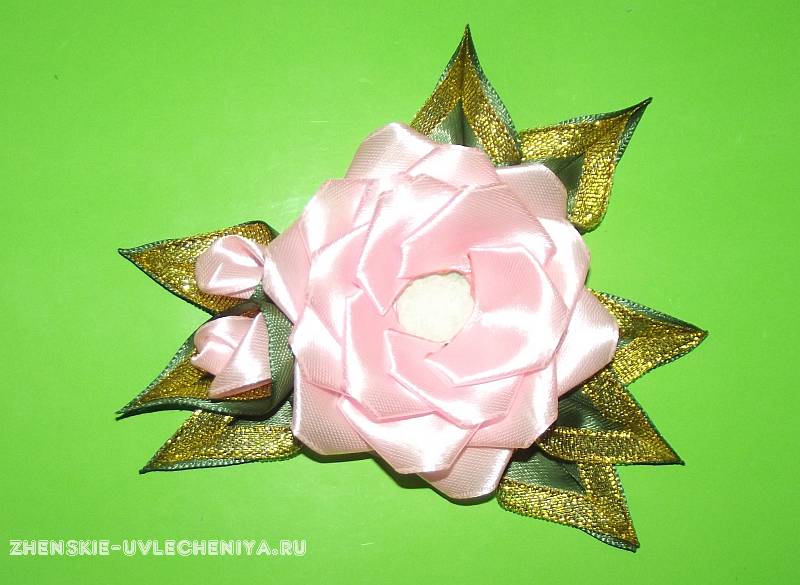
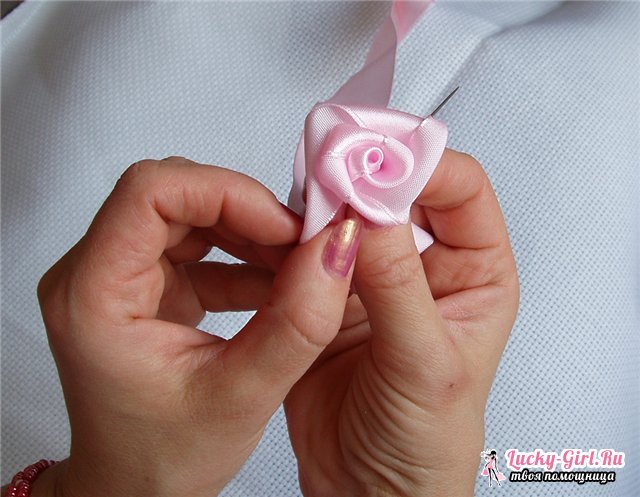
Twist the remaining five petals into a neat bud. When creating this element, wrap each petal opposite the previous one. This way your bud will be symmetrical.

Glue this bud into the middle of the rose.

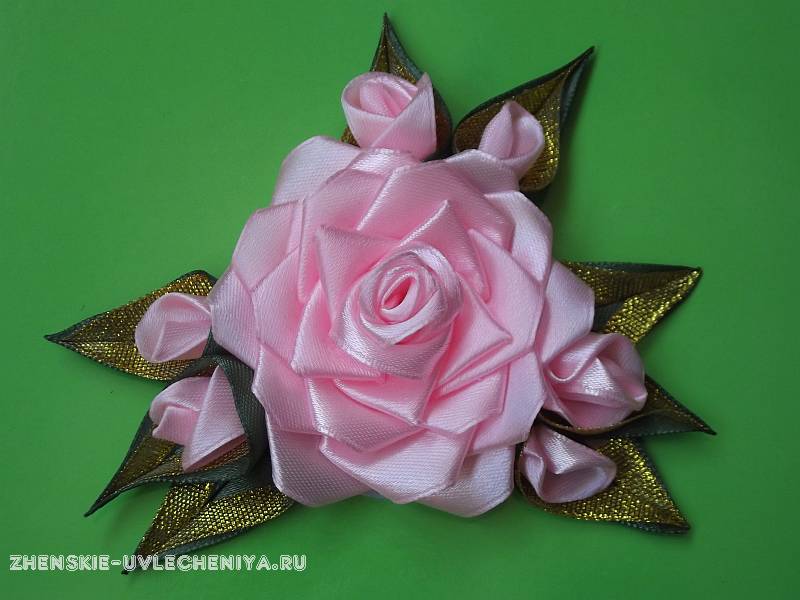

This is how easy it is to make a rose from a satin ribbon with your own hands. There are many options for how you can use it. It all depends only on your goals and imagination!
See other master classes on making. Make hairpins, headbands and jewelry for adults and children, for yourself and as a gift!
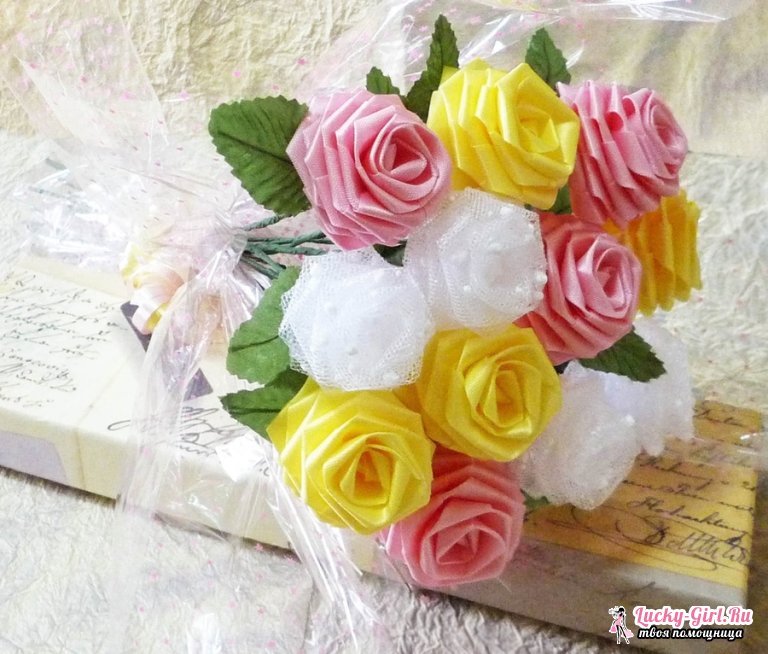
Making roses from satin ribbons is not a difficult process at all. Every needlewoman who takes up ribbons and needles will be able to create stunning flowers with her own hands. These roses can be used to collect entire bouquets, they can be used to decorate accessories and interior items, and can also be used to decorate various celebrations.
Satin ribbon rose: master class
You will need:
- long satin ribbon,
- needle,
- threads to match the ribbon,
- scissors.
Manufacturing:
- Take the prepared satin ribbon by the edge, bend it at an angle of 45 degrees, leaving a small tail. The fold itself must be sewn over the edge with threads to match the selected ribbon.
- The next step is to form a triangle. To do this, bend the tape towards yourself again to visually get this geometric figure. By analogy with the first fold, leave a small tail and sew the edge of the fold with thread.
- Fold the ribbon again. You need to bend it as if in a circle, but since the bending occurs at an angle, the shape of their tape will become like a square. The tape for this fold should overlap the tail left during the first fold. This bend also needs to be stitched. To get a square, make another fold. After this, you will have most of the tape free. She will be on top.
- Turn the resulting square over so that the free part of the tape is at the bottom, and continue working. At the very beginning of the work, you were left with a small tail, which is now visible on the right side of the formed square. Turn the product so that the loose tape rests on your fingers.
- Holding the tape with your fingers, begin bending it into a square again at the same angle, but you no longer need to trim the edges; just fix the bent tape with your fingers. Thus, above the square that serves as the base, you will get another square, differing in volume. Continue forming volumetric squares according to the same pattern.
- These squares of ribbons will serve as petals, so the splendor of the future rose depends on their number. Fold these squares until you have enough tape. From the remaining piece, form a flagellum, the edge of which is placed in the core of the stack formed by squares. Pull the flagellum inside the stack so that it comes out on the other side.
- Unfold the ribbon squares a little so that their tops peek out from behind each other. Thus, you will get an imitation of rose petals. When the ribbon rose looks as much like a real one as possible, turn the product over with the base up. Try to sew the remaining tail of the ribbon as tightly as possible to the base. As a result, you should get a kind of convex circle in the place where the tail of the ribbon is sewn to the flower. The satin ribbon rose is ready.
Two-color roses from satin ribbons: master class
You will need:
- Ribbons 2.5 cm wide - 2 ribbons of 0.5 m each in different colors,
- needle,
- threads to match the ribbon,
- candle and matches,
- scissors.
Manufacturing:
- Cut each ribbon into small pieces (5 cm each), so you will get 10 pieces of each color. Remember, if you need to make the rose more magnificent, take longer ribbons. To prevent the edges of the cut pieces of tape from unraveling, secure them with a burning candle. To do this, carefully run each side of a piece of tape across the top flame of the candle.
- Take one piece of tape in your hands and bend each side so that you end up with a triangle. Bend the corners of the base of such a triangle inward. After all the bending operations, a piece of lena will take the shape of an open envelope. Secure the curved ends by sewing them with thread. Do the same operation with the rest of the workpieces. This way you will get petals for the future rose.
- Now you can start sewing the petals into a rose. Start the process from the center. Sew each new petal to the edges of the previous ones. At the same time, do not forget to alternate colors. When all the petals are sewn on, all that remains is to fluff them slightly. Now the flower is ready!
How to make a rose from a wide satin ribbon?
You will need:
- tape 6.5 cm wide - 90 cm,
- threads to match the ribbon,
- needle,
- scissors.
Manufacturing:
- Fold the ribbon prepared for work in half with the right side facing out. You need to fold along the length, i.e. so that one side edge connects to the other.
- The thread must be threaded into a needle and stitched from the corner adjacent to the fold line to the folded edge. The first stitches should be at a 45 degree angle. Make sure that the stitches are on the same line. Next, mark along the edge. When you have reached the end of the tape, continue stitching to the top corner opposite to where you started. The ends of the thread remaining after basting must be left free.
- Pull the loose thread at one end and gather the ribbon along its entire length. From the beginning of the basting, form a central bud. To do this, simply wrap the tape once and secure it with stitches.
- Continue twisting the ribbon around the resulting central bud. Do not forget to fasten each turn along the basting line or higher. You need to attach it as close to the center as possible.
- At the end of the work, secure the thread and the end of the tape so that the basting and fastening stitches are not visible. Now your luxurious rose is ready.
Roses made from satin ribbons: application
Despite the ease of making, roses made from satin ribbons, made by yourself, will be an excellent element for decorating any thing. They can be placed on the cover of a photo album or personal diary, making these little things more romantic.
Very often, such roses are used to create jewelry. A flower made from ribbons can be easily attached to a hair band, headband, or made into a brooch. Brooches are especially popular because... wearing large flowers made of fabric is now in fashion.
Roses made from satin ribbons can become an important attribute of a wedding celebration. You can use them to make boutonnieres, car decorations, and even a bridal bouquet. In addition, such flowers can become a bright decoration for a dress or shoes. They will also look charming in a wedding hairstyle.
Satin ribbon rose: video
Range of uses satin ribbon roses very wide. Making them is quite simple. Different patterns will help you create a variety of flowers for various needs. How and for what to use them is up to you. Show your imagination, and many of your things will be transformed.
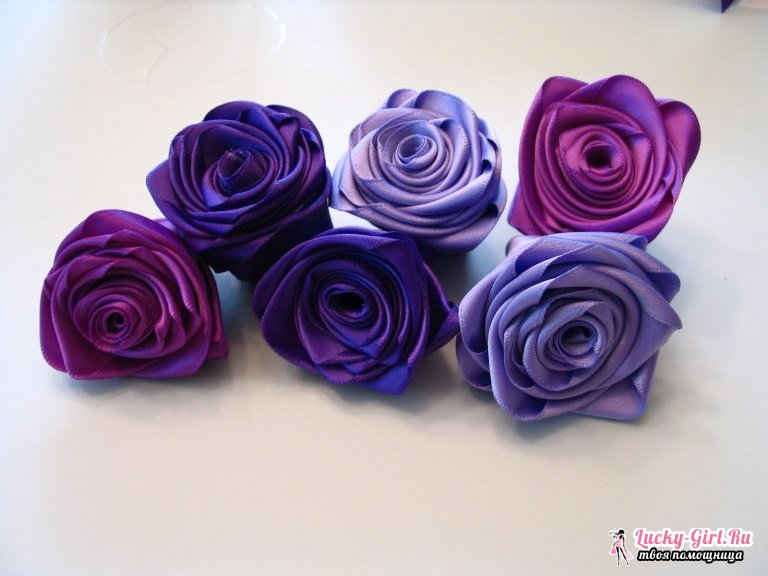
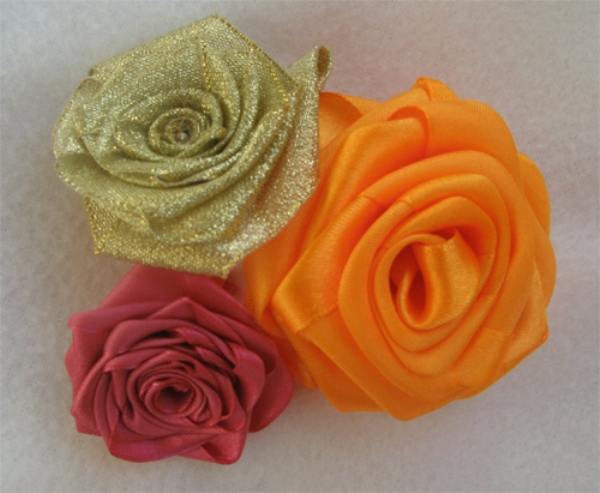
You can make various roses of various colors and shapes from satin ribbons.
Ribbon roses can be used to decorate a dress, make a hairpin, or simply “refresh” the interior of your home.
Here are the most interesting roses from ribbons that you can make with your own hands:
Rose from pieces of ribbon (master class)
Such a rose can be made from leftover ribbons that are about 10 cm long. It will be even more beautiful if you use ribbons of different colors.
You will need:
Ribbons (length up to 10 cm)
Pins
Thread (preferably matching the ribbon) and needle.
Making a bud:
1. Bend the end of the tape at a right angle. Then you need to bend the corner again.

2. Secure the ribbon with a pin and then secure with thread.
3. Repeat steps 1 and 2 with the other end of the tape.
Making the petals:
1. Take another piece of tape and bend its ends at a right angle.

Connecting:
1. Use a pin to attach the petal to the bud.

2. Wrap the petal around the bud and sew it to the core.
3. Repeat steps 1 and 2 with the remaining petals.
4. Fix the base of the flower well.
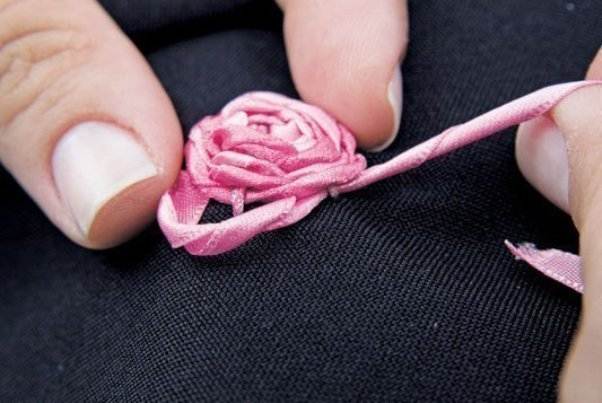
How to make a simple rose from ribbon (photo instructions)


Bouquet of small flowers made from ribbons (photo instructions)


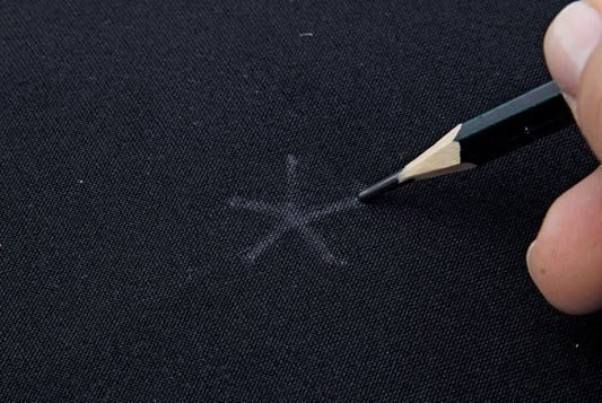
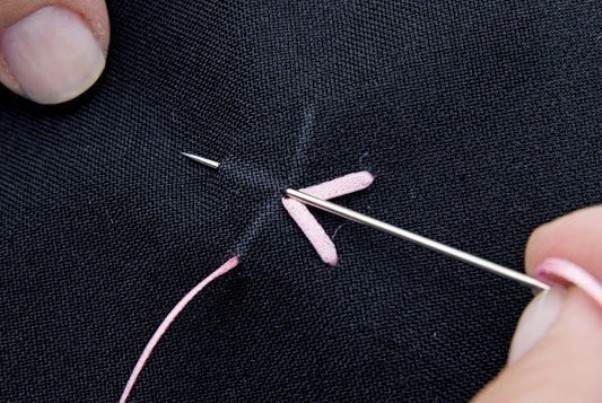
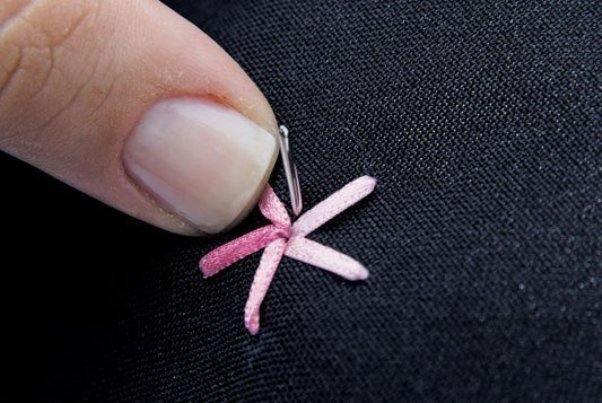
Embroidering roses on fabric (master class)

You will need:
Narrow tape
Pencil
Bead.
Below you can find video instructions for a more detailed overview.


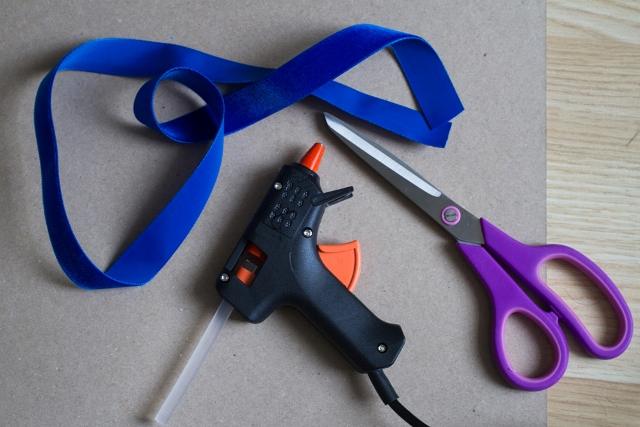
DIY flowers made from velvet ribbon

You will need:
Velvet tape
Scissors.
1. Cut a piece of tape 45 to 60 cm long.
2. Fold the ribbon in half.

3. Apply a bead of glue and twist one end of the folded ribbon tightly to form the center of your bud.
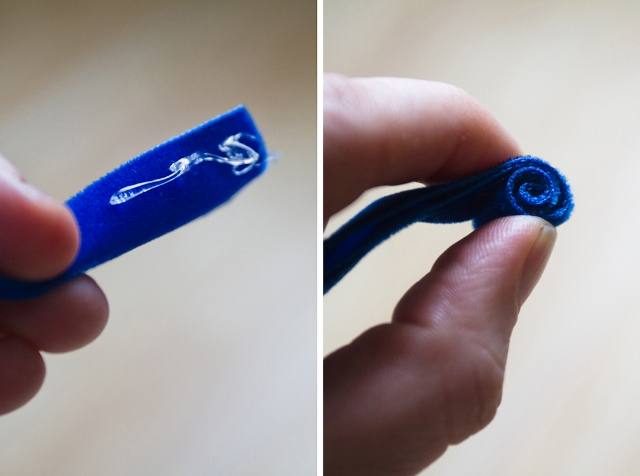
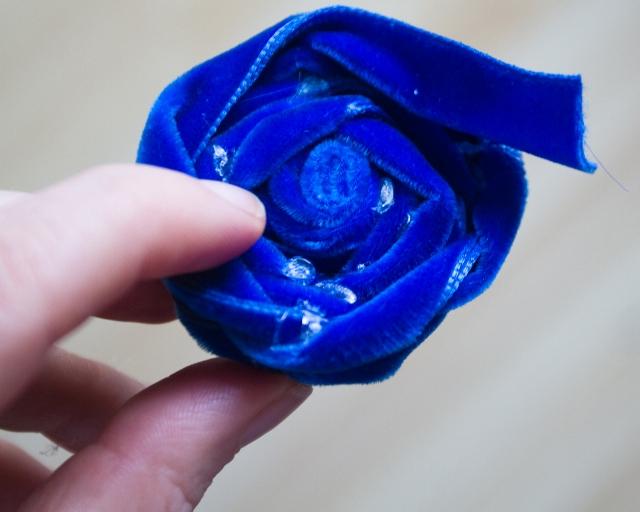
4. Start wrapping the ribbon around the center of the flower, twisting the ribbon regularly and adding glue for strength.
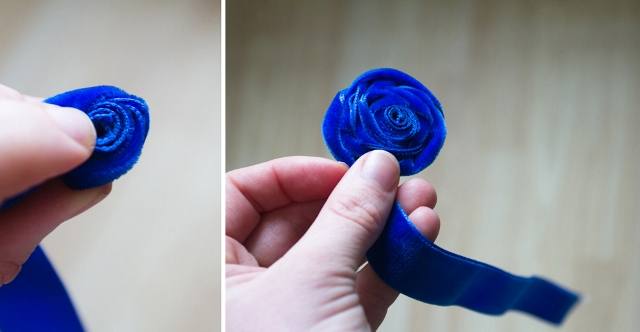
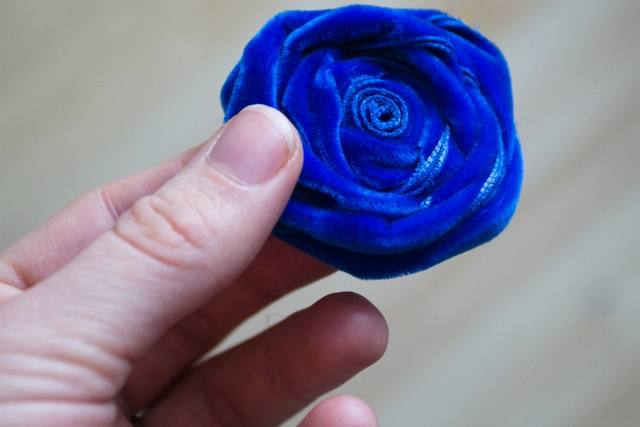
5. When you have about 2-3 cm of tape left, glue this tail to the bottom of the resulting bud.
How to make a lush rosebud from a satin ribbon

You will need:
Satin ribbon 1 m long.
Thread and needle
Hot glue
Pin (if necessary)
Candle or lighter (if necessary).
1. To prevent the tape from fraying, its ends should be slightly scorched.
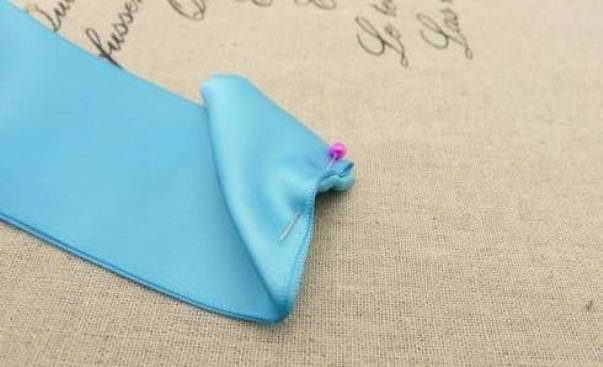
2. Place the ribbon with the wrong side facing you. Step back from the edge of the tape 2-3 cm and bend it at an angle of 30 degrees.

*If desired, you can secure the ribbon with a pin.
4. Use a thread and needle to sew a seam from the top corner of the edge of your ribbon. To begin, thread the needle down, then to the right, moving along the edge.

6. Make folds along the entire length of the ribbon. There can be from 6 to 11 in total - it all depends on how lush the bud you want to make. In this example there are 9 folds.
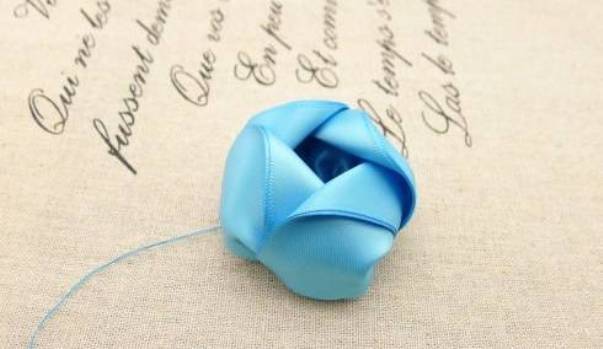
7. Pull the thread to gather the edge of the ribbon.
8. Now twist one end of the ribbon to create a tight center of the flower. Secure this center with hot glue.
9. Start wrapping the ribbon around the center, making sure to add a little glue near the edge.
If you want to make a hairpin, cut out a circle from felt and glue your bud to it. After that, simply glue the brooch mount to the felt.
Large rose flower made of satin ribbon (step by step instructions)

You will need:
Satin or silk ribbon 1 m long
Thread and needle
Bead
Hot glue (if necessary).
1. First, it is advisable to singe the ends of the ribbon, otherwise unwanted fringe may appear.
2. Step back about 5 cm from the edge and bend the tape towards you at an angle of about 50 degrees. Make the main part of the bud - its core - by tightly rolling the ribbon.

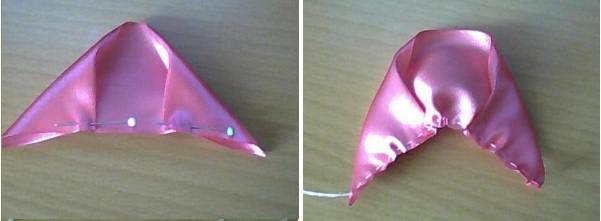
3. Fold the other end of the tape up so that the edges are parallel and meet (image 4). The folds can be secured with a pin.
4. Fold the tape along the line where the edges of the tape touch (image 5). Join using a needle-first stitch , but as close to the edge as possible.
5. Repeat steps 3-4 to fold the ribbon to the end (image 6).
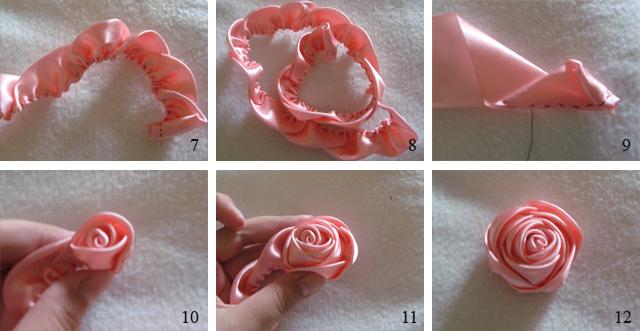
6. Gently pull the thread and secure its end (image 7, 8).
7. Start rolling the ribbon around the core (image 9, 10). You can secure the tape with thread or hot glue.
* You can decorate the bud with leaves.
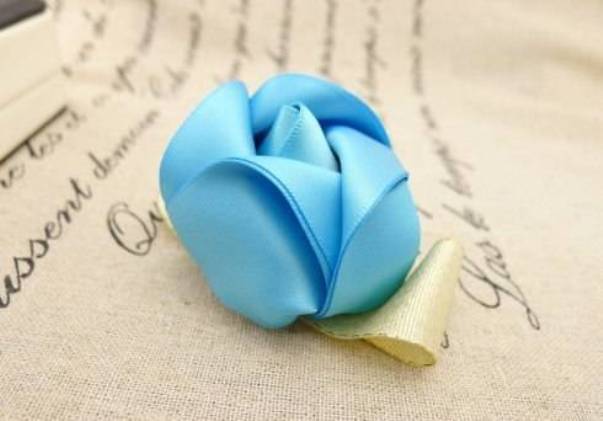
A beautiful rose bud from one satin ribbon (instructions)
You will need:
Satin ribbon 1 m long and 5 cm wide
Thread and needle or glue gun
Below you will find video instructions.
1. You can singe the edges of the tape with a lighter.

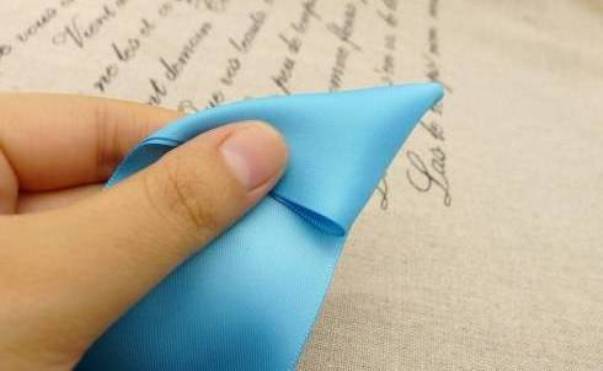
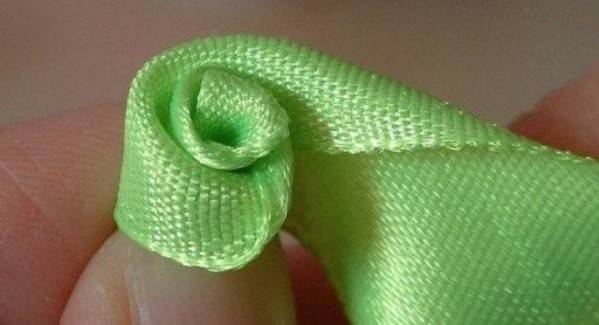
2. Fold 1.5 cm of ribbon diagonally (Image 1) and roll this part to the left (Image 2) to create the center of the rose (3 turns is enough).
Secure the folds of the bud with hot glue or thread and a needle.
3. Holding the workpiece with one hand, try to bend the tape down and around the core. Glue the petal you made to the base of the bud.

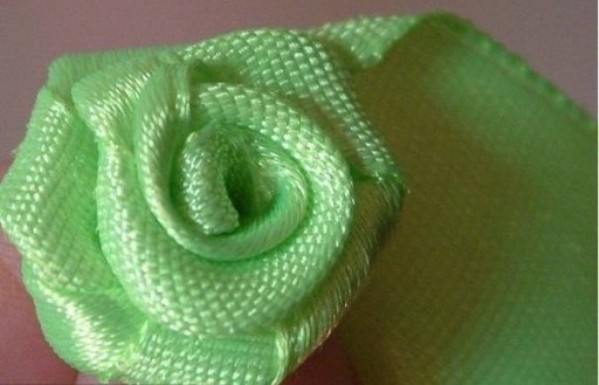
4. Fold the top edge of the ribbon back and then down to make another turn around the core. Glue it to the base of the bud.
5. Complete all the petals, securing them with glue or thread and a needle, and simply glue the tail at the end to the bottom of the bud, cutting it off or attaching it with wire.
Flowers from ribbons (master class)


Rose made of narrow satin ribbon
You will need:
Satin ribbon 0.5 m long and 1 cm wide
Lighter (if necessary).
1. Fold the ribbon in half.
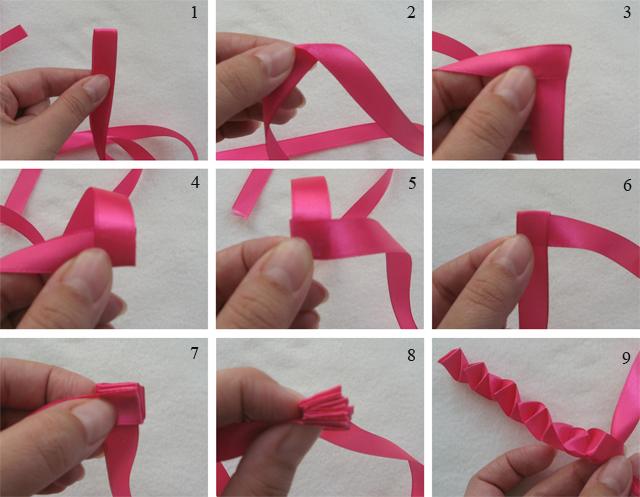
2. Bend the ends of the tape to form a right angle (image 2).
3. Hold the fold and move the end of the tape out right hand to the left (image 3).
4. Place the bottom end of the tape over the top (image 4).
5. Holding the end of the tape in your left hand, throw it to the right. Remember that the tape should always go on top (image 5).
6. Fold the top end of the tape down (Image 6).
7. Repeat steps 3-6 until the tape runs out. You should now have an accordion (image 7, 8).
8. Hold the ends of the tape and release the accordion (Image 9).
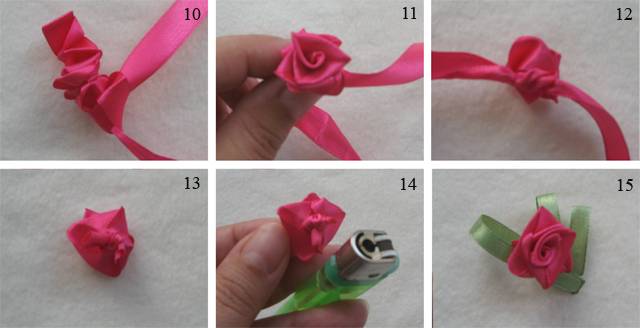
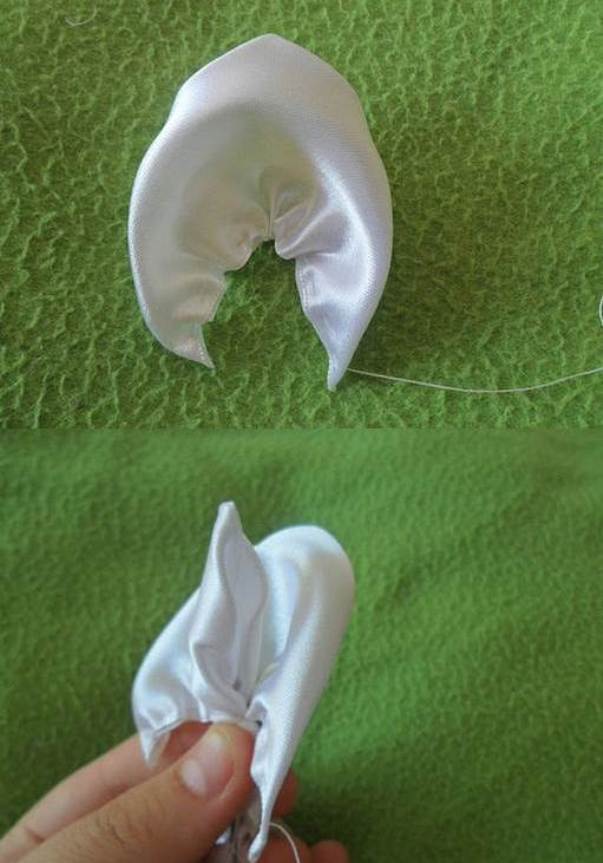
9. Carefully begin to pull one end of the ribbon - the ribbon will begin to take the shape of a rosebud.
10. On the back of the bud, tie the ribbons in a double knot to prevent the flower from blooming (image 10).
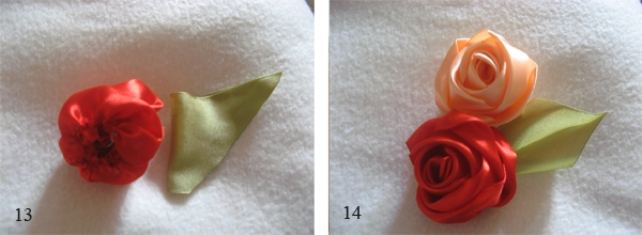
* You can cut off the excess and singe the ends of the tape (image 13, 14).
*You can add leaves.
DIY roses from ribbons (photo instructions)