Accordion doors are a canvas consisting of individual lamellas. Vertical narrow panels are connected to each other with a hinged profile or end hinges to fix them on door frame Guides are installed on the side, on top, and less often, on the bottom. When the canvas is pulled to the side, the panels fold, freeing the passage into the room.
These design features of accordion doors affect the installation process and complicate it. Installation work consists of several operations: preparing the opening, assembling the door frame, installing the guides, assembling the door leaf, securing the door to the guides. Detailed step-by-step instructions on how to install an accordion door will help you understand the nuances of the process and carry out the installation yourself.
Catalog of our products - we work in Moscow and the Moscow region
Materials and tools
In addition to the accordion doors and the fasteners and fittings that come with them, you will need:
- drill with impact mechanism;
- perforator;
- electric jigsaw;
- building level;
- wood hacksaw;
- construction knife;
- miter box;
- corner;
- crosshead screwdriver;
- dowels, anchors, nails and screws;
- tape measure and pencil;
- construction gun and polyurethane foam;
- several wooden blocks 10 mm thick.
If the door package does not include a door frame, you will need to purchase additional fittings and trims. Any thickness from 10 mm will do.
Preparing for work
Even before purchasing an accordion door, you should accurately measure the width of the opening. The preferred method of installing the structure depends on this parameter. For openings whose width does not exceed 1 m, one is usually used - the top - guide.
It is first recommended to remove the old box from the opening. You can install a new folding structure on it too - this will save time and reduce the amount of work, but part of the old door block designed for an ordinary door, and it makes the opening narrower, leaving a minimum of space for installing guides.
The plaster is removed along with the frame and, if necessary, the opening is widened using a hammer drill. After completing the work, measurements are taken using a tape measure (width, height) and with this data they go to purchase an accordion door. It is advisable to choose a model whose dimensions are as close as possible to the parameters of the opening.
Installation of the box
Stages of assembling and installing the box:
- Measure the width of the opening from one corner to the other.
- Measure this distance on a horizontal bar and cut off the excess using a hacksaw, acting carefully so as not to damage the decorative coating.
- Measure the height of the opening. Subtract the thickness from this value top bar, shorten the side pillars.
- The elements are assembled into a single U-shaped structure. It is convenient to do this on the floor, leveling the position of the parts using a corner. It is important to remember that the top bar should be on top of both side bars, and not enclosed between them.
- The extensions are fixed using self-tapping screws or small nails. If self-tapping screws are used as fasteners, then holes are first made for them, and only then they are tightened.
- Install the box in the opening. Insert bars between the opening and the frame to leave space for foaming. Using a level, check the evenness of the horizontal and vertical slats, adjusting their position if necessary. Fix the side strips with self-tapping screws and at least 3 anchors, then fix the top with 2 anchors.
- The space between the box and the opening is filled with polyurethane foam, starting work from the bottom and moving upward.
Once it has completely hardened, you can move on to the next step.
Preparing the installation of guides
Before installing the accordion door with your own hands on the prepared frame, you should mark on it the attachment points of the guide profile.
Measure the height of the side strip, then, using a miter box, cut the profile to the desired length. Drill holes in it for self-tapping screws at a distance of every 15-20 cm. Measure the top strip of the door frame and cut a part of this length from the profile. Holes for fasteners are made in it in increments of 5-7 cm, since it is the horizontal rail that will bear the main load.
Having attached the guides to the box, put marks on the extensions in those places where the profile will be attached to them (focus on the holes made in the profile). Drill holes in the box for fasteners in the marked places.
Fix the guides with 1 self-tapping screw to check the evenness of the structure. If the structure has even slight distortions, the door will not close or open normally.
The side guide is fixed on the side on which the door will be located when folded. The screws must be long so that they pass through the box and reach the wall. Then unscrew the fasteners and remove the profile.
Assembly of the accordion door
The canvas can be made of MDF or plastic. The latter option is less durable, but the design is lightweight and easier to install.
Step-by-step instruction assembling an accordion door from MDF:
- The panels are laid out on a flat surface (for example, the floor) in the order in which they should be connected to each other.
- The panels are assembled into a single sheet using the rods from the kit, which are inserted into the eyes of each panel, or end or hidden type hinges in the places marked by the manufacturer.
- The runners are attached to the upper end. They are installed following the instructions and drawings - different models The placement of the rollers varies.
The installation process is slightly different plastic accordion door“Style” - the instructions below will help you understand the assembly algorithm:
- A narrow panel is attached to the finishing panel, then a hinge profile is inserted, again a wide panel, a narrow panel, a hinge profile, a starting panel, and a connecting guide profile.
- Place plugs on the hinge profiles at the top and bottom and secure them with the screws included in the kit.
- The runners are secured to the end of the top part of the finish and the middle of each wide plank; long screws are used for this.

Installation of door leaf
The accordion door is folded, the top guide removed from the frame is taken, and the runners are inserted into it. The entire structure is applied to the box and secured to the frame, inserting self-tapping screws into the holes made in preparation for installation of the guides. Tighten the fasteners with a screwdriver; doing this with a screwdriver is inconvenient.

Then the side guides are installed. The door leaf is connected to the side profile using a joining profile (it is installed earlier, at the door assembly stage).
The installation of a plastic accordion door is discussed in more detail in the video: step-by-step instructions illustrate each stage. If the process is not completely clear, you can watch the video.
Installation of platbands
First, cut off the excess polyurethane foam using a sharp construction knife.
The platband is placed against the box and aligned with it, applying the edge of the crossbar to the edge of the side strip of the box. Use a pencil to mark the point where the horizontal and vertical elements additional
Place the casing on a flat surface, draw a line from the marked point at an angle of 45 degrees to outside details. Use a hacksaw to cut off the excess. The same operation is performed with the second casing.
Using furniture or other small nails, nail the side elements to the door frame. The fasteners are driven in taking into account the thickness of the extension. For example, if it is 1 cm, then the nails are driven in at a distance of 5 mm from the edge of the casing.
After installing the side elements, move on to the top. Measure the distance from one platband to another, cut out a part of the required size, and nail it.
When one side of the door frame is ready, the other is decorated in the same way.
Installation of accessories

The final stage is the installation of handles, latch and strike plate.
| Operation | Procedure |
| Installation of handles | The elements are fixed to the canvas in special holes provided by the manufacturer. For fixation I use the ties included with the door. |
| Latch installation | Insert into an existing hole at the end of the finishing panel. Fastened with screws |
| Mounting the strike plate | The canvas is closed to determine the exact location for installing the strip. It should be located in the area where the latch contacts the side profile. Having secured it with screws, close the door again. If everything is done correctly, the latch will engage the bar and the blade will remain in this position |
Once you know how to install an accordion door, you can try to do it yourself. Select suitable model in the Revecon catalog: here you will find doors of any design from various materials. If difficulties arise during the installation process, our specialists will come to the rescue.
In this article we will look at how to make and install an accordion door with your own hands. An accordion door is an interior sliding folding door (or a book door if it has two slats). Here you will see step by step instructions with detailed master classes, as well as clear drawings and layouts. We will pay special attention to the installation of a folding door, so that we can figure out how to correctly place all the elements in order to carry out installation.
Article menu:
So, in this publication I will tell you about one specific type of wooden interior door, namely about the folding accordion door.
I’ll say straight away - this type of door, as they say, is not for everyone, and is not suitable for everyone and not for every room, it’s all about the complexity of installation and poor insulation. But, of course, the accordion folding door also has positive sides, for example, it saves enough space and is easy to open. Many people believe that, in order to save money, Money, it is better to buy such a door in a disassembled state and do the installation yourself, they say, “it’s cheaper” since you don’t have to pay for installation... this opinion is WRONG. I’ll explain why: the whole point is that by refusing to install a door, you really save, but very little, since you still have to overpay for a ready-made door, the design of which, by the way, is very simple and can be easily done with your own hands! This way you will not only save money, but also enjoy the creation process! “But how can you make a folding accordion door, or as it is also called a “book door,” with your own hands,” you ask. Very simple! So that you can easily and quickly create your own folding door, I am writing this article now!
Accordion door and book door.
What is the difference???

Flip door mechanism
The diagram below shows the mechanics of an interior folding door with two slats. Also in this drawing you can see the required fittings and their location when creating the door.

Photo source: www.ekb.rusdver.net/findings/00000426-mehanizm_dver-knizhka.html


Folding door installation diagram
The drawing below shows schematically the installation principle of a folding book door and its parts. So to speak "what-where"!!!

Photo source: atlant66.ru/produkciya/dveri-spec/mehanizm_rezident_sdk-01_dlya_dverey_knizhka/
Simple Accordion Door Installation Plan
This collage shows us the process of installing a folding door in an opening.

And so let’s look at the installation in more detail using an example:


How to install an accordion door with your own hands.
(photos, video master class)
 It’s somehow too easy to create a door leaf for a folding interior accordion door, would you agree? There must be some kind of catch in this door. Let's think about this door:
- Convenient to use;
- Easy to create;
- Compact, you save a lot of free space;

Besides:
- Creation door leaf does not take much time;
- Any materials can be used for this purpose;
- The design of such a door will suit almost any interior.
There are some advantages, except for low strength and poor heat and sound insulation, but this generally depends on what materials you choose and how you install this door, so everything can also be good. So what's the catch?
 The catch, however, is to install this type of door with your own hands. If you have read the article “Do-It-Yourself Sliding Door,” then you probably must understand how difficult it is to install interior sliding doors. So, installing an accordion door (or a book door, call it what you want, the meaning still remains the same) is even more difficult. Therefore, it is this stage of creating your own folding interior door with your own hands that deserves special attention. special attention. Let's take a closer look at all the stages and nuances of installing this type of door. Again, I’ll draw a parallel for those who read the article “Do-it-yourself sliding door”; in this article you will find enough overlaps in the installation stages, because these types of doors are, one might say, related and are based on sliding mechanism. Okay, without further ado, let's move on to the installation itself.
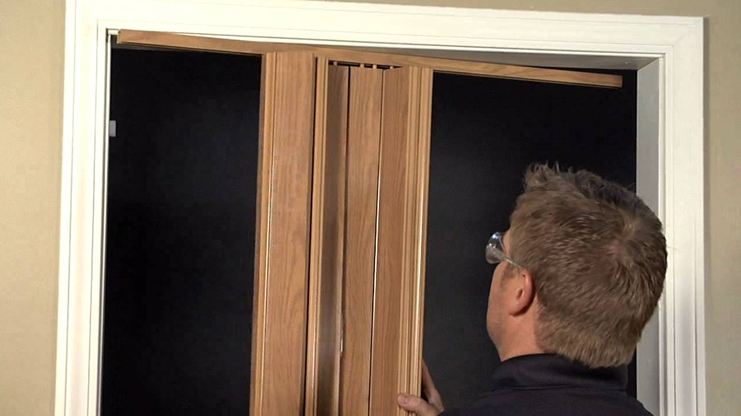
Step-by-step photo master class on installation:
(to view the gallery, just click on any photo)
Photo source and link to video master class: https://youtu.be/XuQEeVSaIyk
Video author: bandq
Original title: How to fit an internal bi-fold door
Watch the video master class:


Photo source: http://www.dveripetli.ru/cistema-skladnyh-dverey
Accordion door leaf design


Hidden and butterfly hinge for accordion door
If you manage to find such hinges in a hardware store, your door will close with special grace.
Pros:
If you choose from two types of loops, it is better to install hidden ones. When open, they leave almost no gaps between the sheets. In addition, they are more powerful and can withstand heavy loads.
Minuses:
Their disadvantages: installation is more difficult and more expensive. But if the doors are made of MDF or solid wood, then they need to be installed. “Butterflies” are suitable for a light door leaf or where significant recesses are made for the body hidden hinge will not work.
Name of the accordion door design elements

DIY installation of folding interior doors.
 If you buy an accordion folding interior door in a store, then you will probably be recommended to pay extra for the installation of these doors, saying “it will be of better quality, trust this to professionals,” don’t believe it, it will probably be faster, three times more expensive, but no better quality. Installing a folding door is quite possible for an ordinary mortal who knows nothing at all about the “correct” installation of folding doors. And if you are exactly the person I’m talking about, congratulations, you will be able to cope with this task, and this and the following fragments of the article will help you in just such a matter.
 Although installing both folding and sliding doors does not require the creation of a door frame, you should still think about how to design doorway. After all, there can’t be bare walls between rooms. For example, a doorway can be plastered and painted, or covered with wallpaper, but most often a decorative false frame is used for these purposes. This is a kind of imitation of a real door frame, which serves a purely decorative role and is not intended for anything else, that is, a door CANNOT be hung on such a frame. And it consists of a box of boards fastened together with screws, installed in the opening.

Photo source: stroyday.ru/ (photo of the false box assembly)
Accordingly, you need to start the installation by creating such a “door frame”, and before creating it, you need to carefully measure the parameters of the door itself doorway(wall thickness, height and width of the opening). I will tell you about the next steps later in the article.
https://youtu.be/bVREAzQTNhg
Original title: How to Install Folding Doors and Bi Fold Doors
Video author: DIY Doctor
Watch the video master class:
Steps to install a folding book door with your own hands.
(photos, instructions, video master class)
 So, let’s use the example of a specific model to analyze the stages of installing a folding interior door, and, of course, a video master class will help us with this! In the last fragment of the article, I told you that it is best to create a decorative false frame for a sliding or folding door, but I also mentioned other methods for decorating a doorway. IN in this case Actually, the creator of this model did not use an imitation door frame, but simply painted the plastered doorway. Well, let’s say you have properly prepared the doorway for installation, and you can move on to the next stage. And the next stage is installing the guide. If you bought the door disassembled in a store, then the kit will include a guide, but in the same case, when you completely make the door yourself, you can do the following: buy separately an aluminum guide and a kit for installing a folding door, believe me, This way you can save much more money than buying a disassembled door.
 To install the guide, you must first measure the width of the doorway. And then the first one appears distinguishing feature from installation sliding door. The guide for a folding door is not installed above the doorway, but inside it, therefore, if you have created decorative box, then you will have to take into account its size so as not to make a mistake. Then, after you have made a guide of the required dimensions, drill several holes in it and fasten it in the opening with one screw, in the middle of the guide (this needs to be done so that you can then insert the door leaf into the guide), ready, the first part is done.
Step-by-step master class
Source of photo and video master class: https://youtu.be/RYONGEDsjRM
Original title: installation of an accordion door
Video author: Natalya Pukhovskaya
Watch the video master class:
We cannot confirm the authenticity of this drawing. Most likely it reflects a variation of only one type of folding door. And the list of door types is quite limited.

From different materials
Folding accordion doors, like book doors, can be made from different materials. Let's look at them in the photo galleries below.
Accordion door made of natural wood
 Natural wood. Durable material provided it is properly processed: the wood is impregnated with an antiseptic, covered with stain and varnish. Over time, the coating is updated. A door made of this material is not resistant to changes in humidity.
MDF accordion door
 MDF. The most resistant material, not susceptible to the destructive effects of fungus and mold. Compared to chipboard, the material is more suitable for making doors complex design. Chipboard is quite durable, lightweight, environmentally friendly, moisture-resistant and fire-resistant.
Accordion door made of chipboard
 Chipboard. Cheap, as it is a sheet of glued together sawdust. A door made of such material will be flimsy. Since it consists of sawdust compressed and glued together, the screws do not hold very tightly in it. The advantage of the material is good heat and sound insulation, but the design of the accordion door does not allow the material to fully demonstrate these qualities. Chipboard also has high moisture resistance and bio-stability, but still this is far from the best option for folding doors.
Accordion door made of plastic
 Plastic. Cheap, wear-resistant and water-resistant material. Ideal for a shower stall. Easy to process, does not chip, scratch or crack, and does not dry out. For interior doors, plastic with a pattern is usually used: wood, the color of the walls, etc.
How to install the door leaf of a folding interior door on a track.
(photos, instructions, video master class)
 So, let's assume that you have prepared the doorway, installed the guide and are ready to install the door leaf. Well, then let’s not delay, let’s start the installation right now!
First, check if everything matches required size, if yes, then great.
It is necessary to install rollers on the door leaf - the main part of the moving mechanism. By the way, here is another difference between a folding accordion interior door and a sliding compartment door: its rollers are not located vertically, but horizontally, relative to the ground, so they move along the walls guide, in addition, accordingly, the rotating axis is directed in the other direction, and, in addition, the rollers also have a rotating roller assembly, it is needed so that the door can be folded.  Otherwise, the steps are the same as for installing a sliding door, that is, one roller is installed on its two parts at the upper end of the door leaf. After the rollers are installed, you need to install the lower axis on which one part of the door leaf will be attached. Now you can insert the rollers into the guide.
Sections of the article:
Often a lot of money is spent on renovating an apartment. As a rule, you have to save money on interior doors. But you can save in different ways. If, for example, after renovation there is a sheet of chipboard or MDF left, you can create comfortable, high-quality and stylish folding interior doors yourself. Most original version folding doors are commonly called “accordion doors”. Self-assembled and installed door DIY accordion - profitable and stylish option for any interior.
Accordion door - what is it?
This is a folding door consisting of a large number of narrow sections connected by hinges or hinges. Such a door is usually installed in wide (from 1 to 1.5 m) doorways. When the door is opened individual elements They walk along a guide, which is most often fixed at the top and, like the bellows of an accordion, are folded against the wall.
Accordion doors fit well into almost any interior, as they take up little space. They are easy to choose for any opening. When folded they are almost invisible.

Advantages and disadvantages
It is not difficult to make and install such a door. Especially for those who were able to make decent repairs in the house on their own. In addition, such a door has a row significant advantages in front of regular doors.
Thanks to the ability of such doors to occupy completely small space they are in great demand in narrow rooms. For a corridor or hallway this is an ideal option.

The design of such doors is universal - they can open in any direction; to do this, you just need to swap the outer panels. If necessary, you can change the width of the door by adding or subtracting sashes.
Accordion doors have a special latch on the guide that prevents accidental opening. Such doors are also not afraid of drafts; they will not be able to close or open due to a random flow of air.
Such doors are silent in operation and do not have a characteristic creaking sound, like conventional swing door leaves. In addition, the folding structure can be easily automated.
They can be installed in showers and bathrooms, provided that the doors are made of waterproof material.
Among the disadvantages of such doors are low resistance to impacts and a relatively short service life.
Anyone who knows how to use a tool at least a little can make accordion doors with their own hands. The assembly process does not take much time, the materials are inexpensive and can be purchased at any hardware store.
Materials for production
Nowadays, making an accordion door with your own hands is not at all difficult. There are many building materials suitable for this purpose. The most common are wood, chipboard, MDF and plastic.
Tree
Solid wood is a fairly durable material that, if properly processed, can last. for a long time. After cutting into lamellas required sizes The wood must be impregnated with antiseptic agents, covered with stain and varnished. Protective covering will have to be updated periodically. The disadvantages of natural wood include sensitivity to high humidity.

Relatively cheap and not very durable material. Since it consists of sawdust compressed and glued together, the screws do not hold very tightly in it. The advantage of the material is good heat and sound insulation, but the design of the accordion door does not allow the material to fully demonstrate these qualities. Chipboard also has high moisture resistance and bio-stability, but still this is far from the best option for folding doors.

Compared to chipboard, the material is more suitable for the manufacture of doors of complex design. Chipboard is quite durable, lightweight, environmentally friendly, moisture-resistant and fire-resistant.

Plastic
It's inexpensive durable material with high water resistance. Easy to process, does not chip, scratch or crack, and does not dry out. For interior doors, plastic with a pattern is usually used: wood, the color of the walls, etc. An accordion door made of white plastic is more suitable as a partition for a shower stall.

One of the most expensive materials used in the manufacture of folding doors is strained glass. However, the process of processing it is quite labor-intensive, so it will be quite difficult to make accordion doors from this material yourself; in this case, it is better to purchase a finished product.
Accessories and tools
For the manufacture and installation of doors you will need special fittings; they can be purchased at construction or furniture stores. These are hinges, stoppers, hinged guides, axles, carriages with sliders, landing plates, and self-tapping screws. You will also need to buy a PVC edge for lining the future door. It is chosen to match the color of the entire structure. More will be needed door knob and a castle.

Tools need to be prepared electric drill with drills, electric jigsaw, metal ruler, glue, tape measure, hacksaw with files, square and pencil.
Manufacturing and installation
Designing and assembling an accordion door with your own hands is not that difficult. The main thing is to carefully consider the measurements and calculate everything correctly.
Design
The door design can be very diverse:
- Single-leaf - sliding from one door frame to another;
- Double-leaf - sliding from the door frame to the center.
Double-leaf, in turn, can be symmetrical or asymmetrical. In the first case, the number of slats (lamellas) in the right and left wings is the same, in the second - different.

Accordion doors consist of individual slats 10-15 cm wide, but can be wider. From the outside, they resemble blinds, but when closed they do not unfold individually, but move like an accordion, in connection with each other.
The number of lamellas will depend on their opening width. This must be taken into account when designing so that the mounted door does not end up narrower or wider than the doorway.
It is also worth paying attention to the fact that wide slats leave more space in the doorway, but less space inside and outside the room. Narrow ones are the opposite. Therefore, if the opening width is small, it is better to use wide slats.
Making a door
To ensure that making and assembling accordion doors with your own hands is not too difficult, we offer for consideration the option of assembling the simplest door model - a single-leaf one.
After the piece necessary calculations The sheets of the selected material are marked and the lamellas for the sashes are cut out. The finished lamellas are sanded along the edges, wiped with a dry cloth, glued to the ends of the PVC edges, then pressed tightly with a roller and left for a day until the glue dries completely. This procedure is not performed with glass and plastic doors.

Then the locations of the hinges are marked on the panels and holes are drilled for their fastening. The hinges are attached using self-tapping screws. Most often they are installed in groups of three, but if the slats are wide and heavy, it is better to increase the number of loops. To avoid displacement of the sashes, fastening is carried out when the canvas is in a horizontal position. There should be a gap of no more than 3 mm between adjacent slats when the doors are fully open.
Hinges are not hung on the outer ends of the outer lamellas, since such a lamella will be attached to the jamb on one edge, and will close the doorway on the other.

If you can find in stores suitable side joining profiles and plugs for the lower edge of the lamellas, the product will look like a factory one.
At the end of the outer lamella, which will be attached to the door frame, an axial pin is placed at the top and bottom. Holes with a depth less than the length of each pin are pre-drilled for them. A hole for the slider is also drilled in the upper part of the end of the lamella to which the handle will be screwed.

On the surface of the last lamella, grooves are made for the handle and the lock. The finished sashes are hung on the fasteners installed in the door opening.
It is important not to forget that when screwing self-tapping screws into the door leaf, it is very easy to damage it if you do not first drill holes of a smaller diameter in this place.
Installation
First, the guide profile is attached. If its length exceeds the width of the opening, the excess is cut off with a hacksaw. If necessary, holes for screws are drilled in the profile. Usually they are made at a distance of 25-30 cm from each other.

Before installation, a latch is attached to the profile. It should be on the side of the opening from which the slats will move. The end panel axis is inserted into the latch.
The individual wings of the door are folded and axial pins are inserted into the seating plates fixed at the fold. All this, together with the carriage runner, is inserted into the guide, then the profile is attached to the opening. Next, a receiving plate for the lower corner of the doorway is installed under the lower axis. It should be flush with the latch on the guide.
To adjust the position of the sash and its movement, a special adjustment key is required. It adjusts the end nuts, tightening or loosening them on the carriage and axles, thus adjusting the optimal functioning of the door.
If the opening length is more than one meter, it will be necessary to increase the number of runners. You may even have to run a rail at the bottom of the structure. In this case, the carriage wheel is installed on the outer lamella and driven onto the guide.

To fix the doors in any specific position, stopper flags are installed. They are attached to the bottom rail. This design is justified if the doorway is too wide. Accordion doors in narrow openings Usually they are not fixed, but opened and closed completely.
Making your own accordion door is not only a cost savings, but also a creative process. Today's variety of materials allows you to design the most unpredictable models. Instead of blind sashes, lamellas with glass inserts or parts with through decorative threads. If the wall on which the doors are attached has a hollow plasterboard construction, the accordion doors can be opened completely or partially inside. This will provide additional space savings.

In too big doorways or partitions the width of the entire wall, it is more reasonable to install door models with two parts, while you can use only one leaf, and the second one can be fixed in a certain position. After some time, change the functions of the valves and make the previously fixed one working. In this case, the roller mechanism will wear out much more slowly.
An integral part of any room is the doorway, and each owner designs it differently. Someone installs a standard, decorative, or even metal door, some prefer, although the latter option is fraught with certain difficulties. Recently, models called “accordions” have appeared on the market, they are also swing doors, the installation of which we will consider
Door Features

Regardless of the design, everything accordion doors have the required identical components: guides, stoppers, rollers. Their installation is not difficult, so it is also accessible to non-professionals.
Before purchasing the product, you need to measure the opening. It should be noted that if its width is within 1 m, then only the upper guide will be needed. When purchasing, you need to look at the package. Some manufacturers do not include extensions and trim, so they are purchased separately.

Standard kit (option):
- guides (1 or 2);
- connecting loops and carriage rollers (2 or 4 pcs.);
- panels;
- additional accessories and adjustment wrench.
It is necessary to pay attention to the number of panels and their width. Together they should completely cover the doorway. In addition, the names and numbers of fasteners correspond to each other. Otherwise, the installation will take a long time.
Stages of installing an accordion
Assembling the door plates into one whole, for which they are laid out on the floor next to each other. The method of fastening together may vary slightly (depending on the manufacturer), but the principle is simple. The result should be a solid canvas.
Side bars. They are installed vertically (checked with a level) and rigidly fixed in the opening.
Installation of guides. If their length is longer, then aluminum (plastic) can be easily cut with a hacksaw.
You need to pay attention to the holes in the guides for fastening to the opening. When shortening them, the part where the holes are located is cut off. You need to prepare the bar so that they are at its ends about 2 - 3 cm from the edge. Then the guide will be securely fixed. Along the entire length between the holes, 25 cm is enough, for the top - no more than 15, since the entire load falls on it.
Fastening the guides. After marking, holes are drilled and sleeves are installed for fasteners.
Even before starting work, it is necessary to check the “geometry” of the opening. The main thing here is strict horizontality, especially if there are 2 guides (top and bottom). Therefore, you need to use a building level. Practice shows that when removing and dismantling the box, the opening that opens is not a perfect rectangle. And parallelism of the top and bottom, as well as the sides, when installing the “accordion” is required.

You need to navigate according to the circumstances. Either leave the box and level the wood, sand it, or remove everything, but ensure horizontality by laying an additional layer of mortar. But at the same time, the fasteners must be longer so that they reach the material of the opening.
There is one nuance here - at first the guide is attached to only one self-tapping screw, and it is not screwed tightly.
After this, the door is hung on the guide (the runners are inserted into the groove), and the “assembly” is attached to the top of the opening according to the previously made markings. Next is the fastening of the rear half-panel with the installed vertical strip.
A magnetic latch is installed on the “front” half-panel (lock panel). Lastly, the door handle is installed.
- It is advisable to lightly lubricate the “runners” with technical petroleum jelly - this way they will glide better;
- It is desirable that the “accordion” itself be slightly wider than the opening.
Please note that this is only general technology works, since different models have their own design differences (for example, in the method of connecting the lamellas, in their material). In each specific case, you must follow the Manufacturer's instructions.
There are more than enough different methods for designing openings. The choice depends not least on the specifics of the room, its size and installation location. IN non-standard openings, built-in wardrobes, and sometimes in partitions, instead of traditional hinged panels, it is advisable to use folding analogues. And no matter what the skeptics claim, the accordion door can be installed quickly enough with your own hands, and the installation process itself is not particularly difficult if you understand the technology in detail.

Where to begin
Clear the opening
- Put the door in old box inappropriate for a number of reasons. Firstly, it is not a fact that they will not contrast with each other; secondly, during the reconstruction it becomes possible to partially redevelop the premises. And widening the opening is one of good options. That is why both specialists and those who have already dealt with self-installation accordion, it is advised to completely dismantle the jamb.
- After processing the ends of the wall, take measurements. Knowledge of linear parameters will allow you to select optimal model folding fabric. There is no point in making it yourself. The range of products is so diverse (in terms of the material of the slats, their shade, design) that when asked how best to make an accordion yourself, there is only one answer - it’s easier to purchase and install a ready-made one. This is what it all comes down to.

The only nuance is that accordion doors are supplied in various sizes, which depend on the number of slats, their width and manufacturer. All necessary data is reflected in the installation manual supplied with the product. Consequently, you will have to “adjust” the opening to the model you like, and not vice versa.
Purchase the necessary materials
Folding doors are available in fully equipped, and its compliance is checked in the furniture showroom. But only after the “rough” preparation of the work area will it become clear what else will be needed (certain tools, polyurethane foam, extensions, platbands, and so on).
After this, the necessary technological operations. The method of narrowing (expanding) a passage in a wall is determined by its material, condition and the capabilities of the craftsman: frame followed by concreting, reinforcement with rods, plastering, and so on. As a result, the opening should be completely ready for installation.

Operating procedure
This step-by-step instruction reflects only the general algorithm of actions and installation features. However, delving into the question of how to install an accordion door with your own hands, you should study the manual from the manufacturer. Some models have their own, albeit minor, nuances. For example, the number of loops recommended for each lamella (depending on the width and weight).
Arrangement of the box
Everything that was previously done in terms of preparing the opening, in fact, rough work. It needs to be refined; It is for these purposes that slopes and platbands are purchased. The specifics of their fastening is a separate topic. The master decides for himself how to fix the decorative strips to the base (using glue, self-tapping screws), focusing on its material. But only one result is needed - the right one rectangular shape opening.
Particular attention to the top; it must correspond exactly to the horizontal. Otherwise, after completing the assembly of the accordion door, its leaf will be skewed. Consequently - big problems with opening/closing, not to mention appearance. This means that some of the work will have to be redone.

Installing the guide
- It comes included. The length is standard, and therefore it will first have to be cut to the width of the opening.
- The peculiarity of fastening the rails is that it is necessary to correctly select the interval between the hardware. There are prepared holes in the guide, but if required for more reliable fixation, it is worth drilling additional ones. For example, if the wall is made of cellular blocks that are not very dense. In this case, the more fasteners, the better.
- When cutting the rail, some of the holes will remain on the removed piece. Consequently, fixation may be insufficient at this edge. It should be taken into account that for reliable fastening of the guide, the last screws in the row should be located no further than 2.5 cm from the edges of the strip.
- Some folding door models have 2 rails. The load on the top rail will be maximum, and therefore the recommended interval between fasteners is 150 mm. For the bottom guide, 250 is enough.

Fabric preparation
- All slats need to be laid out on the floor.
- The outermost one is determined, and it is subsequently rigidly attached to the opening. For doors that slide in both directions, it is assumed that two slats are fixed on the sides of the opening.
- All planks are equipped with hinges and wheels according to the attached diagram. If the accordion budget option, then you will have to drill holes.

Door installation
A fairly simple operation: the lamellas are folded, after which the wheels of each, in turn, are inserted into the profile of the guide. All that remains is to place plugs along its edges and fix the outer panel. Otherwise, the canvas will begin to “move” spontaneously. For this purpose, the kit includes a docking profile (or two).

Fastening accessories
Usually, we're talking about only about the pen. Although some accordions provide for the installation of a lock.
After completing the door assembly, the wheels should be lubricated (with technical Vaseline, for example). This will extend their life and ensure silent sliding.

They will help those who are thinking about how to make an accordion door with their own hands:
- To make planks, you can use thin boards, multilayer plywood, chipboard, fiberboard, and PVC siding. It is necessary to take into account the location of the intended installation. Plastic is more suitable for installing an accordion in the openings of built-in wardrobes or for curtains, for example, in showers. But you shouldn’t use it for an interior door - it’s difficult to fit into the interior. If the lamellas are attached only at the top, this is definitely not an option - the slightest draft will lead to spontaneous movement of the folding sash.
- Its weight can be artificially reduced in order to simultaneously facilitate installation and decorate the canvas according to the principle of paneled doors. That is, provide inserts made of thin glass, plastic, film or original grilles. Focusing on a specific opening, select best option not difficult.

- To avoid skewing of the canvas panels and possible snags, it is recommended to leave a gap of about 2.5 mm between them.
- The accordion design is designed so that it is slightly wider than the opening for which it is intended.
If the installation principle is clear, then installing the door, regardless of its modification, will not cause any difficulties. The main thing is to properly prepare the opening, taking into account all the features of the wall material. And what kind of accordion to choose (make) is up to the owner to decide.


