Do you like to visit on New Year's Eve? And at the same time, like everyone else, come to visit with sweets and a bottle of champagne? This is not about us! After all, you can, with a little effort, turn the same sweets and champagne into a gift with your own hands. Decoupage of champagne for the New Year is a good reason to combine business with pleasure. You will truly enjoy the creative process and the result of your work. And an ordinary bottle will turn into a small masterpiece in your hands. It will be more pleasant to drink from it. And perhaps she will inspire some of your guests to do unusual things. New Year's toasts .
To work you will need:
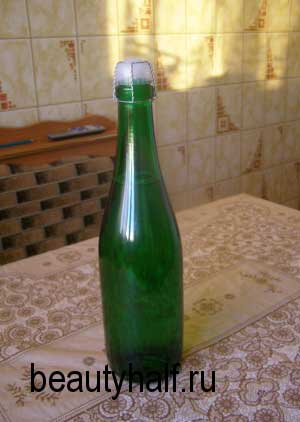
- a bottle of champagne (sealed, with a drink inside);
- a napkin with a suitable pattern;
- acrylic paints(white, blue and gold);
- PVA glue;
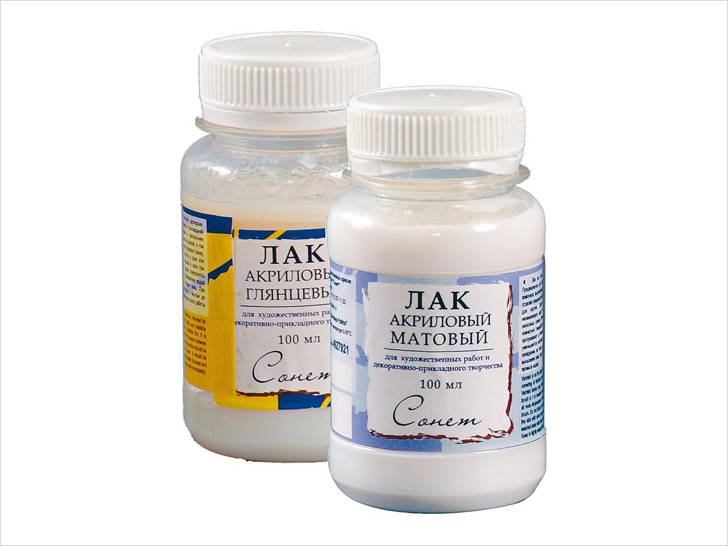
- acrylic lacquer;
- ribbons, rhinestones.

Also prepare a foam sponge or sponge, brushes for painting and applying varnish, a drop of Moment glue for gluing the decor, a small sandpaper, toothpick.
Master class on New Year's decoupage of champagne bottles
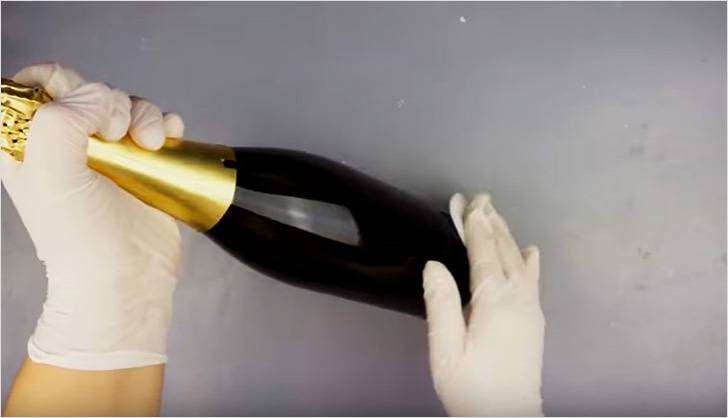
First, let's free the bottle from all labels, stickers, and foil on the neck. To facilitate this procedure, the bottle can be placed in a container with warm water for about an hour.
Wet labels will be easier to remove. Now the bottle needs to be degreased with any dishwashing detergent.

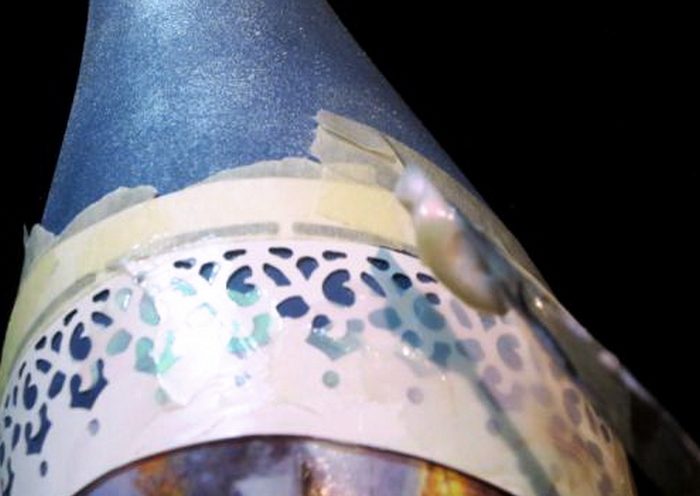
Cover the cork with small pieces of napkin. If one layer is not enough, you can glue another layer of napkins onto the well-dried previous layer. It’s not worth gluing many layers, because someone will also have to open it.
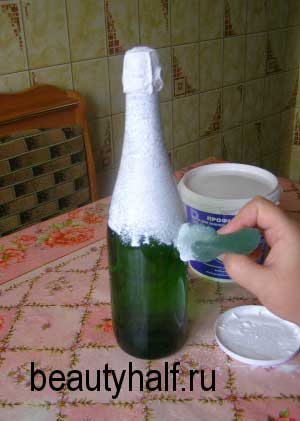
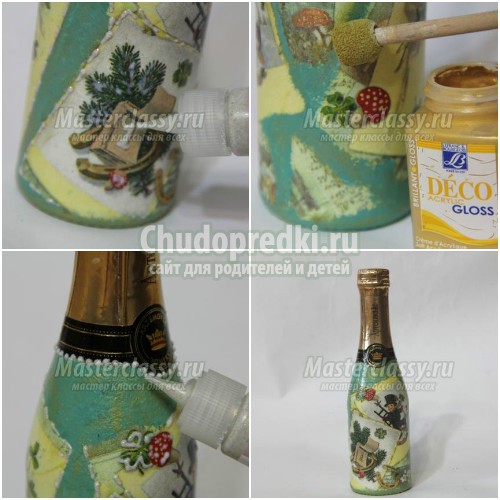
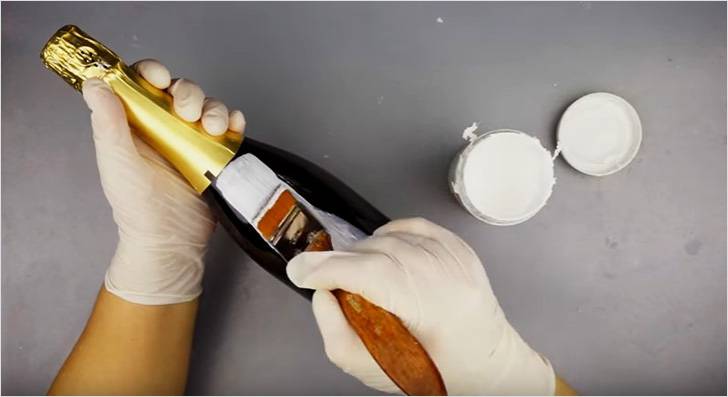
Using a foam sponge or sponge, apply acrylic paint to the dry surface of the bottle. Water-based paint can be used for painting works, and not special for decoupage.

After applying one coat of paint to the bottle, the surface is not uniformly white. When the paint dries, you need to paint it again.
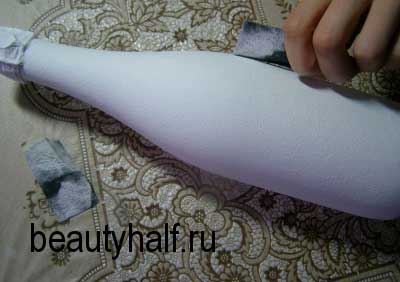
Now the bottle is white, but it is full of pimples due to staining with a sponge. You can smooth the surface with fine sandpaper by sanding the entire bottle.
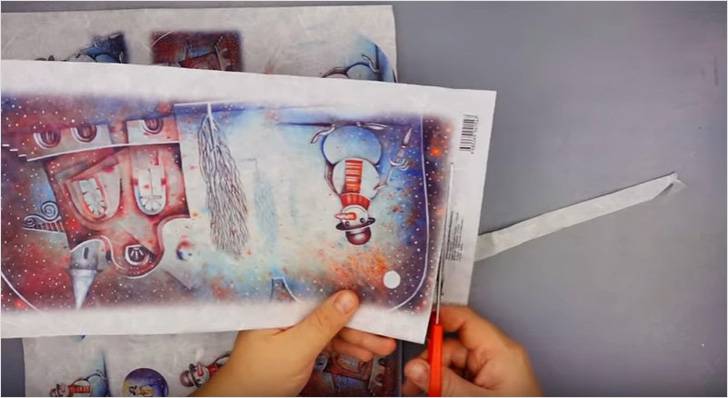
We cut out fragments for decoupage from a napkin and glue them to the bottle in any way. This work uses the puddle gluing method. Apply a speck of water to the middle of the glued fragment with a brush and expand this spot from the center to the edges, smoothing the napkin with a damp brush. The brush needs to be wetted all the time, and we try not to press the napkin too hard with the brush so as not to tear it.

We straighten the folds on a wet napkin by slightly pulling the napkin by the edge from the center to the sides.
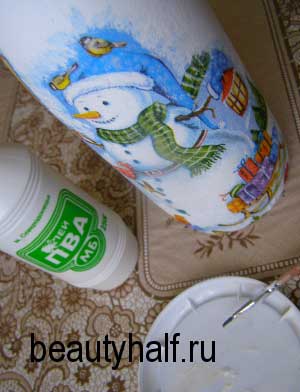
We dilute PVA glue with water in a 1:1 ratio and apply it to the entire surface of the napkin without waiting for it to dry. In this case, you can use a toothpick to smear the cut edges of the napkin. This technique allows you to avoid the transition step from the napkin to the surface of the bottle. Dry the glue layer well.
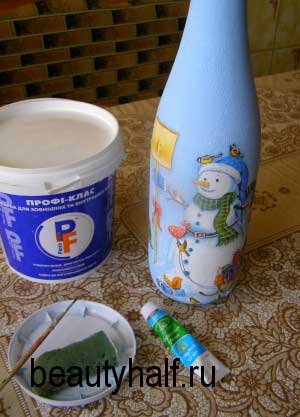
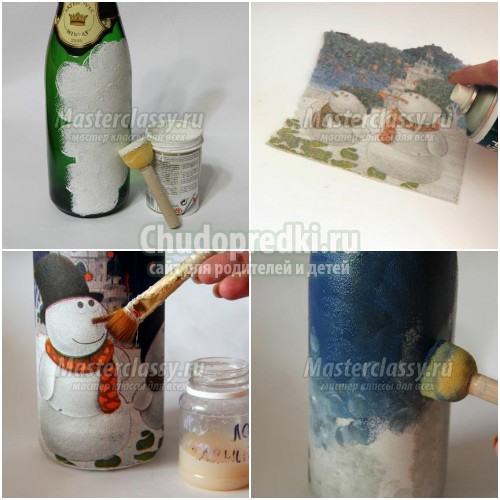
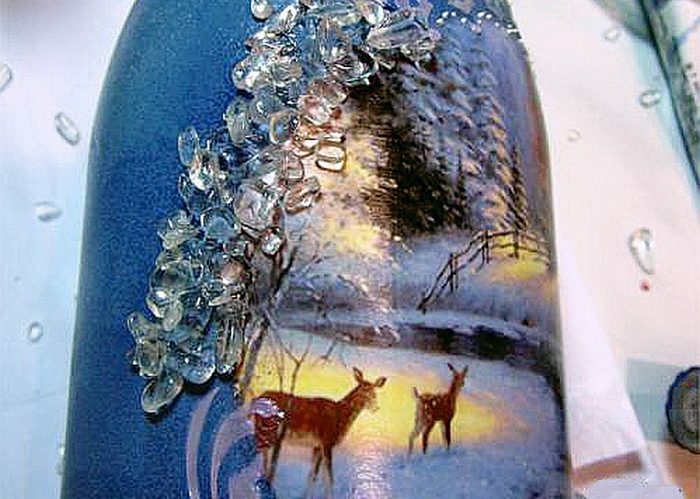
To make the background monochromatic, take enough white paint to paint the entire bottle and add a drop of blue paint to it, achieving desired color. Mix the paint thoroughly and apply it to the bottle using a sponge. Where necessary, you can paint on it with a brush.

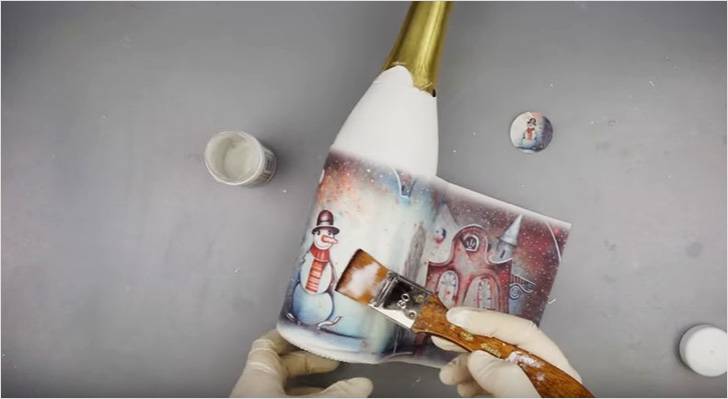
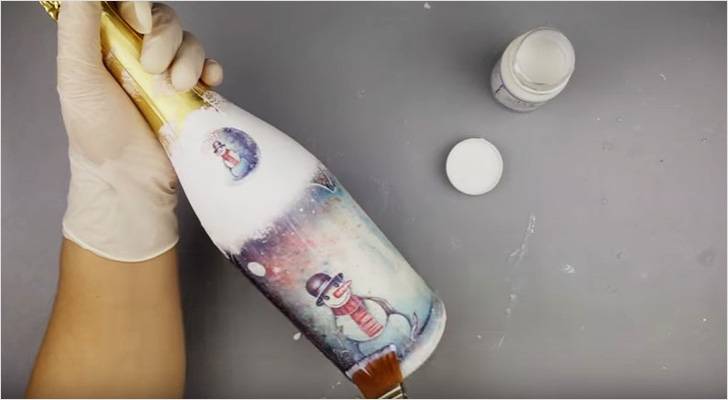
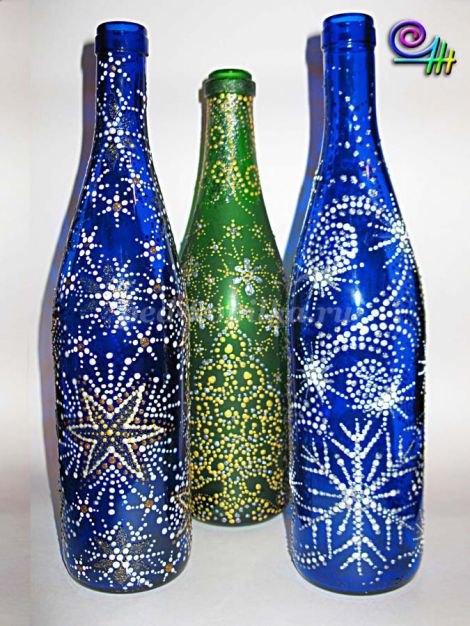
On a dry blue background with a semi-dry sponge we apply chaotic white spots-clouds, paint a little on the snow on the Christmas trees and on the snowman.

Using the opposite tip of the brush, apply large dots of white paint. Between them, use a toothpick to fill the surface of the bottle with small white dots - snowy weather is guaranteed.

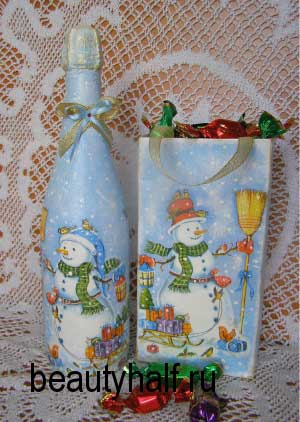
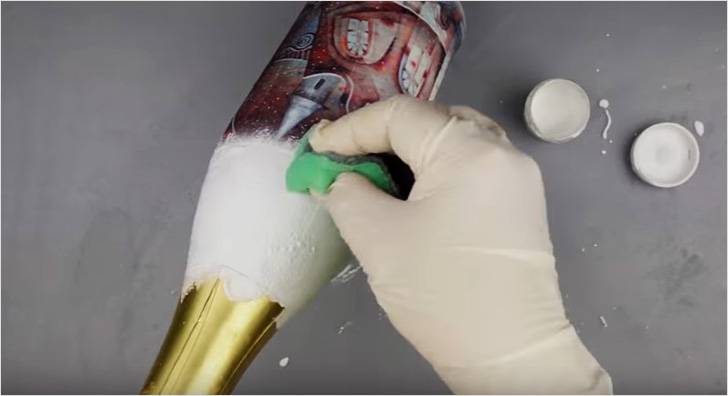
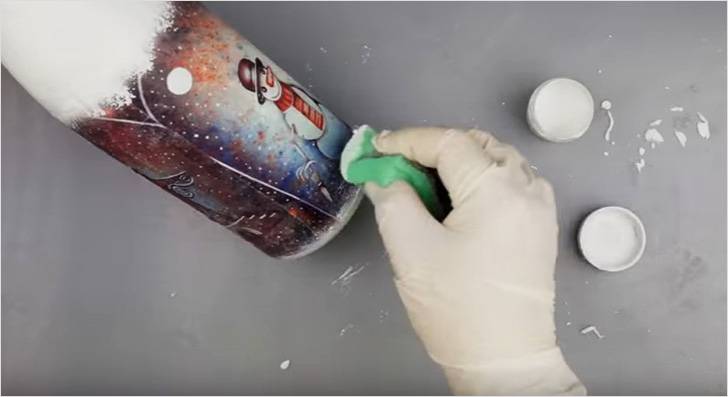
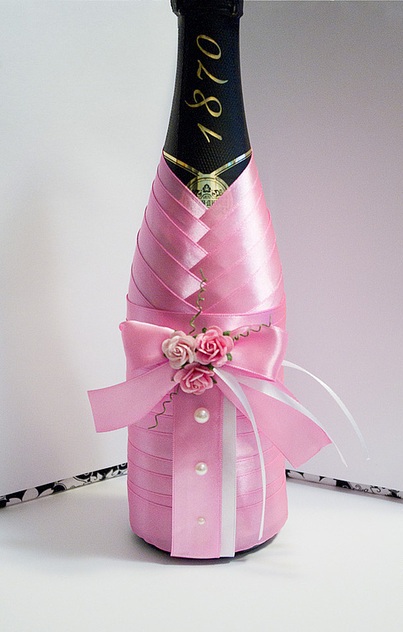
We highlight the relief on the cork a little with gold paint, applying it with a semi-dry sponge. Apply 1-2 layers of varnish with intermediate drying. The varnish can be any, but acrylic dries quickly and does not have a strong odor, so it is preferable. The neck of the bottle can be decorated with rhinestones and ribbons, making bows out of them. It is better to glue the bows using superglue. You can pair the bottle with a candy bag. As a basis, you can take a ready-made box, which we glue on the inside, and decorate the outside in the same way as a bottle. In the finished box, we punch two holes on both sides into which to stretch the ribbons for the handles.
If you are thinking about a great New Year's gift for family and friends, then call for help Decoupage champagne for the New Year. As a result of your labors, you will get beautifully decorated bottles that will be an excellent gift.
Decoupage of champagne for the New Year - master class
Decoupage of champagne bottles for the New Year
Bottles decorated with craquelure cracks look very beautiful. At the very beginning, you should properly prepare the vessel - first wash it thoroughly with detergent, then remove all labels. A clean glass surface must be degreased - wipe it with acetone or alcohol.

Add a little red acrylic to the acrylic art primer, and then prime the entire surface. The resulting pink layer will also act as a background. If you think that one layer is not enough, then apply a second one.
The next step is to apply a craquelure layer - apply a layer of PVA glue to the vessel. Then cover everything with white acrylic paint using a sponge or sponge. After drying White paint it will begin to tear, creating those same craquelure cracks. If you want the process to proceed faster, you can use a warm stream of air from a hairdryer. Paint the bottom again with white acrylic.
Tear out the napkin motif with the image of cute cats, separate the colored layer - it will be the top one. You must attach an image using a file - place the decoupage motif on the file, and then apply an adhesive solution (PVA with water). The file should then be placed on the bottle and carefully removed. The motif will remain flat.

After complete drying, decorate the background - make small curls using glitter contours. Also apply glitter to the bows and Santa's cap. Apply small dots using a green outline. You can also decorate the lid with a glitter contour.
When all the decor is thoroughly dry, you will need to spray a quick-drying aerosol varnish. So you have decorated it, the craquelure effect will look extremely attractive.
MK decoupage champagne bottles for the New Year
Soak a mini bottle of sparkling drink in a bowl of water for several hours, then remove any swollen labels. Spray the bottle with glass cleaner and then wipe thoroughly. After degreasing, coat the surface with white acrylic paint in two layers and wait until dry.
Tear off the pieces from the decoupage napkin that you plan to use while working. It is important to tear it off and not cut it off so that the edges turn out wavy. To work, you will only need the top color layer.
Place the fragment on the chosen place and coat it on top special glue for decoupage. The glue must be distributed evenly with a brush, in this case wrinkles will not appear on the napkin. After drying, you will need to coat it with acrylic varnish in one layer.
Be sure to draw on the background, because the decoupage motif will not cover the completely white background. For painting, mix olive and white acrylic paint to create a suitable shade. Use the resulting shade to paint over all the existing gaps between the napkin; if you wish, you can use it to “refresh” the entire background of the fragment (for ease of work, use a small brush).
The gift will look very vintage if you apply uneven lines around the design with gold acrylic using a foam sponge.
Golden glitter is perfect for adding volume to antique postcards. Outline some elements. In conclusion DIY champagne decoupage for the New Year Cover the vessel with several layers of acrylic varnish with a good gloss, and then wait for it to dry.
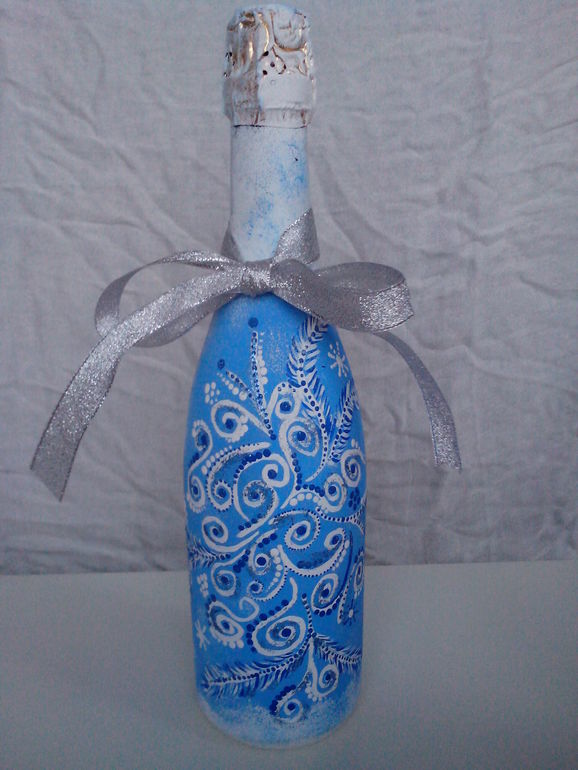
Champagne in decoupage style for the New Year
Remove all labels from the sparkling wine container and degrease with alcohol. Then, using a dish sponge, coat the glass with acrylic primer. Cut out a fragment from the decoupage card and glue it to the front side, then do the same manipulation and glue the fragment to the back side. Cover the container with acrylic primer and grab a little of the neck.

To obtain a rich blue tint mix white and blue acrylic, cover the surface with a sponge. Outline the decoupage motifs with white acrylic.
Decorate the neck with a satin ribbon and use a glue gun to secure it.
Cover the product with acrylic varnish and wait until it dries. For additional decoration, add stars and snowflakes.

Decoupage of champagne for the New Year - photo
Tear off or wash the labels; the glass will need to be wiped with some kind of degreasing agent. You can use alcohol, acetone and even nail polish remover.
Using a sponge or foam sponge, paint the glass in White color- the first layer should be thin, with the second achieve a uniform coating.
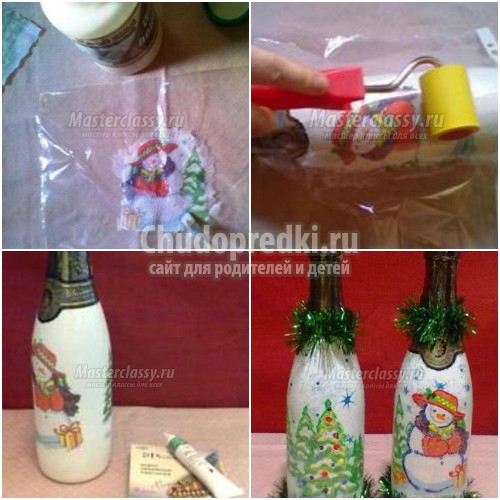
Tear off the fragment with the image of snowmen from the three-layer napkin. Remove the bottom two layers (there is no pattern on them), and sprinkle the paint layer on the back side with a special glue designed to temporarily fix the pattern.
Place the sticky napkin on a white background, straighten the thin paper so that no wrinkles form. It is recommended to tear the upper part of the fragment, which will be located close to the neck, a little so that creases do not form. After you have glued the sticky piece to Right place, you will need to coat it on top with acrylic varnish, which will act as decoupage glue.

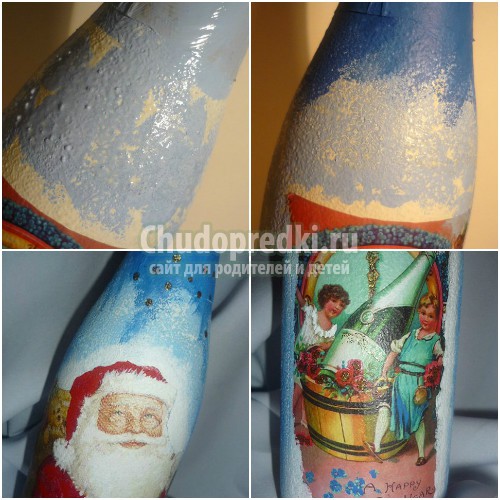
Wait half an hour, and then you can start painting. “Smack” a foam sponge with paints of black, gray, white and blue colors. Try to get a smooth transition from light to dark shades. Leave the craft for another half hour.
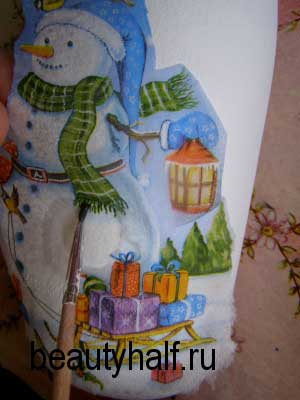
You can highlight the snowman figures using a universal pen or a black outline. The hat and scarf can be made “knitted” by applying volumetric acrylic contours. By the way, you can master and decoupage of champagne for the New Year with fabric. The silver outline will allow you to make the walls of a magic castle look voluminous, and you can glue snowflakes from foil to the winter sky - “plant” them on acrylic varnish. It is recommended to outline the edges of the foil with a silver outline in order to hide any irregularities.
The final stage of making a New Year's gift will be the application of several layers of glossy varnish.
Decoupage of a champagne bottle for the New Year - master class
A purchased bottle of sparkling wine must be soaked in water for some time. cold water(You cannot keep a full container in a hot place, otherwise it may explode).

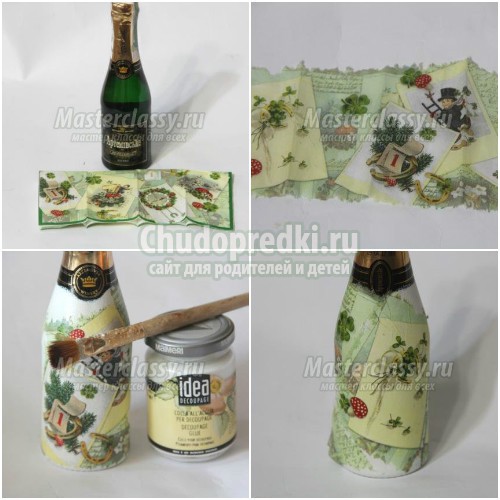
Using a regular sponge, prime the glass, then cover it with white acrylic paint. Cut out the image of Santa Claus from the New Year's napkin, separate the colorful layer. Cut out a Christmas fragment from a decoupage card.
Glue Santa Claus to one side of the bottle and a Christmas motif to the other. PVA glue can be spread over the decoupage material using your fingers (if you have experience) or a brush. Apply in some places thin layer one-component craquelure varnish. After 4-5 minutes, apply blue acrylic with a sponge. Apply paint very carefully, trying not to get the craquelure twice. Cracks will begin to form as the paint dries.
After drying for several hours, you will need to coat the top with blue paint. Add blue where needed. Once dry, brush white over the Christmas image and the outline of Santa Claus. In some places you also need to add red color and glitter glitter. After drying, traditionally open the gift with acrylic varnish.
Decoupage champagne bottle for New Year - photo
Soak the labels thoroughly and remove them. Cover the label that covers the edge of the foil with masking tape. To degrease, you can use hydrogen peroxide or alcohol.
Cover the glass with primer or white acrylic - this should be done with jerky pokes with a piece of dishwashing sponge. Apply two coats, allowing drying in between.
Simply tear out the desired decoupage pattern from the napkin, lay it face down on the file and coat it with PVA. Taking the file by the edges, attach it to the bottle. Smooth the pattern with a rubberized roller - move from the center to the edges, removing excess PVA, as well as air bubbles.
Remove the file carefully; if there are traces of glue left on the surface of the pattern, they must be carefully removed with a cotton pad. After half an hour, using a volumetric contour, you can highlight the details of the picture (place accents, add brightness). When it dries, cover with a couple of layers of acrylic varnish, remove masking tape from the neck and decorate with Christmas tinsel.
Of course you can buy champagne decoupage for the New Year- on the eve of the holidays, there will be a lot of such crafts offered on handicraft forums, but you will agree that it is much more interesting to do everything yourself.
If you have any questions about decorating bottles, you can always look decoupage champagne for New Year video. Such videos will reveal to you many secrets of the masters.
If you liked our site, express your "thank you"
by clicking on the buttons below.
New Year is celebrated only once a year. So why not decorate a bottle of champagne in an original way for this holiday. There are several ways. In particular, clothes are sewn for the bottle, for example, in the form of a Santa Claus or Snow Maiden outfit, wrapped with ribbons, tied with bows, pasted over with buttons, cereals, and so on. But we will talk about another method - decoupage.
In essence, the technique is an appliqué that can decorate a New Year's bottle of champagne in an original way. It happens that they use napkins, but sometimes they also decoupage bottles using fabric. This technique is simple, but certain knowledge will still be useful, for example, what materials to use, what actions need to be performed and in what sequence.
List of necessary items
| A bottle of champagne is the base. The labels must be removed from it. | |
|
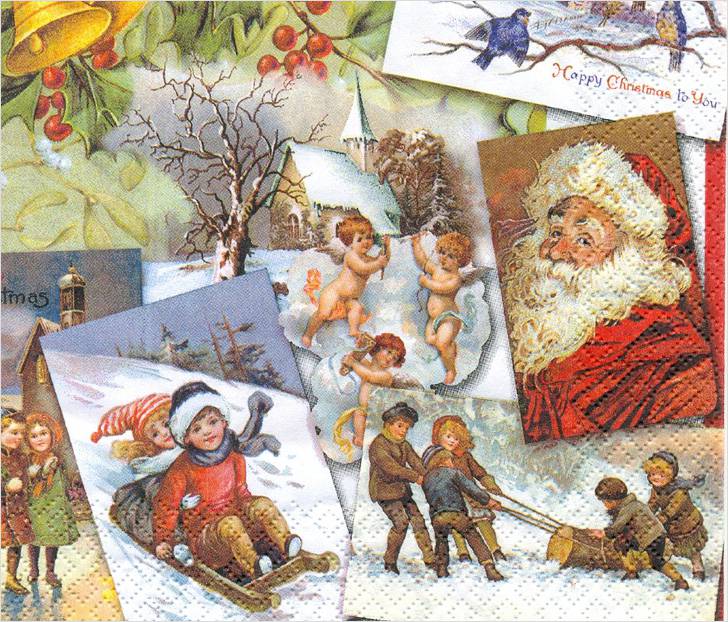
Choose suitable napkins or print the image on regular office paper. |

|
Purchase acrylic paints in the required colors or white paint and colors. |
|
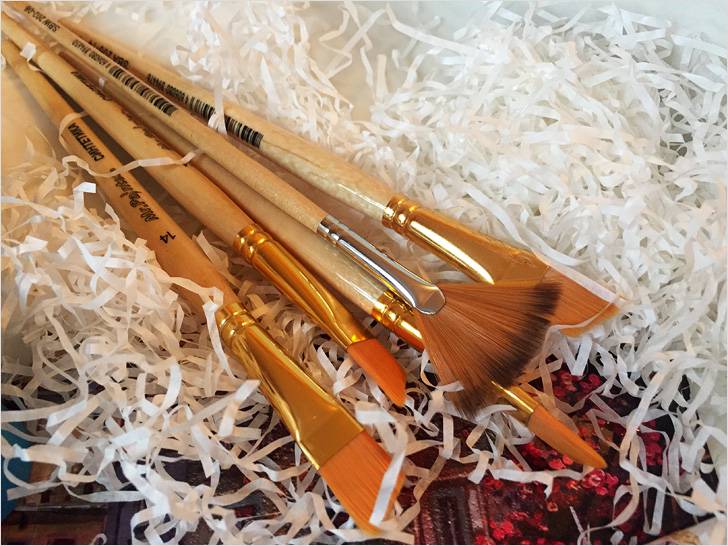
You need synthetic brushes that won't let hair come out. It is very convenient to work with a special decoupage brush. It looks like a fan. |
|
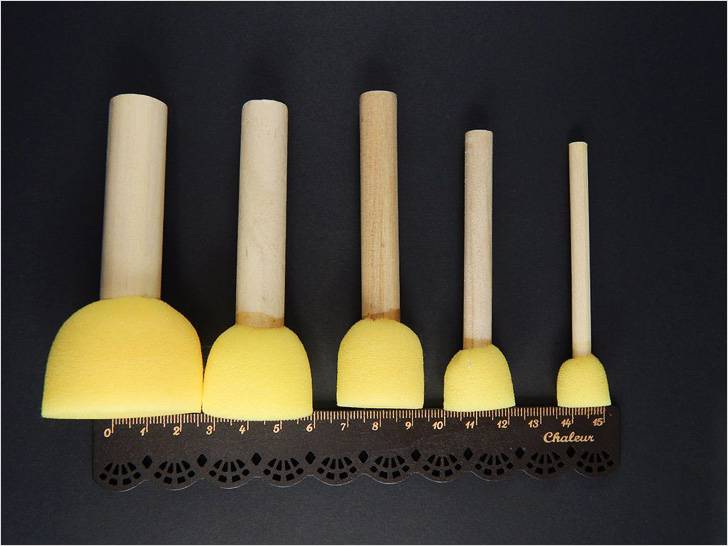
You will need a sponge to apply paint. It can be a piece of foam rubber or a regular dishwashing sponge. |

|
Do not forget about alcohol or acetone, since the surface must be thoroughly degreased. |
|
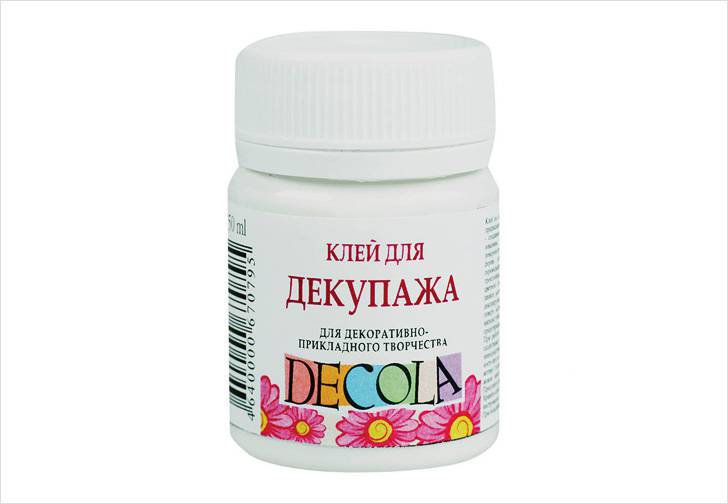
The napkin is glued with special decoupage glue or regular PVA. |
|
The image is coated with acrylic varnish at the end. |
Scissors will come in handy if the image needs to have smooth edges.
Preparing the image
Napkins are most suitable for decoupage. They are thin enough so that the edges are not visible on the finished product. But it is not always possible to choose a successful plot or suitable image sizes. Images printed on a regular sheet of paper significantly expand the boundaries of imagination. But here one significant problem arises: how to thin the image so that it becomes soft and pliable, like a napkin. There are two known ways to achieve the result.
In both cases, the image must first be coated with 2-3 layers of varnish and allowed to dry.

In the first case, the printed picture must be placed in warm water for several minutes and the bottom layer should be allowed to soak. At the same time, be careful not to damage it with water. upper layer. Then the image is blotted with a towel and the paper of the bottom layer is rolled up with your fingers. A thin facial layer remains.
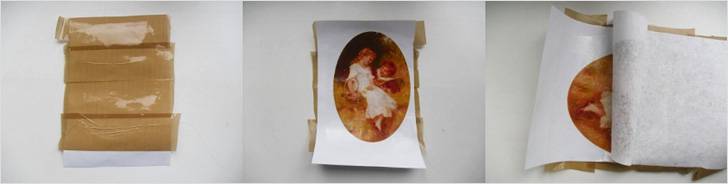
In the second case, the patched picture is covered with tape on the reverse side, pressed well, then the tape is carefully separated along with the layer of paper.
Step-by-step master class on decoupage of a champagne bottle
Below you can explore step by step instructions by decoupage using a decoupage card.

You will need:
- a bottle of champagne;
- decoupage card;
- gloves;
- alcohol;
- brush;
- acrylic primer;
- scissors;
- decoupage glue;
- white acrylic paint;
- Matt lacquer;
- sponge.
 |
Degrease the glass with alcohol. |
 |
Cover with acrylic primer. |
 |
Then we paint it with white paint. |
 |
We cut out the design, or better yet, tear it off with our hands. |
 |
We attach the fragment to the bottle and apply glue on top. Start smoothing the napkin from the center to expel all the air from under it. |
 |
Now we need to mask the transition. Apply paint overlapping onto a napkin. We decorate the bottle with white paint, although you can use any color. |
 |
Don't forget about the bottom of the bottle. |
 |
Cover with varnish. Let it dry and make another layer. |
Video: decoupage of champagne with glue drips
Video: decoupage with volumetric elements
Reverse decoupage with window
Bottles with a window look original. If you look into it, a beautiful design shines through the drink. Try making this decoupage with your own hands, following the instructions. You will need:
- champagne;
- self-adhesive film;
- priming;
- White paint;
- acrylic lacquer;
- imitation snow;
- glue.
 |
This is the wonderful result you should get. |
 |
First, cut out the design from a napkin. We apply it to the bottle and glue it with glue. Let it dry. |
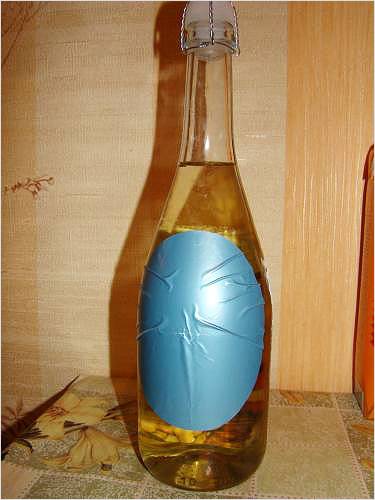 |
Opposite the picture we glue an oval cut from self-adhesive film. |
 |
We prime the bottle. We paint it in the desired color. |
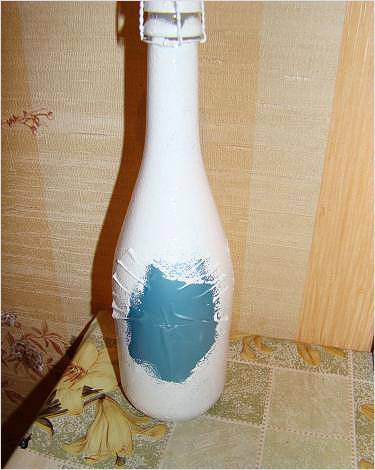 |
Feel free to visit self-adhesive film. |
 |
You can attach another image on top of the picture, which is glued on the back side. in the usual way. Self-adhesive film can be removed. It is advisable to trim the paint a little along the contour before removing it. Now decorate the outline of the window with imitation snow and coat the bottle with varnish. |
Decorate with fabric
In general, the procedure will be similar to regular decoupage, only the fabric is first glued to the bottle.

Note! When choosing fabric for decoupage, choose a natural material: cotton or linen.
- Dilute PVA glue with water in a 1:1 ratio in a container.
- Place a piece of fabric there. Let it soak in the composition.
- Squeeze and wrap the bottle, forming folds and creases.
- Let dry.
- And then we follow the well-known scheme: prime it, glue a fragment of a napkin with a pattern.
- If desired, you can paint the folds in different shades, achieving visual depth.
- Then, when the paint dries, coat the bottle with several layers of varnish.
Video: champagne decoupage using fabric
- The surface must be well cleaned.
- Parts that should not be covered with paint, even accidentally, should be sealed with masking tape.
- Allow each layer of acrylic paint to dry.
- Do not cut out fragments, but tear them off with your hands, torn edges easier to disguise.
- All air bubbles must be expelled from under the napkin.
Additional decorations for a decoupaged bottle
If you wish, you can limit yourself to only decoupage the bottle and not use any additional decorations. But it is necessary to know about wider possibilities. You can use:
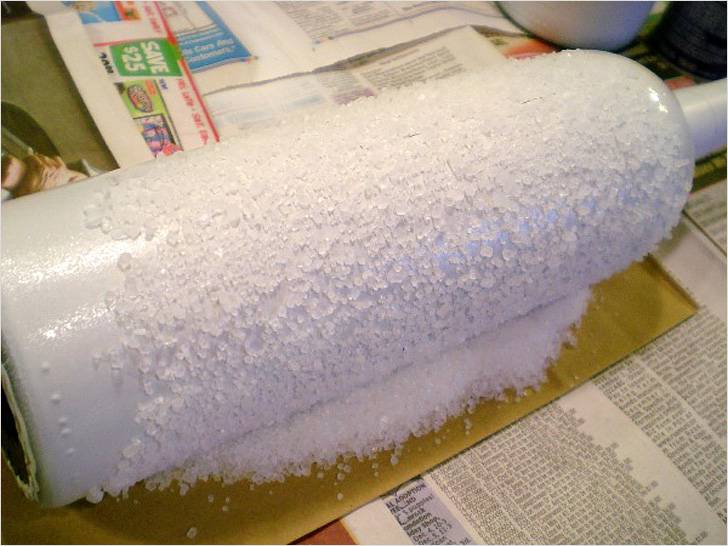
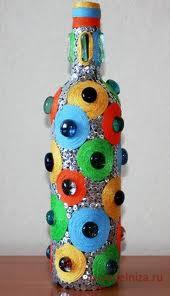
- Salt. If you roll a bottle of paint that has not yet dried on a table sprinkled with salt, you will get the effect of snow. Snow patterns are first drawn with glue on the bottle, and then sprinkled with the same salt. This allows you to make a certain ornament.
- Groats. It will look interesting New Year's bottle rice, semolina.
- Ribbons. Using ribbon, you can decorate the neck of a bottle by wrapping it and placing the ribbon on glue, or simply tying a beautiful bow.
- Lace. Lace motifs will definitely not be superfluous.
- Shell. The easy way achieve a craquelure effect.
- Fir branches. They will create a New Year's mood and add volume.
- Cones. They will go well with spruce branches. The main thing is to glue them well.
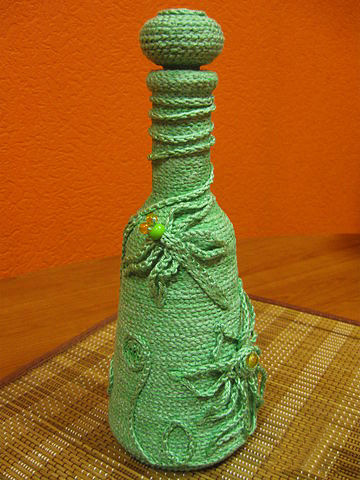
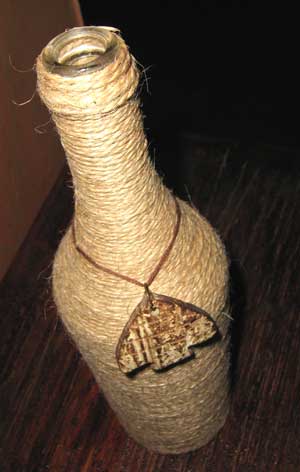
- Threads. They can also serve as the main decorative element.
Video: eggshell mosaic on a bottle
On New Year's Day, we all try to give as many gifts as possible to each other, especially to our loved ones. To do this, you can use a variety of objects, embodying your ideas in decorating them.
New Year's decoupage champagne bottle


In our case, we’ll try to decorate a bottle of champagne with our own hands.
 Photo 2 – Decoupage of Christmas tree decorations in the shape of a center and a New Year’s box
  Photo 3 – Decoupage of a plastic Christmas tree toy
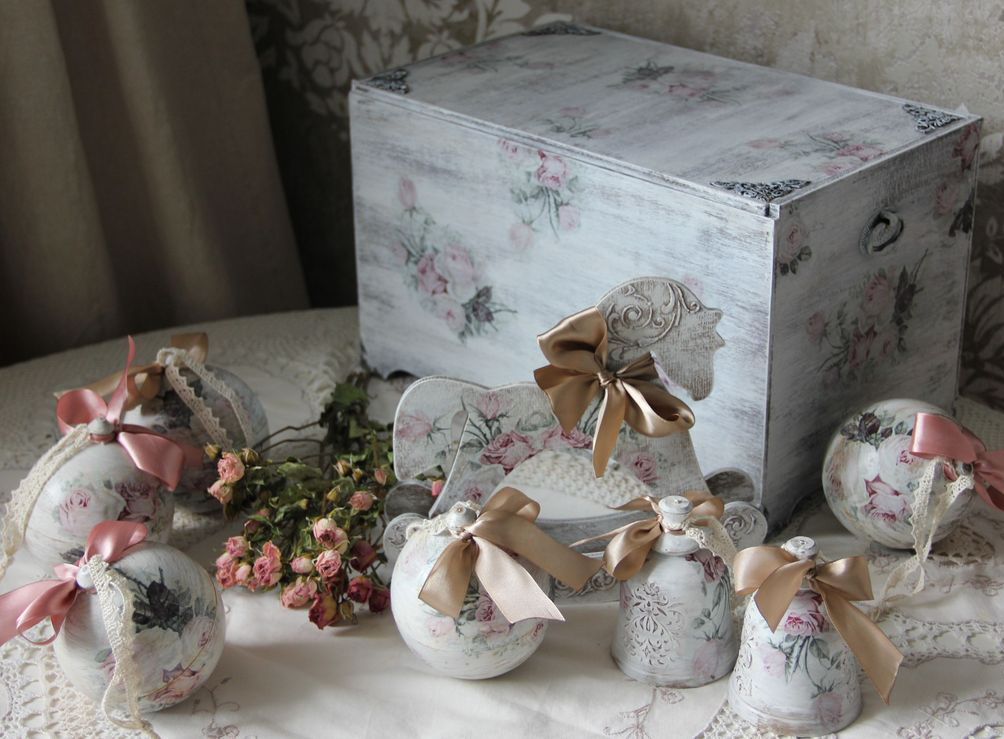
 Photo 4 – Decoupage of Christmas tree decorations and New Year’s box in Provencal style
 For this you will need:
- alkyd enamel as a primer for glass;
- sponge;
- disposable gloves;
- napkin;
- acrylic paints;
- gel paste in two colors: purple and green;
- putty;
- stencils;
- baguette paste;
- rhinestones.

To make the neck you will need:
- narrow satin ribbons;
- glue "Moment".
At the first stage, it is important to thoroughly prime the bottle. Using a sponge, apply the enamel, moving it vertically from top to bottom. If everything is done carefully, it will level out well.
IMPORTANT! Try to work in a ventilated area to avoid the accumulation of unpleasant odors.
Prime the bottle with one layer. Then we paint, constantly adding a drying retardant. If the bottle is not painted densely enough, you should once again paint with light paint from the neck to the middle.


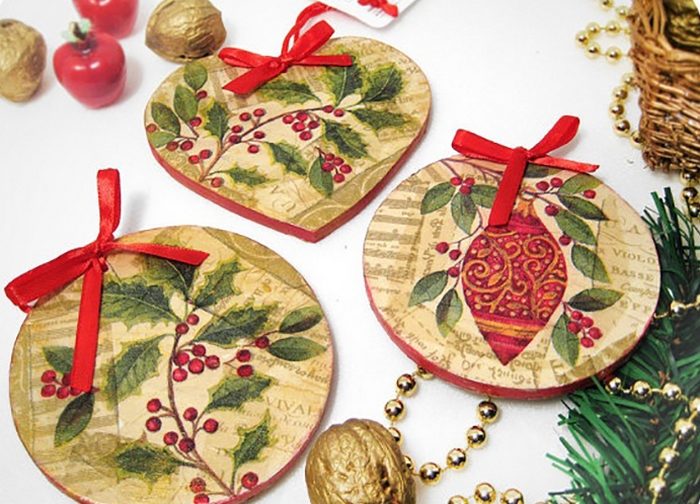 Photo 9 – Decoupage of Christmas tree decorations made of wood
 It is worth noting that this bottle decoupage can also be used for wooden cutlery. The painted product is coated with matte varnish. This should be done from the neck to the bottom, slowly turning the bottle.
 Photo 10 – Decoupage of Christmas tree decorations made of thick cardboard
 Photo 8 – Decoupage of Christmas tree decorations from book pages
Let's start decorating the still semi-finished product. We apply multi-colored gel pastes to get an iridescent color. The stencil itself must be filled with putty and, after it dries, tinted with color. After the stencil patterns have dried, we glue rhinestones onto them.
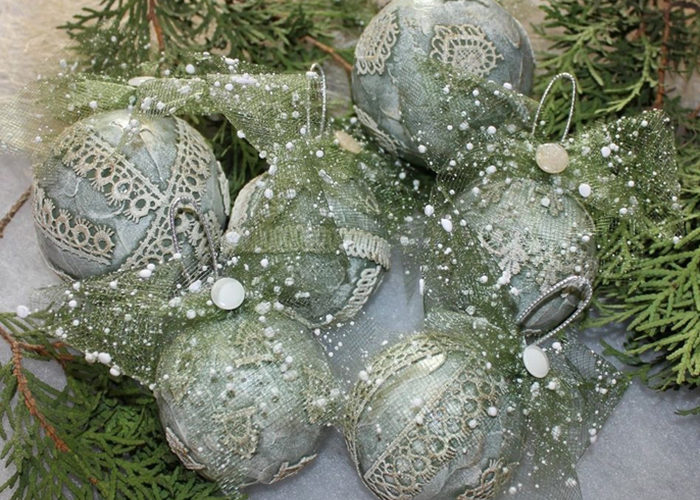 Photo 13 – Decoupage of Christmas tree decorations with ribbons and fabric mesh
  Photo 14 – Decoupage of Christmas tree decorations: using openwork ribbons, plastic snowflakes and mother-of-pearl beads
 To increase the effect, you can add some dotted patterns with contour paste. Once everything is completely dry, close the neck with tapes, gluing them to the very top, and then using double sided tape We wrap it once around its axis.

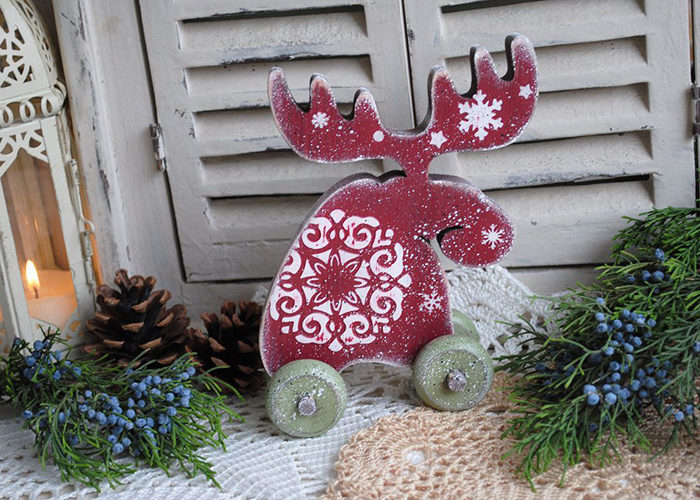
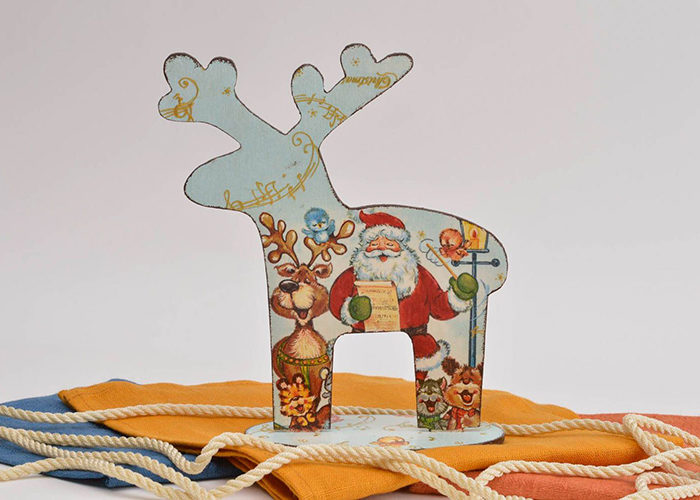
 Photo 15 – Decoupage New Year's decor: wooden deer
To prevent the edges of the tape from fraying, they need to be burned a little. From the description it is clear that decorating a bottle with your own hands is absolutely easy. Design ideas You can borrow it from the Internet or come up with it yourself.
Champagne decoupage: video master class
In the video you can see a master class on elegant champagne decoupage.
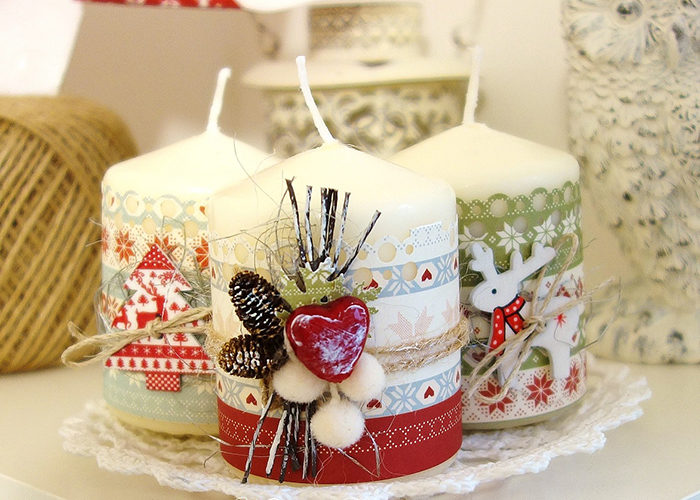
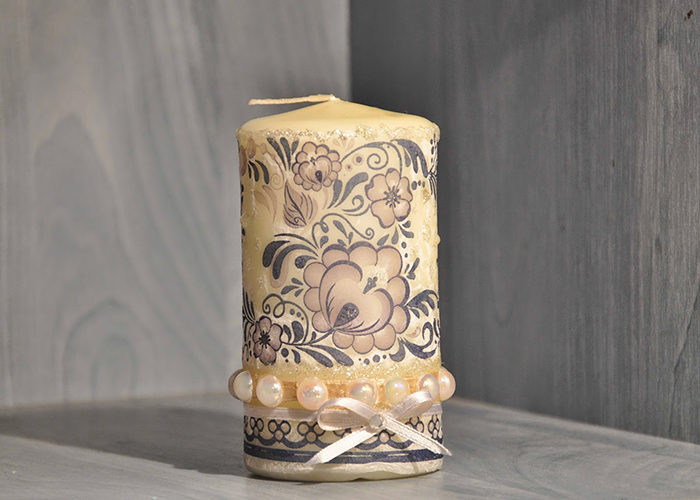
Decoupage of candles for the New Year
To decoupage a large candle for the New Year, you will need the following materials:
- two simple candles;
- two small boxes of different sizes;
- cereals, coffee beans, beans, dried flowers, dried fruits;
- skewer.
Take a candle, break it into small pieces, and remove the wick.
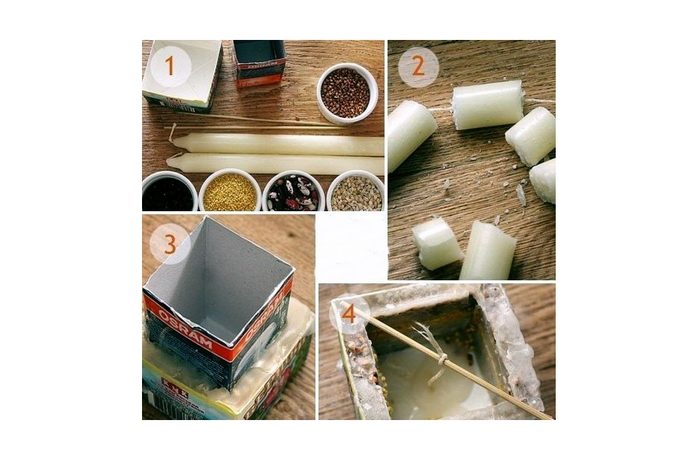
It needs to be preserved and the wax melted. The smaller box should be placed in the larger one, and the gap should be filled with a layer of any grains. Then pour melted wax and let it harden. When the final cooling occurs, remove the smaller box. Then a little melted wax is poured onto the bottom.
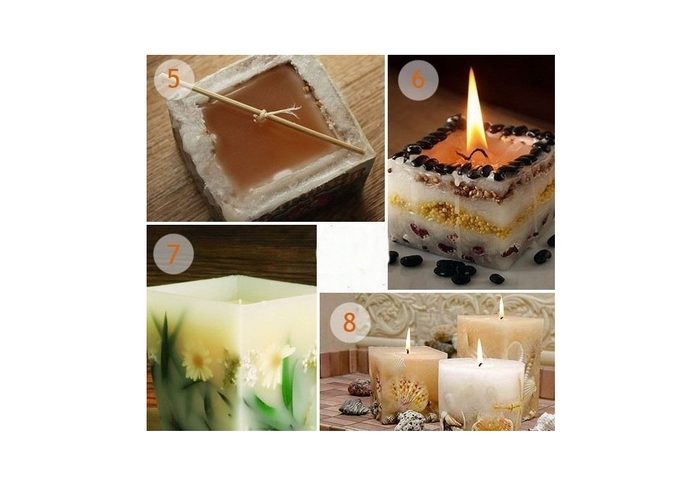
One end of the wick is fixed at the bottom, the second is tied to a skewer so that it is located in the center. On last stage you need to carefully fill the bottom with wax and cool until completely hardened.
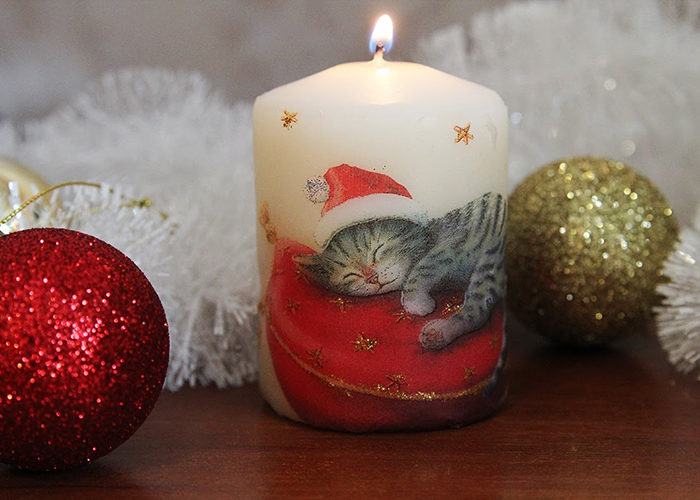 Photo 23 – Decoupage New Year's candles: sleeping kitten
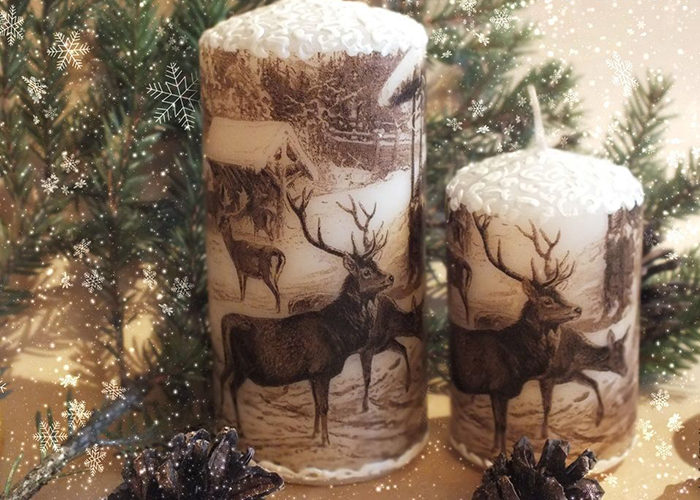
Decoupage candles with napkins: video of step-by-step production
In the video you can see decoupage of a candle with napkins.
Decoupage of glasses for the New Year
For work we will need:
- any glass;
- glass primer;
- color or b/w printouts;
- PVA glue;
- acrylic paints;
- wood varnish;
- putty;
- plaster and sandpaper.
For the New Year beautiful glasses will definitely attract the attention of your friends and family. The process itself consists of the following stages:
1. We thoroughly wipe the glass with alcohol and apply a primer.
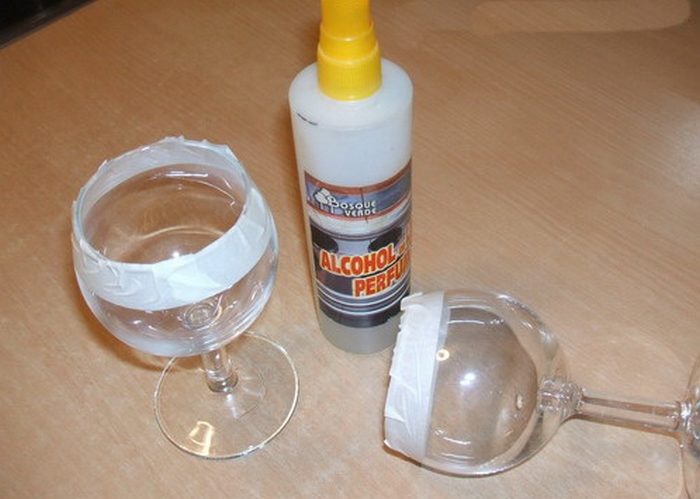
You can prime twice; in some cases, regular white paint will do. Photo 29 – Option for decoupage glasses
3. Clean with sandpaper.
Decoupage plates for the New Year
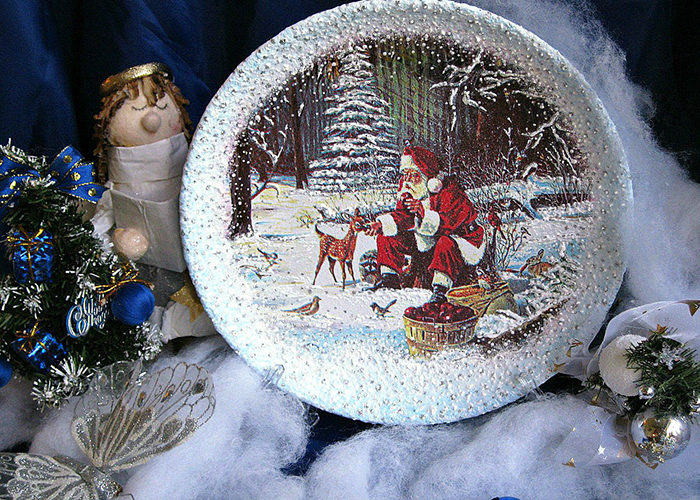
To decorate and create unique decoupage, you need the following materials:
- plate;
- napkins;
- acrylic paints;
- PVA glue;
- glue brush;
- soft sponge;
- acrylic lacquer;
- glitter for decoration.
The work consists of several stages.
- degrease the plate well;
- then prime it tightly with acrylic paint.
- separate the top layer of the napkin, cut out the plot and glue it to the middle of the plate;
- We cut out fir branches from another napkin and glue them on;
- The edges of the plate can be slightly shaded with metallic gold paint.


Out of habit, we constantly throw away beautiful bottles from alcohol or soft drinks. For many they are of no interest. But for a creative person, this is simply a godsend and the basis for creating an original, exclusive item. You can make it out of bottles stylish gift for the New Year and decorate the festive table.
The bottle decoration technique does not limit the field of activity. In addition, the shapes and sizes of bottles are so varied that you can choose bottles of interesting shapes and create unique crafts.
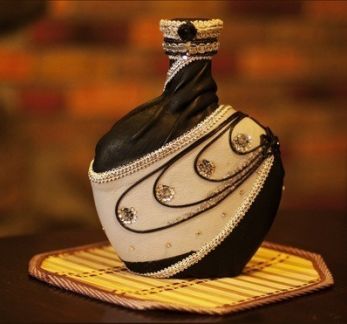
Bottle design techniques
One of the most common types of bottle decoration is decoupage. An image cut out of the bottle is attached to the bottle. various materials. This type of decoration will be appropriate for the New Year and other holidays.
- Gluing cut-out pictures
For the New Year, you can apply a drawing of a fir branch or an animal. The cut out pictures are attached to the bottle using glue or another method. The rest of the space is sealed or painted over.


- Decoration with ribbons, ropes and threads
You can also decorate the bottle with ribbons, ropes and threads. Transparent glue is used to attach the decor. If the bottle is decorated with threads, then the decoration begins from the neck.

The choice of thread determines what style the bottle will turn out to be. So, bright shiny threads and braid will allow you to decorate the bottle in an oriental style.
- Decorating with shells
Decorating with shells is great way not only create original bottle, but also to remind yourself of the pleasant moments associated with the sea. It is best to attach the shells in a continuous layer, having first wrapped the bottle with threads. To do this, you will need superglue so that the shells stick tightly. You can pour sand into the small spaces between the shells.
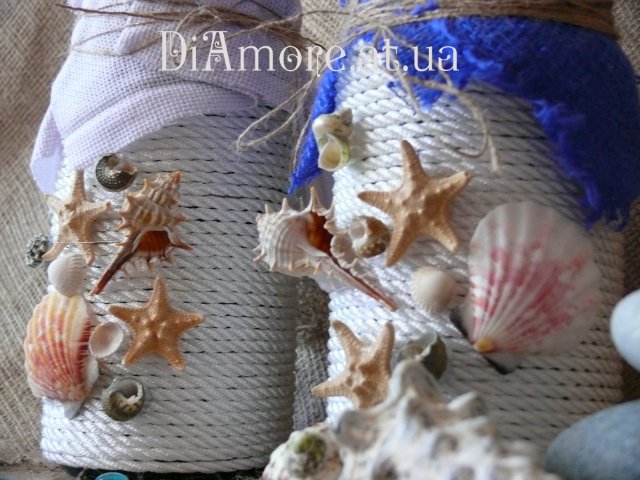
Shells can be purchased in specialized stores.


- Leather decoration
Leather decoration is another one good way bottle decorations. You can decorate the bottle like a flask. To do this you will need a flat bottle, pieces of thick and thin leather, and glue.
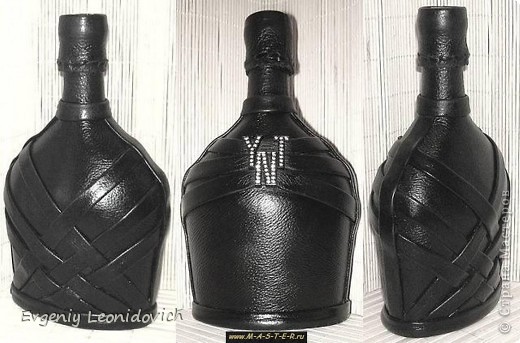
The cork can also be covered with leather. Bottle decoration can be combined with other types of decoration.

- Decorating bottles with paints
Acrylic paints and acrylic varnish for coating are suitable for painting bottles; they are particularly durable. Decorating with paints is suitable for those who love and know how to draw.
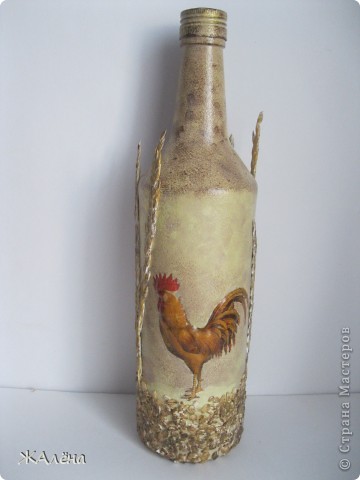
Draw a rooster - the main character of Slavic fairy tales.

Try another idea. For example, draw a snow-covered hut against the night sky. In this case, only one part of the bottle is painted, the bottom. The role of the sky is played by dark glass bottles decorated with stars. You can write a New Year's wish on the gift bottle.

- To remove labels from bottles, place them in warm water for an hour.
- You can remove any glue remaining on the bottle with acetone or another solvent.
- If it is impossible to immediately decide what color to paint the bottle, then to make the work easier, it is better to immediately choose a bottle of the desired color. Then you can combine different kinds decorating without waiting for the paint to dry.
Thus, if New Year is approaching, then decorate the bottles according to the winter theme. Any design technique will do. In many families, decorating bottles for the New Year has become a tradition. Join us too.
In contact with


